Category: Uncategorized

  • Why Your Product Images Are Invisible to Alexa for Shopping — and the Legibility Fixes That Change That

    Why Your Product Images Are Invisible to Alexa for Shopping — and the Legibility Fixes That Change That

    Split-screen comparison showing illegible Amazon product infographic versus AI-readable redesign with bold high-contrast text — IF ALEXA FOR SHOPPING CAN'T READ YOUR IMAGES, YOU'RE INVISIBLE

    There is a peculiar irony running through a large slice of Amazon’s seller base in 2026. Brands spend real money on professional photography, graphic design, and creative direction to build image stacks they believe are doing heavy lifting on their listings. The product looks sharp. The infographic slides look polished. The lifestyle shots look aspirational. And then Alexa for Shopping — Amazon’s AI shopping assistant, which now mediates the discovery experience for hundreds of millions of shoppers — reads approximately none of the text inside those beautiful images.

    Not because the AI is unsophisticated. It is, in fact, highly sophisticated. The problem is that sophistication does not compensate for bad input. When your text overlays use decorative script fonts at 14px, when your callout copy sits in light grey on a white background, when your comparison table is rendered over a busy lifestyle photograph — the OCR layer that feeds the AI assistant fails silently. No error message. No notification in Seller Central. Just a quiet, invisible gap between what your images say and what the AI assistant actually registers.

    Industry practitioner data suggests this affects roughly 40% of seller images currently live on Amazon. That means four out of ten image slides in the average product listing are contributing zero textual signal to the system now ranking and recommending your products. The features you paid to showcase, the benefits you need shoppers to understand, the differentiators your brand spent years developing — they exist in your images, but not in Amazon’s model of your product.

    This article is about fixing that. Specifically, it covers the technical mechanics of how Amazon’s AI stack reads (or fails to read) product images, the design and content decisions that determine OCR success or failure, and the structured approach to rebuilding your image stack so that every slide contributes legible, indexable, AI-useful information.

    From Rufus to Alexa for Shopping — What Actually Changed on May 13, 2026

    For most of 2024 and 2025, Amazon’s AI shopping assistant was called Rufus. It launched as a conversational chatbot embedded in the Amazon app, answering shopper questions about products, comparing options, and surfacing recommendations through natural language queries. Sellers learned to optimize their listings for Rufus, and a cottage industry of “Rufus optimization” guides emerged.

    On May 13, 2026, Amazon retired the Rufus brand and folded its technology into a unified experience called Alexa for Shopping. The rebrand was more than cosmetic. Alexa for Shopping is designed as an agentic assistant — meaning it does not just answer questions, it can take purchasing-adjacent actions, surface recommendations proactively, compare products across multiple attributes simultaneously, and sit inside the search bar, product pages, the Amazon Shopping app, and Echo Show devices simultaneously.

    What This Means Practically for Sellers

    The core capability that sellers need to understand remains consistent from Rufus to Alexa for Shopping: the assistant uses multimodal AI to process product listings. That means it does not just read your title, bullets, and description. It also ingests your images, your A+ content, and your customer reviews, fusing all of those signals together to determine how well your product matches a given shopper’s intent.

    What changed with the May 2026 transition is scope and surface area. Alexa for Shopping is no longer a sidecar chatbot — it is now woven into the core search experience. When a shopper searches for “insulated travel mug that keeps coffee hot for 8 hours,” the AI assistant is not just filtering results by keyword match. It is actively reading product listings — including image content — to determine which products best answer that specific query.

    The implication for image legibility is direct: more shopper queries now flow through an AI layer that reads images. A higher percentage of your organic discovery now depends on whether the AI can extract usable signals from your visual content. The text you buried in a 12px italic font on slide three of your image stack is not a minor design choice. It is a data quality decision that affects how the AI models your product.

    The No-Prime Expansion Factor

    Alexa for Shopping also removed the Prime requirement that previously limited Rufus access. The assistant is now available to all Amazon shoppers regardless of subscription status. That expands the pool of queries running through AI-mediated discovery considerably — and it means the image legibility problem is not an edge case affecting a niche set of searches. It is a mainstream visibility issue for any seller whose products get surfaced through AI-assisted queries.

    How the Multimodal Stack Actually Reads Your Images

    Three-layer technical diagram showing how Amazon Alexa for Shopping reads product images: OCR text extraction, computer vision via Rekognition, and Vision-Language Model fusion into ranking signal

    Understanding why image legibility matters requires understanding the technical pipeline that processes your images before any AI assistant ever “sees” them. Amazon does not use a single model to read product images. It uses a layered stack, and each layer has different failure modes.

    Layer 1: OCR — Optical Character Recognition

    The first pass on any product image is OCR. Amazon uses Amazon Rekognition — its own computer vision service — to extract text from images. Rekognition scans every pixel for character patterns, attempts to reconstruct words and phrases, and hands that extracted text off to downstream systems.

    This is where most legibility failures happen. OCR is not magic. It is a pattern-matching system that performs reliably when the input is clean and degrades predictably when the input is noisy. The primary factors that determine OCR success or failure are: text size relative to image resolution, contrast ratio between text and background, font style complexity, text orientation, and the degree to which text overlaps with busy visual elements.

    When OCR fails to extract your text, the downstream systems — including the ranking models and the AI assistant — receive no information about what that text said. The feature claim you highlighted in slide four simply does not exist in Amazon’s representation of your listing. It is as if you never wrote it.

    Layer 2: Computer Vision via Amazon Rekognition

    Alongside OCR, Amazon Rekognition runs object detection, scene classification, color analysis, and compositional analysis on every product image. This layer answers questions like: What type of product is this? What is the dominant color? Is this a lifestyle shot or a white-background product image? Are there people in this image, and if so, what are they doing?

    This layer is generally more robust than OCR because it does not require text to be present at all — it works on pure visual content. But it interacts with the OCR layer in important ways. An infographic slide where the text fails OCR but the visual context is clear gives the system partial information: it knows the image exists and something about its composition, but it cannot extract the specific claims or features you were trying to communicate.

    Layer 3: Vision-Language Models

    The top of the stack is the Vision-Language Model (VLM) — the component that most closely resembles what we think of when we imagine “AI reading an image.” The VLM takes the outputs from OCR and computer vision as inputs and fuses them with the listing’s structured text data (title, bullets, attributes) and review data to construct a unified model of what the product is, what it does, and which shopper queries it is likely to satisfy.

    This is the model that ultimately informs Alexa for Shopping’s recommendations. When a shopper asks “what’s the best yoga mat for bad knees?” the VLM is drawing on a representation of each relevant product that includes — when the image stack is legible — the text claims from your infographic slides, the visual attributes detected in your product photos, and the structured keywords in your copy.

    When image text fails OCR at Layer 1, the VLM receives an impoverished representation. It can still work with your structured text data, but it has lost a meaningful input channel. In competitive categories where multiple products have similar structured text, the brands whose image text is successfully extracted by OCR have a structural advantage in how richly the AI model represents their product.

    The 40% OCR Failure Rate — What It Is, Why It Happens, and What You’re Losing

    Bar chart showing the 40% OCR failure problem — optimized images at 95% success vs typical seller images at 60%, with the three main failure causes: font too small, low contrast, stylized script font

    The 40% figure is not Amazon’s published statistic — Amazon does not publicly report on image OCR performance. It comes from practitioner analysis of Amazon Rekognition’s behavior across large seller catalogs, and it is consistent enough across multiple independent sources that it represents a reasonable working estimate for the scale of the problem.

    The more important question is not the exact number. It is understanding which specific design decisions cause OCR to fail — because those failures are almost entirely preventable.

    Failure Mode 1: Text That Is Too Small at Upload Resolution

    Amazon recommends uploading product images at a minimum of 1,000 pixels on the longest side, with 2,000 pixels or higher as the recommended standard for zoom functionality. OCR systems work on pixel data. A text label that appears “readable to a human” when viewed at normal zoom can sit at 18px effective height in the raw image file — below the threshold where Rekognition reliably extracts characters.

    The practical threshold from current practitioner guidance is a minimum of 24 pixels of rendered text height at the uploaded image resolution, with 36 pixels or higher as the recommended standard for reliable extraction. On a 2,000px wide image, that means headline text occupying considerably more vertical space than many current listing infographics allow.

    The failure pattern is consistent: sellers design their infographic slides on a 1080px canvas in Photoshop or Canva, viewing it at 100% zoom on a large monitor. The text looks fine. They export and upload. But at the resolution Amazon processes for OCR, the body copy is effectively invisible to character recognition.

    Failure Mode 2: Insufficient Contrast

    OCR systems rely on contrast to distinguish characters from their background. The Web Content Accessibility Guidelines (WCAG) define a minimum contrast ratio of 4.5:1 for normal text legibility — a threshold that also maps closely to the minimum contrast level at which Amazon Rekognition reliably extracts text from images.

    Common contrast failures in Amazon seller images include: light grey text on white backgrounds, white or cream text on pastel-colored panels, text that overlaps with gradient transitions in lifestyle photographs, and brand-colored text where the brand palette was chosen for aesthetic rather than accessibility reasons.

    The contrast problem is compounded by JPEG compression. Amazon re-compresses uploaded images, and compression artifacts reduce effective contrast at character edges — meaning an image that barely passes a contrast threshold at upload may fall below it after Amazon’s processing pipeline.

    Failure Mode 3: Decorative and Script Fonts

    OCR systems are trained on the distribution of fonts that appear in real-world text. They handle common sans-serif and serif typefaces extremely well. They handle script, display, handwritten, and heavily stylized fonts poorly to catastrophically.

    A brand that uses a custom calligraphic font for its headline copy, or a decorative serif with extreme weight variation, is asking the OCR system to solve a character recognition problem it was not optimized for. The system may extract garbled text, partial words, or nothing at all. From the AI’s perspective, that beautifully branded headline callout is noise.

    Failure Mode 4: Text Over Busy Backgrounds

    Placing text on top of lifestyle photography — a product in use, a model, an outdoor scene — creates a highly variable background that makes character segmentation difficult. Even at high contrast on average, the local contrast at individual character edges may be insufficient for reliable extraction. This is why the most OCR-reliable infographic layouts use solid or near-solid color panels behind text rather than relying on drop shadows, glows, or partial transparency to create legibility.

    What You’re Losing When OCR Fails

    When an infographic slide’s text fails OCR, the specific feature claims, benefit statements, and differentiating attributes in that slide do not get added to the AI’s representation of your product. For a product like a protein powder where the critical purchase factors — flavor, protein content per serving, sweetener type, protein source — are typically communicated in infographic slides rather than structured attributes, OCR failure can leave the AI with a materially incomplete picture of what makes your product relevant.

    The downstream consequences include: the AI assistant answering shopper queries without being able to reference information that was in your images; your product failing to surface in intent-based queries that your image text would have satisfied; and in competitive categories, rivals with better OCR compliance getting credited with signals that your listing technically contains but cannot effectively communicate.

    The Main Image Rule: Why Text-Free Remains Non-Negotiable

    Before discussing how to make image text legible, it is worth being precise about where image text belongs at all. Amazon’s product image policy is unambiguous on the main image: it must show the product on a pure white background with no text overlays, no logos in the frame (other than on the product itself), no badges, and no additional props or elements.

    This rule exists for multiple reasons, but from an AI-readability perspective it is actually a feature rather than a constraint. The main image slot is where Amazon’s computer vision system performs its most confident product classification. A clean white-background product shot gives the visual system clear signal about what the product is, its shape, its dominant colors, and its physical form factor. Clutter — including text — degrades that signal.

    Where Text Belongs and Where It Doesn’t

    The hierarchy for Amazon image text placement in 2026 is as follows:

    • Main image: No text. No exceptions. Violations risk listing suppression and lose you the clean visual classification signal.
    • Secondary images (slots 2–7): Text overlays are permitted and, when properly executed, are actively valuable. These are your infographic slides, benefit callouts, comparison images, and use-case demonstrations.
    • A+ Content modules: Text in A+ is processed by the VLM layer and can contribute meaningful signals, particularly in comparison tables and benefit modules. More on this below.
    • Amazon Stores: Image tiles in Stores have specific size specifications (3,000×1,500px for full-width tiles) and text overlay guidance that aligns with general OCR best practices.

    The practical implication is that your text legibility effort should be concentrated in secondary image slots 2–7 and your A+ content. Those are the surfaces where text is both allowed and actively useful for AI indexing — and where most current sellers are failing silently.

    Secondary Images as Structured Data: The New Way to Think About Infographic Slides

    Before and after comparison of Amazon product infographic slide — cluttered illegible design versus clean dark-panel design with bold white benefit callout text readable by AI and shoppers alike

    The most significant mindset shift available to Amazon sellers in 2026 is treating secondary image slots not as design canvases but as structured data entry points. This reframing has practical consequences for every decision you make about what goes in those slides and how it is presented.

    In the old model, a secondary image slide existed to persuade a shopper who had already clicked on your listing. Its job was emotional and visual: make the product look good, make the brand feel premium, communicate aspirational value. Design instincts optimized for these goals produce images that are often beautiful and often OCR-incompatible.

    In the current model, the secondary image slide serves two simultaneous audiences: the human shopper browsing your listing, and the AI system indexing your product. Those two audiences have different but largely compatible requirements. Humans need clarity, hierarchy, and visual appeal. The AI needs extractable text, meaningful semantic content, and consistency with your listing’s other data. Designing well for both is not a compromise — it is a discipline.

    Thinking About Slides as Database Fields

    Consider reframing each secondary image slot as an entry in a structured product database. If you were writing a database record for your product, what fields would you populate? Key ingredients or materials. Primary use cases. Quantified performance claims. Certifications and compliance. Comparison against the product it replaces. Size and dimension data. Compatibility information.

    Each of those “fields” maps directly to a high-value infographic slide. And each slide, if its text is legible, adds that field’s content to the AI’s representation of your product. The AI can then use those fields to match your product to relevant queries it might otherwise have missed.

    A protein powder listing with a legible “26g Protein Per Serving — No Artificial Sweeteners” callout in slide three gives the AI a precise, extractable data point. When a shopper asks Alexa for Shopping “what protein powder has no artificial sweeteners?” the AI has a signal to draw on. If that callout is in a 14px script font on a gradient background, that signal does not exist in the AI’s model of your product — even though you put it there.

    Content Priority for Each Slot

    With six secondary image slots available (and more with enhanced listings), a structured approach to slot allocation produces better AI signals than a purely creative one. A high-performing secondary image stack typically follows this hierarchy:

    1. Slot 2: The single most important purchase factor for your category — the one claim that most directly answers the primary shopper question. Make this the clearest, most legible slide in your entire stack.
    2. Slot 3: The second key purchase factor, or a quantified performance claim that supports slot 2.
    3. Slot 4: Ingredients, materials, certifications, or compliance information — particularly high value for categories where these are active shopper concerns.
    4. Slot 5: Use case or lifestyle context, with a text overlay that states the use case explicitly rather than relying on visual inference alone.
    5. Slot 6: Comparison, either against your own product variants or against the category standard (framed as benefit, not competitive attack, to avoid policy issues).
    6. Slot 7: Social proof anchor or brand story element that reinforces trust signals already present in your reviews.

    This is not a rigid template — category context matters significantly. But the underlying logic — allocating each slot to a specific, meaningful data point rather than a vague benefit statement — is consistent regardless of category.

    The Technical Legibility Stack — Font, Contrast, Size, and Hierarchy

    Typography contrast ratio reference chart for Amazon sellers — showing contrast ratios from 1:1 (invisible to OCR) through 4.5:1+ (WCAG AA compliant and OCR-reliable), with minimum font size guidance of 24px at upload resolution

    Now the specifics. The following technical parameters are derived from Amazon Rekognition’s documented OCR behavior, WCAG accessibility standards (which correlate strongly with OCR reliability), and practitioner testing across large catalog sets. These are not theoretical recommendations — they represent the thresholds at which OCR success rates shift materially.

    Font Selection

    Recommended: Clean sans-serif typefaces. Inter, Helvetica Neue, Montserrat, Source Sans, Open Sans, and their equivalents perform reliably in OCR extraction. These fonts have consistent stroke weights, clear character differentiation, and minimal ambiguity between similar letterforms (e.g., I, l, 1).

    Acceptable with care: Heavier-weight serif typefaces with consistent stroke widths. Fonts like Playfair Display at heavy weights or Georgia Bold can perform adequately, but they introduce more OCR uncertainty than their sans-serif equivalents.

    Avoid: Script fonts, handwritten fonts, ultra-thin weight variants of any typeface, condensed fonts at small sizes, and any custom brand font with unusual letterforms. If your brand guide requires a custom font, use it for hero elements only (large, single-word headlines) and fall back to a standard sans-serif for all substantive content text.

    Weight consideration: Use Medium (500) to ExtraBold (800) weight variants for body copy in infographics. Ultra-light variants (100–300) consistently underperform in OCR extraction regardless of size, because thin stroke widths create insufficient contrast at character edges after JPEG compression.

    Contrast Ratio

    The WCAG AA standard for normal text is a contrast ratio of 4.5:1. For large text (18px+ or 14px+ bold), the minimum is 3:1. These thresholds also represent the practical boundary for reliable Amazon Rekognition OCR extraction.

    In practice, aim higher. A contrast ratio of 7:1 or above — which is the WCAG AAA standard — provides a meaningful buffer against the contrast reduction introduced by Amazon’s image compression. This means:

    • White (#FFFFFF) text on a dark panel (#1A1A2E or similar) is essentially foolproof.
    • Near-black (#1C1C1C) text on pure white (#FFFFFF) is equally reliable.
    • Brand-colored text on white backgrounds should be verified against a contrast checker before use — many brand palettes produce ratios in the 2:1–3:1 range that fail OCR.
    • Text on lifestyle photo backgrounds requires careful placement to achieve consistent contrast. If you cannot guarantee 4.5:1 across the entire text area, use a solid color panel behind the text instead.

    Text Size at Upload Resolution

    The minimum for reliable OCR extraction is approximately 24 pixels of rendered text height at the uploaded image resolution. At the recommended upload size of 2,000 pixels on the longest side, this translates to headline text occupying roughly 3–5% of the image height, and body copy at a scale that would feel “large” by typical infographic design standards.

    Practical recommendations by content type:

    • Main headline / primary claim: Minimum 60–80px at 2,000px image width. This is your primary OCR target — the most important text in the slide should be the most reliably extracted.
    • Supporting callouts and sub-claims: Minimum 36–48px at 2,000px width.
    • Body copy or list items: Minimum 28–32px at 2,000px width. If your content cannot fit comfortably at this size, reduce the amount of text rather than the font size.
    • Fine print, legal disclaimers, certification badges: Anything below 24px is likely to fail OCR. Move critical compliance information into your listing bullets or description where it will be reliably indexed.

    Text Volume and Hierarchy

    A common design failure is treating infographic slides as a place to say everything at once. The more text you cram into a slide, the smaller each element must be, and the lower the average OCR success rate across the slide. OCR systems also struggle with dense text blocks where character boundaries are close together.

    A better approach: one primary claim per slide, expressed in the fewest words possible, at maximum size. Supporting details in a clearly differentiated secondary tier. Three or four bullet points at most per slide. White space is not wasted space — it is contrast buffer, and it gives the OCR system clear character separation to work with.

    Orientation and Angle

    OCR performs best on horizontally oriented text. Rotated, diagonal, or curved text paths reduce OCR accuracy significantly. If your design includes angled text for visual dynamism, assume that text will not be reliably extracted. Reserve it for purely decorative elements and keep all substantive content claims in standard horizontal orientation.

    A+ Content and the Visual Indexing Opportunity Most Sellers Miss

    Annotated Amazon A+ Content module diagram showing AI indexing opportunity zones: module text indexed by VLM, product comparison table, lifestyle image benefit callout, and brand story copy — labeled A+ Content: Your Most Underused AI Indexing Surface

    Most seller conversations about image legibility focus on the main product image stack — the seven slots visible on the product detail page. But Amazon’s multimodal AI system also processes A+ Content, and that content represents one of the most underused AI indexing surfaces in most sellers’ catalogs.

    A+ Content is processed by the VLM layer of Amazon’s system — the layer that fuses visual and textual signals into a unified product representation. Because A+ Content is brand-registered content with a higher quality signal than user-generated material, it gets meaningful weight in how the AI models the product.

    The Comparison Table Opportunity

    A+ Content’s comparison module — which allows you to compare your product against other ASINs in your catalog — is particularly high-value from an AI indexing perspective. The structured tabular format of comparison data is highly legible to both OCR and the VLM layer. Attribute names and values in a clean table format are essentially ideal structured input for the AI system.

    The mistake most sellers make with comparison modules is treating them primarily as upsell tools — designed to push shoppers toward higher-priced variants. They are also indexing tools. Every row in your comparison table is a structured feature attribute that the AI can use to match your product to relevant queries. Populate the comparison table with attributes that directly correspond to the queries your category shoppers actually ask, not just the attributes that make your premium variant look better.

    Image Modules in A+ Content

    Images embedded in A+ Content modules are subject to the same OCR and VLM processing as product listing images. The same legibility rules apply: high contrast, sufficient size, clean fonts, horizontal orientation, solid color panels behind text. The difference is that A+ Content images tend to be displayed at smaller effective sizes in the rendered page view, which means the resolution and text size requirements are even more critical relative to the finished image dimensions.

    A useful heuristic: design A+ Content image modules as if they will be viewed on a mobile screen at 50% zoom. If the text is still legible at that scale, the OCR system will have no trouble with it. If it requires squinting, it needs to be larger.

    Brand Story Modules and Contextual Matching

    The brand story section of A+ Content is often treated as a brand values page — a place to talk about origin story, mission, and craftsmanship. From an AI perspective, it is also a contextual signal that helps the VLM layer understand the broader product ecosystem and shopper intent your brand serves.

    Brand story copy that includes specific, concrete category language — material types, use contexts, performance characteristics — gives the AI additional context for placing your products in relevant discovery paths. Generic mission statements (“we believe in quality you can trust”) contribute nothing to AI indexing. Specific contextual language (“designed for high-altitude hiking, our insulation technology is tested at temperatures down to -20°F”) gives the AI precise signals to work with.

    What to Write in Your Image Text — Content Strategy, Not Just Design Strategy

    Legibility is a necessary but not sufficient condition for effective image text. The text also has to say the right thing. An OCR system that successfully extracts “OUR AMAZING QUALITY DIFFERENCE” has added very little to the AI’s model of your product. The same system successfully extracting “TESTED TO ASTM F1292 — 6-FOOT FALL PROTECTION” has added a precise, searchable, query-matching signal that could directly determine whether your product surfaces for a highly relevant shopper.

    The Query-Answer Framing

    The most useful framework for writing image text content is to ask: what question does this text answer, and is that the question shoppers in my category are actually asking?

    Amazon’s AI shopping assistant surfaces products in response to natural language queries. Those queries have specific information needs. A shopper asking “best air purifier for pet allergies” needs to know: does this purifier capture pet dander and pet-specific allergens? A shopper asking “protein powder for women over 50” needs to know: is this appropriate for that demographic, and what specific formulation decisions reflect that?

    Your image text should be answering these questions directly and explicitly. Not implicitly through lifestyle imagery and brand aesthetic, but explicitly through text that a query-matching AI can extract and use.

    Precision Over Poetry

    Brand copywriting instincts often push toward evocative, aspirational language. “Elevate your morning routine” is evocative. “KEEP HOT 12 HOURS / KEEP COLD 24 HOURS” is extractable. The AI assistant processes both, but only one of them becomes a usable data point when a shopper asks “which travel mug keeps coffee hot longest?”

    This does not mean your images should read like a spec sheet. It means that the primary claim on each slide should be stated in precise, descriptive language before any evocative framing is added. “ULTRA-SOFT BAMBOO JERSEY — TEMPERATURE REGULATING” serves both the human shopper and the AI. “THE SLEEP YOU DESERVE” serves neither particularly well.

    Numerical Specificity as an AI Signal

    Numbers are exceptionally well-handled by OCR systems and are high-value signals for AI query matching. A product that states “400-THREAD COUNT” in a legible slide has given the AI a precise matchable attribute for “high thread count sheets” queries. A product that shows “SPF 50+ / PA++++” in its sunscreen infographic has given the AI classification signals for multiple protection-level queries.

    Wherever your product has a quantifiable performance claim — capacity, duration, weight, dimensions, concentration, protection level, temperature range — that number should appear in your image text, legibly, in a format the OCR system can extract without ambiguity. Numbers with units beat pure superlatives every time in AI-mediated discovery.

    Consistency with Structured Listing Data

    One final content principle: the text in your images should be consistent with and complementary to the text in your structured listing data. The AI system fuses image text and structured text — if they contradict each other, the system may discount both. If your title says “BPA-Free” but your infographic slide says “Made with Food-Grade Stainless Steel Only — Zero Plastic Components,” the more specific image claim reinforces and extends the title claim rather than conflicting with it.

    Conflicts arise when infographic slides make claims that are absent from structured data entirely — a product marketed as “Keto Certified” in images but with no dietary certification data in the structured attributes, for example. These inconsistencies create uncertainty in the AI’s model of the product and can reduce the confidence with which it surfaces your listing for relevant queries.

    Testing and Validating Your Image Legibility

    Knowing the rules for legible images is one thing. Verifying that your actual images pass is another. There are several practical methods for testing before you go live — and for monitoring after you do.

    Pre-Upload OCR Testing

    Amazon Rekognition is available as a standalone API, and you can test your images against it directly before uploading them to Seller Central. Upload your infographic slides to the Rekognition DetectText endpoint and examine the extracted text blocks. Any text that does not appear in the extraction output will not be available to downstream systems including Alexa for Shopping.

    This is the most direct method for identifying OCR failures pre-upload, and it gives you actionable feedback: you can see exactly which text blocks failed to extract, adjust size and contrast accordingly, and re-test until extraction is complete.

    Third-party tools that wrap this functionality in seller-friendly interfaces are also available, and several major Amazon optimization platforms have added image OCR testing modules to their toolsets in 2026 in response to growing seller awareness of the issue.

    Contrast Ratio Checkers

    Before finalizing any infographic slide, run each text element through a contrast ratio checker. Free web tools allow you to input the exact hex values of your text color and background color and return the precise contrast ratio. Check every text element, not just the headline. A slide where the headline passes at 7:1 but the supporting bullet points sit at 2.8:1 is still a partial OCR failure.

    Manage Your Experiments — The Conversion Validation Layer

    Amazon’s Manage Your Experiments tool allows brand-registered sellers to run A/B tests on product images. This is the right mechanism for validating that legibility-optimized images not only improve AI indexing but also maintain or improve human conversion rates.

    The typical pattern for running image legibility tests: create a variant image set that applies the technical legibility standards above, run a 4–6 week test against your current images, and measure the impact on conversion rate, click-through rate from search, and (if available) organic rank position changes over the test period.

    Sellers running these tests in 2026 consistently report that well-executed infographic improvements lift conversion rates in the 10–30% range relative to plain product photography — consistent with the broader data on secondary image impact. The key “well-executed” qualifier includes legibility as a prerequisite: cluttered, low-contrast infographics do not consistently outperform simpler approaches, and in some cases underperform them by creating visual complexity that discourages shoppers.

    Monitoring After Upload

    After uploading optimized images, monitor your organic visibility metrics over the following 4–8 weeks. Amazon’s catalog indexing and AI model updates operate on a crawl cycle that is not instantaneous — changes you make today may not be fully reflected in AI-mediated discovery for several weeks. This lag means that image legibility improvements produce a delayed visibility effect, which sellers sometimes misinterpret as evidence that the changes did not work.

    Track your brand keyword ranking, non-brand keyword ranking, and (if you have access) the category search terms for which you appear in AI-generated responses. Improvements in non-brand keyword visibility are often the clearest signal that image OCR optimization is working, because non-brand queries rely more heavily on feature-matching signals — the kind of signals your infographic text provides when it is successfully extracted.

    The Silent Compounding Effect — What Legible Images Do to Organic Rank Over Time

    Line graph showing the compounding effect of image legibility on Amazon organic rank over 90 days — optimized OCR-compliant image stack trends steeply upward in green versus unoptimized images staying flat in red, with milestone markers at Week 1 image update deployment, Week 3 crawl cycle, and Week 6 rank velocity improvement

    Individual image optimization produces one-time improvements. A consistent commitment to image legibility across your entire catalog produces something different: a compounding structural advantage that accumulates over time and becomes increasingly difficult for competitors to close.

    Here is why it compounds. Every time Amazon’s system re-crawls and re-indexes your listing, it updates its model of your product based on all available inputs — including image text. A catalog where every secondary image and every A+ content module consistently provides high-quality, legible, semantically meaningful text gives the system more to work with on every crawl cycle. The AI’s confidence in its classification of your product increases with each successful extraction cycle.

    The Relevance Score Feedback Loop

    Amazon’s AI systems operate on relevance scores — continuous assessments of how well a product matches a category of queries. High-confidence, consistent signals (including legible image text that consistently confirms the same product attributes) raise the relevance score for specific query types. Higher relevance scores produce better positioning in AI-mediated discovery responses. Better positioning produces more clicks. More clicks produce better conversion data. Better conversion data raises the relevance score further.

    This is a virtuous cycle that begins with the data quality of your image text. Breaking into that cycle requires nothing more exotic than making sure the text in your images is actually readable by the system that determines whether shoppers find you.

    The Competitive Context

    In most Amazon categories, the majority of sellers have not systematically addressed image OCR compliance. This is not an indictment — the problem was not widely understood until the scale of AI-mediated discovery became apparent in 2025 and 2026. But it means that sellers who move now to implement a legibility-first image strategy are doing so in a competitive environment where most rivals are still losing 40% of their image signals.

    The window for a first-mover advantage here is meaningful but not permanent. As awareness of the issue spreads, more sellers will optimize. The sellers who build the compounding relevance score advantage now will be harder to displace later — but the advantage is only durable if the underlying catalog quality is maintained and updated as Amazon’s requirements and AI capabilities evolve.

    New Products vs. Existing Catalog

    For new product launches, building legibility into the image strategy from the start is significantly less costly than retrofitting an existing catalog. New listings start with no crawl history — the AI system builds its initial model of the product from the first crawl. A new product with a fully legible, well-structured image stack gives the AI a high-quality initial model, which tends to produce better early ranking than listings that require iterative improvement to reach legibility compliance.

    For existing catalog items, the retrofit approach — auditing current images, identifying OCR failures, and uploading corrected versions — produces improvements but requires patience for the crawl cycle to reflect the changes. Prioritize high-volume ASINs and categories where AI-mediated discovery is demonstrably active (categories with high rates of conversational queries) for the first wave of optimization.

    Building the Alexa-Ready Image Audit Process

    Turning the principles above into an operational process requires a structured audit methodology. The following framework is designed to be repeatable across a catalog of any size, from a single-ASIN brand to a multi-thousand ASIN catalog operation.

    Step 1: Image Inventory and OCR Baseline

    Pull all current product images from your Seller Central catalog. Run each secondary image through an OCR extraction test (Amazon Rekognition API or a third-party wrapper). For each slide, record: which text blocks were successfully extracted, which failed entirely, and which were partially extracted with errors. This establishes your baseline OCR compliance rate by ASIN and by slide position.

    Step 2: Prioritization by Impact

    Not all ASINs are equal. Prioritize the audit and redesign effort by: organic sales volume (high-volume ASINs benefit most from ranking improvements), competitive intensity (categories with AI-active shopper queries benefit most from legibility optimization), and OCR failure rate (ASINs with the highest failure rates have the most room for improvement).

    Step 3: Brief Creation for Design Teams

    Before sending images to a designer or design agency, create a structured brief for each ASIN that specifies: the primary claim for each slide (one per slide), the exact text to be used (pre-written, query-aligned content, not left to designer judgment), the technical requirements (minimum font size, minimum contrast ratio, approved font families, no text over busy backgrounds), and the image resolution requirement (minimum 2,000px on longest side).

    This brief-driven approach ensures that the design output is optimized for AI legibility from the start, rather than requiring a second round of corrections after design has been completed to human-centered aesthetics standards alone.

    Step 4: Post-Delivery Verification

    Before uploading any new image, verify: OCR extraction test passes for all substantive text elements, contrast ratio check passes at 4.5:1 minimum for all text (7:1 preferred), minimum font sizes met at delivered resolution, no substantive text appears over busy or variable backgrounds. Only images passing all four checks should be uploaded.

    Step 5: Monitoring and Iteration

    After upload, set a 6–8 week monitoring window. Track organic rank position for 3–5 target keywords per ASIN, click-through rate from search, and conversion rate. At the end of the monitoring window, assess whether improvements match expectations and identify any ASINs where the changes did not produce expected results for further investigation.

    Conclusion: The Legibility Gap Is a Data Quality Problem — Treat It Like One

    The framing of this problem as a “design issue” has caused a lot of sellers to underestimate its strategic importance. Adjusting font sizes and contrast ratios sounds like a minor creative concern. In the context of AI-mediated product discovery, it is a data quality problem — and data quality problems at scale have outsized consequences.

    When approximately 40% of the text in your image stack fails to extract, you are operating with a self-inflicted data gap in how Amazon’s AI models your product. The system is doing its best to match your listing to relevant shopper queries — but it is doing so with less information than you intended to provide. The features you highlighted, the benefits you invested in demonstrating, the differentiators that justify your price point: they are present in your images, but absent from the AI’s representation of your product.

    The fix is not complicated. It requires precision, discipline, and a willingness to prioritize AI legibility alongside human aesthetics in design decisions. The technical thresholds are concrete: 4.5:1 minimum contrast ratio, 24px minimum text height at upload resolution, clean sans-serif fonts, horizontal orientation, solid backgrounds behind text, one primary claim per slide expressed in specific and precise language.

    Implementing those standards consistently across your secondary image stack and A+ content does not require a major creative overhaul. It requires treating every image slot as a data entry point as well as a visual communication tool — and verifying, before upload, that the data you intended to enter is actually what the system receives.

    Alexa for Shopping is reading your images. The only question is whether it can actually read them.

    Quick-Reference Checklist

    • ☐ Main image: no text, pure white background, product only
    • ☐ Secondary images: each slide has one primary claim, stated in precise language
    • ☐ Minimum font size: 24px at uploaded image resolution (36px+ recommended)
    • ☐ Minimum contrast ratio: 4.5:1 (7:1+ recommended for body copy)
    • ☐ Font choice: clean sans-serif for all substantive content (no script, no ultra-thin weights)
    • ☐ Text orientation: horizontal only for all extractable content
    • ☐ Background: solid color panels behind text, not lifestyle photos
    • ☐ Image resolution: minimum 2,000px on longest side
    • ☐ OCR pre-test: run Rekognition DetectText before uploading
    • ☐ Contrast pre-test: verify all text elements against a contrast ratio checker
    • ☐ A+ content: apply same legibility standards to all image modules
    • ☐ A+ comparison table: populate with query-aligned attributes, not just upsell positioning
    • ☐ Content consistency: image text claims consistent with structured listing data
    • ☐ Monitor post-upload: track organic rank and CTR over 6–8 week crawl window
  • SBV Budget Rebalancing: When Video Should Eat Search

    SBV Budget Rebalancing: When Video Should Eat Search

    SBV Budget Rebalancing: When Video Should Eat Search — split screen showing fading search ads and a bright product video playing on an Amazon search page

    Most Amazon PPC accounts are built on the same unspoken assumption: Sponsored Products is the engine, and everything else exists to support it. Sponsored Brands Video gets a sliver of budget — enough to say it’s being tested, not enough to actually pressure-test whether it should own a larger share. That assumption made complete sense in 2021. In 2026, it is quietly costing brands significant money every month they leave it unchallenged.

    The economics of Amazon search have shifted. Sponsored Products CPCs have climbed roughly 48% cumulatively since 2019, with competitive categories absorbing 10–15% annual increases that in some verticals reach 25–35% year-over-year. More budget into SP no longer reliably buys more proportional reach or sales. Instead, it increasingly buys position maintenance — defending placements brands already hold against competitors willing to outspend them by a few cents more per click.

    Sponsored Brands Video, meanwhile, has moved from experimental format to dominant Sponsored Brands strategy. Advanced accounts now route 80–95% of their SB spend into SBV, and aggregate data from Q1–Q2 2026 shows SBV delivering approximately 1.6× the click-through rate and 1.3× the conversion rate of static Sponsored Brands. New-to-brand customer acquisition data — which SP campaigns simply cannot surface — reveals an entirely different story about where incremental growth is actually coming from.

    The question in 2026 is not whether video should take more of your search budget. The question is when — and what signals, metrics, and structures should govern that decision. This post works through all of it.

    The CPC Squeeze: What’s Actually Happening to Sponsored Products Economics

    Before you can make a rational case for moving budget out of Sponsored Products, you need to understand exactly what those rising CPCs are buying — and, more importantly, what they are no longer buying at the margin.

    The cost trajectory since 2019

    Amazon’s auction model for Sponsored Products has compressed advertiser efficiency consistently over the past several years. CPCs that averaged under $0.90 in many categories in 2019 now commonly land between $1.05 and $1.65 across mid-competition verticals, with high-competition categories — consumer electronics, supplements, home goods — pushing well beyond $2.00 for top placements on core keywords.

    The cumulative 48% CPC increase across the SP ecosystem since 2019 is not evenly distributed. Branded and category-defining keywords have absorbed the steepest increases, because these are the terms where auction pressure concentrates. Every established brand in a category is bidding on the same short-tail terms. The winner pays more than they did last year for the same position, and the loser goes back to the drawing board to figure out whether to overspend on defensive bidding or accept the erosion.

    What diminishing marginal returns looks like in practice

    Diminishing returns in SP aren’t always visible in the headline ROAS number — which is precisely why they’re dangerous. A Sponsored Products campaign can show a stable 4× ROAS while every additional dollar of budget added to it earns a 2× marginal return. The average looks fine. The marginal reality is quietly terrible.

    The clearest symptom is budget utilization behavior: campaigns that used to run out of budget by 11am now pace through the full day without exhausting their allocation, yet conversion volume hasn’t increased proportionally. This pattern signals that the algorithm is spending more carefully because incremental impression opportunities at acceptable CPCs are genuinely scarce. More budget cannot create more qualified search intent. It can only compete more aggressively for the intent that already exists — which, in a saturated category, means paying more to reach audiences that have already been heavily targeted.

    Position defense is not growth

    There is an important distinction between SP spend that acquires customers and SP spend that defends position. When a brand has established organic rank on its core keywords and runs SP to maintain those placements against competitor conquesting, a significant portion of that budget is effectively insurance rather than acquisition. That’s not inherently wrong — competitive defense has real value. But treating defensive SP spend and growth-oriented SP spend as a single undifferentiated pool is what causes accounts to chronically underinvest in formats that can actually expand the customer base.

    Recognizing the split between defensive and acquisitive SP spend is the first analytical step toward a rational SBV rebalancing conversation.

    Side-by-side comparison of Amazon Sponsored Products vs Sponsored Brands Video — CTR, CVR, new-to-brand reporting, and what each format actually buys

    SBV vs. SP: Understanding What Each Format Is Actually Buying You

    The mistake most advertisers make when comparing Sponsored Brands Video to Sponsored Products is treating them as substitutable formats competing for the same objective. They are not. They operate at different points in the shopping funnel, they deliver different types of value, and they should be evaluated on different metrics. Conflating them in a single ROAS comparison produces misleading conclusions in both directions.

    What Sponsored Products is purpose-built for

    Sponsored Products is, fundamentally, an intent-capture engine. When a shopper types “noise cancelling headphones under $100” into Amazon’s search bar, SP intercepts that expressed, bottom-of-funnel intent and places your product in front of someone who has already decided what category they’re buying from and roughly what they’re willing to spend. The conversion efficiency is high because the qualification work has already been done by the shopper’s own search behavior.

    This is why SP consistently posts higher direct ROAS than SBV in last-click attribution models. It’s not that SP is better at advertising — it’s that SP is fishing in a pond stocked with fish that are already hungry. The format deserves credit for execution, but the underlying demand isn’t being created by the ad. It existed before the ad appeared.

    The ceiling of SP efficiency is therefore largely determined by the volume of existing search intent in your category. Once you’ve captured the efficient portion of that intent, additional SP spend competes for diminishing returns: lower-intent queries, less-qualified audiences, and expensive defensive placements.

    What Sponsored Brands Video is actually doing

    SBV operates differently. It appears in the search results environment — same page, same intent context — but it functions more like an awareness and consideration tool than a pure intent-capture mechanism. The video format interrupts the browsing session in a way that a static text-and-image ad cannot. It communicates product context, brand story, and key differentiators within the first three seconds of autoplay, before the shopper has consciously decided to engage.

    That interruption capability is what produces SBV’s 1.6× CTR advantage over static Sponsored Brands. Shoppers who weren’t specifically looking for your brand get pulled into an evaluation they might otherwise have skipped. And because video conveys more information faster than a static thumbnail, the shoppers who do click arrive at the product detail page better informed — which supports the 1.3× CVR lift relative to static formats.

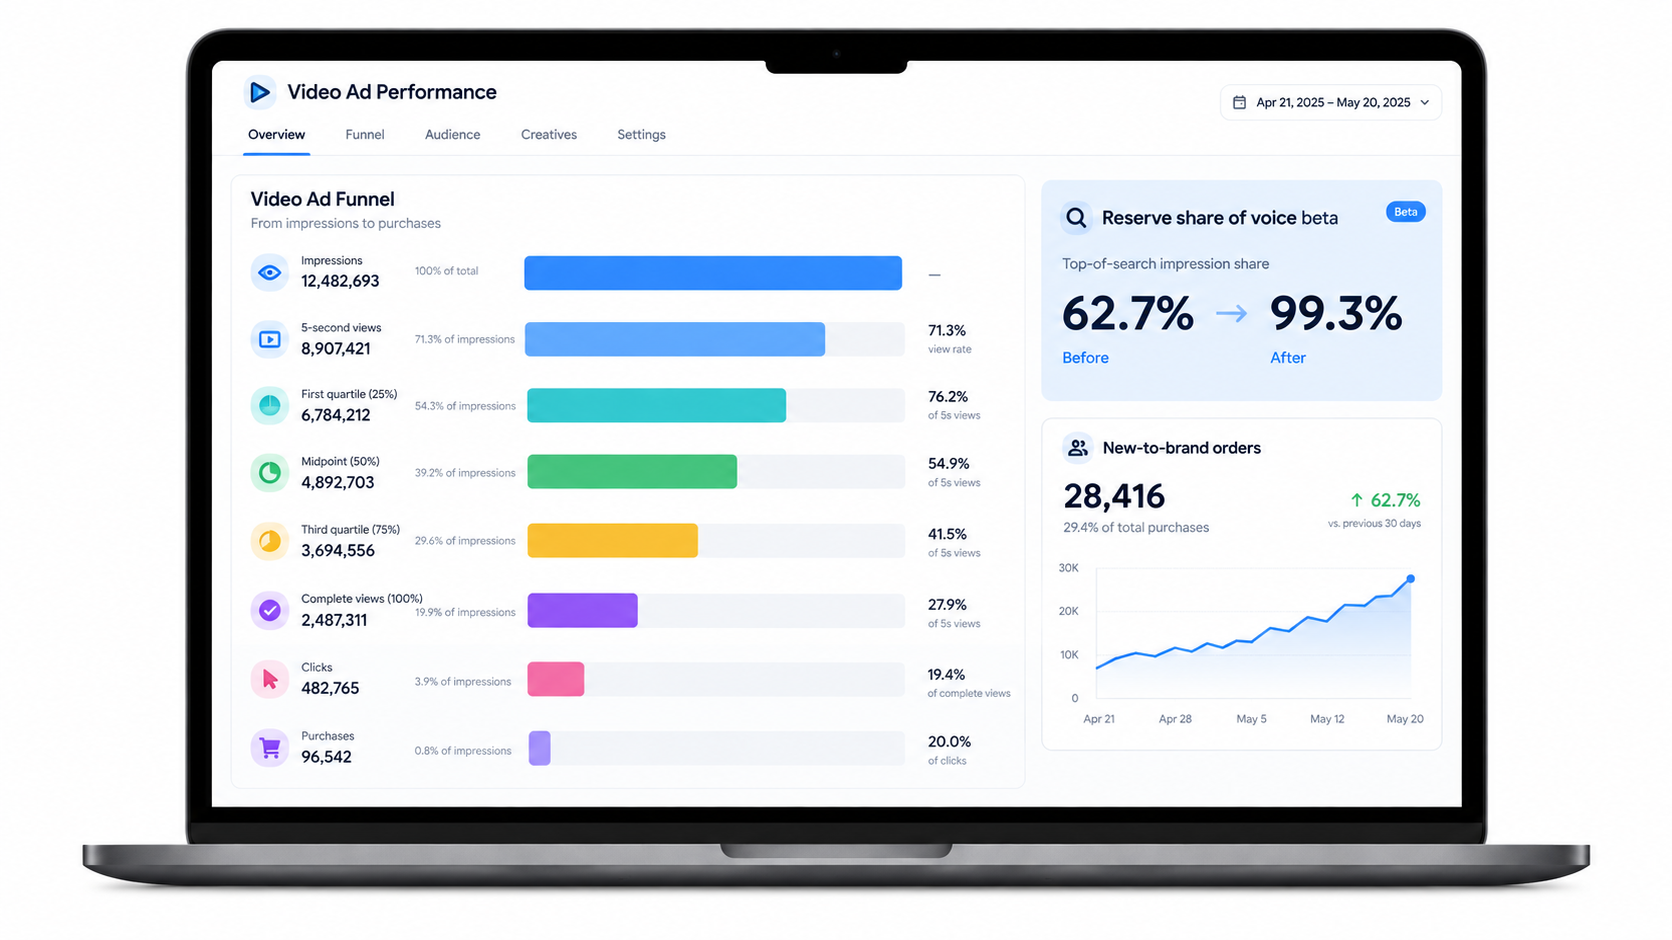
    Critically, SBV’s impact doesn’t stop at the direct conversion. Amazon’s new-to-brand reporting — available for Sponsored Brands formats but not Sponsored Products — reveals that SBV consistently drives a higher proportion of NTB customers than SP. These are shoppers who had never purchased from your brand in the prior 12 months. They represent genuine incremental growth, not recapture of existing demand.

    The attribution gap that makes SP look better than it is

    Standard Amazon attribution assigns conversion credit to the last-clicked ad before purchase. In a typical multi-touch journey, a shopper might see a Sponsored Brands Video ad that introduces your brand, spend four days considering the purchase, and eventually convert through a Sponsored Products click on a branded keyword. The SP campaign gets the credit. The SBV campaign that initiated the journey shows zero.

    This attribution structure systematically undervalues SBV’s contribution to overall account performance and overvalues SP’s apparent efficiency. Accounts that optimize exclusively on last-click ROAS will perpetually underinvest in the formats that drive top-of-funnel awareness — and then struggle to understand why their SP conversion rates gradually decline as branded search volume stagnates.

    The NTB Advantage: Why Standard ROAS Comparisons Lie

    New-to-brand metrics are one of the most underused data sets in Amazon advertising. They’re available for Sponsored Brands (including SBV) and Sponsored Display but absent from Sponsored Products entirely, which creates a structural information asymmetry that most advertisers never fully reckon with.

    What NTB metrics actually tell you

    Amazon defines a new-to-brand customer as someone who has not purchased from your brand in the previous 12 months. NTB metrics in the SBV reporting dashboard show you the number of NTB orders, NTB order revenue, NTB order rate, and the average NTB order value generated by your SBV campaigns.

    These numbers are important for one specific reason: they represent the only reliable proxy for incremental demand creation in your Amazon advertising account. Existing customers who repurchase would have done so with or without your ad. New-to-brand customers, by contrast, represent expansion of your addressable customer base — growth that almost certainly would not have occurred without the advertising exposure.

    A Sponsored Brands Video campaign showing a 2.5× direct ROAS with a 45% NTB order rate is delivering substantially more business value than its ROAS number suggests. A Sponsored Products campaign showing a 4.5× ROAS with a 12% NTB rate is largely servicing existing demand, not growing it. If you evaluate these two campaigns purely on ROAS, you’ll defund the one actually building your brand.

    Long-Term Sales ROAS and incremental ROAS frameworks

    Amazon has introduced Long-Term Sales ROAS (LTS ROAS) as an additional measurement layer, designed to estimate the incremental sales value of new-to-brand customers over a 12-month horizon after acquisition. The logic is straightforward: a customer acquired through SBV today may make five additional purchases over the next year. Attributing only the first purchase to the acquisition campaign dramatically understates its true economic contribution.

    Advanced advertisers are increasingly building incremental ROAS (iROAS) frameworks that incorporate NTB acquisition rates, estimated customer lifetime value, and downstream organic purchase behavior. When you run this math, SBV’s apparent ROAS disadvantage relative to SP frequently disappears — and in high-repeat categories like consumables, supplements, or pet products, SBV often shows superior iROAS precisely because it acquires customers who hadn’t yet been reached by SP.

    Practical NTB benchmarking

    If you’re running SBV campaigns and haven’t established NTB benchmarks, start there before making any rebalancing decisions. Pull 90-day NTB order rate, NTB order revenue, and NTB customer acquisition cost (NTB ad spend ÷ NTB orders) from your SBV campaigns. Compare NTB CAC to your estimated first-order margin to establish whether SBV is acquiring customers profitably. Then factor repeat purchase rate into a 12-month LTV calculation to determine the true value of each NTB customer generated by SBV.

    This analysis — not a surface-level ROAS comparison — is the analytical foundation for a defensible rebalancing decision.

    Four-quadrant signal dashboard showing the four triggers for rebalancing Amazon advertising budget from Sponsored Products to Sponsored Brands Video

    Four Signals That Mean Video Should Take Search Budget

    The rebalancing decision is not a one-time judgment call. It’s a diagnostic exercise that should be repeated at least quarterly, because the conditions that justify or contra-indicate a budget shift change as your account matures, your category evolves, and the auction dynamics shift. These four signals are the most reliable indicators that SBV deserves a larger share of your total PPC budget.

    Signal 1: SP CPC rising faster than category average

    When your Sponsored Products CPC is climbing 15% or more year-over-year on your core non-branded keywords, you’re experiencing auction pressure that additional budget cannot solve. You can’t bid your way out of a structurally expensive auction. At some threshold — different for every category and margin structure — incremental SP spend crosses from profitable to value-destroying, even if the headline ROAS looks acceptable.

    The diagnostic is simple: calculate your marginal ROAS on SP for the most recent 30 days versus the previous 30-day period, controlling for seasonality. If marginal ROAS is declining while CPC is rising, you’re past the efficient frontier on SP. That’s budget that should be finding a more productive home, and SBV is the logical first candidate.

    Signal 2: ROAS plateau despite sustained budget increases

    If your SP budget has increased by 20% or more over the past 90 days and total account ROAS has stayed flat or declined, the auction has absorbed your incremental spend without delivering proportional output. This is the most visible symptom of SP saturation in a mature account — the algorithm has found the profitable keywords and is now spending more to maintain those positions rather than finding new, efficient opportunities.

    The distinction here matters: ROAS plateauing because of seasonal softness is different from ROAS plateauing because of structural auction saturation. The test is whether your impression share on core keywords is already high (above 70%) even before budget increases. If you’re already capturing the majority of available impressions at your target keywords, adding budget will mostly raise CPCs rather than meaningfully expand volume.

    Signal 3: Branded search volume is stagnant

    Organic branded search — shoppers typing your brand name directly into Amazon — is one of the cleanest leading indicators of brand health and future conversion efficiency. When branded search volume grows, your SP branded campaigns become cheaper and more efficient, and organic conversion rates typically improve alongside. When branded search volume stagnates, it signals that your brand is failing to capture new customers at the top of the funnel who would eventually become high-value branded searchers.

    SBV’s primary mechanism for building branded search volume is exposure at the discovery stage: shoppers who see your SBV ad, don’t click immediately, but remember the brand name well enough to search for it specifically in a later session. This halo effect is real and measurable — brands that add SBV to an SP-only strategy consistently report 10–18% branded search volume increases over 90-day periods, which compounds into long-term organic rank improvements and reduced branded CPC.

    Signal 4: Category keyword saturation with available SBV placements

    Not all categories reach SBV saturation at the same pace. If your category analysis shows that fewer than 30–40% of search results pages in your core keywords display SBV ads — or that the same two or three competitor brands own the SBV slots consistently — there is an immediate placement arbitrage available. SBV CPCs in undersaturated categories frequently run materially lower than SP CPCs for comparable keyword targets, while delivering superior CTR and reaching audiences at a different decision-making stage.

    This asymmetry won’t last. As more advertisers recognize SBV’s efficiency advantage, auction pressure on video placements will increase. The window for low-CPC SBV entry into competitive categories is narrowing — which means accounts that act on this analysis in 2026 will establish creative assets, quality scores, and historical performance data that provide durable advantages before costs normalize.

    The Rebalancing Math: How to Calculate the Right Budget Split

    The portfolio math for SBV allocation in 2026 has crystallized around some fairly consistent benchmarks from advanced accounts. But those benchmarks are outputs of a calculation, not inputs to it. Understanding the calculation is more durable than memorizing the numbers.

    The standard advanced account structure

    Data from well-optimized Amazon PPC accounts in 2026 clusters around a consistent portfolio structure: 60–70% of total ad spend in Sponsored Products, 20–25% in Sponsored Brands, and 10–15% in Sponsored Display. Within the Sponsored Brands allocation, 80–95% flows to Sponsored Brands Video rather than static Sponsored Brands headline ads.

    Working through that math: if SB receives 20–25% of total spend and 90% of that goes to SBV, then SBV is absorbing roughly 18–22% of total PPC budget in advanced accounts. For a brand spending $50,000 per month in Amazon advertising, that’s $9,000–$11,000 per month in SBV — a number that would have seemed aggressive for most advertisers three years ago and is now increasingly treated as the baseline for accounts that take video seriously.

    How to calculate your specific rebalancing threshold

    Rather than adopting aggregate benchmarks wholesale, calculate your account-specific rebalancing ceiling using this structure. First, identify the portion of your current SP spend that is defensive rather than acquisitive — budget spent maintaining top-of-search positions on branded keywords and saturated category keywords where incremental ROAS has demonstrably declined. This is your rebalancing pool: spend that is currently delivering below-marginal returns in SP and could potentially generate higher incremental value in SBV.

    Second, establish your SBV capacity constraint. SBV budget can only be effectively deployed if you have sufficient creative assets and keyword targeting infrastructure to utilize it without quality degradation. Running more budget through a single SBV campaign with one creative asset leads to frequency fatigue and creative decay. The practical rule is that each distinct SBV creative should support no more than $3,000–$5,000 in monthly spend before performance begins to diminish from repetition.

    Third, calculate the incremental NTB acquisition opportunity. Using your current SBV NTB rate and NTB CAC, estimate how many additional new-to-brand customers the rebalanced budget would generate per month. Multiply by your 12-month LTV estimate. If that LTV figure exceeds the marginal ROAS you’re generating from the SP spend you’d be reallocating, the math supports the shift.

    The 5–10% incremental rule

    Whatever the calculation suggests, the execution should be gradual. The consensus among advanced Amazon PPC managers in 2026 is that budget shifts exceeding 10% of total account spend in a single adjustment period create performance instability. Amazon’s campaign algorithms require observation data to optimize new bid levels and placement priorities effectively. Large sudden budget changes can trigger algorithmic recalibration periods — sometimes manifesting as temporary performance dips — that make it impossible to evaluate whether the shift was genuinely beneficial or simply disruptive.

    Move 5–10% of SP budget into SBV over each 30-day period. Observe for 30 days before making the next adjustment. This pacing gives algorithms time to stabilize, gives you clean data to evaluate at each stage, and limits downside exposure if the initial rebalancing reveals unexpected issues with creative quality or keyword targeting in the SBV campaigns.

    Budget allocation pie chart for advanced Amazon PPC accounts in 2026 showing recommended split between Sponsored Products, Sponsored Brands Video, and Sponsored Display

    Creative That Earns the Budget: What SBV Needs to Perform

    Budget rebalancing without creative infrastructure is a money-wasting exercise. SBV is an unforgiving format in one specific respect: the creative asset is the campaign. You can build technically sound targeting, competitive bid levels, and a sensible keyword strategy, and still generate mediocre SBV results if the video asset fails to earn attention in the first three seconds. This is categorically different from SP, where a strong main image and price point do the majority of the conversion work.

    The first three seconds are non-negotiable

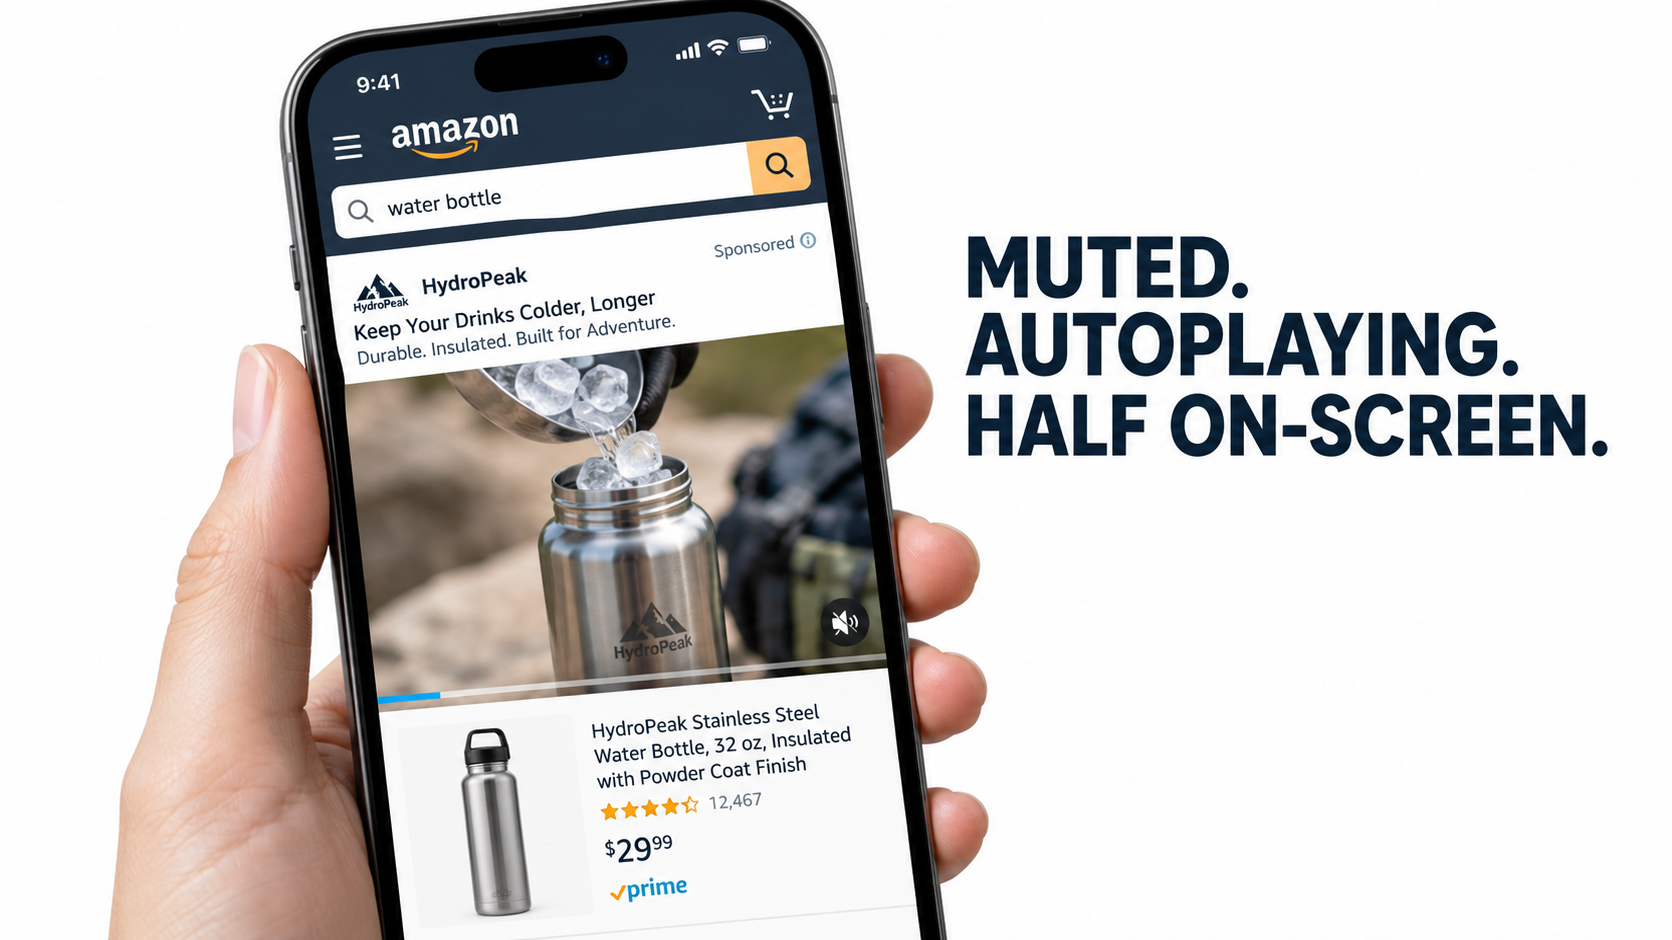
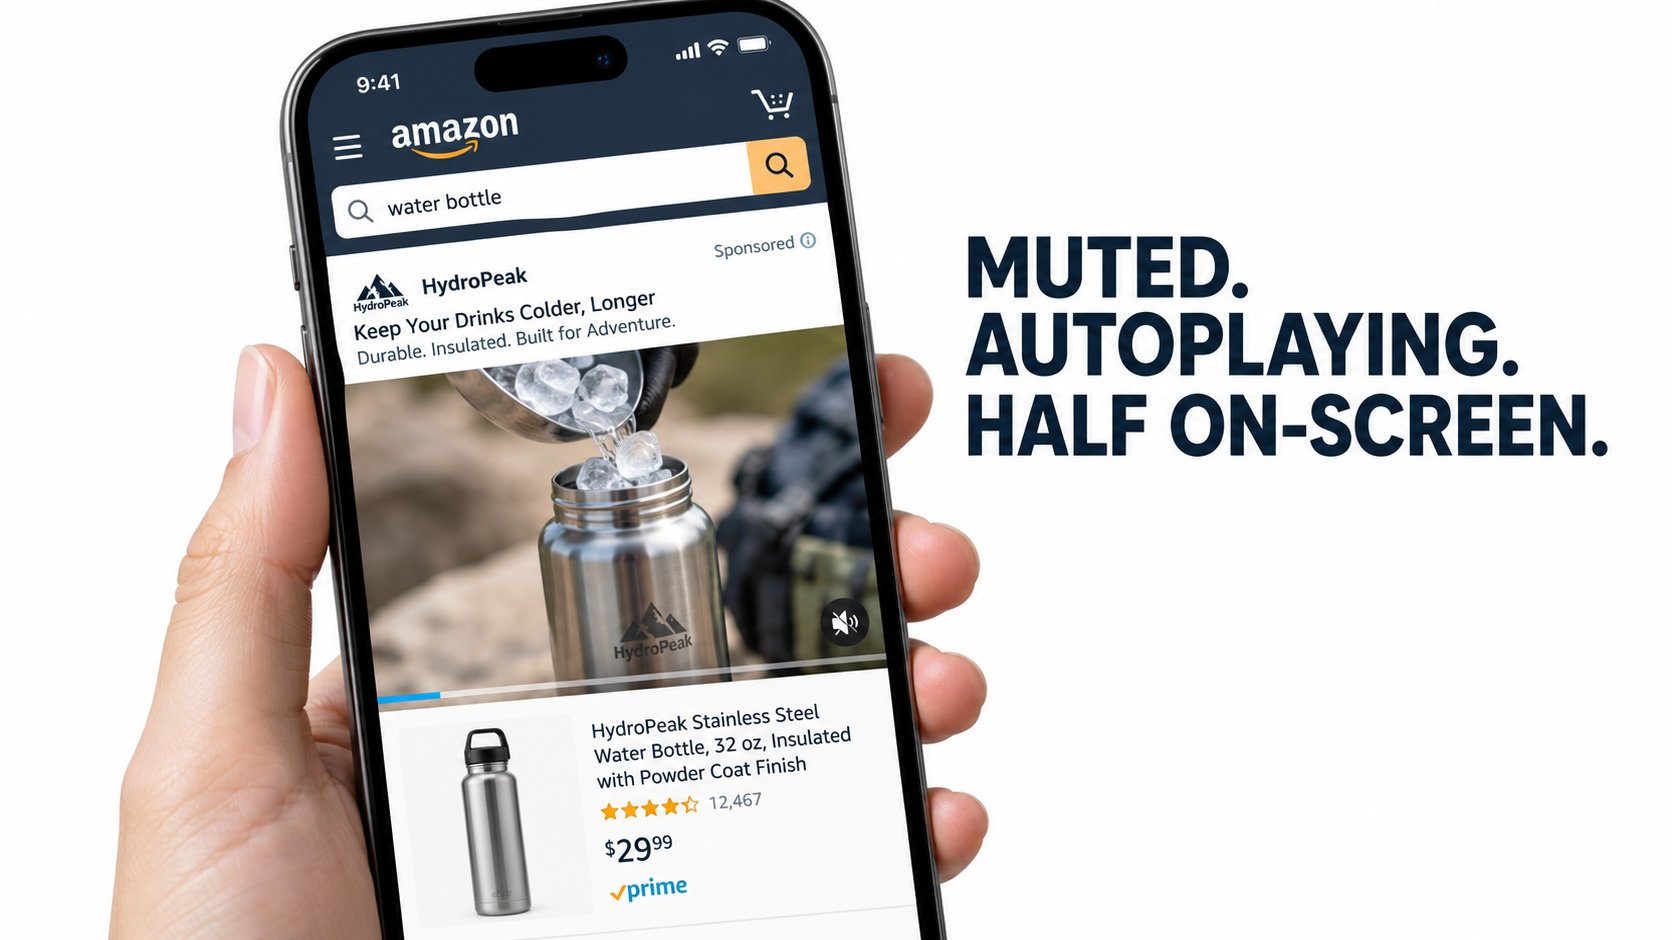
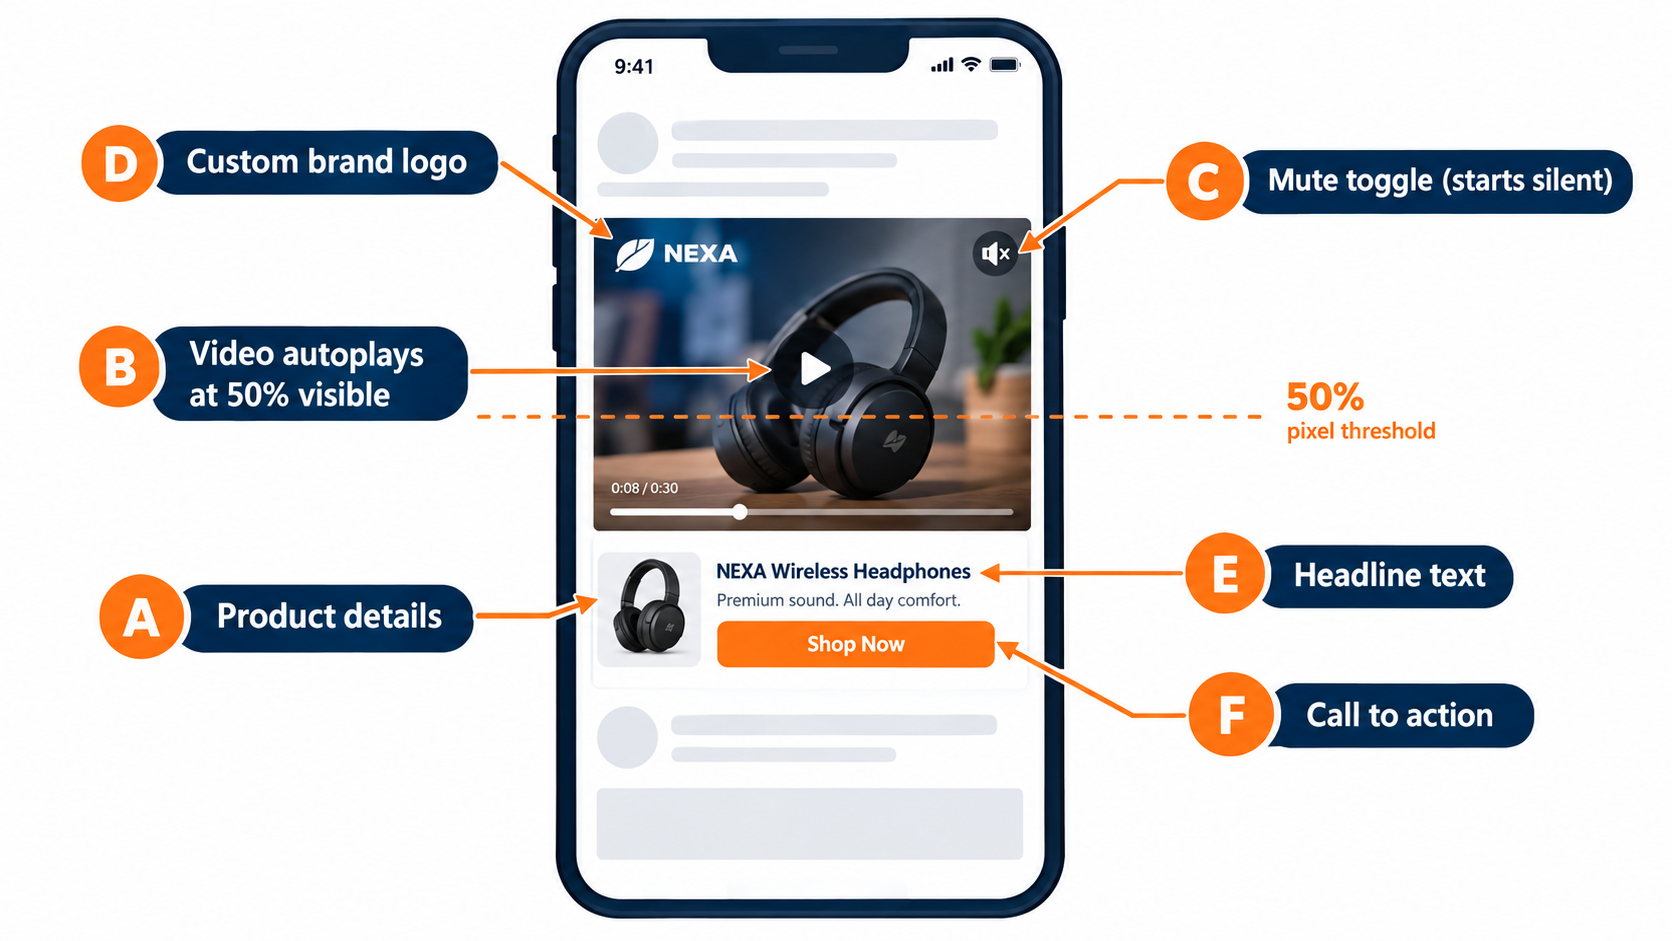
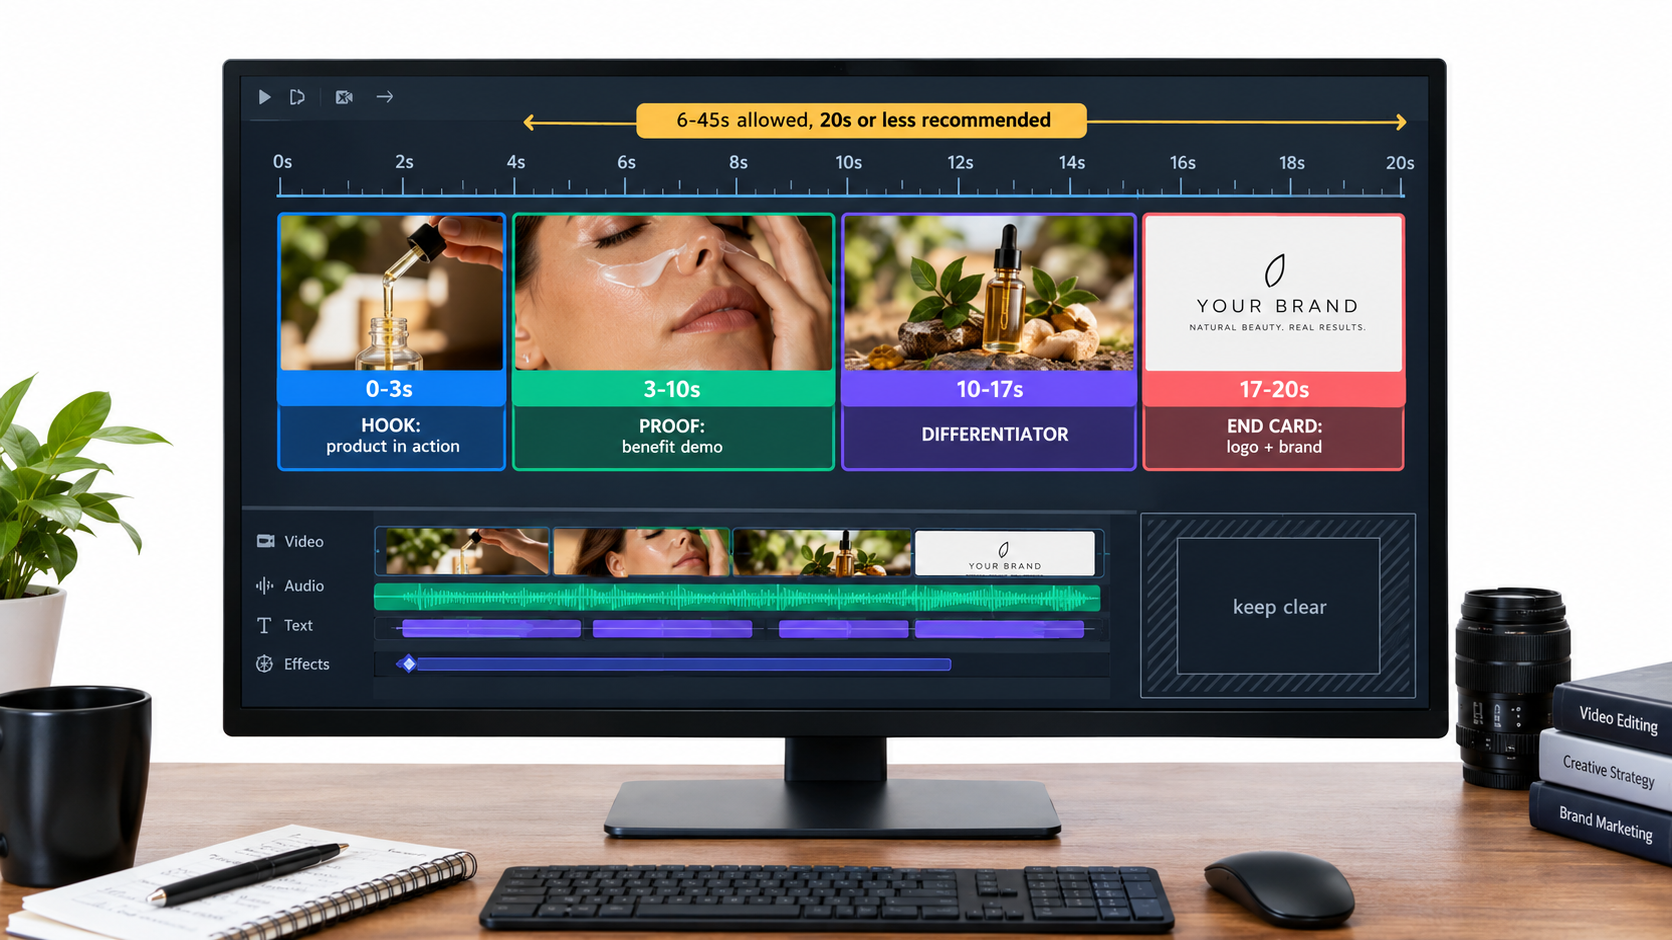
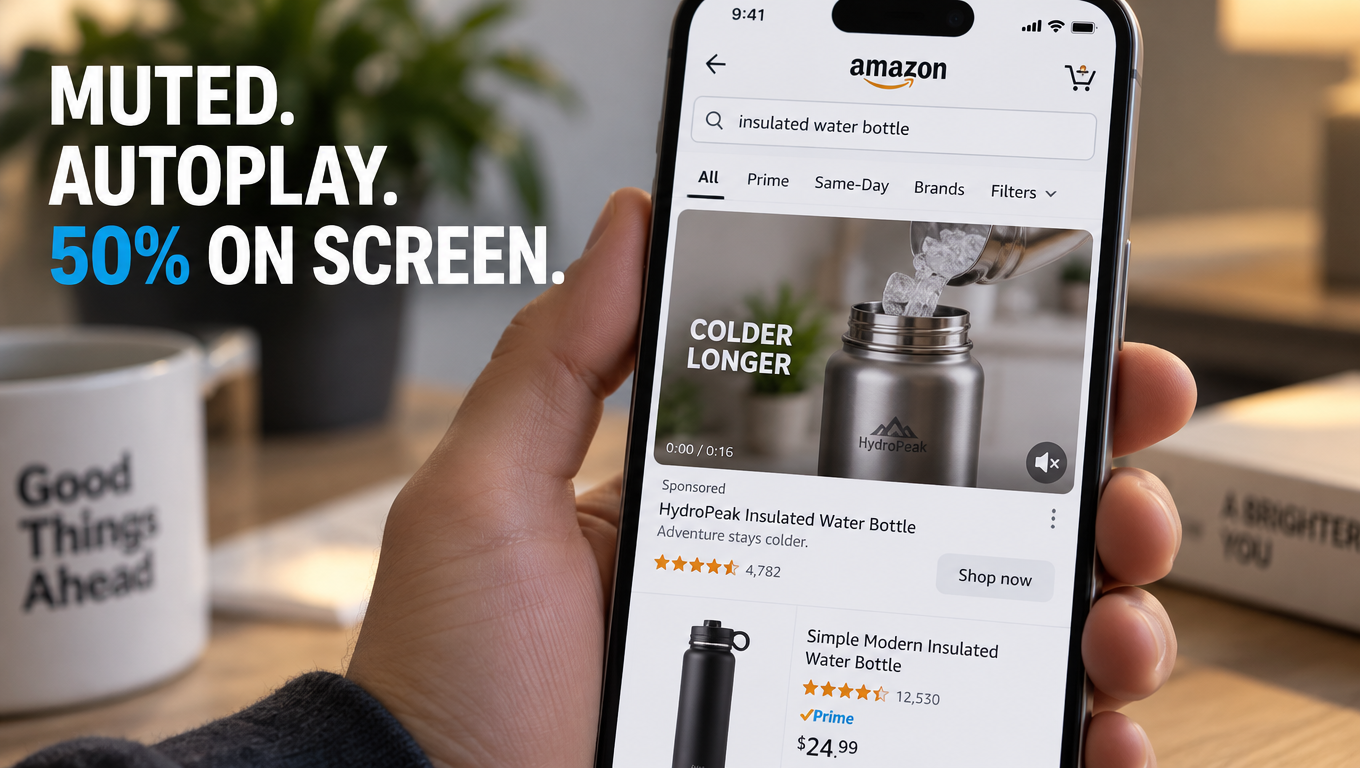
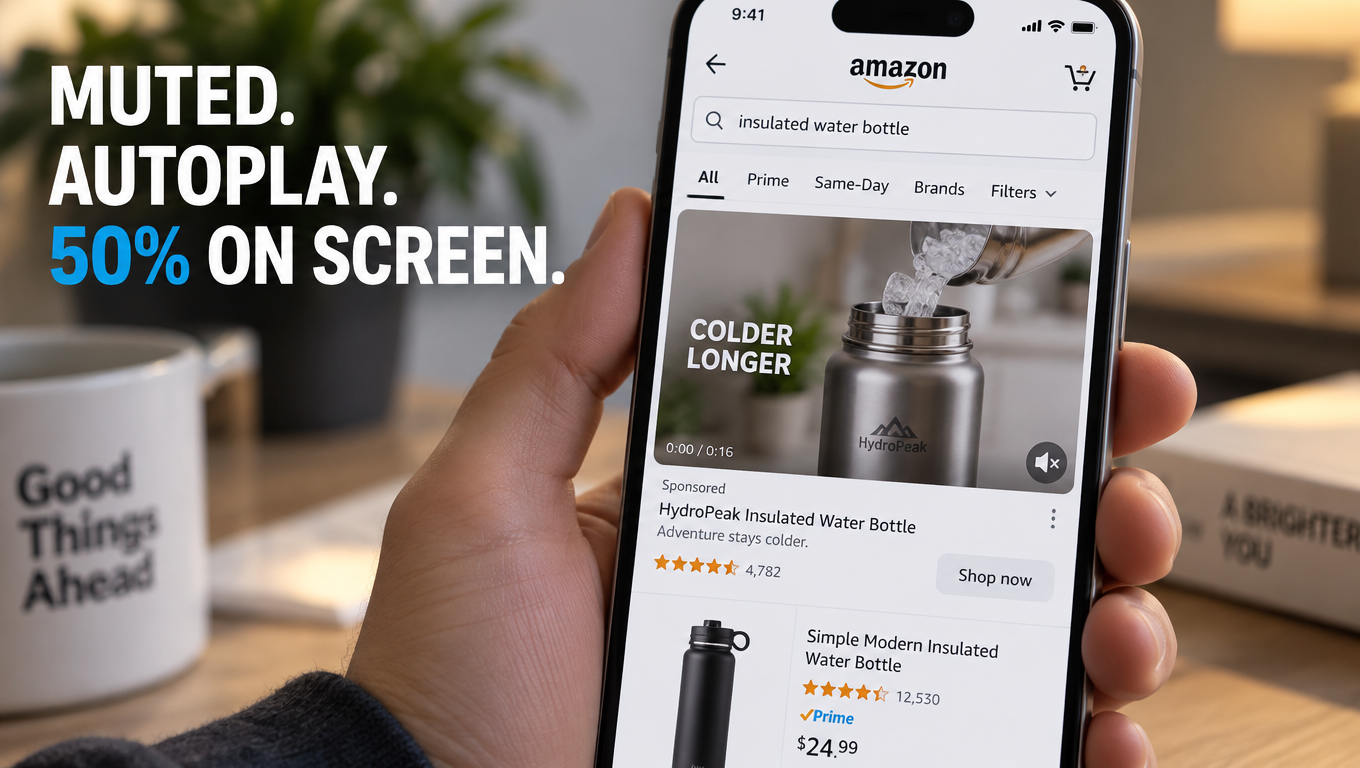
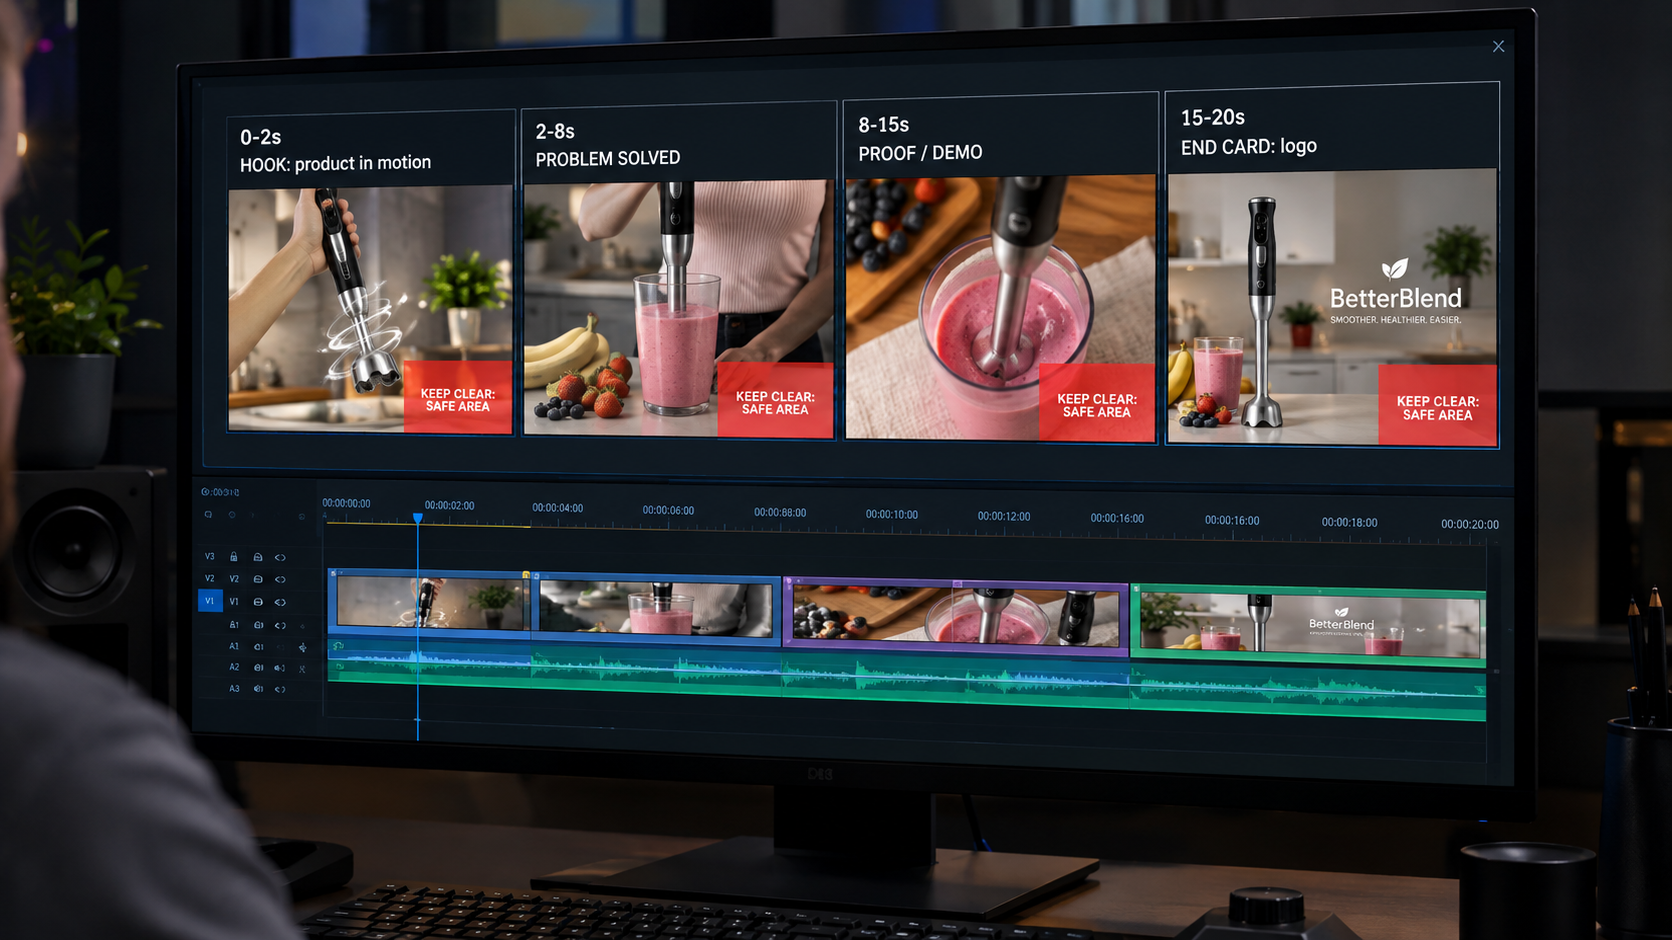
    SBV ads autoplay when approximately 50% of the unit is visible on screen, without sound, on mobile and desktop. The shopper did not choose to engage with your ad. The ad appeared in their scroll path, and they have approximately two to three seconds before their thumb continues to the next result. In that window, the video must accomplish one thing: show the product doing something interesting enough that stopping and watching more seems worthwhile.

    This sounds obvious. It is routinely violated. Common first-three-second failures include: opening with a logo or brand name before the product appears; slow-building lifestyle montages that haven’t shown the physical product by second four; text-heavy title cards that require reading rather than watching; and transitions that obscure the product during the critical hook window.

    Amazon’s own research supports the product-first principle: videos that show the core product within the first two to three seconds consistently outperform those that build to the product reveal. The mechanism is practical — a shopper searching for “stainless steel cookware” who immediately sees a gleaming pan being used on a stovetop has received immediate confirmation that this ad is relevant to their intent. A shopper who sees a nature landscape opening sequence has not.

    Design for mute: captions are not optional

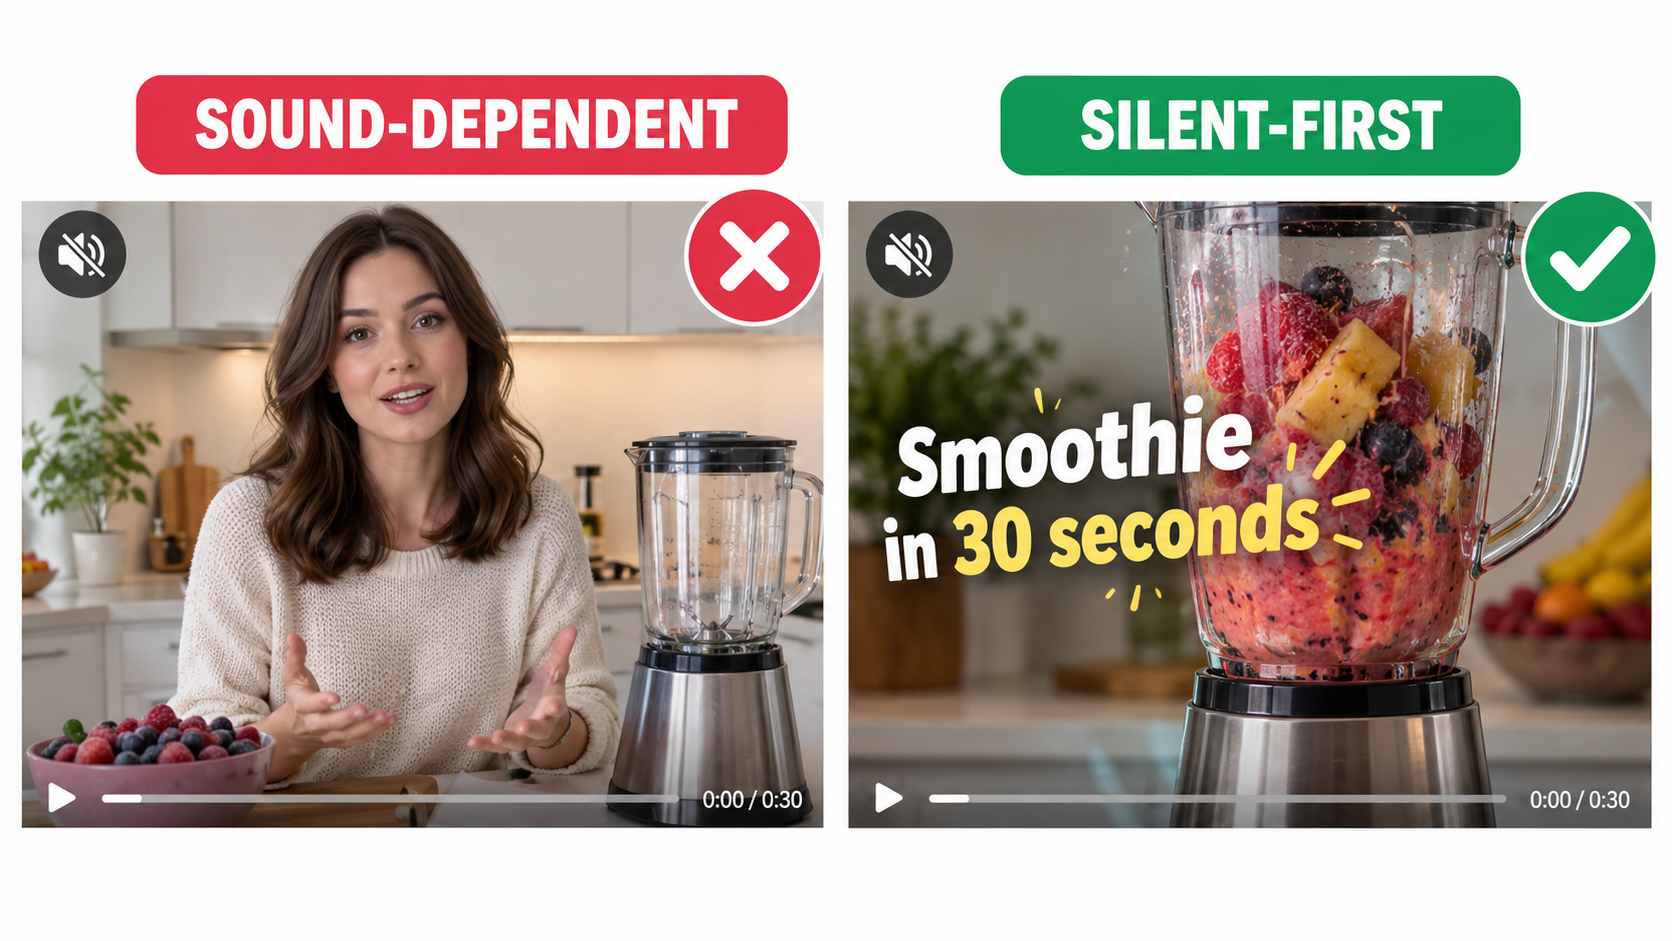
    Because SBV autoplays without sound, every video that relies on spoken information to communicate its core message is operating at a structural disadvantage. The shopper who watches a 15-second SBV ad on mute and has no idea what the product does or what makes it different from competitors is not going to tap to enable audio — they’re going to scroll to the next result.

    Bold, high-contrast text overlays that mirror or supplement the visual content are the standard approach for mute-first design. Key benefit statements, differentiators, size/quantity callouts, and pricing signals should all appear as on-screen text at the relevant moment in the video. Captions for spoken content are a secondary measure — effective, but not a substitute for text overlays designed specifically for a sound-off experience.

    Runtime, refresh cadence, and creative volume

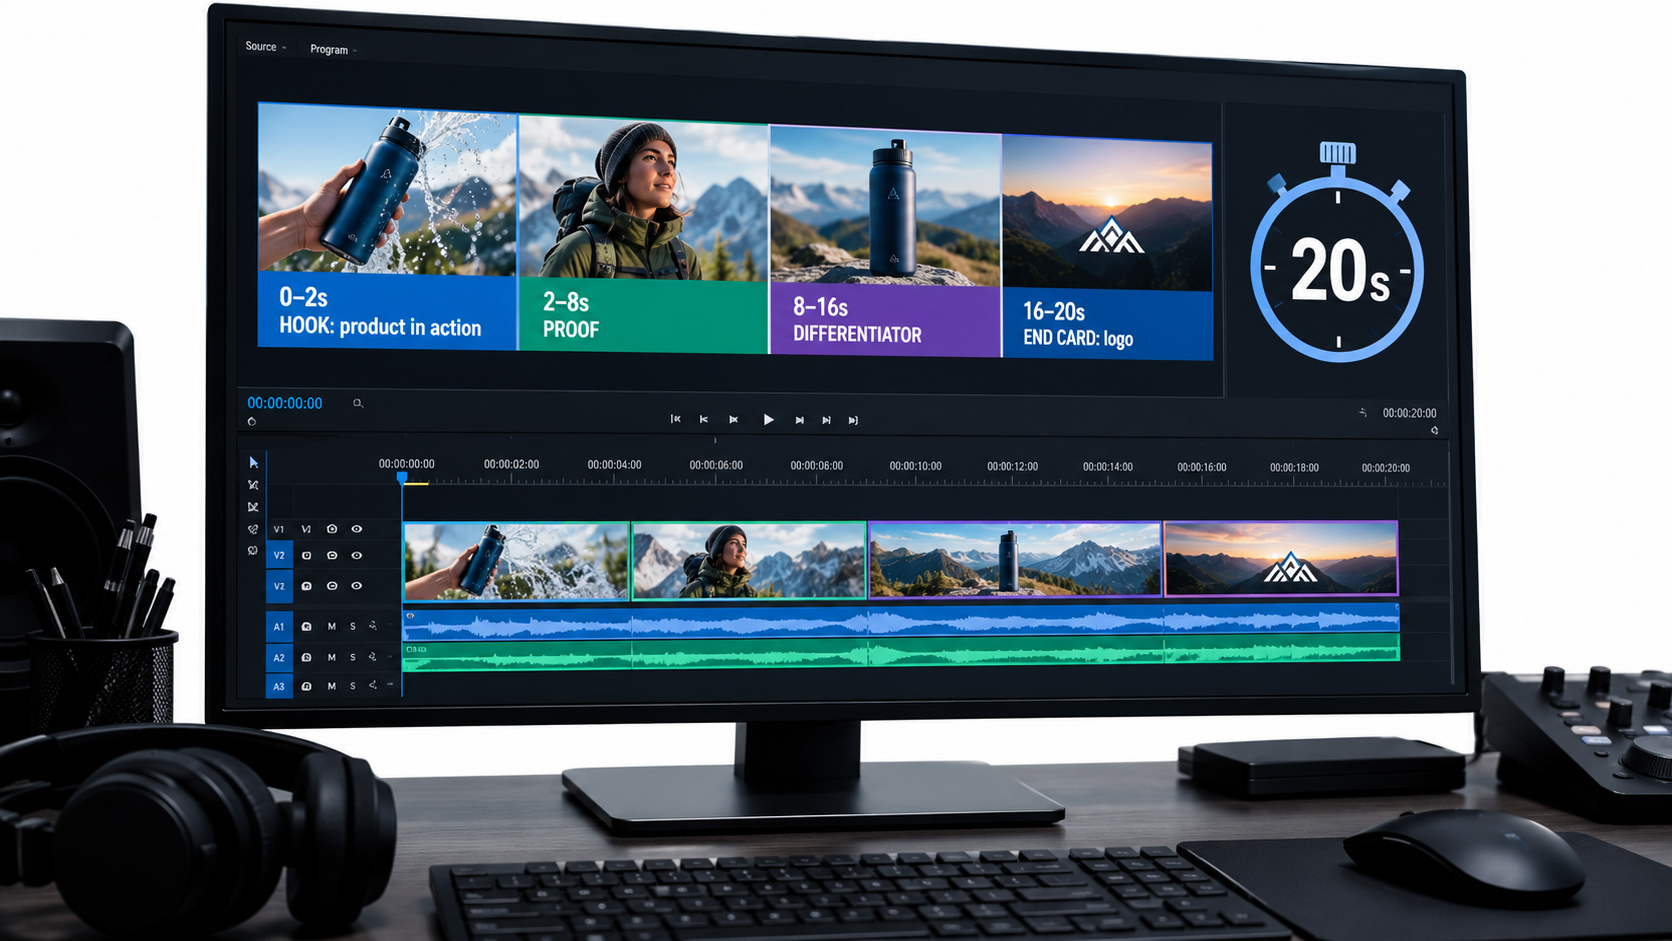
    Current SBV best practice benchmarks in 2026 center on videos in the 15–30 second range, with 15–20 seconds outperforming longer formats in most categories where the product benefit can be communicated concisely. Categories with complex products — technical equipment, multi-component systems, software-adjacent products — support slightly longer formats, but even these rarely benefit from videos exceeding 45 seconds in the search results environment.

    Creative decay is one of the most underappreciated performance risks in SBV campaigns. A video that drives strong CTR in month one will typically show meaningfully declining performance by month two or three as the same audiences see it repeatedly. Advanced SBV accounts maintain a minimum of two to three active creative variants per campaign and rotate in new assets at least every 30 days. Some highly scaled accounts run monthly creative production cycles specifically to prevent fatigue-driven performance erosion.

    Amazon’s introduction of its own Video Generator tool for Sponsored Brands campaigns in 2026 has lowered the production barrier for smaller advertisers, enabling basic video creation from existing product images and text. While this tool won’t replace purpose-built video production for established brands, it removes the “we don’t have video assets” constraint for brands that have been deferring SBV entry for creative-cost reasons.

    Multi-ASIN vs. single product SBV strategy

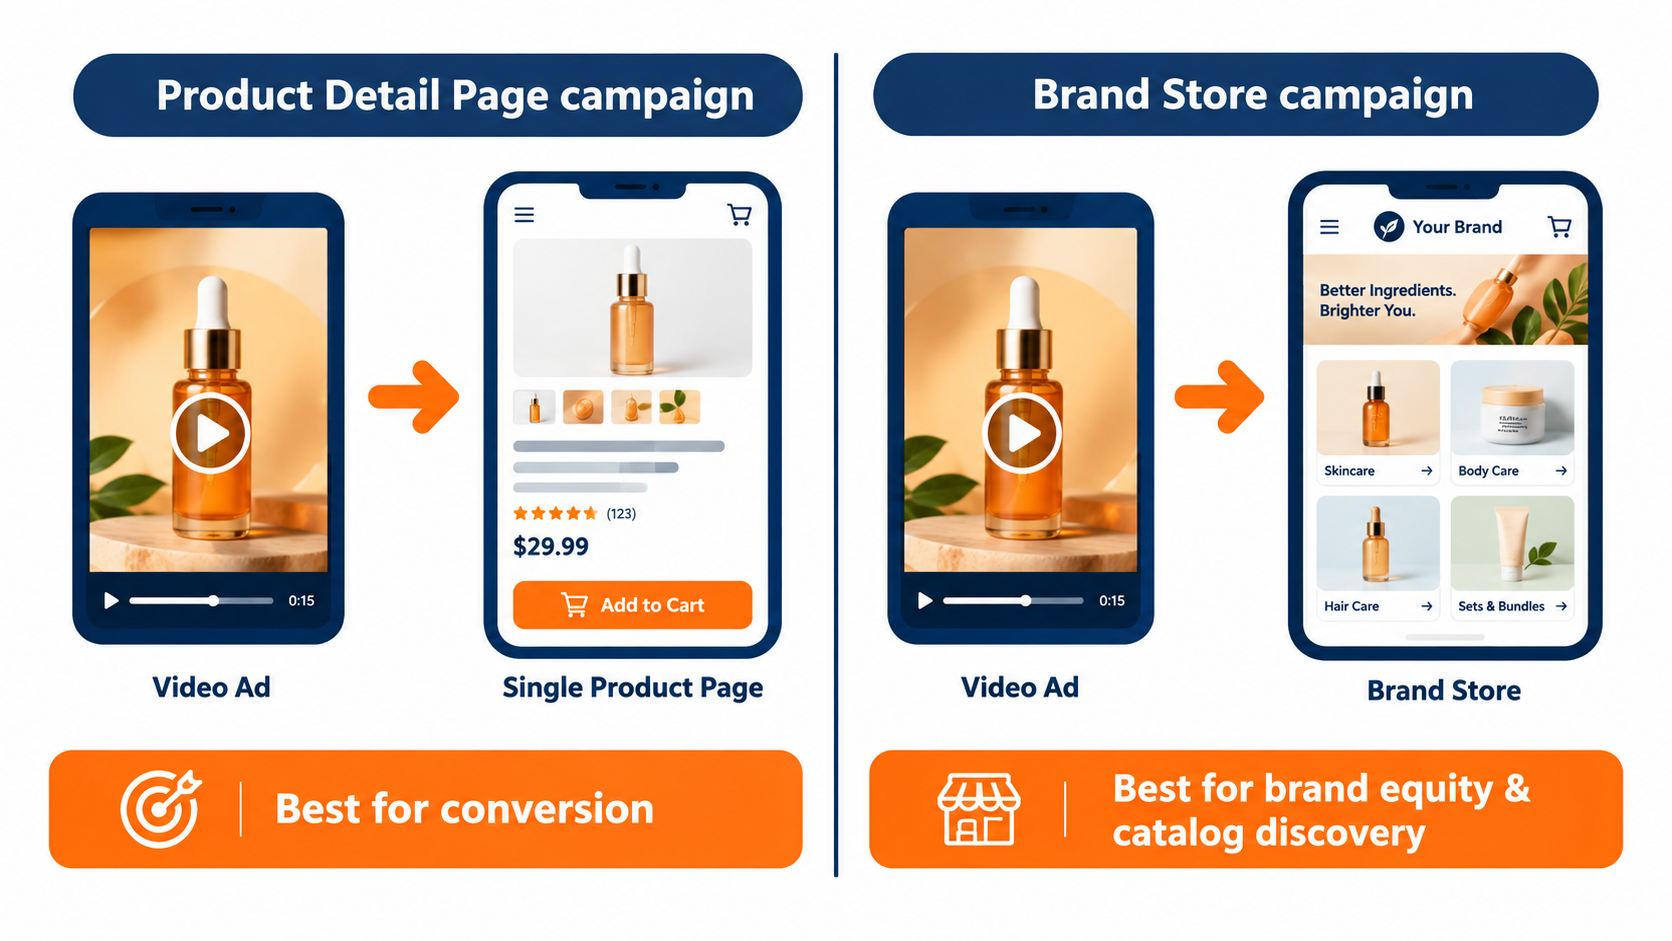
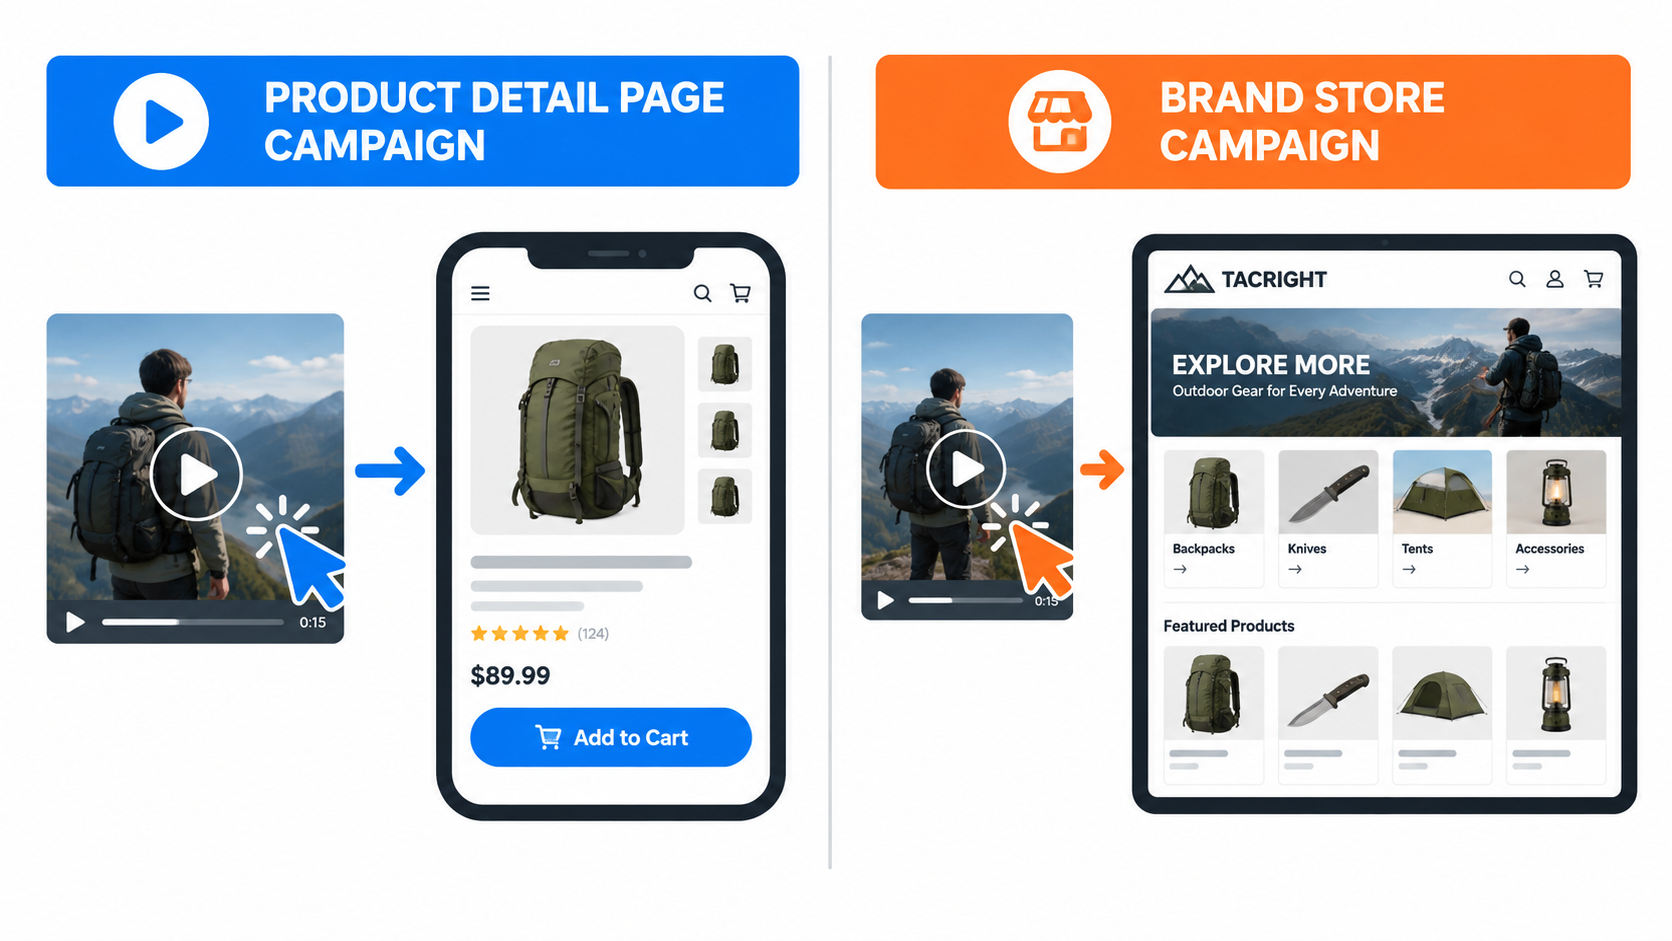
    SBV campaigns can showcase a single product or a curated selection of up to three products in a store spotlight format. The strategic choice between these approaches has meaningful implications for budget efficiency. Single-product SBV is typically more conversion-focused: the ad communicates one clear value proposition, and the click lands on a specific ASIN detail page. Multi-product SBV is more acquisition-focused: it shows category breadth, drives traffic to a custom landing page or brand store, and is more likely to drive NTB exploration across the catalog.

    The general guidance from 2026 account data is to run single-product SBV for your highest-priority ASINs where conversion rate optimization is the objective, and multi-product SBV when the goal is brand building and catalog discovery among new-to-brand audiences. Both have a place in a mature SBV portfolio — but mixing objectives within a single campaign makes it impossible to evaluate performance accurately.

    Attribution Reality: Measuring SBV’s True Contribution

    The measurement challenge for SBV is not technically complex — the tools exist. The challenge is organizational: most Amazon PPC reporting dashboards are built around last-click ROAS, which is the metric most brand managers and finance teams understand and can benchmark against. Introducing incremental ROAS, NTB metrics, and halo effect analysis requires either building new reporting infrastructure or doing a significant amount of educational work with stakeholders who have strong intuitions about what “good” ROAS looks like.

    Building an incrementality baseline

    The first step in accurate SBV measurement is establishing what your account looks like without SBV. If you’ve been running SBV campaigns for six months or more, you can do a retrospective analysis by pulling weekly performance data and identifying periods when SBV budgets were paused or significantly reduced — then examining what happened to SP conversion rates, branded search volume, and overall account ROAS during those periods. If SBV pauses correlate with degraded account-level performance even when SP budgets were held constant, that’s directional evidence of SBV’s incremental contribution.

    For accounts building a prospective incrementality baseline, the cleanest methodology is a geo-based holdout test: run SBV in specific states or regions while suppressing it in matched control regions, with SP budgets held constant across both groups. Comparing sales velocity, branded search growth, and NTB acquisition rates between test and control groups over 30–60 days gives you a reasonably clean incrementality estimate without touching your core SP performance.

    The branded search lift metric

    One of the most practical proxies for SBV’s halo contribution is branded search volume lift. Track your branded keyword impression volume in Sponsored Brands reports before and after SBV campaigns launch or scale. If branded search impressions increase materially — even if your branded SP bids haven’t changed — SBV is generating awareness that converts to intent in later sessions. This metric isn’t available in a single report; it requires pulling SB impression data over time and correlating it with SBV spend levels. But it’s tractable, and it tells a clean story that’s easy to communicate to stakeholders who aren’t fluent in incrementality methodology.

    What to actually report to decision-makers

    For internal reporting purposes, present SBV performance across three distinct metrics tiers: direct performance (CTR, CVR, direct ROAS), new-to-brand performance (NTB order rate, NTB revenue, NTB CAC), and brand health performance (branded search volume trend, branded keyword CPC trend). Showing all three simultaneously makes it impossible to evaluate SBV in purely direct-ROAS terms — which is the framework that leads to chronic SBV underinvestment — and creates a richer, more accurate picture of what the format is delivering to the business.

    How Rufus and Alexa for Shopping Change the Video Equation

    Amazon’s AI-powered shopping assistant — initially launched as Rufus and increasingly integrated across the shopping experience under the Alexa for Shopping umbrella — is adding a new dimension to the SBV value calculation. The precise mechanics of AI-assisted ad placement are still evolving and not fully documented by Amazon, but the directional trends are clear enough to inform 2026 budget strategy.

    Conversational discovery and Sponsored Prompts

    Rufus/Alexa for Shopping processes conversational queries — “What’s the best protein powder for building muscle?” — and generates product recommendations that blend organic results with Sponsored Brands and Sponsored Prompts placements. The AI’s intent-matching capability creates a new discovery surface that is qualitatively different from keyword-triggered search: the shopper is expressing category interest through a conversational format rather than entering a precise search query, which means the discovery mechanism rewards brand awareness and category association more than keyword optimization.

    SBV has a structural advantage in this environment. A brand that has generated meaningful awareness and association with a category through SBV campaigns — impressions, video completions, click-throughs — builds signals that inform the AI’s understanding of brand-category relevance. Brands that exist only as keyword-targeted SP listings have a thinner signal footprint for the AI to work with. As conversational discovery grows as a share of total Amazon shopping sessions, the brands with richer upper-funnel data will have compounding advantages in AI-assisted placement.

    Video surfaces in AI-driven shopping experiences

    Amazon has begun integrating video ad units into AI-assisted discovery surfaces alongside traditional search results. The trajectory suggests increasing video representation in these environments over time, consistent with broader platform trends toward richer media in shopping interfaces. Brands that have established SBV creative assets, performance history, and quality signals in 2026 will be better positioned to occupy these placements as they scale, compared to brands that delay video entry and attempt to build that infrastructure later in a more competitive environment.

    What this means for the rebalancing decision

    The Rufus/Alexa for Shopping trend reinforces the rebalancing case without transforming it. The core argument for shifting budget from SP to SBV — based on CPC economics, NTB acquisition, and incremental ROAS — is already compelling on its own terms. The AI shopping assistant dynamic adds a forward-looking dimension: the investment in SBV creative and performance history being made today is building assets that will compound in value as Amazon’s AI-driven discovery surfaces grow in importance. Brands that treat SBV as an experimental supplement to SP will find themselves starting from scratch in that future environment.

    Common Rebalancing Mistakes (And How to Avoid Them)

    Budget rebalancing decisions are easy to get wrong even when the strategic logic is sound. These are the most consistent failure modes observed in accounts that attempt SBV rebalancing without adequate preparation.

    Moving budget before creative is ready

    The most common and costly mistake is reallocating SP budget into SBV before the SBV creative infrastructure is genuinely ready to absorb it efficiently. Launching a $10,000/month SBV budget against a single 30-second video with mediocre production quality will produce poor results — not because SBV doesn’t work, but because the creative is the limiting factor. Poor SBV results often lead to the incorrect conclusion that “video doesn’t work for our category” and a reversion to SP-heavy allocation, when the actual lesson is that video requires creative investment proportional to the budget behind it.

    The rule of thumb: don’t move more than $3,000–$5,000 per month into SBV per creative asset until you’ve validated CTR and CVR performance on that asset at lower spend levels. Scale budget only behind creative that has demonstrated it can earn attention.

    Evaluating SBV on the same metrics as SP

    Applying SP’s ROAS target to SBV campaigns is analytically incorrect and will systematically prevent SBV from reaching budgets where it can generate its distinctive value. SBV typically shows 15–30% lower direct ROAS than SP in the same account — not because it’s less efficient, but because it’s doing different work. Holding SBV to the same ROAS threshold as SP ensures that every marginal dollar of SBV budget that exceeds that threshold gets cut before the campaign has the scale to generate NTB acquisition at volume.

    Set separate performance targets for SBV based on NTB-adjusted metrics, not direct ROAS. A reasonable starting threshold: SBV ROAS + (NTB order rate × estimated NTB LTV) should exceed SP marginal ROAS. If the combined metric clears the bar, the SBV budget is justified even if the direct ROAS looks weaker in isolation.

    Rebalancing during peak seasons

    Budget structure changes made during Q4, Prime Day, or other high-velocity periods introduce additional variables that make it impossible to evaluate whether performance changes are driven by the rebalancing or by the seasonal dynamics. Always conduct rebalancing tests during stable, predictable demand periods. Use Q1 and Q3 for the bulk of your structural budget experimentation. Apply the learnings from those experiments to your Q2 and Q4 budget configurations, rather than running live experiments during your most consequential trading periods.

    Ignoring keyword strategy in SBV campaigns

    SBV is a keyword-targeted format. The quality of keyword selection in SBV campaigns matters significantly for both performance and cost efficiency. A common mistake is targeting only the same core category keywords in SBV that are already heavily contested in SP — which drives up CPCs, reduces the efficiency advantage of SBV, and limits the format’s reach to audiences the account is already aggressively targeting through SP.

    SBV keyword strategy should include a meaningful proportion of broader, aspirational, or adjacent category keywords that SP campaigns don’t target efficiently. These wider matches reach shoppers earlier in the consideration journey — exactly where SBV’s awareness and video-engagement advantages are most relevant. The CTR from these broader terms will be lower than core keyword CTR, but the NTB acquisition rate will typically be higher, and the CPCs will be more competitive.

    90-day phased Amazon PPC budget rebalancing roadmap: Phase 1 audit and baseline, Phase 2 test 10-15% shift, Phase 3 scale or pause based on incrementality data

    The Phased Rebalancing Framework: A 90-Day Approach

    The following framework provides a structured approach to SBV budget rebalancing that manages risk, preserves account stability, and generates clean data at each stage to support subsequent decisions. It assumes an existing SP-primary account with either no current SBV presence or a small experimental SBV allocation.

    Phase 1 (Days 1–30): Establish baselines and prepare creative

    The first month is entirely analytical and preparatory. Run your existing SP and SBV campaigns without structural changes. Pull 30-day and 90-day performance data across: SP CPC by keyword group, SP marginal ROAS (estimated), SP impression share on core keywords, SBV CTR and CVR by creative asset, SBV NTB order rate and NTB CAC, and branded keyword search volume trends.

    Use this data to identify: (1) which SP campaigns or keyword groups are showing the clearest diminishing marginal returns — these are the rebalancing source pool; (2) which SBV creative assets have demonstrated the strongest CTR and NTB performance at current spend levels — these are the assets worth scaling; and (3) what creative gaps exist if the SBV budget were to double or triple.

    Simultaneously, prepare or commission any additional creative assets needed for Phase 2 scaling. The 30-day Phase 1 window is the production runway for the video assets that Phase 2 will need. Entering Phase 2 without ready creative puts you in the position of scaling budget against an asset before it’s been adequately tested.

    Phase 2 (Days 31–60): Execute the first rebalancing shift

    Move 10–15% of your identified SP rebalancing pool into SBV. If your analysis in Phase 1 suggested $8,000/month in SP spend that is delivering below-marginal returns, shift $800–$1,200 of that into SBV in Phase 2. This is deliberately conservative — the goal is not to maximize the rebalancing speed but to generate clean, observable data on how the shift affects both account-level performance and SBV-specific metrics.

    Configure SBV campaigns with the validated creative assets identified in Phase 1. Separate campaigns by targeting strategy: one campaign targeting your core category keywords, one targeting broader adjacent keywords, and — if you have the budget — one targeting competitor ASINs or branded terms where SBV’s video format can interrupt competitor consideration. Maintain all existing SP campaigns at their current levels minus the reallocated amount; do not simultaneously adjust SP bids, which would introduce additional variables.

    Track weekly: total account ROAS (not just SBV ROAS), SP conversion rate, SBV CTR and CVR, SBV NTB order rate, and branded keyword impression volume. Any significant deterioration in total account ROAS or SP conversion rate should trigger a diagnostic review before Phase 3.

    Phase 3 (Days 61–90): Scale, hold, or pull back based on data

    By Day 61, you have 30 days of clean Phase 2 performance data. The decision tree is straightforward:

    If total account ROAS held or improved: SBV has absorbed the rebalanced budget without degrading overall performance. The data supports further rebalancing. Execute a second 10–15% shift in Phase 3 and extend the framework to a 180-day cycle.

    If total account ROAS declined but SBV NTB metrics are strong: The direct ROAS decline may be offset by NTB acquisition value. Run the iROAS calculation including estimated LTV contribution from NTB customers. If the combined metric supports the shift, hold the current allocation and monitor for 30 more days before deciding whether to scale further or stabilize.

    If both direct ROAS and NTB metrics are weak: The creative or targeting in Phase 2 is the problem, not the rebalancing thesis. Pause the SBV scale, diagnose which elements of creative and targeting underperformed, produce revised assets, and re-run Phase 2 with the improvements before attempting Phase 3 again.

    The structured approach forces each rebalancing decision to be grounded in observed data rather than either blind commitment to the rebalancing thesis or premature retreat at the first sign of performance volatility. Most accounts that fail at SBV rebalancing fail because they either move too fast without adequate measurement infrastructure or abandon the strategy based on direct ROAS data alone without incorporating NTB and iROAS context.

    Conclusion: The Budget Assumption Worth Revisiting

    The SP-primary Amazon advertising account was the right structure for a previous version of the Amazon advertising ecosystem. In that environment — lower SP CPCs, limited SBV placement inventory, fragmented video creative tools — allocating 80–90% of PPC budget to Sponsored Products was a rational, efficient choice. That environment no longer exists in 2026.

    SP CPCs have climbed to levels where incremental spend in many categories generates genuinely poor marginal returns. SBV has matured into a format with documented CTR advantages, measurable NTB acquisition capacity, and a clear place in the full shopping funnel. The analytical tools — NTB metrics, LTS ROAS, incremental ROAS frameworks — to evaluate SBV on appropriate terms are available in Amazon’s own reporting console. The creative production barrier has dropped with Amazon’s Video Generator and widespread access to affordable video production services.

    The remaining barrier is organizational: the habit of evaluating all advertising spend on last-click direct ROAS, which makes SP look more efficient than it is at the margin and makes SBV look less efficient than it is when NTB and halo contributions are included. Changing that measurement framework is the precondition for making rational rebalancing decisions.

    The four signals — rising SP CPCs, ROAS plateaus, stagnant branded search volume, and underutilized SBV placement inventory — are a diagnostic toolkit, not a checklist requiring all four items to be present before action is warranted. Two or three of them appearing simultaneously is sufficient to begin the 90-day rebalancing framework and generate the data that will either confirm or complicate the thesis.

    Video is not eating search because it is a better channel in some abstract sense. It’s earning budget because the economics of search have shifted to a point where video’s incremental contribution — measured honestly and completely — is frequently more valuable than the marginal return on additional search spend. That’s not a creative trend. It’s a math problem with a specific answer that differs for every account and changes every quarter. The job is to run the math, act on what it shows, and keep running it.

    Key Takeaways

    • SP CPCs have risen ~48% cumulatively since 2019; marginal returns on additional SP spend are declining in most competitive categories.
    • SBV delivers approximately 1.6× higher CTR and 1.3× higher CVR than static Sponsored Brands, with new-to-brand reporting that SP cannot provide.
    • Standard last-click ROAS comparisons systematically undervalue SBV; NTB-adjusted and incremental ROAS frameworks are required for accurate evaluation.
    • Advanced accounts in 2026 allocate 80–95% of SB budget to SBV, representing roughly 16–25% of total PPC spend.
    • The four rebalancing signals: rising SP CPC, ROAS plateau, stagnant branded search volume, and available SBV placement inventory.
    • Move budget in 10–15% increments per 30-day period; evaluate with a combined direct ROAS + NTB + iROAS framework.
    • Creative quality is the binding constraint on SBV performance — do not scale budget ahead of creative readiness.
    • Rufus/Alexa for Shopping’s conversational discovery surfaces reward brands with richer upper-funnel data, reinforcing the long-term case for SBV investment.
  • Amazon Ads AI Bidding: The Test-First Framework That Actually Sequences Your Experiments

    Amazon Ads AI Bidding: The Test-First Framework That Actually Sequences Your Experiments

    Amazon Ads AI bidding test-first framework: chaotic random testing vs structured sequenced flowchart

    Here is the mistake most Amazon advertisers are making with AI bidding in 2026: they treat it as a feature to activate, not a system to build. They flip on dynamic bidding, wait a week, see mixed results, then chase the next lever — placement multipliers, a third-party tool, maybe the new Ads Agent — without ever knowing whether the first test actually worked.

    The result is a campaign account that looks increasingly automated but performs no better than it did six months ago. Sometimes worse.

    The core problem is not the tools. Amazon’s native AI bidding infrastructure has matured considerably. The problem is test sequencing. Each bidding layer you add to a campaign interacts with the ones already in place. If you run placement multipliers before you’ve established a stable bid mode, you cannot attribute the outcome to either variable. If you hand off to Ads Agent before you’ve established clean conversion signals, the agent learns from noise. The tests compound — but so do the errors.

    This article lays out a specific test order: what to run first, what each test actually measures, how long to wait before drawing conclusions, and what failure looks like at each stage. It draws on real campaign data, Amazon’s own documentation, and practitioner analysis from accounts managing thousands of Sponsored Products campaigns in 2026.

    This is not a beginner’s overview of dynamic bidding. It is a sequenced testing framework for advertisers who already understand the basics and want to know how to build on top of them systematically — without breaking what is already working.

    Why Test Order Matters More Than the Test Itself

    Most Amazon PPC education treats each bidding feature as an independent dial. Turn this one up for volume, turn that one down for efficiency. In practice, these features are interdependent layers in a single auction system, and the order in which you activate them determines what signals each layer receives.

    Consider a simple example. You run a Sponsored Products campaign on dynamic bidding — up and down. Amazon’s algorithm is now adjusting your bids in real time based on its estimate of the probability that any given impression will convert. You then add a 100% Top of Search placement multiplier. The result: on a high-intent search with strong conversion probability, Amazon bids up (say, 30% above your base), and then your multiplier pushes another 100% on top of that. Your effective CPC on top-of-search placements is now 2.6x your stated base bid — a number no efficiency model anticipated.

    You now have two variables interacting in a way you cannot disentangle from a single report. If ACoS spikes, was it the bidding mode or the multiplier? You do not know, and you cannot know, unless you tested them separately in sequence.

    The Compounding Signal Problem

    This sequencing challenge becomes even more critical when AI is involved. Amazon’s bidding algorithms — whether native dynamic bidding or the newer Ads Agent — learn from the conversion data your campaigns generate. That learning is path-dependent: the AI builds a model based on the historical pattern of impressions, clicks, and conversions your campaign has produced. If that history contains periods where two variables changed simultaneously, the model’s understanding of cause and effect is degraded.

    Introduce a third-party AI tool on top of an already-noisy foundation and the problem multiplies. The external tool is now learning from data that Amazon’s system already partially shaped — and both systems may be making competing bid adjustments on the same auction. Practitioner analysis from 2026 accounts consistently flags this as a primary cause of “AI drift,” where automated systems stabilize at a local optimum significantly below what disciplined manual management would have achieved.

    The Right Mental Model: Layers, Not Levers

    Think of Amazon Ads AI bidding as a layer cake. The base layer is your campaign structure and keyword match types. The second layer is your bid mode. The third is your placement modifiers. The fourth is your portfolio or budget controls. The fifth is any AI agent or third-party automation layer on top.

    Each layer should be stable and understood before you add the next one. Stability does not mean perfect — it means you have enough data to have a directional read on performance. This is the foundation of the framework that follows.

    Step One: The Pre-Test Audit — Diagnose Before You Automate

    Before changing any bidding setting, there is a diagnostic step that most advertisers skip entirely. It takes roughly 30 minutes per campaign, but it determines whether AI bidding has any chance of working in the first place.

    AI bidding systems learn from conversion signals. If those signals are weak, infrequent, or contaminated, the algorithm learns the wrong patterns and confidently executes on them. The diagnostic checks four things:

    1. Conversion Volume Sufficiency

    Amazon’s native AI bidding stabilizes with approximately 30 or more conversions over any 30-day window per campaign. Below that threshold, the algorithm does not have enough data to model conversion probability with any reliability. This is not a formal Amazon policy number — the company does not publish a universal minimum — but it reflects consistent practitioner experience and parallels the documented behavior of Amazon DSP Performance+, which officially requires a minimum conversion volume before the learning phase can conclude.

    Check your last 30 days of conversion data at the campaign level. If you are running below 30 orders, AI bidding will not reliably outperform a well-structured manual bid. Fix conversion volume first: tighten match types, eliminate non-converting keywords, and improve listing conversion rate before touching bidding mode.

    2. Attribution Cleanliness

    Amazon’s 14-day attribution window means conversions show up in reports days after the click. If you have recently changed prices, run a coupon, or had a Buy Box loss, the conversion data in your current window is contaminated — it reflects a product state that no longer exists. AI bidding trained on that data will optimize for a context that has passed. Always audit your last 30 days for any external changes before running a bidding test.

    3. Campaign Isolation

    Each campaign you test should contain products with similar economics and conversion rates. Mixing high-margin, fast-selling ASINs with slow-moving commodity SKUs in a single campaign forces the AI to average across wildly different conversion patterns. The result is an algorithm that is perpetually confused and perpetually underperforming. Segment before you test.

    4. Listing Quality Baseline

    Bidding AI cannot fix a listing that does not convert. If your main image, title, price, or review count is meaningfully below category benchmarks, raising bids — automatically or otherwise — generates expensive impressions that do not convert. Document your listing conversion rate (orders divided by sessions from the Brand Analytics or Business Reports page) before starting any bidding test. If it is below 10% in a category where competitors average 15–20%, the problem is the listing, not the bids.

    Step Two: Bidding Mode — Down Only vs Up and Down (The Data You Actually Need)

    Amazon dynamic bidding comparison: Down Only vs Up and Down — ACoS, CPC, and volume trade-offs with 2026 data

    Bid mode is the first real test in the sequence, and the data on it is clearer than most advertisers realize. A BidX analysis of approximately 130,000 campaigns in 2024 found that dynamic bidding — down only produced the lowest average ACoS across the study group, with a click-through rate only 0.02% lower than up and down campaigns. The CTR difference was negligible; the ACoS difference was not.

    In 2026, this picture has sharpened further. Multiple advertisers and agency reports have documented that the up-and-down engine has been retuned by Amazon, with CPCs running approximately 18–27% higher in many categories since late April 2026 compared to historical averages — while conversion rates remained largely flat. That combination is a direct efficiency hit to any campaign using up and down without a deliberate rationale for accepting higher costs.

    When Down Only Is the Right Default

    Down only should be your starting bid mode for the majority of Sponsored Products campaigns. It functions as a cost floor — Amazon can reduce your bid when conversion probability is low, but it cannot inflate your bid above your stated maximum. This gives the AI a real optimization lever (downward adjustment) while preventing the uncapped spend that damages ACoS in high-competition auctions.

    This mode is particularly effective for mature campaigns with established conversion history, campaigns with tight margin constraints, and any ASIN in a category where CPCs have risen significantly in 2026. The algorithm’s downward adjustments can reduce wasted spend on low-intent impressions without requiring you to manually review every keyword bid daily.

    When Up and Down Has a Specific Role

    Up and down is not a universally bad choice — it has a specific, narrow use case: product launches and aggressive share-capture scenarios where you have pre-committed to higher short-term CPC in exchange for velocity and ranking signal. If you are launching a new ASIN and need to build conversion history quickly, or if you are running a time-limited conquest campaign against a key competitor, giving Amazon the ability to bid above your base to win high-intent auctions can be worth the cost.

    The critical discipline is defining an exit condition before you start. Decide: after how many days, or at what ACoS threshold, does this campaign revert to down only? Without a predefined exit, up and down campaigns tend to accumulate cost and never get rationalized.

    How to Run This Test Cleanly

    To test bid mode in isolation, use Amazon’s Campaign Experiments tool (available within the Ads console under “Experiments”). This feature splits your campaign traffic between two configurations — a control and a treatment — and attributes outcomes to each. Run the experiment for a minimum of 28 days to capture enough conversion events for statistical reliability. The single variable to change is bid mode. Keep base bids, keyword lists, match types, and placement modifiers identical across both arms of the experiment.

    Step Three: Placement Multipliers — The Lever Nobody Tests Correctly

    Amazon Top of Search placement multiplier testing diagram showing adjustment ranges and ACoS decision logic

    Placement multipliers are tested in Step Three because they operate on top of your bid mode. If your bid mode is not yet stable and understood, adding placement modifiers creates compounding uncertainty that you cannot resolve. Once you have established a stable bid mode — ideally down only — and have at least 28 days of clean data from that mode, placement multipliers become the next variable to isolate.

    Amazon Sponsored Products allows you to set percentage bid modifiers for two placements: Top of Search (first page) and Product Pages. Rest of Search always uses your base bid with no modifier. Modifiers can go up to +900%, though anything above 150% is almost never justified outside extreme brand-defense scenarios.

    The Stacking Problem

    The most important thing to understand about placement multipliers is how they interact with dynamic bidding. If you are on dynamic bidding — up and down — and you add a 100% Top of Search multiplier, Amazon’s algorithm can bid above your base on a high-intent impression, and then your multiplier adds another 100% on top of that adjusted bid. The CPC you actually pay can reach multiples of your stated base bid, with zero notification from Amazon. This is the stacking risk that inflates spend silently.

    On dynamic bidding — down only, stacking is less dangerous: the multiplier can push above your base for top-of-search placements, but Amazon cannot inflate the base beyond your stated maximum before the multiplier applies. The effective exposure is more predictable. This is one more reason to resolve your bid mode first.

    How to Test Placement Multipliers Correctly

    Start with your placement report, not with a multiplier adjustment. Pull the Placement Report from your campaign’s reports tab, filtered to the last 30 days. This report breaks out ACoS, CPC, conversions, and spend by placement type: Top of Search, Product Pages, and Rest of Search. This data tells you whether Top of Search is currently profitable for your campaigns — before you spend a dollar more amplifying it.

    If your Top of Search ACoS is already below your target, a moderate multiplier (try 25–50% to start) will send more budget to your most profitable placement. Increase in 10-percentage-point increments every 10–14 days, checking placement-level ACoS after each adjustment. Expert consensus in 2026 puts the productive range for most accounts at 50–150% for Top of Search. Above 150%, CPC exposure typically erodes the efficiency gains from better placement.

    If your Top of Search ACoS in the placement report is already above target, a multiplier will not fix that — it will amplify the problem. The issue is either keyword relevance, listing conversion, or a CPC floor set too high for your margin. Fix the underlying conversion issue before applying any positive multiplier.

    Product Pages: The Underused Placement

    Product page placements (your ads appearing on competitor or complementary product detail pages) often convert at lower rates than Top of Search but can deliver profitable scale at lower CPCs. Test product page multipliers separately from Top of Search multipliers using the same placement-report-first process. Many accounts find a moderate product page multiplier (20–40%) expands volume cost-effectively when top-of-search is expensive and competitive.

    Step Four: The Learning Period Protocol — How to Protect the Algorithm’s Work

    Amazon AI bidding learning period 8-week timeline showing optimal intervention points and what not to do in weeks 1 and 2

    Every time you make a meaningful change to a campaign running AI-assisted bidding — bid mode, placement modifier, keyword addition, budget change — the learning period effectively resets. Amazon’s algorithm needs time to rebuild its conversion probability model under the new conditions. This is not unique to Amazon; it mirrors the documented behavior of Google’s Smart Bidding, which carries a formal 2-week learning period designation.

    On Amazon, the learning period is not formally labeled as such in most campaign types (though Amazon DSP Performance+ explicitly documents up to four weeks), but practitioner data consistently shows performance instability in the first two to three weeks after a structural campaign change. The accounts that most commonly report “AI bidding doesn’t work” are the ones making changes every few days.

    The Eight-Week Protocol

    When you activate a new bidding configuration, commit to the following timeline:

    Weeks 1–2 (Learning Zone): Do not change bids, match types, budgets, or placement modifiers. Monitor impressions and spend to confirm the campaign is active and within expected ranges, but resist any optimization impulse. The algorithm is building its baseline model. Any intervention at this stage teaches the system that its early signals were wrong — even if they weren’t.

    Weeks 3–4 (Early Signal Review): Begin reviewing conversion trend data only. You are not yet optimizing — you are assessing whether the trajectory is directionally correct. Is ACoS trending downward compared to the pre-change baseline? Is conversion rate stable or improving? These are the questions to answer. Still no bid or structure changes.

    Weeks 5–6 (First Adjustment Window): If the trajectory is positive, make incremental adjustments — small changes of 10–15% to base bids or placement modifiers, never multiple changes simultaneously. If performance has deteriorated materially from your pre-test baseline, evaluate whether the issue is the bidding configuration or an external factor (seasonality, listing change, inventory constraint).

    Weeks 7–8 (Optimization Phase): You now have approximately 60 days of data under the new configuration. At this point you can make more confident decisions about scaling, restructuring, or moving to the next layer in the framework.

    What Counts as a “Reset” Trigger

    Not every campaign change resets the learning period equally. Minor changes — adding a single negative keyword, adjusting budget by less than 20% — typically do not cause significant disruption. Major changes — switching bid mode, adding or removing large keyword groups, changing campaign structure, enabling or disabling a third-party bidding tool — will reset the model’s confidence in its conversion estimates. Apply the full eight-week protocol after any major change.

    Step Five: Portfolio Bidding and Budget Signals — Teaching the Algorithm What Matters

    Once individual campaigns are stable under a tested bid mode with understood placement behavior, the next layer is portfolio-level optimization. Portfolio bidding on Amazon allows you to set shared budget caps and, for some ad types, target ACoS or ROAS goals at the portfolio level rather than managing each campaign individually.

    This matters in 2026 because Amazon’s bidding engine increasingly looks at portfolio-level signals — not just individual campaign data — when modeling conversion probability. A campaign within a well-structured portfolio with a clear, consistent budget signal performs differently than the same campaign running in isolation. The algorithm uses budget pacing behavior, cross-campaign conversion patterns, and aggregate spend data as inputs alongside the keyword-level signals it has always processed.

    Budget Signals the Algorithm Reads

    Amazon’s AI bidding reads your budget behavior as a quality signal. Campaigns that run out of budget early in the day and go dark for hours create a fragmented performance history — the algorithm sees active-then-inactive patterns and struggles to model consistent conversion probability. Budget depletion events also suppress impression share during high-converting hours (typically mid-morning and early evening), replacing your AI-optimized bids with absence.

    Before adding portfolio-level controls, audit your daily budget utilization. If any campaign is consistently hitting its daily cap before 3 PM, the budget constraint is limiting what the AI can learn. Either raise the budget or reduce it deliberately to a level where the campaign can run all day on its existing allocation. Partial days create partial data.

    Portfolio ACoS Targets vs Campaign-Level ACoS Targets

    A common mistake in 2026 is setting a portfolio-level ACoS target that averages out fundamentally different product economics. A $15 accessory with a 60% margin should not share an ACoS target with a $150 appliance running at 25% margin. The algorithm receives a blended efficiency goal that is wrong for both products.

    Structure portfolios around products with similar margin profiles and similar business goals. Keep launch campaigns — where you deliberately accept higher ACoS to build conversion history — in separate portfolios from mature, efficiency-optimized campaigns. The portfolio’s ACoS target is a signal the AI uses to calibrate bid aggressiveness. A mixed signal produces mixed results.

    The Budget Increase Protocol

    When increasing campaign or portfolio budgets, Amazon’s guidance and practitioner consensus both suggest limiting single-step increases to approximately 20–30% of the current budget. Larger budget jumps can cause the AI to recalibrate its pacing model, temporarily overserving impressions in early-day hours and underserving in peak-conversion windows. Gradual increases preserve the pacing behavior the algorithm has learned and produce more stable performance through growth phases.

    Step Six: Amazon Ads Agent — Where It Actually Helps and Where It Doesn’t

    Amazon Ads Agent launched in early 2026 as an agentic AI campaign management layer built on Amazon’s Bedrock infrastructure. It allows advertisers to describe goals in plain English, receive proposed campaign setups, bid adjustments, keyword suggestions, and budget changes — then approve or reject those proposals before they go live. It is the closest thing Amazon has offered to a fully AI-managed campaign workflow within its native console.

    The key word is “proposed.” Amazon Ads Agent does not make changes autonomously by default — it surfaces recommendations for human review and approval. This is meaningful: it means the agent operates as an informed advisor rather than an autonomous bidder, and it means its effectiveness depends entirely on the quality of the input signals it receives.

    What Ads Agent Does Well

    Ads Agent is genuinely useful for three specific tasks. First, search term harvesting: the agent can identify converting search terms from auto-targeting campaigns and recommend promotion into exact-match manual campaigns, a task that is time-consuming and easy to deprioritize manually. Second, bulk bid adjustments: for accounts with dozens or hundreds of campaigns, reviewing and proposing bid changes at scale is where the agent saves the most time, surfacing the same adjustments that a skilled human manager would make but across a larger surface area faster. Third, campaign creation from briefs: describing a new product launch goal in natural language and receiving a structured campaign draft (with suggested keyword groups, match types, and initial bids) materially reduces the time from product launch to active advertising.

    Where Ads Agent Falls Short

    Ads Agent does not currently understand your product economics, inventory position, or margin structure. It optimizes for the performance metrics it can see inside Amazon Ads — clicks, conversions, ACoS — without any awareness that your ASIN is low on stock, that your margin on this product is 12% rather than 35%, or that this campaign’s goal is new-to-brand acquisition rather than immediate profitability. These strategic inputs still require human specification.

    The agent also performs significantly better when it is working with stable, clean campaign data. This brings us back to sequencing: Ads Agent should be introduced after you have established stable bid modes (Step Two), tested and calibrated placement multipliers (Step Three), and completed at least one full learning period (Step Four) on your primary campaigns. Activating the agent on a campaign that is still in its first 30 days of a new bidding configuration means the agent learns from noise and projects that noise forward into its recommendations.

    A Practical Activation Checklist for Ads Agent

    Before activating Ads Agent on any campaign, confirm: the campaign has at least 60 days of stable performance data; your ACoS target is explicitly documented and can be entered as a goal parameter; you have a human review cadence (minimum weekly) to evaluate proposed changes before approving them; and you have excluded any campaigns in active launch or experimental phases from the agent’s scope. Ads Agent is a force multiplier for stable, mature campaigns — not a replacement for the foundational work that makes those campaigns stable.

    Step Seven: Hourly Bid Scheduling via Amazon Marketing Stream

    Amazon Marketing Stream hourly bid scheduling heatmap showing peak and off-peak conversion windows with Tinuiti case study results

    Hourly bid scheduling is the most operationally advanced layer in the framework — and the one with some of the most dramatic published results. Amazon Marketing Stream provides near-real-time hourly performance data (traffic, conversions, CPC, ACoS, budget consumption) via the Amazon Ads API, updated hourly across Sponsored Products, Sponsored Brands, Sponsored Display, and DSP. Accessing this data requires API integration — either via a third-party tool that has built Marketing Stream integration or via a custom technical build.

    When Tinuiti applied historical hourly Marketing Stream data to identify peak conversion windows for a soda-category campaign and raised bids 40–55% during those windows, the results were notable: share of voice increased 104%, sales increased 273%, and new-to-brand units increased 570% at the account level. The test campaigns directly attributed 120% sales growth to the hourly optimization. These are extreme results in a particular category context, not a universal guarantee — but they illustrate the magnitude of value available when intraday conversion patterns are significant.

    How to Build an Hourly Bid Schedule

    The starting point is data collection, not adjustment. Before modifying any bids, you need at least four to six weeks of hourly Marketing Stream data to establish reliable conversion patterns. Most categories show identifiable peaks — commonly mid-morning (7–9 AM), lunch hours (12–2 PM), and evening windows (7–10 PM) — but these patterns vary significantly by product type, audience demographics, and category. Consumer electronics may peak differently from grocery; home goods may peak differently from automotive.

    Once your hourly conversion data reveals clear high-converting and low-converting windows, structure bid adjustments through a third-party tool (most major Amazon PPC platforms including Perpetua, Intentwise, and Quartile offer Marketing Stream-based dayparting), or via API rules if you have technical resources in-house. A reasonable starting range: reduce bids 15–25% during consistently low-converting hours and increase bids 20–40% during consistently high-converting hours. Adjust in increments, not all at once, and re-evaluate after four weeks as the bid changes may themselves shift which hours generate the most volume.

    When Hourly Scheduling Is Not Worth the Complexity

    Hourly bid scheduling adds meaningful operational complexity. It requires Marketing Stream API access, a technical integration layer, and ongoing monitoring to ensure that bid schedules remain aligned with actual conversion patterns as they evolve. For accounts spending under approximately $500 per day, this complexity is unlikely to generate returns that justify the investment — the conversion volume at that spend level may not be large enough to make hourly patterns statistically significant. At higher spend levels, particularly $1,000 per day and above, the efficiency gains from routing budget away from low-converting hours and toward peak windows can deliver meaningful annual savings.

    The Guardrail Stack: Bid Floors, Ceilings, and Exit Conditions

    No AI bidding system — native or third-party — should operate without a defined guardrail stack. Guardrails are the human-set constraints that prevent automation from optimizing toward local maxima that destroy account health: bids that run to zero and kill impression share, or bids that spike unconstrained during competitive auctions and blow through margin.

    Bid Floor: Your Non-Negotiable Minimum

    A bid floor prevents your AI from bidding so low that you lose impression share entirely. Calculate your floor based on the minimum CPC needed to remain competitive for your top-priority keywords in your category. This is not a fixed number — it varies by category and changes as competitor behavior evolves — but as a starting rule, your bid floor should sit at approximately 70–80% of your current average CPC for high-priority keywords. Below that level, you become invisible in the auction; above it, the AI has meaningful room to optimize downward without eliminating your presence.

    Bid Ceiling: The Protection Against Runaway Spend

    A bid ceiling caps the maximum your AI can bid on any individual keyword or placement. This is most critical when using dynamic bidding — up and down combined with placement multipliers, where effective CPCs can reach multiples of your base bid. Set your ceiling at the maximum CPC that still delivers a profitable conversion given your margin and target ACoS. The formula: bid ceiling = (product price × target ACoS × conversion rate). Any bid above this ceiling cannot, on average, produce a profitable result. Feed this number explicitly into your bidding tool’s cap settings.

    Exit Conditions: Knowing When to Turn It Off

    Every AI bidding experiment needs a predefined exit condition — a specific, quantified threshold at which you stop the test and revert to your control configuration. Without this, poor performers accumulate spend indefinitely while you wait for the algorithm to “figure it out.”

    Define exit conditions before each test, typically: if ACoS exceeds 150% of your target for more than 14 consecutive days after the initial learning period, revert to control; if conversion rate drops more than 30% relative to pre-test baseline and stays there for 7 days, revert; if campaign budget depletes before noon on more than 5 consecutive days, adjust budget before proceeding. These thresholds should be written down and checked systematically, not evaluated subjectively when you feel uncomfortable with the numbers.

    When to Escalate to Third-Party AI Bidding Tools

    Decision tree for choosing native Amazon AI bidding vs third-party tools based on spend level, catalog complexity, and portfolio needs

    Amazon’s native AI bidding infrastructure — dynamic bidding modes, portfolio controls, Ads Agent, and Marketing Stream — covers the majority of optimization needs for most accounts. Third-party AI bidding tools offer incremental capabilities in specific situations, but they are not universally superior to the native stack, and they introduce operational complexity that should be justified by expected returns before adding.

    In 2026, the gap between native Amazon AI and third-party AI tools has narrowed significantly. Amazon’s own algorithms have improved, Ads Agent has added meaningful automation, and Marketing Stream has brought intraday granularity that was previously only available via external integrations. For accounts under approximately $1,000 per day in spend with a catalog of fewer than 50 ASINs, the native stack is the rational starting point.

    Cases Where Third-Party Tools Add Genuine Value

    Third-party tools — platforms like Perpetua, Quartile, Intentwise, and several others — earn their place in three specific scenarios.

    First, cross-campaign portfolio optimization at scale. For accounts managing hundreds of campaigns across dozens of ASINs, native tools require significant manual effort to coordinate budget reallocation across campaigns. Third-party platforms can rebalance spend across the entire portfolio in response to real-time performance signals — moving budget from underperforming campaigns to overperforming ones intraday. Amazon’s native portfolio tools offer some of this, but the external platforms generally operate with more sophistication at high campaign counts.

    Second, margin-aware bidding. Native Amazon bidding optimizes to ACoS, ROAS, or click volume — it does not know your cost of goods, fulfillment fees, or net margin. Third-party tools that integrate product economics data can bid to true profitability rather than proxy metrics. For catalogs with highly variable margins, this distinction matters significantly.

    Third, cross-marketplace coordination. Sellers active across multiple Amazon marketplaces (US, EU, UK, Japan) managing coordinated campaigns benefit from third-party platforms that can apply shared learning and budget coordination across geographies — something native Amazon tools cannot currently do.

    The Overlay Risk

    The most important caution with third-party tools is what happens when their bid adjustments conflict with or layer on top of Amazon’s native AI adjustments. If Amazon’s dynamic bidding algorithm is adjusting bids in real time and your third-party tool is also adjusting bids on a 15-minute cycle, both systems are operating on delayed information about what the other has just done. The result can be erratic effective CPCs and unstable learning data for both systems.

    Best practice in 2026: when using a third-party bidding tool, set Amazon’s native bid mode to “fixed bids” for those campaigns, giving the external tool full control rather than running two competing AI systems simultaneously. Establish which layer has authority, and stick to it.

    What Good Testing Infrastructure Looks Like in Practice

    The framework above is a sequence of decisions. Making those decisions well requires a consistent measurement infrastructure that most Amazon advertisers do not have in place. Here is what that infrastructure needs to include.

    A Documented Pre-Test Baseline

    Before each test in the sequence, document your current performance metrics: average daily spend, ACoS, conversion rate, CPC, and impression share over the prior 30 days at the campaign level. Without this baseline, you cannot assess whether the test delivered an improvement, a degradation, or no measurable change. This sounds obvious, but a significant number of advertisers run tests without recording the starting state and then evaluate outcomes by feel rather than by comparison.

    Consistent Reporting Cadence

    During any active test, pull placement reports, search term reports, and campaign performance reports weekly — not daily. Daily data on Amazon is highly volatile due to attribution delays and normal auction variance. Weekly data provides a smoother, more reliable signal. Monthly data is too infrequent to catch issues before they compound. Weekly is the right cadence during active experiments.

    One Variable at a Time — Enforced as a Rule

    This principle appears in every PPC testing framework ever written, and it is violated in every account examined by every agency that has ever conducted an audit. The pressure to make multiple improvements at once is real — you have a list of things you want to fix, and changing one at a time feels slow. The cost is that you never know what worked, which means you cannot scale what works or avoid what doesn’t.

    In AI bidding specifically, the cost of violating this principle is higher than in manual bidding, because each change resets the algorithm’s learning state. Multiple simultaneous changes do not reset the learning period once — they reset it into a configuration where the algorithm is building a model for a state that may change again before the model has stabilized. The compounding confusion can set performance back months.

    An ACoS Waterfall by Product Lifecycle Stage

    Document your ACoS targets explicitly by product lifecycle stage. Launch-phase ASINs should have a deliberately higher ACoS target (you are paying to build conversion history). Growth-phase ASINs should have a moderate target. Mature, high-volume ASINs should have a tight efficiency target. Each stage implies a different bidding mode, different exit conditions, and different intervention thresholds. Without this documentation, you will inevitably apply efficiency-phase thinking to launch campaigns and kill their velocity, or apply launch-phase thinking to mature campaigns and erode their margin.

    The Sequence Is the Strategy

    Amazon Ads AI bidding in 2026 is genuinely powerful. The algorithms have improved, the data infrastructure has deepened, and the tools — from Ads Agent to Marketing Stream hourly data — provide capabilities that required expensive third-party solutions or custom engineering just two years ago. The frustrating reality, however, is that power does not equal performance. The accounts that are extracting the most from these systems are not the ones with the most advanced tools. They are the ones that built the right foundation in the right order.

    The sequence matters because each layer feeds the next. Clean conversion data makes AI bidding stable. A stable bid mode makes placement testing interpretable. Understood placement behavior makes portfolio ACoS targets accurate. Accurate targets make Ads Agent recommendations trustworthy. Trustworthy recommendations, combined with hourly Marketing Stream data, make intraday bid scheduling genuinely useful rather than just technically possible.

    Running these steps out of order — or running them all at once — collapses the clarity that makes each step work. The accounts that report AI bidding “doesn’t deliver results” have almost universally skipped the audit, changed too many things at once, evaluated outcomes before learning periods completed, or added AI on top of a structurally broken campaign foundation.

    The Practical Starting Point for This Week

    If you are reading this with an active Amazon Ads account and want to know where to start, the answer is the pre-test audit in Step One. Pull your last 30 days of conversion data by campaign, check each campaign for the four diagnostic criteria, and identify which campaigns have the data quality to support AI bidding and which ones need foundational work first. That audit, completed honestly, will tell you more about your account’s current situation than any bidding tool or algorithm setting can.

    From there, the framework gives you a sequence. Follow the sequence. Let each step complete before starting the next. Document your baseline before each change. Set exit conditions before you begin. And resist the pressure to accelerate — in AI bidding, patience at each step is not passivity. It is the mechanism by which the algorithm learns to deliver the results you are trying to measure.

    Key takeaways: Complete your four-point pre-test audit before changing any bid setting. Start with dynamic bidding — down only as your default mode. Test placement multipliers only after bid mode is stable. Protect the learning period from interference for at least 4 weeks after any major change. Build portfolio structures around products with similar margins. Introduce Ads Agent only on mature, stable campaigns. Explore hourly scheduling at scale only after the preceding layers are working. Always define guardrails and exit conditions before starting any test.

  • Search-Term-First SBV Targeting: Mining Your SP Data for Amazon Video Ad Wins

    Search-Term-First SBV Targeting: Mining Your SP Data for Amazon Video Ad Wins

    Search-Term-First SBV Targeting — Turn SP Data Into Amazon Video Ad Wins

    Most Amazon advertisers approach Sponsored Brands Video the wrong way. They start with the creative — picking a product, shooting a video, and then going into the campaign builder to think about keywords as an afterthought. The result is a beautifully produced video ad chasing keywords that have never proven they can convert, burning budget against intent signals it hasn’t earned the right to target yet.

    The smarter path runs in the opposite direction. You start with the data you already have — specifically, the search term report sitting inside your Sponsored Products campaigns right now — and you use it to identify exactly which customer queries have demonstrated the ability to drive purchases before you spend a dollar on video. Then, and only then, do you build your SBV campaigns around those proven terms.

    This is what search-term-first SBV targeting actually means. It is not a creative-led strategy with keywords bolted on at the end. It is a data-led strategy where every video placement you run is anchored to a query that has already passed a conversion test in a lower-cost environment. The creative serves the term. The bid serves the term. The campaign structure serves the term.

    As of 2026, Sponsored Brands Video accounts for roughly 58% of total Sponsored Brands spend across managed Amazon advertising accounts — making it the default format rather than a specialty option. The opportunity is real. But so is the waste for advertisers who haven’t built a systematic way to decide which search terms deserve a video impression in the first place. This post builds that system from the ground up.

    Why SBV Has Earned Its Place at the Top of the Funnel

    Static Sponsored Brands versus Sponsored Brands Video CTR comparison — SBV delivers up to 3x higher click-through rates

    Before getting into the mechanics of mining SP data, it’s worth being precise about what makes SBV different enough to warrant its own keyword strategy — because the answer is more specific than “video performs better than images.”

    The Placement Is the Differentiator

    Sponsored Brands Video occupies a distinct placement that static Sponsored Brands ads and Sponsored Products ads cannot. It appears as an autoplay video strip within the organic search results — not above them, not beside them, but embedded directly inside the page that shoppers are actively reading. That placement creates a fundamentally different interaction dynamic.

    A shopper browsing search results for “stainless steel insulated water bottle” is in a comparison state of mind. They are evaluating products side by side. A static banner above those results asks them to stop and look upward. An SBV placement asks for nothing — it begins playing in their peripheral view as they scroll, and it either earns attention through motion and clarity or it doesn’t. This is why SBV’s click-through rate advantage over static Sponsored Brands is consistently reported in the 1.5x to 3x range.

    An Amazon Science study spanning 15 countries found CTR lifts of 17x for SBV versus static image formats in controlled conditions. Real-world account data is more moderate — most practitioners report 1.5x to 2.5x lift in their actual campaigns — but even the conservative end of that range changes the CPC economics significantly. More clicks at the same CPC means more conversion opportunities, which is why SBV’s conversion rate also runs roughly 10% to 30% above equivalent static Sponsored Brands campaigns for the same terms.

    The Format Rewards Intent, Not Just Awareness

    One of the common misconceptions about video advertising is that it belongs at the awareness stage of the funnel — that it is inherently a brand-building tool rather than a performance tool. SBV demolishes that framing. Because it is keyword-targeted and appears within search results, it reaches shoppers who have already expressed intent through their query. The video format doesn’t move them away from purchase consideration — it accelerates it by delivering richer product information in the moment of search.

    This is the core insight that makes search-term-first SBV targeting so powerful: when you put a video behind a high-intent keyword, you are not trading performance for brand — you are stacking both in the same impression. The term captures the intent. The video converts it.

    SBV Is Now the Default, Not the Exception

    The 58% share-of-Sponsored-Brands-spend figure cited above reflects a structural shift that has been building since 2024. Amazon has progressively made SBV easier to launch — simplifying the creative specifications, lowering the technical bar for video production, and expanding the placement to more device types. In competitive categories like home goods, supplements, pet supplies, and personal care, SBV placements now appear on almost every major search page, which means not running SBV is effectively ceding premium in-search real estate to competitors who are.

    The strategic question is no longer whether to run SBV. It’s which terms to run it on, and how to decide. That answer lives inside your SP data.

    The SP Search Term Report as a Targeting Intelligence Engine

    Amazon search term report with color-coded qualification tiers — SBV-Ready, Watch List, and Negative Now

    Your Sponsored Products campaigns are, functionally, a keyword testing lab. Every day they are running broad match, phrase match, and auto-targeting, they are collecting data on which exact customer queries led to clicks, which of those clicks led to purchases, and at what cost. This data is captured in the search term report, and it represents something genuinely valuable: real shopper behavior, not projected behavior.

    What the Report Actually Contains

    The Amazon Ads search term report shows the actual queries customers typed before clicking your SP ads. For each query, you can see impressions, clicks, click-through rate, spend, attributed orders, attributed sales revenue, and cost-per-click. Critically, you can also see the keyword that matched the query — meaning you can distinguish between a query that your broad match keyword triggered versus one your phrase match keyword triggered, which has implications for confidence in the data.

    Amazon retains up to 65 days of search term data accessible in the native reporting interface, and the Ads Console UI allows export for the past 90 days. For SBV keyword seeding purposes, a 30 to 60-day window is the most actionable — long enough to have statistically meaningful data, recent enough to reflect current demand patterns and seasonal relevance.

    The Data Hierarchy That Matters for SBV

    Not all columns in the search term report are equally important when you are mining for SBV candidates. The metrics that matter most, in order of priority:

    • Orders attributed: This is the bedrock qualifier. A query that has never produced an order has not proven purchase intent, regardless of its click volume. For SBV, where CPCs tend to run higher than SP, only proven converters justify the investment.
    • ACoS (Advertising Cost of Sale): Calculated as spend divided by attributed sales. A term that converts but at an ACoS far above your target is a conversion signal with poor efficiency — it may still qualify for SBV if you believe the creative improvement will reduce CPC, but it needs a tighter bid structure.
    • Click-through rate relative to impressions: High impressions with low CTR can indicate poor listing-page relevance or competitive listing quality. A term with excellent CVR but middling CTR is actually a strong SBV candidate — because better creative (video versus static) is exactly what can close the gap.
    • Conversion rate (CVR): Orders divided by clicks. This is the most reliable signal of query-to-purchase alignment. Terms with CVR significantly above your account average are priority SBV candidates because they demonstrate that shoppers who arrive via that query are predisposed to buy.

    Downloading and Preparing the Report

    To access the data, navigate to Amazon Ads Console → Reports → Create Report → Sponsored Products → Search Term. Set the date range to the past 30 to 60 days, select all available metrics, and export to CSV. From there, the analysis process is the same whether you work in Excel, Google Sheets, or a dedicated PPC tool — filter, sort, and score terms against the qualification criteria detailed in the next section.

    One important note: the report shows customer search terms at the campaign level. If your SP campaigns are not already segmented by product category or match type, your data may be difficult to interpret because high-performing terms from different product categories or intent stages will be mixed together. If your SP campaign architecture is messy, cleaning it up first will make your SBV keyword mining significantly more accurate.

    Setting the Right Filters — What Actually Qualifies a Term for SBV Promotion

    The most common mistake when mining SP data for SBV is using too low a bar. A term that converted twice in 30 days at a borderline ACoS is not an SBV keyword — it’s a keyword that needs more data in SP before it earns a more expensive placement. Being selective at this stage is not cautious; it’s what keeps your SBV campaigns from becoming a vehicle for testing on expensive impressions.

    The Three-Gate Qualification Framework

    Apply these gates sequentially. A term must pass all three to qualify for SBV promotion:

    Gate 1 — Minimum Conversion Activity: The term must have generated at least 3 to 5 orders in the reporting window. Below this threshold, conversion data is too noisy to act on. Some practitioners use a higher threshold of 5 to 10 orders for high-competition categories where CPCs are elevated. The specific number matters less than having a minimum that filters out statistical noise.

    Gate 2 — Acceptable Efficiency: The term’s ACoS must be at or below 150% of your target ACoS. So if your target ACoS is 20%, terms up to 30% ACoS can qualify with the assumption that SBV’s creative improvement may reduce CPC and improve CVR enough to bring it into range. Terms above this threshold need remediation in SP first — fixing bids, improving listing conversion rate, or both — before they deserve a video placement.

    Gate 3 — Volume Adequacy: The term must have generated at least 100 to 200 impressions in the reporting window. Terms with very low impression counts, even if they converted, do not have enough volume to sustain an SBV campaign. SBV CPCs are typically higher than SP CPCs, and low-impression terms often have thin search volume that will not deliver meaningful scale.

    Secondary Scoring for Prioritization

    After applying the three gates, you will typically have a list of qualified terms that is longer than your initial SBV budget can support. Prioritize by scoring each term on a combination of:

    • CVR premium: How much does this term’s conversion rate exceed your SP account average? Higher premium = higher priority.
    • Revenue per click: Attributed sales divided by total clicks. Higher revenue per click terms produce more value per SBV impression regardless of CPC.
    • Competitive sensitivity: Is this a generic category term, a branded competitor term, or your own brand term? Each category has a different priority logic for SBV (covered in more detail in the campaign architecture section below).

    The output of this scoring process is a tiered list: your top-priority SBV exact match candidates, your second-tier phrase match candidates, and a watch list of terms that are close to qualifying but need another 30 days of SP data before promotion.

    Campaign Architecture — Building SBV Campaigns Around Harvested Terms

    Three-tier SBV campaign architecture diagram — Exact Match proven converters, Phrase Match expansion, SP Auto/Broad discovery

    Once you have your qualified, scored list of SBV-ready search terms, the campaign structure you build around them determines whether the system is manageable, measurable, and improvable over time.

    The Three-Campaign Stack

    The cleanest SBV architecture for search-term-first targeting uses three distinct campaign types, each with a defined role:

    Tier 1 — SBV Exact Match (Proven Converters): This is where your highest-priority terms go. Exact match gives you precise control — you know exactly which query triggered the impression, you can set specific bids per keyword, and you can measure performance at the term level with confidence. Budget allocation here should be your heaviest, as these are the terms with demonstrated purchase intent and the highest confidence in their conversion behavior.

    Tier 2 — SBV Phrase Match (Expansion Layer): Your second-tier terms — those that qualified but with lower scores — go here as phrase match keywords. Phrase match allows close variants and additional words around your core term, which creates controlled volume expansion. You will collect new search term data at the SBV level that can feed future exact match promotions or negative keyword additions.

    Tier 3 — SP Auto/Broad (Discovery Engine — not SBV): This is your existing SP infrastructure, continuing to do what it does best: discover new search terms through broad match and auto targeting. This tier feeds qualified new terms upward into the SBV tiers on a regular review cadence (typically every 30 days).

    Ad Group Architecture Within SBV Campaigns

    Within your SBV exact match campaign, resist the temptation to pile all keywords into a single ad group. Segmenting ad groups by intent cluster allows you to align creative more precisely with the shopper’s mindset and, importantly, allows you to run different video creatives for different query types.

    Practical intent clusters that work well for SBV ad group segmentation:

    • Category-generic terms (e.g., “insulated water bottle”) — high volume, competitive, discovery intent
    • Feature-specific terms (e.g., “leak proof water bottle with straw”) — lower volume, higher CVR, feature-match intent
    • Use-case terms (e.g., “hiking water bottle 40oz”) — mid volume, lifestyle intent, strong upsell/lifestyle creative potential
    • Competitor brand terms (e.g., “Hydro Flask alternative”) — high intent, conquest context, requires specific creative framing

    Each cluster gets its own ad group, its own video creative (where budget allows), and its own performance benchmarks. This granularity is what allows you to see not just “does SBV work?” but “which intent context does SBV perform best in?” — which is the question that drives meaningful optimization.

    Budget Allocation Across Tiers

    A practical starting split for accounts new to search-term-first SBV targeting: 70% of SBV budget to Tier 1 exact match, 30% to Tier 2 phrase match. As exact match campaigns accumulate sufficient data and you’ve confirmed performance, you can increase total SBV budget while maintaining this ratio, or shift more toward exact match as phrase match terms graduate.

    Keep SBV campaigns separate from static Sponsored Brands campaigns. Mixing formats within the same campaign prevents clean performance analysis and makes bid management unnecessarily complex. The separation also makes it much easier to track SBV-specific metrics like view rates and the new-to-brand percentage that video tends to generate.

    Match Type Strategy: Why Exact-First Thinking Governs the Whole System

    There is a recurring debate in Amazon PPC circles about whether to launch SBV campaigns broad or narrow. Some practitioners argue for starting broad to collect data quickly. Others argue for starting narrow to control spend. When you’re operating a search-term-first system sourced from SP data, this debate resolves itself: you already have the data. You don’t need broad match to discover what works — you know what works. Exact-first is not caution; it’s precision informed by evidence.

    Why Exact Match Is the Right Starting Point for SBV Candidates

    When you promote a term from SP into SBV exact match, you have a specific piece of knowledge: this exact customer query, typed in this exact way, has driven purchases at an acceptable efficiency in your SP campaigns. Exact match in SBV preserves that precision. You know your ad will appear when shoppers type that query (and close variants), and you can set your bid based on the CVR and revenue-per-click data you already have.

    Launching those same terms as phrase or broad match in SBV introduces variability — the ad may appear for queries that look similar but behave differently. A phrase match on “stainless steel insulated water bottle” will also trigger for “stainless steel insulated water bottle for kids” and “best stainless steel insulated water bottle 2026” — queries you may not have data on. If those variants don’t convert, you are paying SBV CPC rates for impressions that your SP data would have told you to avoid.

    When to Introduce Phrase Match in SBV

    Phrase match becomes appropriate in SBV under two conditions: First, when your exact match campaigns are hitting budget limits regularly, indicating your exact match terms are too restrictive for the available demand. Second, when you want to deliberately expand coverage to related intent variants that you haven’t yet tested in SP — essentially using SBV phrase match as a slightly more expensive version of SP discovery.

    If you use SBV phrase match for discovery, treat the SBV search term reports from those campaigns as a secondary source of exact match candidates — for both SBV and, potentially, for expansion in SP where the CPC will be lower and data collection more cost-efficient.

    Broad Match in SBV: Handle with Care

    Broad match in SBV campaigns is best avoided for terms that haven’t proven their performance in SP first. Amazon’s broad match can trigger for queries with significant semantic distance from your target term, and at SBV CPC rates, that discovery cost is high. If you want to use SBV for pure brand discovery (reaching shoppers with no prior SP data), that is a legitimate strategy — but it should be in a separate campaign with a separate budget, clearly labeled as awareness-stage spend, and measured with different KPIs than your performance SBV campaigns.

    Creative That Actually Converts at the Keyword Level

    15-second SBV video timeline showing the four key segments with muted-viewing design principles — 71% of SBV views are muted

    Search-term-first targeting tells you where to run your video. It doesn’t tell you what the video should say. The creative layer is where the targeting logic and the shopper experience connect — and getting it wrong can negate the advantages of even the most carefully selected keyword set.

    Design for Muted Viewing First

    As of 2026, an estimated 71% of SBV views are played with sound off, up from roughly 64% two years prior. The trend toward muted autoplay viewing is structural — it reflects how people shop on Amazon in real-world environments (offices, public transit, shared spaces). This means your SBV creative must be fully comprehensible without audio. If the primary message of your video relies on a voiceover that a muted viewer will never hear, the video is failing the majority of its audience.

    The practical rule: close-caption every piece of speech in the video, and more importantly, put the core product benefit statement as a large, readable on-screen text element that appears within the first three to four seconds. Don’t treat captions as an accessibility afterthought — treat them as the primary communication layer.

    The 15-Second Timeline That Works

    Amazon allows SBV formats ranging from 6 to 45 seconds, but practitioner data consistently points to 15 to 20 seconds as the sweet spot for search-result placements. Longer videos may perform well on product detail pages, but in the search results context, shorter is better because the format competes with organic listings and the shopper’s primary goal is evaluation, not entertainment.

    A practical 15-second structure that aligns with search-result intent:

    • Seconds 0–3: Product clearly in frame. No logo reveal, no cinematic opening. The product should be recognizable within the first two seconds. This is when most drop-off decisions happen.
    • Seconds 3–8: Primary benefit stated on-screen in readable text. This should answer the implicit question behind the keyword. A shopper who typed “leak proof water bottle” should see “100% Leak Proof, Guaranteed” within the first five seconds.
    • Seconds 8–13: Supporting proof — a quick product demo, a use-case shot, or a secondary benefit. This is where lifestyle context can help without replacing product clarity.
    • Seconds 13–15: Call to action. “Shop Now” is the standard. Consider including a brief differentiation statement here — “Free shipping on Prime orders” or a specific offer — that creates urgency without overpromising.

    Aligning Creative to Keyword Intent

    This is the operational implication of search-term-first targeting that most advertisers miss: if you have segmented your SBV ad groups by intent cluster (as described in the campaign architecture section), you should be running different video creative for different clusters where budget allows.

    A shopper who typed “hiking water bottle 40oz” is in a different mental context than one who typed “stainless steel water bottle office.” The first shopper wants to see outdoor usage context — rugged terrain, a trail, a daypack. The second shopper wants to see clean design, desk compatibility, professional aesthetics. Running the same generic product video against both terms is leaving persuasion efficiency on the table.

    You don’t need an unlimited video production budget to do this. Simple video variants — changing the opening shot, swapping the benefit headline text, showing a different use context in seconds 8 to 13 — can be produced as edits of a core video asset rather than entirely separate productions. The key is matching the opening frames and the benefit headline to the specific shopper intent cluster you’re targeting.

    Amazon’s Autoplay Loop and the Scroll Behavior Problem

    SBV autoplays and loops continuously as shoppers scroll past. This is both an advantage (multiple exposures per page load) and a creative constraint (the video must make sense when entered at any point in the loop, not just from the beginning). Design your creative so the product and primary benefit are visible throughout the video, not just in the final seconds. Treat the loop as a feature, not an afterthought — a shopper who catches the second playthrough should understand your product as well as one who saw it from the start.

    Bidding Logic for SBV — Why SP Benchmarks Don’t Translate Directly

    One of the most common errors in SBV campaign setup is taking the CPC benchmarks from SP campaigns and applying them unchanged to SBV bids. The two formats operate in different auction environments with different competitive dynamics, and treating them as interchangeable will either leave impressions on the table (underbidding) or erode margin (overbidding).

    Why SBV CPCs Are Structurally Different

    SBV ads compete in a separate auction from Sponsored Products. The bidders are fewer — not every advertiser running SP on a given keyword is also running SBV — and the placements are more prominent (in-stream, high-visibility, autoplay). This creates variable CPC dynamics by category:

    • In categories where SBV adoption is high (supplements, beauty, home goods), SBV CPCs can be close to or exceed SP CPCs because competition for the placement is active.
    • In categories where SBV is less adopted, CPCs may be meaningfully lower than SP while delivering significantly higher CTR — an exceptionally favorable efficiency combination.
    • Branded keyword SBV is typically the most efficient placement in terms of CPC-to-conversion ratio, because brand-loyal shoppers click at high rates and competitors are less likely to bid aggressively on your own brand terms.

    Building a Starting Bid Framework from SP Data

    Use your SP data to calculate revenue-per-click for each qualified SBV term: attributed sales divided by total clicks over the reporting period. This gives you the maximum CPC you can afford at breakeven on that specific term, assuming the same conversion rate applies in SBV. Then apply a discount factor to account for the assumption that SBV conversion rates may not exactly match SP conversion rates initially — a common starting factor is 0.7 to 0.85 (bidding 70% to 85% of your calculated maximum CPC).

    As your SBV campaigns accumulate data over the first 30 days, compare actual SBV CVR to the SP CVR assumption. If SBV is converting at a higher rate (common due to the creative improvement), you can increase bids toward the maximum. If it’s converting at a lower rate (sometimes seen when the video creative isn’t well-matched to the keyword intent), investigate the creative alignment before adjusting bids.

    Dayparting and Budget Pacing in SBV

    SBV campaigns tend to perform differently by time of day than SP campaigns, reflecting the different attention states shoppers bring to video content. Late morning and early evening hours typically show the strongest SBV engagement rates — shoppers who are in a more deliberate browsing mode rather than quick mobile searches. Amazon’s own campaign scheduling tools allow budget adjustments by day, though not yet by hour in all markets. Monitor your SBV impression and click data by day of week during the first month to identify any meaningful patterns in your specific category.

    Measuring SBV Performance Beyond ROAS

    SBV measurement dashboard showing ROAS versus New-to-Brand, Branded Search Lift, and Organic Rank — ROAS is only half the story

    ACoS and ROAS are the metrics Amazon advertisers default to because they are familiar, comparable across campaigns, and easy to understand. For SBV, they are also incomplete. Relying on ROAS alone to evaluate SBV performance leads to two systematic errors: undervaluing campaigns that deliver strong brand growth alongside modest direct ROAS, and over-pruning keyword targets that are building brand equity that will show up in organic performance weeks later.

    New-to-Brand Metrics: The Primary Incremental Signal

    Amazon’s new-to-brand (NTB) metric tracks orders from customers who have not purchased from your brand within the past 12 months. This is, in practical terms, a proxy for incremental customer acquisition — the metric that reflects whether your advertising is reaching genuinely new customers or simply recapturing existing ones who would have purchased anyway.

    SBV consistently shows higher NTB percentages than Sponsored Products campaigns for the same keywords. This makes structural sense: SBV’s prominent, autoplay placement is more likely to capture attention from shoppers who are still in evaluation mode versus those who are specifically seeking your brand. A campaign that delivers a 45% NTB rate is doing something different and more valuable than one with a 20% NTB rate, even if their headline ROAS figures are identical.

    Track NTB % per keyword cluster, not just per campaign. This granularity reveals which intent clusters are driving customer acquisition (typically category-generic and feature-specific terms) versus which are capturing repeat purchase intent (often brand terms). Neither pattern is inherently better, but they call for different measurement frameworks and different success benchmarks.

    Branded Search Lift as a Lagging Indicator

    One of SBV’s most economically significant — and least measured — effects is its impact on branded search volume. When shoppers see your brand video in search results for a category term, some portion of them who don’t click immediately will later search specifically for your brand. This creates a halo effect in branded search that shows up as increased impression share on your own branded terms in SP and SBV.

    To measure this, track weekly branded search impression volume in your SP brand campaigns. If you launch SBV on high-volume category terms and branded search impressions begin rising two to four weeks later, that is likely a SBV halo effect. Amazon’s Brand Analytics tool — specifically the Search Query Performance report — can show you branded query growth over time if you are enrolled in the relevant Brand Registry tier.

    Organic Rank Correlation

    A well-structured SBV campaign running on high-volume category terms can indirectly support organic rank by driving increased sales velocity, which is one of the signals Amazon’s ranking algorithm considers. This is not a guaranteed or direct effect, but categories and ASINs where SBV has been running aggressively on category terms for 60 or more days sometimes show organic rank improvements that cannot be fully explained by SP activity alone.

    Measure this by tracking organic rank for your target keywords using a rank tracking tool (or manual search snapshots at consistent intervals) and correlating movements with SBV campaign spend levels. Be cautious about drawing causal conclusions from short time windows — rank data is noisy — but over 60 to 90 days, meaningful patterns do emerge for well-run SBV campaigns.

    View-Through Metrics: What to Track and What to Ignore

    Amazon provides video-specific metrics in SBV campaigns: impressions, video views, view-through rate (VTR), and first quartile, midpoint, and complete view percentages. These metrics are useful for diagnosing creative performance — a video with a very low midpoint completion rate is losing viewers before the core message lands — but they are secondary to conversion metrics for keyword-level optimization decisions. Track VTR at the ad group level to assess creative quality; track CVR and NTB at the keyword level to make targeting decisions.

    Negative Keyword Discipline — The Step Most SBV Builders Skip

    Building a high-quality SBV campaign is half about which terms you target and half about which terms you actively exclude. Negative keyword management in SBV is less discussed than in SP, partly because SBV’s higher CPC makes wasted impressions less tolerable, and partly because the search term data in SBV campaigns provides a second layer of qualification data that requires active management.

    Cross-Campaign Negatives to Prevent Cannibalization

    When you promote a term from SP exact match into SBV exact match, both campaigns are now eligible to show for that query. If both trigger simultaneously, you are bidding against yourself — driving up the CPC you pay in the auction and potentially showing two of your own ads on the same results page (which can look redundant to shoppers and is inefficient from a spend perspective).

    The solution is to add the promoted term as a negative exact match keyword in your SP campaigns when it graduates to SBV. This is the “graduation and negation” principle: promote the term upward, negate it in the originating campaign. The term now lives exclusively in your SBV exact match campaign, where it will receive the video placement, and the SP campaign continues searching for new terms through broader match types.

    SBV Internal Negatives: Managing Phrase and Broad Match Bleed

    If you are running SBV phrase match alongside exact match, add your exact match terms as negative exact keywords in your phrase match campaign to prevent the phrase match campaign from triggering on queries already covered by exact match. Without this, your phrase match campaign will generate impressions on your best-performing terms at a less controlled bid, muddying your performance data and potentially overpaying.

    This cross-campaign negative structure is sometimes called a “waterfall” or “cascading negative” setup. The logic is that each tier only sees queries not already captured by the tier above it. Implementing this properly ensures that each campaign in your SBV stack is doing distinct work: exact match handles proven terms at precise bids, phrase match handles expansion terms at slightly looser bids, and neither overlaps with the other.

    Category-Level Negatives Based on SBV Search Term Reports

    After four to six weeks of running, pull the search term reports from your SBV phrase match campaigns. You will find queries that triggered the ads but showed no conversion — and some that showed very high CPC with very low CTR, indicating poor query relevance. Add these as negative phrase match keywords. This pruning process, repeated monthly, progressively tightens the quality of your SBV targeting and reduces the percentage of spend going to non-converting impressions.

    Pay particular attention to navigational queries (shoppers looking for a specific brand they already know), informational queries (shoppers in research mode, not purchase mode), and unrelated product queries that share surface-level word similarity with your keywords. These three categories are responsible for the majority of wasted SBV spend in accounts without active negative management.

    Scaling the System — When to Expand, When to Hold, When to Kill

    SBV scaling decision matrix — four quadrants based on search volume and conversion efficiency, from Scale Now to Kill

    A search-term-first SBV system is not set-and-forget. It is a living structure that requires periodic review to determine which keywords deserve more investment, which need creative intervention before scaling, and which should be removed entirely to protect budget efficiency.

    The Four-Quadrant Scaling Framework

    Evaluate each keyword cluster in your SBV campaigns against two axes: search volume (the available impression pool) and conversion efficiency (actual CVR relative to your target). This creates four decision quadrants:

    • High volume, high efficiency: Scale immediately. Increase bids toward your maximum CPC (calculated from revenue-per-click), add phrase match variants, and consider additional video creative variants to test different hooks or benefit messages.
    • Low volume, high efficiency: Hold and watch. These terms are performing well but may have a small addressable audience. Don’t cut budget, but don’t dramatically increase it either. Focus instead on ensuring creative is strong so you capture all available impressions efficiently. Monitor for volume growth over time.
    • High volume, low efficiency: Investigate before cutting. High-volume terms with poor efficiency have a diagnosis problem before they have a spend problem. Common causes: bid is too high relative to actual CVR, creative is not aligned to the query intent, or the product listing page has a conversion issue independent of the ad. Fix the diagnosis first, then reassess efficiency.
    • Low volume, low efficiency: Remove and reallocate. These terms are consuming budget at an inefficient rate on a small audience. Return them to SP phrase or broad match for further testing at lower cost and revisit in 60 days.

    The 30-Day Review Cadence

    SBV campaigns need at minimum a monthly review cycle to function efficiently at scale. The review covers three activities: pulling the search term report from phrase match campaigns to find new exact match candidates, auditing bid levels against updated revenue-per-click calculations, and checking creative metrics for signs that video performance is declining (dropping VTR or rising CPC with flat CVR often signals creative fatigue in high-frequency categories).

    Some high-spend advertisers move to bi-weekly review cycles. The right cadence depends on budget scale — a $1,000/month SBV account can afford monthly reviews; a $50,000/month account cannot. In general, review frequency should scale with the dollar amount at risk in the period between reviews.

    Expanding Into New Term Categories

    Once your initial SBV exact match campaigns are performing well, the next expansion opportunity is term categories you haven’t yet targeted. The most systematic way to identify these is to look at your SP auto-targeting campaigns and extract any intent clusters that have not yet been promoted to SBV — use case terms, accessory-related terms, problem-state terms (terms describing the problem your product solves rather than the product itself). Run these through the same three-gate qualification process described earlier. If they qualify, promote them into SBV with appropriate creative.

    Competitor brand terms deserve their own consideration. They typically require specific creative framing — positioning your product as an alternative or comparison rather than simply demonstrating product benefits — and they often show different CVR patterns than generic category terms. If your SP data shows strong conversion on competitor brand terms, they can be viable SBV candidates, but budget them separately and track them with their own benchmarks.

    Common Mistakes That Undermine Search-Term-First SBV Campaigns

    The system described in this post is logical when laid out in sequence, but in practice several failure patterns appear repeatedly in SBV campaigns that claim to be data-driven but aren’t truly operating search-term-first.

    Using SP Impression Data Instead of Conversion Data as the Primary Filter

    High-impression terms in SP are attractive — they suggest there is a large audience for the query. But impressions without conversion data only tell you that the query has volume, not that it converts. SBV built around high-impression, low-conversion terms will generate views but not orders. Always filter on conversion activity first. Volume is a secondary consideration.

    Skipping the Negative Keyword Setup at Launch

    New SBV campaigns are often launched without any negative keywords because the thinking is “we’ll add negatives once we see what’s converting.” This is backwards. At a minimum, you should add known irrelevant terms as negatives at launch — terms that triggered in SP with zero conversions, informational queries, and competitor navigational terms. Waiting until the SBV campaign generates its own wasteful data means paying SBV rates to discover what your SP data already told you.

    Running a Single Video Creative Across All Intent Clusters

    Generic product videos that perform adequately across all keyword types perform excellently for none of them. If your budget only allows for one video initially, accept that constraint and plan for creative variants as the campaign matures. But don’t rationalize one creative as “good enough” — it is a starting point, not an endpoint. Creative alignment to keyword intent is one of the highest-leverage optimization opportunities available in SBV.

    Measuring SBV on the Same Efficiency Target as SP

    Setting the same ACoS target for SBV and SP campaigns systematically undervalues SBV’s contribution. Because SBV drives higher NTB percentages and creates branded search halo effects, its true economic contribution exceeds what last-click ACoS captures. Set SBV efficiency targets at a modest premium — typically 20% to 35% higher ACoS tolerance than your SP target — and evaluate NTB and organic impact alongside ACoS to justify the differential.

    Letting the SP Data Source Go Stale

    The SP search term report that seeded your initial SBV keywords was relevant when you pulled it. Customer search behavior evolves, seasonal demand shifts, and your SP campaigns continue generating new data. A SBV campaign built on a one-time SP data pull will gradually drift out of alignment with current demand. Build the 30-day SP-to-SBV review into your standard operating cadence. Treat it as an ongoing feed, not a one-time setup step.

    Building the Repeatable System — From One-Time Setup to Ongoing Flywheel

    The most durable competitive advantage from search-term-first SBV targeting comes not from the initial setup but from the flywheel effect created when the system runs continuously: SP discovers and tests terms at lower cost, the strongest terms graduate to SBV for higher-visibility placement, SBV generates additional search term data and NTB customers, branded search lift feeds back into brand campaign efficiency, and organic rank improvements from increased sales velocity reduce the reliance on paid placement over time.

    This flywheel only spins consistently if the process is documented, assigned, and repeatable. The practical operational requirements:

    • A monthly SP search term report pull with documented qualification criteria applied consistently
    • A clear handoff process for new terms entering SBV (campaign placement, match type assignment, bid calculation, negative keyword deployment)
    • A performance review template that covers ACoS, CVR, NTB%, view metrics, and bid adjustments for each SBV keyword cluster
    • A creative review process triggered when view-through metrics decline or CPC-to-CVR ratios deteriorate
    • A scaling review that assesses each keyword against the four-quadrant framework monthly

    Teams that treat SBV targeting as a one-time project tend to see initial performance gains followed by gradual degradation as the keyword set becomes stale and creative grows repetitive. Teams that build it as a repeatable system compound their advantage month over month — each review cycle improving keyword precision, creative alignment, and bid accuracy simultaneously.

    The Competitive Reality: What Happens If You Don’t Build This System

    The argument for search-term-first SBV targeting is sometimes framed as an offensive opportunity — a way to take share, build brand awareness, and accelerate growth. But it is equally important to understand the defensive dimension: in competitive categories where your rivals are running SBV on the high-intent keywords you’ve proven, your organic and SP placements are being surrounded by video content from other brands. Shoppers who search for terms where you rank well organically are seeing competitor SBV ads before they ever reach your organic listing.

    The SP data you’re sitting on right now tells you which keywords deserve video defense. It tells you where competitors are most likely building their SBV campaigns, because those are the high-intent terms that every serious advertiser in your category is watching. Acting on that data before competitors fill those placements is the strongest timing argument for urgency in building this system.

    SBV placements are finite — there is typically one video placement per search results page per query. First-mover advantage in SBV targeting for a given keyword cluster is real and meaningful. The brand that occupies the in-stream video position on a high-intent search term consistently, over weeks and months, builds a visual association advantage that is difficult to displace once established.

    Conclusion: Data First, Video Second — Always

    The core argument of search-term-first SBV targeting is simple even if the execution is detailed: video is a powerful format, but format alone doesn’t win. The terms you choose to run video against determine whether that format power is directed at shoppers who are predisposed to purchase or at a broad audience with unclear intent. Your SP search term data is the most reliable tool you have for making that determination — because it is based on actual customer behavior, not projected demographics or estimated demand.

    Build the qualification process before you build the campaign. Build the campaign structure before you build the creative. Set up negatives before you collect waste. Measure NTB and organic halo alongside ROAS. Review the SP data feed every 30 days to keep the keyword set current. And when you’re ready to scale, use the four-quadrant framework to make decisions that are evidence-based rather than instinct-based.

    The advertisers winning in SBV-dominant categories in 2026 are not necessarily the ones with the biggest video production budgets or the most creative teams. They are the ones who have built the most systematic, data-informed approach to deciding which search terms deserve a video impression in the first place. That system starts in your SP search term report. Everything else follows from there.

    Key Takeaways

    • Start with SP data, not creative: Qualify search terms through a three-gate filter (minimum orders, acceptable ACoS, adequate impressions) before committing them to SBV.
    • Use exact match first: Proven SP converters deserve exact match SBV placement. Phrase match is for controlled expansion, not initial targeting.
    • Segment by intent cluster: Different ad groups for category-generic, feature-specific, use-case, and competitor terms — with aligned creative where budget allows.
    • Deploy negatives at launch: Don’t wait for SBV to discover waste your SP data already flagged. Add known non-converters as negatives from day one.
    • Measure NTB alongside ROAS: New-to-brand percentage is the primary signal of SBV’s incremental value beyond last-click attribution.
    • Build the 30-day review cycle: The system compounds when SP data continuously feeds new qualified terms into SBV. One-time setup is not enough.
    • Apply the four-quadrant scaling framework: Scale high-volume, high-efficiency terms; investigate high-volume, low-efficiency terms; remove low-volume, low-efficiency terms.
  • What Your SQP Data Is Actually Telling You About Your Images (And How to Act on It)

    What Your SQP Data Is Actually Telling You About Your Images (And How to Act on It)

    Split-screen showing high impressions vs low clicks on identical Amazon products, with the text YOUR SQP DATA ALREADY KNOWS THE PROBLEM

    Most Amazon sellers treat the Search Query Performance (SQP) report as a keyword discovery tool. They pull it, look at what queries are driving volume, and feed those terms back into their listings and PPC campaigns. That’s not wrong — but it’s only half the job, and it’s the less valuable half.

    The more powerful use of SQP data is as an image diagnostic system. Every query in your SQP report carries a silent verdict about your main image: either shoppers are clicking on it, or they’re not. When your impression share is outpacing your click share on a given query, the market is telling you something very specific — your listing is showing up, but your thumbnail is losing the moment of decision.

    This post is about building a CTR-first methodology around that signal. Not a “make pretty images” philosophy, but a structured workflow where SQP data tells you which queries to fix, your competitive audit tells you why you’re losing them, and your image changes are tested and tracked back to the same dataset that identified the problem in the first place. It’s a closed-loop system — and it’s one that most sellers aren’t running yet, even in 2026 when the tools to do it have never been more accessible.

    The sellers who understand this have a compounding advantage: better CTR drives ranking, better ranking drives more impressions, and more impressions at higher CTR rates drive purchases — all without increasing ad spend. That’s the actual prize here.

    Why SQP Is an Image Diagnostic Tool First

    The conventional framing of SQP is that it answers the question “which keywords should I target?” But SQP’s most precise signal sits one layer deeper: it tells you, at a per-query level, how your listing performs at the moment of comparison against every competing product in those search results.

    Let’s be precise about what SQP actually measures. At the ASIN level, you get five core metrics for each query: impressions, clicks, add-to-carts, purchases, and your percentage share of each relative to the total market for that query. These five numbers describe your complete conversion funnel for every individual search term, not in aggregate, but query by query.

    The Moment SQP Becomes a Visual Feedback Signal

    When you compute your click share as a percentage of your impression share for any given query, you get a ratio that has a very specific meaning. A ratio close to 1.0 means your listing is converting impressions to clicks at roughly the same rate as competitors. A ratio significantly below 1.0 means you are consistently being chosen less often than your share of eyeballs would predict — and at that specific moment on that specific query, the thing differentiating you from every other listing is your thumbnail.

    It’s not your price — shoppers can barely process price in 0.3 seconds of glance time on a search results page. It’s not your reviews — they register as a star rating and a number, which changes very little between listings in competitive categories. It’s primarily your main image. That’s the creative variable that governs whether a shopper’s eye pauses on your listing or slides to the next one.

    This is the insight that makes SQP such a powerful image tool: it’s not showing you abstract engagement metrics — it’s showing you exactly which shopping scenarios your image is failing in, and how severe the failure is.

    What SQP Cannot Tell You Directly

    SQP doesn’t tell you why your image is losing. It doesn’t explain whether your frame fill is too small, your product angle is confusing, your background isn’t clean enough, or your packaging doesn’t match what shoppers expect to see for that query. That diagnosis requires a separate step — the competitive thumbnail audit. But SQP gives you the targeting precision to know exactly where to look. Without it, you’re guessing which images to improve and testing without a hypothesis. With it, you’re following data to the specific queries where image quality is costing you clicks at scale.

    The Impression-Click Gap: Anatomy of a Missed Click

    ICAP funnel diagram showing the gap between impressions and clicks as the image problem, with click share vs impression share callout

    The impression-click gap is the core diagnostic unit of a CTR-first image strategy. Understanding its anatomy — what causes it, what makes it worse, and what conditions it can and cannot diagnose — is essential before you start pulling data.

    Defining the Gap with Precision

    For any given query in SQP, your impression share represents how often your ASIN appeared in search results when someone searched for that term, as a percentage of total appearances across all competitive ASINs. Your click share represents what percentage of all clicks on that query you captured. The gap is simple arithmetic: impression share minus click share. A gap of zero means you’re winning clicks proportionally to your visibility. A gap of 10 percentage points means for every 10 times you appear, you’re capturing 10 fewer clicks than you should be if performance were neutral.

    In practice, most competitive categories see individual ASINs with impression-click gaps of 5 to 20 percentage points, meaning the typical product is significantly underperforming on click capture relative to its visibility. The best-performing listings — the ones with highly optimized thumbnails, strong reviews, and competitive pricing — often show negative gaps, meaning their click share actually exceeds their impression share. These listings are punching above their weight in every impression they receive.

    What the Gap Is Really Measuring

    Think about what happens in a search results page interaction. A shopper types a query, Amazon displays up to 60+ ASINs across multiple pages. But eye-tracking research across e-commerce platforms consistently shows that the vast majority of clicks go to the first handful of results, with position and visual salience being the two dominant variables. Your impression share is largely a function of your ranking and PPC coverage — it tells you how often you’re in the room. Your click share is a function of what happens once you’re in the room.

    The gap, therefore, isolates the creative and pricing performance of your listing from the ranking and advertising performance. A high impression share with low click share tells you that you’ve solved the ranking problem but not the persuasion problem. That’s precisely where image optimization applies.

    The Compounding Cost of a Large Gap

    What makes the impression-click gap worth obsessing over is that it’s self-reinforcing. Amazon’s A10 algorithm factors click-through rate into ranking signals — listings that generate more clicks per impression gradually gain organic rank, which in turn generates more impressions, creating a flywheel. Conversely, listings with persistently low CTR on high-volume queries signal to the algorithm that the listing isn’t what shoppers want for that search, which can suppress organic rank over time even when keyword relevance and sales velocity are strong.

    This means a large impression-click gap isn’t just a revenue problem today — it’s a compounding ranking problem tomorrow. Fixing it through image optimization isn’t just about winning more clicks this week; it’s about building an organic rank trajectory that sustains itself without relentless advertising spend.

    Segmenting Queries by Intent Before You Touch a Single Image

    2x2 query intent segmentation matrix showing high volume/high purchase rate vs low volume/low purchase rate quadrants for image budget prioritization

    One of the most consequential mistakes in SQP-driven image optimization is treating every query the same way. Not all queries with a large impression-click gap deserve the same response — because not all queries represent the same type of shopper, the same conversion potential, or the same type of image requirement.

    Before you commission a single reshooting session or brief a designer, you need to segment your SQP queries into buckets based on intent. This segmentation determines both the priority order of your image work and the creative direction for each set of images.

    Using the Full ICAP Funnel to Classify Intent

    SQP gives you the complete ICAP funnel data (Impressions, Clicks, Add-to-Cart, Purchases) at the query level. The shape of this funnel for each query is your intent signal. Here’s how to read it:

    • High impression share + high purchase rate relative to click rate: These are high-converting queries where every click is valuable. The funnel narrows sharply at clicks but stays wide through to purchases. These are your highest-priority image optimization targets because improving CTR here has an outsized downstream revenue impact.
    • High impression share + high click share but low cart-add rate: Shoppers are clicking but not converting. The image is working — but there’s a disconnect on the product detail page. This is a content and gallery image problem, not a main image problem.
    • High impression share + very low click share + moderate purchase rate: The classic image problem. Shoppers who do click through are buying, but too few are clicking in the first place. This is your primary CTR-first opportunity.
    • Low impression share across the board: This is a ranking or advertising coverage problem, not an image problem. No amount of image optimization will fix an ASIN that isn’t appearing for the query in the first place.

    Building the Segmentation in Practice

    Export your SQP data for the past 90 days. Create a spreadsheet with columns for each of the five ICAP metrics plus the derived ratios: click share ÷ impression share (your “click efficiency ratio”) and purchase share ÷ click share (your “post-click conversion ratio”). These two derived metrics tell you where each query sits on the problem spectrum.

    Queries with a click efficiency ratio below 0.7 and a post-click conversion ratio above 0.5 are your Tier 1 image optimization targets — they have proven buying intent but your image is losing the click competition. Sort by impression volume to find the ones where fixing the image will move the most revenue. These are the queries that deserve your first creative brief and your first Manage Your Experiments test.

    The Intent-to-Image Connection

    Intent segmentation also informs what your image should actually show. A query like “stainless steel french press 34 oz” is a high-specificity, high-intent search — the shopper knows exactly what they want, and your image needs to confirm at a glance that your product matches their mental model. A query like “coffee maker gift” is a browse-intent, low-specificity search — shoppers are evaluating options, and your image might benefit from communicating context and occasion rather than just product specs.

    This distinction matters enormously for creative direction. The same product needs different images to win different types of queries — which is exactly why the Amazon gallery exists. But for main image optimization, you need to understand which intent type represents the majority of your high-gap, high-volume queries, because that’s the shopper your thumbnail needs to convert first.

    The Competitive Thumbnail Audit: Seeing What Shoppers See

    Row of Amazon product thumbnails where one standout image with 85% frame fill dominates CTR compared to generic competitors

    SQP tells you that you’re losing clicks on a specific query. The competitive thumbnail audit tells you why — and more importantly, what winning looks like in that context. This is the step most sellers skip because it feels qualitative, but done systematically, it’s highly actionable.

    How to Run a Query-Level Thumbnail Audit

    For each of your Tier 1 queries from the intent segmentation step, open an incognito browser window (or use Amazon’s mobile app) and perform the actual search. Don’t look at the page as a seller — look at it as a shopper who has 8–10 seconds to scan results and decide where to click. Take a screenshot. Then do the following analysis:

    Step 1: Identify the visual winners. Which three to five thumbnails draw your eye first? Note what they have in common: product scale relative to the frame, background cleanliness, angle, color contrast against the white search results page, and whether any visual element creates a clear differentiation from adjacent listings.

    Step 2: Locate your ASIN. Find your own listing in the results. Does it visually stand out or blend in? Does it appear smaller, lower-contrast, or more generic than the top-performing thumbnails? Be honest about this assessment — what you see is what shoppers see.

    Step 3: Document the gap. List the specific visual differences between your thumbnail and the three most visually compelling listings on that SERP. These differences are your creative brief. Common gaps include: product fills less than 70% of the frame (competitors fill 85%+); product angle shows a less informative face of the product; packaging detail is illegible at thumbnail size; product appears in a shadow or unclean white background; key differentiators (size, color, quantity) are invisible in the thumbnail.

    What Frame Fill Actually Means

    Frame fill is the percentage of the image area that the product itself occupies. Amazon’s own seller guidelines recommend that the product occupy at least 85% of the image. But many sellers interpret this as “the product plus any packaging” — which often results in a thumbnail where the actual product looks small against the full image dimensions.

    At thumbnail size (Amazon displays main images at roughly 160×160 pixels in most grid views), a product filling 65% of the frame looks dramatically smaller than a product filling 85%. In categories where product size is a purchase decision (kitchenware, supplements, tools, outdoor equipment), that size signal can be a decisive factor in the click decision. Shoppers choose what looks bigger and more substantial, all else equal.

    Color Contrast and Category Context

    Every product category has a de facto visual language — a set of image conventions that experienced shoppers in that category have internalized. Beauty products tend to be shot with clean, clinical precision. Outdoor gear tends to use bold angles that suggest durability. Food products use color saturation that triggers appetite appeal. When your thumbnail violates category visual conventions, it registers as slightly “off” to shoppers, even if they can’t articulate why — and that feeling translates to fewer clicks.

    Conversely, when your thumbnail conforms to the best version of category visual conventions but differentiates through one specific element — an angle, a color accent, a size demonstration — you’re working with the shopper’s expectations rather than against them. The audit is your way of mapping those conventions for your specific competitive set.

    Building Your Image Priority Queue from SQP Data

    With your segmented query list and competitive audit complete, you now have enough data to build an image priority queue — a ranked list of image changes, ordered by expected revenue impact. This is where the data work pays off, because it means you’re not spending budget on image redesigns for queries that are already performing well, or for queries where the problem isn’t actually the image.

    The Priority Scoring Framework

    Score each potential image change opportunity using three inputs from your SQP analysis:

    1. Query volume: Higher monthly search volume means more impressions, which means more clicks available to capture. Weight this heavily — a 10% CTR improvement on a 50,000-impression query is worth more than a 30% improvement on a 5,000-impression query.
    2. Impression-click gap magnitude: Larger gaps represent more clicks being left on the table. An impression share of 12% with a click share of 3% is a more urgent problem than impression share of 8% with click share of 6%.
    3. Post-click conversion rate: This is your confidence signal. If the queries where you have a large gap also show strong purchase rates among the clicks you do capture, then every additional click you win is highly likely to convert to revenue.

    A simple priority score: (Query Volume × Impression-Click Gap) × Post-Click Conversion Rate. Sort your query list by this score, descending. The top 10 queries are your first image sprint. Don’t try to fix everything at once — a focused, sequenced approach produces cleaner test data and clearer attribution.

    Single-Image vs Multi-Image Strategy

    An important structural question: are all your top-priority queries being lost by the same image weakness, or are different queries revealing different creative problems?

    If your audit shows that the problem is consistent — say, frame fill is too small across the board — then a single main image redesign will address multiple queries simultaneously, and you should test one new image variant across all affected queries. But if different queries reveal different problems (one query’s SERP is dominated by lifestyle imagery while another’s is dominated by technical specification callouts), you may need to consider whether multiple listing variants, Sponsored Brands imagery, or A+ content can serve as creative solutions for the secondary queries while your main image optimizes for the primary one.

    Respecting Amazon’s Main Image Constraints

    One reality check that every CTR-first strategy must account for: Amazon’s rules for main images are specific and enforced. The main image must show only the product (no additional props, backgrounds, text overlays, or lifestyle elements) on a pure white background (RGB 255,255,255). Amazon has ramped up enforcement of these rules, with AI-based image scanning flagging non-compliant images with increasing accuracy in 2026.

    This means your creative options for the main image are narrower than they might seem: angle, frame fill, lighting, product configuration (assembled vs. components), color variant selection, and shadow treatment are your primary variables. These constraints aren’t limitations — they’re a creative challenge. The best-performing main images in competitive categories win within these rules, not by working around them. Your competitive audit should surface how the winners are doing this.

    What to Change First: Frame Fill, Angle, Overlays, or Color

    Once you have a priority queue and a creative brief from your thumbnail audit, the practical question is sequencing: which change should you make first? Not because you can only make one change, but because you can only test one hypothesis at a time and attribute the result correctly.

    The Four Primary Image Variables

    Frame fill is almost always the first change to test if your audit shows your product appearing smaller than competitors’ at thumbnail size. The mechanics are simple: crop tighter, shoot closer, or remove excess whitespace in post-production. This change is fast, cheap to implement, and often produces the largest single-variable CTR lift because it changes the product’s visual weight on the page.

    The target is 85%+ product coverage within the frame. Test at thumbnail size — not at full image size — because that’s the context in which the change matters. A product that looks perfectly framed at 1000×1000 pixels may still look small at the 160px thumbnail dimension depending on the product’s aspect ratio and shape.

    Product angle is the second variable to test when frame fill is already strong. The question is whether your current angle communicates the product’s most important attribute at thumbnail size. For a multi-tool, a top-down spread of tools might be more informative than a three-quarter view. For a supplement, a front-facing label view with legible branding might outperform an angled glamour shot. The audit tells you what angle the CTR winners in your category are using — test toward that angle if it differs from yours.

    Product configuration applies to items that can be shown assembled or disassembled, packaged or unpackaged, singular or in set quantities. For multi-packs, showing the quantity visually (three bottles arranged together) rather than relying on text to communicate it can significantly improve CTR for queries like “bulk” or “pack of 3” — because the image confirms what the query expects before the shopper has to read anything.

    Shadow and lighting treatment is a subtler variable but meaningful in categories where product quality and premium positioning matter. Hard shadows against white backgrounds can make products look lower-quality or older in photography style. A natural drop shadow or completely shadow-free shot (achieved in editing) can meaningfully shift the perceived value of the product, which affects click behavior particularly for higher-price-point items.

    What Changes to Defer

    If your audit identifies that competitors are winning with lifestyle imagery in the main image slot, don’t try to replicate this by violating Amazon’s content policies. Non-compliant main images can get your listing suppressed — which eliminates all your impressions, not just your clicks. The correct response to a lifestyle-dominated SERP is to make the strongest possible compliant main image while investing in Sponsored Brands creative for that query, where lifestyle imagery is explicitly permitted.

    Running Manage Your Experiments Without Wasting 8 Weeks

    7-step image test cycle flowchart showing the process from pulling SQP data through launching experiments to scaling the winner

    Amazon’s Manage Your Experiments (MYE) tool is the native way to A/B test main images with statistical rigor, and it’s available to brand-registered sellers with sufficient traffic. The challenge most sellers face with MYE isn’t technical — it’s methodological. They run experiments without a clear hypothesis, test too many variables simultaneously, or let tests run indefinitely without acting on the results.

    Designing a Test That Produces Actionable Data

    The single most important principle in MYE testing is one variable at a time. If you change the angle, the frame fill, and the color balance simultaneously in your test image, you cannot attribute a CTR change to any specific element. You’ll know the new image performed better (or worse), but you won’t know why — which means you can’t systematically build on the result.

    Start with the highest-priority change from your creative brief: if the audit showed frame fill is the primary gap, test only a tighter frame fill, keeping all other elements identical. If the test wins, you’ve confirmed the hypothesis and can proceed to the next variable. If it loses, you’ve ruled out frame fill and need to reassess your audit findings.

    Write your hypothesis explicitly before launching: “We believe that increasing frame fill from 65% to 85% on our main image will improve CTR on queries with high impression-click gaps by reducing our visual size disadvantage against the top three competitors on those SERPs.” This forces clarity about what you’re measuring and why, and it gives you a post-test evaluation framework beyond just “did the number go up?”

    The Traffic Threshold Problem

    MYE requires sufficient traffic to reach statistical significance within a reasonable timeframe. Amazon’s own guidance suggests experiments need at least a few hundred clicks per variant to be meaningful. For high-traffic listings, this can happen within two to three weeks. For lower-traffic ASINs, an experiment might require six to eight weeks to reach the traffic threshold — during which time market conditions, pricing, and competitive dynamics can all shift, introducing noise into the results.

    If your ASIN doesn’t have enough organic traffic to run MYE efficiently, there are two workarounds. First, consolidate your experiment to your highest-traffic ASIN in a brand and apply learnings to lower-traffic ASINs without formal testing — directional data from a high-traffic sibling product is better than no data. Second, use Sponsored Products to drive controlled traffic to both variants during the experiment period, accelerating the time to statistical significance. This costs money, but it gets you a result in half the time and significantly reduces the influence of external variables.

    Reading the Results Without Bias

    MYE results show you both statistical confidence and projected annual sales impact. The temptation is to declare a winner as soon as the confidence indicator is high — but confidence in a statistically insignificant positive result can still be misleading. Look for both high confidence (85%+ by Amazon’s indicator) and a meaningful delta in the primary metric before calling the experiment.

    Also watch what MYE measures by default: it typically optimizes for units sold, not CTR specifically. Since CTR improvements cascade through to units sold, this is usually the right metric — but if your test shows improved CTR with flat units sold, the issue may be post-click conversion, not the main image. That’s a useful finding too, and it redirects your optimization effort to the product detail page rather than the thumbnail.

    Tracking CTR Gains Back to SQP: Closing the Loop

    Analytics dashboard showing SQP to image ROI tracker with before and after CTR line graph showing 123% CTR lift after image update

    This is the step that turns a one-time image fix into a repeatable system. Once you’ve made an image change and your MYE test has concluded, you need to return to SQP and measure whether the impression-click gap on your target queries actually narrowed. This closes the feedback loop — and it’s where most sellers drop the thread, walking away after the MYE result without verifying the effect in the source data.

    The 30-Day SQP Pull Protocol

    Pull your SQP data approximately 30 days after your new main image goes live (or after the MYE winner is deployed at 100%). Compare your click share on the Tier 1 queries you targeted against the click share from the 90-day period before the change. Look specifically at:

    • Did your click share increase on the target queries?
    • Did your impression share stay flat or increase (ruling out ranking changes as a confounding variable)?
    • Did your add-to-cart share and purchase share move proportionally with click share, or did click share increase while downstream metrics lagged (suggesting the new image is drawing the wrong shopper intent)?

    The third point is important and often overlooked. An image change that dramatically improves CTR but produces a parallel drop in add-to-cart rate is a warning sign — the new image may be winning clicks from shoppers whose intent doesn’t match the product. This is particularly common when sellers make images more visually dramatic in ways that create expectations the product doesn’t meet. A 40% CTR improvement that comes with a 30% conversion rate drop is a net negative. SQP catches this where MYE’s unit-sales metric might not.

    Building a Query-Level Tracking Sheet

    Maintain a persistent spreadsheet — or automate a pull using Amazon’s Brand Analytics API if your volume justifies it — that tracks, for each of your priority queries, the click efficiency ratio (click share ÷ impression share) across rolling 90-day periods. This gives you a longitudinal view of image performance that no single-point-in-time snapshot can provide.

    Update this tracking sheet every 30 days. Over time, you’ll see which queries have been permanently improved by image changes, which ones drift back toward poor CTR as competitors update their own images, and which new queries have emerged (through keyword expansion or market growth) that have entered your impression profile but are showing early signs of a click gap.

    This tracking discipline is what distinguishes a CTR-first image strategy from a one-time image refresh. The market changes. Competitors improve their thumbnails. New entrants arrive with better creative. Your SQP data will surface these dynamics before they cost you meaningful revenue — but only if you’re actually looking at it on a recurring basis.

    When Better Images Aren’t Enough: The Price, Badge, and Rating Factor

    A rigorous CTR-first strategy requires intellectual honesty about what main image optimization can and cannot fix. There are real scenarios where the impression-click gap is caused by factors that have nothing to do with your thumbnail — and chasing an image solution for a non-image problem wastes time, budget, and creative energy.

    Price as a CTR Variable

    On most Amazon search result pages, price is displayed prominently alongside the thumbnail. At desktop size, shoppers can see price before they click. This means a meaningful portion of your impression-click gap on price-sensitive queries may be attributable to price positioning rather than image quality. The diagnostic test is simple: temporarily narrow the price gap against the top two competitors on your highest-gap queries and monitor the click efficiency ratio in SQP over the subsequent 30-day period. If click share moves meaningfully with the price change while nothing else changes, price was the dominant variable — not the image.

    Review Count and Star Rating

    In some categories, review count and star rating are the primary click-decision variables, particularly for commoditized products where thumbnails are relatively undifferentiated and shoppers are using social proof as a quality shortcut. If your ASIN has significantly fewer reviews or a lower rating than the top CTR performers on your target queries, image optimization alone will not close the gap.

    The practical implication: use your click efficiency ratio as a proxy for competitive health. If your ratio is below 0.7 and you have strong images, competitive pricing, and good reviews, then image refinement is the right lever. If your ratio is below 0.7 and you have 47 reviews versus competitors with 4,700, invest in review acquisition first and revisit image optimization once social proof is no longer the dominant impression-to-click barrier.

    The Amazon Choice Badge and Coupon Flags

    One underappreciated CTR driver is badge visibility. Amazon’s Choice badges, Prime badges, and coupon flags all appear in the search results thumbnail view and demonstrably affect click-through behavior. If your competitors are running 10% or 15% off coupons that appear as bright orange flags on their thumbnails, that visual element competes directly with your image quality for click attention.

    This isn’t an argument to run coupons at all times (the economics may not support it) — but it’s a reminder that your main image doesn’t compete in isolation. Your thumbnail is the sum of the product photo, the price, any badges, the rating and review count, and the Prime eligibility indicator. All of these together constitute what a shopper sees in the 0.3-second glance that determines whether they click. Image optimization addresses one component of that bundle — and an important one — but a truly CTR-first strategy accounts for all of them.

    Scaling the System: From One ASIN to a Full Catalog

    Once you’ve run the SQP-to-image workflow successfully on one or two high-priority ASINs, the question becomes how to scale it across a larger catalog without the analytical workload becoming unmanageable. This is where systematization matters more than sophistication.

    Building the Triage Layer

    At catalog scale, you can’t do a deep competitive thumbnail audit for every ASIN every month. Instead, build a triage system that surfaces which ASINs deserve deep analysis based on their SQP signal. Create a weekly or monthly report that flags any ASIN whose average click efficiency ratio across its top 10 queries has dropped below 0.65 in the current 90-day window, compared to the prior window.

    ASINs flagged by this triage trigger go into the deep analysis queue: competitive audit, creative brief, and MYE experiment. ASINs with stable or improving ratios get a lighter-touch review — no immediate action, just continued monitoring. This approach concentrates your creative investment where the data says it matters, and keeps the system sustainable at scale.

    Building a Creative Asset Library

    As you run image experiments across your catalog, you’ll accumulate institutional knowledge about what works — which angles win in your category, what frame fill level consistently outperforms, whether your brand’s color palette helps or hurts thumbnail differentiation. Document these findings explicitly and build them into a creative brief template that your photographers and designers use for every new ASIN shoot.

    This means your new product launches start with a higher creative baseline informed by performance data from your existing catalog. Instead of launching with an image that will need to be improved after SQP data accumulates, you launch with an image built on the principles that your data has already validated. The result is shorter ramp-up times to optimal CTR and less lost revenue during the critical early weeks of a new ASIN’s life.

    Integrating SQP Review into Operations

    The final piece of scaling is operational: making SQP review a standard, recurring business rhythm rather than an occasional deep-dive. Set a monthly cadence for SQP pulls. Assign clear ownership for the analysis. Build the click efficiency ratio and impression-click gap metrics into whatever reporting dashboard your team reviews regularly. When SQP data is part of weekly business reviews alongside advertising metrics and inventory health, it stops being an advanced tool that only power users access and becomes a standard part of how your team thinks about listing health.

    At that point, the CTR-first image strategy is no longer a project — it’s a process. And that’s when the compounding advantage starts to accumulate: consistent click efficiency improvements quarter over quarter, organic rank gains that reduce dependence on paid traffic, and a visual competitive moat that takes competitors significant time to close.

    Conclusion: The Repeatable SQP-to-Image Workflow

    The core insight of a CTR-first image strategy is disarmingly simple: Amazon already tells you which queries your image is failing on — you just have to know how to read the signal. The SQP report, used as an image diagnostic tool rather than a keyword tool, gives you query-level precision about where the impression-click gap is largest, which queries have the conversion potential to make closing that gap profitable, and whether your changes are actually working.

    The workflow this produces has a clear, repeatable sequence:

    1. Pull SQP data for 90 days at the ASIN level. Compute click efficiency ratios and post-click conversion rates for each query.
    2. Segment queries by intent using the full ICAP funnel shape. Identify Tier 1 targets: high gap, high conversion, high volume.
    3. Run the competitive thumbnail audit for your top 10 priority queries. Document the specific visual differences between your ASIN and the CTR winners.
    4. Build a priority-scored image change list based on expected revenue impact (volume × gap × conversion rate).
    5. Test one change at a time through Manage Your Experiments. Write an explicit hypothesis before launching. Wait for statistical significance before acting.
    6. Close the loop in SQP 30 days post-launch. Verify that click share improved on target queries. Watch for any deterioration in add-to-cart or purchase rates that would indicate the image is attracting the wrong intent.
    7. Systematize and scale. Build triage triggers for catalog-wide monitoring. Compile creative learnings into a brief template. Make SQP review a standing business rhythm.

    What makes this system valuable isn’t any single step — it’s the closed loop. Too many Amazon optimization efforts are one-directional: change something, hope for the best. SQP-driven image optimization is iterative and self-correcting. The data that tells you where to start is the same data that tells you whether you succeeded — and that’s a structural advantage most of your competitors aren’t building yet.

    In a marketplace where the average click-through rate sits between 0.4% and 0.6% and the difference between a 0.4% CTR and a 0.8% CTR represents double the organic traffic at identical advertising spend, the sellers who take image performance seriously — and measure it with the same rigor they apply to their PPC metrics — are the ones building durable, compounding advantages. SQP is your starting point. The image is your lever. The click efficiency ratio is how you know it’s working.

  • From ASIN to Air: How Amazon’s New SBV Template Workflow Actually Works in Practice

    From ASIN to Air: How Amazon’s New SBV Template Workflow Actually Works in Practice

    Amazon SBV Creative Studio dashboard showing ASIN-to-video workflow with product image transforming into polished video ad

    There is a moment every Amazon advertiser hits eventually. You have a great product, a healthy ad budget, and a campaigns manager who keeps saying the same thing: “We should really be running Sponsored Brands Video.” And you agree. Every benchmark you read says SBV outperforms static. The data is unambiguous. But video production is expensive, time-consuming, and your creative agency has a four-week lead time and a five-figure quote for something that might live on Amazon for 15 seconds.

    That’s the wall. And for most brands, it has kept Sponsored Brands Video as a theoretical priority rather than an active strategy. You plan to do it next quarter. Then the next quarter after that.

    Amazon’s new SBV creative tools — most notably the Video Generator inside Creative Studio and the newer Creative Agent workflow — are designed to demolish that wall entirely. In theory, you can now go from a product ASIN to a polished, live Sponsored Brands Video ad in under 30 minutes, at zero production cost, without a camera, an editor, or an agency on the phone.

    But how does it actually work? What does the template system let you control, and what does it decide for you? When should you use the Quick Video path versus the Creative Agent chat workflow? And critically — what are the performance and measurement pitfalls that brands keep tripping over after launch?

    This post answers all of it, from the mechanics of the tool to the testing system you need to build around it, and the new-to-brand metrics that tell you whether any of it is actually working.

    The Creative Toolkit Amazon Has Actually Built

    Before getting into workflow specifics, it helps to understand what Amazon has actually shipped versus what it announced. The distinction matters because there’s been a lot of noise around AI creative tools, and not all of it maps cleanly to what’s available inside your Amazon Ads console today.

    Creative Studio: The Central Hub

    Creative Studio is the unified creative environment within the Amazon Ads console. Think of it as the workspace that houses all of Amazon’s ad production tools under one roof. You access it directly from the Ads console — it does not live in Seller Central. This is a deliberate design choice. Creative Studio is an advertiser tool, not a seller tool, and the distinction affects who in your organization should be managing it.

    Within Creative Studio, you can produce image ads, video ads, audio ads (for streaming), and eventually Streaming TV creatives. For Sponsored Brands Video specifically, you’ll primarily be working with two sub-tools: the Video Generator and the Creative Agent.

    The Video Generator: The Fast Path

    The Video Generator is the quick-production tool. It’s designed for advertisers who want to create SBV-ready assets fast, with minimal decision-making required. You input a product ASIN or product detail page URL, the system pulls your existing product images and copy, applies them to pre-built templates, and outputs six video variations in minutes. These are short — typically 6 to 15 seconds, which aligns with Amazon’s SBV spec requirements.

    The Video Generator was the flagship announcement at Amazon’s unBoxed 2025 event and has been rolling out broadly since. As of 2026, it’s available to most Amazon advertisers in the US and is expanding internationally. It’s free — there’s no production charge. Amazon absorbs the generation cost as part of its advertising ecosystem.

    Creative Agent: The Strategic Path

    The Creative Agent is Amazon’s agentic AI creative workflow. It went into open beta on February 12, 2026, and it works differently from the Video Generator. Instead of a button-click template system, Creative Agent is a conversational interface — you open a chat window inside Creative Studio and brief the tool in natural language.

    You might say something like: “I want to create a Sponsored Brands Video for my collagen supplement. The audience is women 35–55 who are new to supplements. The key message is that this is tasteless and mixes easily into any drink. The tone should be warm and approachable, not clinical.”

    From that brief, Creative Agent generates a concept, a script, a storyboard, and then a finished multi-scene video. It handles voiceover scripting, music selection, text animation, and scene sequencing. The result is significantly more customized than what the Quick Video template path delivers — but it takes longer, and it requires you to engage with the creative process rather than offload it entirely to a template.

    The two tools serve different use cases, and the smartest advertisers are using both in tandem rather than choosing one.

    Split-screen comparison of old traditional video production workflow taking 6-8 weeks versus new Amazon SBV template workflow completing in under 30 minutes

    The Quick Video Template Path: A Practical Walkthrough

    The fastest way to understand the Video Generator template workflow is to walk through it step by step. Here is how it actually functions in practice, not as a marketing description but as a realistic account of what you click, what you input, and what gets produced on the other side.

    Step 1: Access the Video Generator from Within a Campaign

    You start a new Sponsored Brands campaign in the Amazon Ads console. When you reach the creative setup stage — where you’d normally upload your video — you’ll see an option to generate a video instead of uploading one. Clicking this takes you into the Video Generator interface. This entry point is important: unlike Creative Studio, which is accessed independently, the Video Generator is embedded directly in the campaign setup flow. You don’t have to leave your campaign, produce something in a separate tool, and come back. It’s a single continuous workflow.

    Step 2: Input Your ASIN

    You enter the product ASIN you’re advertising. The system then reaches into the product detail page and pulls your existing assets: product images, title, bullet points, and any A+ content images that are available. This is one of the more underrated aspects of the tool. You’re not uploading anything — Amazon already has your assets from the listing. The quality of what gets generated is therefore directly tied to the quality of what’s already on your PDP. Poor main images, dark photographs, inconsistent backgrounds — all of these feed directly into the video output and show up as production problems.

    This is not a bug; it’s the system behaving exactly as intended. But it catches a lot of brands off guard, especially those who haven’t invested heavily in their product photography.

    Step 3: Select a Template and Scene Layout

    The Video Generator offers a selection of template styles. These templates vary in scene sequencing (how many scenes, in what order), text animation style (the way headlines appear, fade, or move), background treatment, and pacing. Some templates are product-forward — the product dominates almost every scene. Others are more narrative, with more text and minimal product visibility in certain frames. The right choice depends heavily on your product category and where the viewer is in their purchase journey.

    For high-consideration products where “what is this?” is still the operative question, product-forward templates perform better. For commoditized categories where the product is familiar but differentiation is the challenge, the more narrative templates give you room to make a case.

    Step 4: Customize Headline, Logo, and Music

    This is where advertisers have more control than many expect. The Video Generator allows you to edit the primary headline text, add your brand logo, and select background music from a licensed library. You can adjust the call to action and make basic edits to the text that appears on-screen in each scene.

    What you cannot do is reorder scenes arbitrarily, add custom footage, change the animation style of a specific template element, or adjust individual scene duration. The templates are structured. You’re customizing within lanes, not redesigning the road. That’s the trade-off: speed and zero technical skill required in exchange for constrained creative control.

    Step 5: Generate Six Variations and Choose

    After inputting your customizations, the system generates six video variations simultaneously. These variations apply your inputs across slightly different executions — different scene emphasis, different text pacing, different background music choices within your selected style. You preview all six, choose the one that best represents the product, and proceed to attach it to your campaign.

    The total elapsed time from starting the campaign to having a video attached is typically 15 to 30 minutes for a first-time user. For advertisers who’ve done it before and know the tool’s interface, it can be under 10 minutes.

    Five-step SBV template workflow flowchart from entering ASIN to generating six video variations in Amazon Creative Studio

    Creative Agent: When the Template Path Isn’t Enough

    The Quick Video template path solves the access problem for SBV. It gets brands into the format who otherwise wouldn’t be running it at all. But there’s a ceiling on what templates can do creatively, and for brands competing in crowded categories — or launching products where storytelling is genuinely part of the conversion argument — the Creative Agent workflow offers meaningfully more.

    The Brief-to-Video Conversation

    Creative Agent operates through a conversational interface. You open chat in Creative Studio and begin with a brief. The more specific that brief, the better the output. Vague prompts like “make me a video for my supplements” produce generic results. Detailed briefs that include audience specifics, the one or two product benefits to emphasize, the tone and register you want, and any messaging to avoid produce output that’s significantly more targeted.

    A well-constructed brief for Creative Agent might include: the target customer (not just a demographic but a behavioral description — “someone who has tried other collagen supplements and been turned off by the taste”), the primary claim to lead with, the emotional register (confident, warm, clinical, playful), the call to action, and any brand voice notes. Amazon has published guidance suggesting that Creative Agent performs best when the brief treats it as you would brief a human creative director — giving it enough context to make good editorial decisions rather than trying to specify every element upfront.

    Storyboard Review and Scene Editing

    After processing the brief, Creative Agent doesn’t immediately produce a finished video. It first presents a storyboard — a scene-by-scene outline of what it intends to produce. This is a deliberate checkpoint. You can review the storyboard, request changes to specific scenes, adjust the script for individual frames, and redirect the concept before any rendering happens. This saves significant iteration time compared to reviewing a fully-rendered video that needs structural changes.

    Once you approve the storyboard, Creative Agent renders the video. Voiceover, if included, is generated by AI voice models. Music is selected from Amazon’s licensed library based on the brief’s tonal guidance. Text animations are applied consistent with the creative direction established in the storyboard review.

    Where Creative Agent Adds Real Value

    The clearest use case for Creative Agent over the Quick Video template is any situation where the product is unfamiliar to the target audience, or where the differentiation story is complex enough that it needs to be told rather than implied. New-category products, products solving non-obvious problems, or brands launching into a category where they’re competing against established names with strong brand recognition — these are the contexts where a structured creative narrative matters more than fast template execution.

    Creative Agent also produces assets that are inherently more differentiated from each other across an ad portfolio, which matters for testing. Template-generated videos, even across variations, share a structural sameness that can limit your ability to learn what messaging element is driving performance differences. Creative Agent output is diverse enough to test genuinely different creative approaches rather than different executions of the same approach.

    What You Can and Cannot Control: The Creative Constraints Map

    One of the most practical things to understand before running SBV through either of these tools is the exact boundary between what you control and what the system controls. Misunderstanding this is the source of most early frustration with the workflow.

    What Advertisers Control

    • Headline text: The primary claim or product descriptor that appears on-screen. This is the single highest-leverage creative element you control, and it deserves significant attention. The headline in the first two seconds of an auto-playing, muted video is effectively your entire message to anyone who doesn’t watch past the opening frame.
    • Brand logo placement: You can upload and position your logo. Getting this right matters for brand recall, particularly for new-to-brand audiences encountering the brand for the first time.
    • Music selection: You choose from a library of licensed tracks within a stylistic category. You cannot upload custom music. For brands with strong sonic identity this is a limitation; for most brands it’s a reasonable constraint.
    • Call to action text: The CTA button or text that appears at the end of the video. The options are templates-bound (e.g., “Shop Now,” “Learn More,” “See Details”) rather than fully custom.
    • ASIN selection: Which product drives the creative. For multi-product brands, this is a meaningful choice — different product images produce materially different video quality depending on photography quality.

    What the System Controls

    • Scene duration and pacing: Each template has fixed scene lengths. You can’t extend a scene to give a particular product feature more screen time.
    • Image selection from your listing: The Video Generator picks which product images to use from your ASIN. It generally selects the main image and the first few secondary images. If your image order on the listing isn’t optimized, the video may pull images that don’t represent the product’s best angles.
    • Animation style: The way text appears, transitions happen, and scenes cut is determined by the template. You’re selecting a template style, not configuring individual animation parameters.
    • Video resolution and format: Amazon generates to its own SBV spec (16:9 aspect ratio, minimum 1080p, typically 1280×720 or 1920×1080). You can’t adjust aspect ratio for a different placement type within the same generation flow.

    The key practical takeaway here: treat the headline as your primary creative lever. It’s what you have the most control over, it has the most direct impact on performance, and it’s the one element where small changes produce measurable differences across test variants.

    The Performance Case for Video: What the Data Actually Says

    The argument for Sponsored Brands Video over static Sponsored Brands has been made many times, but it’s worth grounding it in the specific numbers that are actually available — rather than the vague “video performs better” claims that appear in most generic coverage of the topic.

    Performance benchmark bar chart showing Amazon SBV delivering 507% higher CTR on branded terms, 28-43% higher ROAS, and 38% new-to-brand rate versus static ads

    Click-Through Rate Differentials

    Sponsored Brands Video consistently delivers higher CTR than static Sponsored Brands across both branded and non-branded search. On branded keyword searches, SBV has been cited at approximately 507% higher CTR than other Sponsored Brands ad types — a number that, while striking, makes intuitive sense. A searcher looking for your brand by name, encountering a video auto-playing your product, is in an extremely receptive moment. The video reinforces the brand recognition that already drove the search.

    On non-branded keyword searches, the CTR advantage is cited at approximately 703% higher — even more significant, because these are discovery-mode shoppers who had no prior intent to find you specifically. Stopping their scroll with a video format rather than a static image is a meaningful edge in a genuinely competitive context.

    ROAS and Conversion Rate

    SBV’s ROAS advantage over static Sponsored Brands is documented at approximately 28–43% higher, depending on category and campaign structure, based on Amazon’s own published benchmark data cited by third-party research firms including Perpetua. The average ROAS for a Sponsored Brands campaign across all formats sits around $5.66 with an ACOS of roughly 17.68% per Amazon’s own benchmark materials — but SBV-specifically tends to land at the higher end of that range when campaigns are properly structured.

    It’s worth noting what drives this ROAS premium. SBV doesn’t inherently produce better conversions on the click — the conversion rate difference comes in part from the quality of the audience clicking. A shopper who watches 10+ seconds of an auto-playing video and then clicks has demonstrated significantly higher intent than one who clicks a static image. The self-selection of engaged viewers is built into the format.

    New-to-Brand Acquisition

    The most compelling data point for brands investing in SBV is the new-to-brand customer rate. Sponsored Brands Video campaigns have shown a new-to-brand purchase rate of approximately 38%, compared to roughly 22% for Sponsored Products. This gap — nearly 16 percentage points — is not incidental. It reflects that SBV does actual brand awareness work in a way that Sponsored Products fundamentally cannot. SP ads appear to people already searching; SBV stops people who weren’t necessarily looking and makes them look. That’s a different customer acquisition mechanic entirely, and it justifies running SBV as part of a customer acquisition strategy rather than purely as a bottom-funnel conversion tool.

    Where SBV Ads Actually Appear — And Why Placement Matters

    Amazon has been actively expanding the placement inventory for Sponsored Brands Video, and understanding the placement landscape affects how you structure your creative. The video that works at the top of search results does not necessarily work the same way on a product detail page.

    Amazon search results page diagram showing three SBV ad placement zones: Top of Search, Inline/Mid-Search, and Product Detail Page placements

    Top of Search: The Premium Placement

    The top of search placement — the very first position on a search results page, above any organic listings — is the highest-visibility placement in the SBV inventory. It auto-plays as soon as it’s 50% visible on screen, and because it’s the first thing the searcher sees, the first 2–3 seconds of your video are doing an enormous amount of work. This placement rewards videos that lead with the product identity immediately. The viewer has no context about your brand; they just entered a search query and the first thing they see is your video. The creative has to orient them instantly.

    Videos that open with brand-forward content (a logo, a tagline, a lifestyle scene that doesn’t show the product quickly) tend to underperform at this placement compared to videos that start with the product itself in the first frame. The Top of Search viewer is in discovery mode and impatient.

    Inline Search Results: The Volume Placement

    Inline search placements appear between rows of organic product listings as the shopper scrolls. This placement captures a viewer who has already begun their search journey — they’ve seen multiple products and are evaluating. Creative that works here tends to be more differentiating: leading with a specific product advantage, addressing a concern (“mixes clear — no clumping”), or calling out a comparison point. The viewer is already in comparison mode; meet them there.

    Product Detail Pages: The Consideration Placement

    PDP placement is the most recently expanded placement type for SBV, and it operates differently from search placements. The viewer is already on a competitor’s product page. They’ve shown purchase intent for the category; they just haven’t committed to a specific product. SBV appearing here is competing for a high-intent shopper in the middle of a consideration phase. Creative for PDP placement benefits from being benefit-dense — making a specific, credible product claim that gives the viewer a reason to click away from the page they’re already on.

    Amazon lets you apply placement bid adjustments — modifiers that increase or decrease how much you bid on each placement type. Use placement reporting to understand which placement is delivering your strongest ROAS and adjust bids accordingly rather than leaving them flat across placements.

    Building a Creative Testing System Around SBV Templates

    The biggest operational advantage of the new SBV template workflow isn’t the zero cost or the speed — it’s the volume. When producing a single SBV used to cost $5,000–$15,000 and take six weeks, most brands ran one video per campaign and hoped it worked. When producing six variations takes 15 minutes and costs nothing, you can test aggressively. But testing aggressively without a system produces noise, not signal.

    SBV creative A/B testing system showing four video variants running simultaneously with CTR comparison bars identifying the winning creative

    The One-Variable Rule

    The core discipline of SBV creative testing is changing one variable at a time. If you generate four video variations with different headlines, different template styles, different music, and different CTAs simultaneously, you cannot determine what drove any performance difference between them. You’ll know which video won; you won’t know why. And why is what lets you compound learnings across future creative cycles.

    For your first testing sprint, choose the variable you’re least certain about and hold everything else constant. For most brands new to SBV, that variable is the headline. Generate six videos with the same template and music, varying only the headline text across them. After sufficient data has accumulated — typically at least 500 impressions per variant, though more is better — pause the underperformers and move the winning headline into the next round of testing where you vary the template style or CTA.

    Campaign Structure for Testing

    The cleanest testing structure is to run each video variation as a separate ad within the same campaign. This keeps targeting, bidding, and placement identical across all variants, ensuring that performance differences are attributable to the creative rather than any campaign-level variable. Amazon’s campaign manager allows multiple ad creatives within a single Sponsored Brands campaign; use this feature deliberately rather than running separate campaigns per variant, which introduces budget allocation and bid competitiveness variables that contaminate the creative signal.

    Setting a Decision Timeline

    Many brands make the mistake of pausing underperforming ads too early — pulling a video after 200 impressions when the data is still statistically noisy. The right decision timeline depends on your daily ad spend and how quickly you accumulate impressions. A campaign spending $100/day will reach meaningful sample sizes faster than one spending $20/day. As a general operating rule: don’t make pause decisions in the first 7 days of a new creative test regardless of what the numbers appear to be saying. Amazon’s ad delivery system needs time to calibrate placement and bidding for new creative; early results often don’t reflect steady-state performance.

    What to Learn, Not Just What to Test

    Each testing round should be generating a transferable insight. “Test C won” is not an insight. “Test C won, and its headline led with a specific product claim (‘melts in 45 seconds’) rather than a brand benefit (‘premium quality’), which suggests our audience at this placement responds to functional specificity over aspiration” — that’s an insight. Document every round at this level and you’ll accumulate a creative intelligence asset that pays dividends well beyond any individual campaign.

    The Common Template Mistakes That Kill Performance Before a Click

    The availability of fast, low-cost SBV production creates a new failure mode: brands are now making creative errors at scale, quickly, where before those errors were rare because production was prohibitively expensive. Understanding the most common template mistakes helps you avoid distributing bad creative efficiently.

    Relying on Product Images That Weren’t Built for Video

    The Video Generator pulls from your existing product images. These images were almost certainly photographed for a static context — designed to look good as a thumbnail in a listing grid, on a white background, isolated and clear. When those images are animated and sequenced in a 15-second video, the result often looks like a slideshow rather than a video. It’s technically compliant, but it lacks the visual momentum that makes video effective.

    The solution is to ensure your product image library includes at least a few lifestyle images — products in use, in context, against non-white backgrounds — before generating template videos. These images translate into far more compelling video frames than isolated white-background hero shots. This is a listing preparation task, not a video production task, and many brands overlook it entirely when they think about SBV readiness.

    Writing Headlines That Are Too Long

    The headline in an SBV plays over a moving image, often against a background that isn’t perfectly controlled for legibility. Long headlines — anything over 7–8 words — become difficult to read in the screen time available and compete with the visual for attention. The best-performing SBV headlines are short, specific, and instantly comprehensible. “Zero Sugar. Full Flavor.” beats “Our award-winning sports drink now comes in sugar-free formulations.” The former lands in one second. The latter requires three seconds of reading that most viewers won’t give you.

    Using the Same Video Everywhere

    Because production is now cheap, there’s no reason to run a single SBV across all placements, all keyword groups, and all stages of your funnel. A brand-awareness-mode video (looser, lifestyle-forward, emotional) is not the right creative for a shopping-mode placement against high-intent keywords. A direct-response video with a tight product claim and a “Shop Now” CTA is not the right creative for a PDP placement where the shopper needs more convincing. The template workflow makes it cheap to produce placement-specific and intent-specific creative; use that capability.

    Not Accounting for the Muted Autoplay Context

    SBV ads autoplay muted. The viewer has not chosen to engage with your ad; it simply started playing in their field of view. Every creative element that assumes audio — voiceover, sound effects, music that creates emotional context — is invisible to the majority of initial viewers. Your video must communicate its primary message through visuals and text alone. If the headline disappears and only the product remains on screen, can the viewer still understand what this product does and why they might want it? If the answer is no, the creative needs revision.

    Measuring SBV Template ROI: The Metrics That Actually Matter

    The new SBV creative tools solve a production problem, but they create a measurement responsibility. When creative was expensive, brands were careful about what they produced and watched performance obsessively. When creative is free and fast, it’s easy to keep generating videos without establishing a clear success definition. Don’t fall into this trap.

    New-to-Brand Metrics Are Non-Negotiable

    Amazon now exposes new-to-brand (NTB) metrics directly in Sponsored Brands reporting. These include: new-to-brand orders, new-to-brand order rate, new-to-brand sales, and new-to-brand orders as a percentage of total orders. These metrics use a 12-month lookback window — a customer counts as new-to-brand if they haven’t purchased from your brand in the prior 12 months.

    For any SBV campaign, NTB rate should be a primary KPI alongside ROAS. A campaign delivering strong ROAS but 100% to existing customers is doing remarketing work, not customer acquisition. That’s still valuable — but if your goal is growth, it’s a different strategic contribution than you think you’re making. SBV running a 38% NTB rate is growing your customer base; a campaign running 12% NTB is largely selling to people who would have bought from you anyway.

    Branded Search Lift as a Halo Signal

    One of the most underutilized measurements for SBV is tracking branded search volume before and after campaign launch. When SBV campaigns generate genuine brand awareness among new audiences, branded search volume typically rises — people who encountered the brand through video then search directly for it. This is a real signal that’s systematically excluded from ROAS calculations, because the branded SP campaign that captures that search gets credit rather than the SBV that created the intent.

    Monitor your branded search impression share and branded keyword conversion rates in parallel with SBV campaign performance. If both rise in the weeks after an SBV scale-up, you’re capturing brand equity that ROAS doesn’t show you. This matters enormously for justifying SBV budget at the senior level, where ROAS-only storytelling undervalues the format’s contribution.

    Video Engagement Metrics Inside Creative Studio

    Amazon provides video-specific performance metrics within Creative Studio, including video completion rate (what percentage of viewers watched to the end), average watch time, and impression-to-click ratios. These are leading indicators of creative quality. A video with a 12% completion rate is losing most viewers before they’ve received your message. A video with a 55% completion rate is generating extended brand exposure across every impression.

    Benchmarks vary by category and placement, but as a general orientation: below 20% completion rate suggests a first-scene problem (the opening frame isn’t holding attention); between 20–40% suggests a mid-video pacing or relevance problem; above 40% is solid and suggests the creative is genuinely engaging the audience it reaches.

    What’s Coming: The SBV Creative Roadmap

    Amazon’s investment in AI-assisted creative tools is accelerating, and the current Video Generator and Creative Agent workflows are early iterations rather than finished products. Understanding the direction of travel helps you build a creative infrastructure now that will adapt well to capabilities arriving in the next 6–18 months.

    Vertical Video for Mobile-First Placements

    The current SBV spec is 16:9 horizontal, which aligns with desktop viewing and traditional video production. But Amazon’s mobile traffic has been growing consistently, and social-platform mobile behavior — where vertical video is the default — is reshaping viewer expectations. Amazon has been signaling a move toward supporting vertical (9:16) video formats for mobile placements, similar to how Meta and TikTok have built mobile-native ad environments. Brands that begin thinking about their SBV creative in a mobile-first vertical format now will have an advantage when Amazon officially opens those placements.

    ASIN-to-Video Personalization at Scale

    The next maturity stage for the Video Generator is likely dynamic creative optimization at the ASIN level — where large catalog brands can generate video assets for dozens or hundreds of products simultaneously, with product-specific assets auto-generated from each ASIN’s unique images and copy. For brands with broad catalogs, this would represent a step-change in SBV coverage that currently requires significant manual work. Early agentic features in Creative Agent already hint at this direction.

    Streaming TV and the Full-Funnel Creative Stack

    Amazon’s broader creative strategy, as outlined at unBoxed 2025, is a full-funnel video stack that runs from Streaming TV and Prime Video ads (upper funnel, large-format) down through SBV (mid-funnel, search intent) to Sponsored Products Video (lower funnel, conversion intent). Creative Studio is being built to serve all of these formats from a single creative workspace. Brands that get efficient with SBV template production now are building institutional knowledge that will transfer directly to the broader video formats as Amazon’s programmatic video inventory expands.

    From Tool to Strategy: Putting the Workflow to Work

    The most important reframe for brands approaching the new SBV creative tools is this: the bottleneck has moved. It used to be production — getting video made was the hard part. That bottleneck is now effectively gone. The new bottleneck is strategy: knowing which products to prioritize, which creative angles to test, which placements to target, and how to read the measurement data to make better decisions in the next cycle.

    Brands that treat the Video Generator as a “set it and generate” solution will produce video ads they’re mildly satisfied with and wonder why performance doesn’t match the benchmarks. Brands that use the speed of the template workflow to run structured, systematic creative tests will accumulate learnings that compound over time — getting better at SBV with every iteration in a way that was simply not possible when each video cost $10,000 to produce.

    The tools are genuinely useful. But they’re the beginning of the work, not the end of it.

    Conclusion: 5 Actionable Takeaways

    Amazon’s new SBV creative tools represent a real shift in who can run Sponsored Brands Video effectively. The production barrier — the one that kept most small and mid-size brands from competing in the format — is functionally gone. But removing a barrier doesn’t guarantee results. Here is what to actually do with this new capability:

    1. Audit your product images before touching Creative Studio. The Video Generator is only as good as the assets on your listing. Lifestyle images, in-use photography, and diverse angles produce far better video output than white-background hero shots. Fix the inputs before generating the output.
    2. Use the Quick Video template path for testing volume and Creative Agent for narrative-driven launch creative. They’re complementary tools, not competing ones. Let the template path generate your testing variants cheaply; use Creative Agent when you need a truly differentiated hero creative for a major campaign.
    3. Make the headline your primary creative variable. It’s what you control most, it’s what viewers read first, and it’s where small changes produce measurable performance differences. Test it systematically and document what you learn.
    4. Add new-to-brand metrics to every SBV campaign report. ROAS alone misrepresents SBV’s contribution. NTB rate tells you whether the campaign is growing your customer base or recycling it. Both matter; neither tells the whole story without the other.
    5. Start building the habit now. The brands that will have durable advantage in SBV over the next 12–24 months are the ones building creative testing data, NTB benchmarks, and placement performance intelligence today. The tools are early. The learning curve is real. Get on it ahead of your competitors rather than after them.

    The template workflow makes SBV accessible. What you do with that access is still a strategic choice. Make it deliberately.

  • When Agents Work Together: The Engineering Reality of Robust Multi-Agent Pipelines

    When Agents Work Together: The Engineering Reality of Robust Multi-Agent Pipelines

    Multi-agent pipeline architecture diagram showing orchestrator, researcher, validator, executor, and review agents connected by directed handoff edges with status indicators

    There is a moment every team hits, usually around their third or fourth agent in production, when the system stops behaving like software and starts behaving like a group of colleagues who haven’t been properly briefed. An agent hands off a half-baked result. Another agent accepts it without checking. A third goes quietly off-script. By the time anyone notices, the pipeline has produced something technically complete and factually wrong — and nobody can explain how.

    This is the coordination tax. It doesn’t show up in demos. It doesn’t appear in benchmark scores. It surfaces in production, at scale, after you’ve already committed to the architecture.

    The shift to multi-agent systems was supposed to solve problems that single agents couldn’t: parallelism, specialization, long-horizon task decomposition. And it does solve those things — when the orchestration layer is designed as carefully as the agents themselves. The trouble is that most teams spend 90% of their effort on the agents and about 10% on what happens between them.

    This post is about that 10%. It covers the topology choices that determine how failure propagates, the state management patterns that make pipelines recoverable, the protocol stack that is rapidly becoming the enterprise standard for agent coordination, the six failure modes that quietly destroy multi-agent pipelines in production, and the observability and security work that most teams skip until something breaks badly enough to force them back to first principles.

    If you’ve already deployed agentic workflows and found the complexity growing faster than the value, this is the engineering perspective you were missing at the start.

    What “Post-Agentic” Actually Means — and Why the Terminology Matters

    The phrase “post-agentic orchestration” is doing real conceptual work, not just following a naming trend. It marks a specific inflection point in how teams think about AI systems.

    The first wave of agentic AI — roughly 2023 to mid-2025 — was characterized by what might charitably be called optimistic autonomy. Teams built agents and let them route their own decisions. The LLM chose the next tool. The LLM chose when to stop. The LLM decided which result was good enough to pass downstream. Frameworks like early LangChain made this easy to set up and very hard to reason about in production.

    Post-agentic orchestration rejects that premise. It treats agents as specialized components inside a larger, explicitly governed workflow — not as autonomous actors that happen to share a pipeline. The LLM is still doing the hard cognitive work, but the control flow, the handoff logic, and the state transitions are defined in code, not inferred at runtime by a model.

    The Distinction That Actually Changes Your Architecture

    Anthropic’s engineering team captured this distinction cleanly in their work on building effective agents: workflows are systems where LLMs and tools are orchestrated through predefined code paths, while agents are systems where LLMs dynamically direct their own processes. Both are valid. The question is which one you need for a given task — and most teams reach for the autonomous agent when a well-structured workflow would be more reliable, cheaper to run, and easier to debug.

    Post-agentic orchestration is the recognition that in most enterprise contexts, you want agents to be excellent at their specific tasks while the orchestrator — not the agent — decides what happens next. This isn’t a step backward from agentic AI. It’s what agentic AI looks like when it grows up.

    Why the Terminology Matters Beyond Semantics

    When you call something an “agent,” there’s an implicit expectation of autonomy and self-direction. When you frame it as a “component in an orchestrated pipeline,” the design questions change immediately: What inputs does this component require? What outputs does it guarantee? How does it signal failure? What authority does it have to make side effects?

    These are not LLM questions. They are distributed systems questions — and that’s exactly the lens that 2026’s most reliable multi-agent pipelines are being built with. Production teams in 2026 are increasingly treating multi-agent pipelines less like prompt chains and more like distributed microservice architectures, applying the same engineering rigor around contracts, state, retries, and observability.

    The Four Topology Choices — and When Each One Breaks

    Comparison diagram of four multi-agent topology patterns: linear chain, hierarchical orchestrator-worker, peer-to-peer mesh, and directed acyclic graph

    Before you write a single line of orchestration code, the most consequential decision you’ll make is your topology. How agents are connected determines how errors propagate, how context flows, how parallelism works, and ultimately how much you can recover when something goes wrong.

    There are four dominant topologies in production multi-agent systems, and each has a specific failure profile that’s worth understanding before you commit.

    Linear Chains: Simple to Build, Brittle to Operate

    A linear chain is the default topology most teams reach for first. Agent A passes output to Agent B, which passes to Agent C, and so on. It’s intuitive, easy to reason about, and maps cleanly to sequential tasks like “research, then draft, then review.”

    The problem is error propagation. In a linear chain, a degraded output from Agent B doesn’t just produce a worse result at step C — it actively misdirects Agent C, which may then produce a confident but incorrect output that propagates to D. Research from fault-injection studies on MetaGPT-style linear architectures shows near-total cascade collapse under certain failure modes, because there is no mechanism to intercept an error mid-chain without discarding all downstream work.

    Linear chains are appropriate for tasks that decompose cleanly into sequential steps where each step is deterministic and the output of each step is easy to validate programmatically. When steps involve LLM judgment calls, you need gates — explicit programmatic checks that validate intermediate outputs before passing them downstream. Without gates, a linear chain is a cascade-failure machine waiting to be triggered.

    Hierarchical Orchestrator-Worker: The Production Workhorse

    The hierarchical pattern puts a dedicated orchestrator agent at the top of the stack. The orchestrator plans, routes, and assembles — but doesn’t execute domain tasks. Worker agents below it handle specialized execution: a research agent, a calculation agent, a writing agent, a validation agent. Results flow back up to the orchestrator, which decides what to do next.

    This topology is the most widely adopted in enterprise production deployments in 2026 for a simple reason: it localizes failure. When the research agent fails, the orchestrator knows it, can retry with a different strategy, and the writing agent never sees a degraded input it wasn’t designed to handle.

    The orchestrator-worker pattern’s weakness is the orchestrator itself becoming a bottleneck — both in terms of latency (everything passes through it) and in terms of cognitive load (the orchestrator’s context window fills with accumulated task state across long workflows). Teams address this with sub-orchestrators: smaller orchestrators that manage subsections of the workflow and report aggregated results upward, creating a two-level or three-level hierarchy.

    Peer-to-Peer Mesh: Theoretically Flexible, Practically Dangerous

    In a mesh topology, agents can communicate directly with each other without routing through a central orchestrator. An agent can request help from any peer, delegate subtasks laterally, and receive results from multiple sources simultaneously.

    The appeal is flexibility and low latency for certain coordination patterns. The reality in production is complexity explosion. Debugging a failure in a mesh is extremely difficult because you lose the single path of execution that you could trace. Circular delegation — where Agent A asks Agent B, which asks Agent C, which asks Agent A — becomes possible and is surprisingly hard to prevent without explicit cycle detection. Trust boundaries become ambiguous because any agent can communicate with any other.

    Mesh topologies remain mostly in research contexts or in tightly scoped, well-instrumented production deployments. Most teams who start with mesh architecture migrate toward hierarchical or graph-based designs after their first significant production incident.

    Graph (DAG) Topologies: The Most Resilient, the Hardest to Design

    Directed Acyclic Graph (DAG) topologies model the workflow as an explicit graph of nodes and edges, where each node is an agent or tool invocation and each edge represents a data dependency or control flow transition. Branches, merges, conditional routing, and parallel execution are all native to the model.

    Iterative, closed-loop designs built on DAG principles neutralize over 40% of faults that cause catastrophic collapse in linear workflows, according to recent fault-injection research. The reason is structural: a DAG forces you to design explicit merge points, where outputs from parallel branches are combined and validated before proceeding, and explicit conditional branches, where the next node is chosen based on structured evaluation of the previous result.

    The cost is design complexity upfront. Building a good DAG requires you to model your workflow as a proper state machine before you build it — which is uncomfortable for teams that want to iterate rapidly. The payoff at scale is substantial. Frameworks like LangGraph have emerged specifically to make DAG-based multi-agent pipelines manageable, offering graph-based workflow definition with built-in checkpointing and state management.

    State Management: The Hidden Load-Bearing Wall

    Diagram showing multi-agent shared state management with schema-enforced state store, color-coded successful and failed state transitions, and rollback mechanism

    If topology determines how failure propagates, state management determines whether you can recover from it. And in most multi-agent systems built in 2024 and early 2025, state was an afterthought — which is why so many of those systems are being rewritten in 2026.

    State in a multi-agent pipeline has three distinct layers, and conflating them is one of the most common architectural mistakes teams make.

    Layer 1: Conversational Context

    This is the in-context memory each agent carries — the accumulated messages, tool results, and instructions that fit within its context window. Conversational context is ephemeral: it dies when the agent call ends, and it doesn’t survive restarts, retries, or handoffs unless you explicitly pass it forward.

    Many teams treat conversational context as if it were workflow state, passing the full conversation history as a handoff payload from agent to agent. This creates two problems. First, context windows fill up — a five-hop agent pipeline passing full history at each step is burning tokens on information most downstream agents don’t need. Second, the receiving agent has no structured way to identify which parts of the history are relevant to its task.

    The production pattern is to summarize or extract structured outputs at each hop, passing only the typed data the next agent actually requires, not the full conversational trace. This requires more upfront schema design but dramatically improves reliability and cost efficiency.

    Layer 2: Workflow State

    Workflow state is the persistent, typed record of what has happened in the pipeline so far — completed steps, intermediate results, branching decisions, and retry counts. This is the layer that makes recovery possible.

    The non-negotiable property of production workflow state is durability. If a worker agent crashes mid-execution, the orchestrator needs to know what was completed, what was not, and what inputs the failed step received — so it can retry without re-running everything from scratch. Without durable workflow state, any failure resets the entire pipeline.

    The 2026 production standard is schema-enforced shared state with explicit write semantics. Every state mutation is typed, validated, and logged. Agents don’t write arbitrary key-value data to a shared store — they emit structured state transitions that the orchestrator validates before they’re committed. This is the same pattern used in event sourcing and CQRS architectures, and it maps directly onto multi-agent pipelines because the fundamental problem — distributed components modifying shared state — is identical.

    Layer 3: External Side Effects

    Side effects — database writes, API calls, emails sent, files written — are the most dangerous category of state because they cannot be easily rolled back. A multi-agent pipeline that makes an external write halfway through and then fails faces a partial commitment problem that’s familiar to anyone who has debugged a distributed transaction.

    The pattern that works is treating all external side effects as idempotent operations with explicit rollback plans. Every tool call that touches external state should have an idempotency key, a confirmation step before execution, and a logged record of what was written. Agents should not be given open-ended write access to external systems — they should have scoped, validated, reversible write capabilities that the orchestrator controls. This isn’t overcaution; it’s the baseline requirement for operating any distributed system reliably.

    MCP and A2A: How the Protocol Stack Changes Your Design Decisions

    Split-screen diagram showing MCP protocol for agent-to-tool connections versus A2A protocol for agent-to-agent coordination, labeled as complementary standards

    Through the first half of 2026, the multi-agent protocol landscape consolidated faster than most analysts expected. Two standards now dominate, and understanding exactly what each one does — and what it doesn’t do — is essential for designing systems that will survive vendor changes and ecosystem shifts.

    MCP: The Tool Access Layer

    The Model Context Protocol (MCP), originally released by Anthropic and now stewarded by the Linux Foundation’s Agentic AI Foundation (AAIF), standardizes how agents access external tools and data sources. An MCP server exposes capabilities — search, code execution, database queries, file operations — in a structured, discoverable format. An MCP client (the agent) can query which tools are available, understand their input/output contracts, and invoke them without bespoke integration code for each tool.

    The practical impact is significant. Before MCP, every new tool integration required custom code in every agent framework that wanted to use it. With MCP, a tool server is written once and consumed by any MCP-compatible agent. This dramatically reduces the integration tax when adding new capabilities to a multi-agent pipeline.

    What MCP does not do is handle coordination between agents. It’s a tool access layer, not a coordination layer. An agent using MCP is still making its own decisions about which tools to call and in what order — MCP just makes those tools universally accessible.

    A2A: The Agent Coordination Layer

    The Agent-to-Agent (A2A) protocol, which hit v1.0 and formal AAIF governance in mid-2026, addresses exactly the coordination gap that MCP leaves open. A2A defines how agents discover each other, delegate tasks, communicate progress, and exchange results — across vendor boundaries, across cloud environments, and across different underlying model providers.

    With A2A, an orchestrator agent can discover available worker agents, query their capabilities in a structured format, delegate a task with a typed payload, receive streaming progress updates, and get a structured result back — all without needing to know which framework the worker agent was built on, which model it’s running, or which cloud it’s deployed to.

    This interoperability matters enormously as enterprise multi-agent systems grow larger. Without a standard, every agent-to-agent interaction requires bespoke integration. With A2A, a financial services firm can compose a multi-agent pipeline that includes agents from multiple vendors without building custom coordination logic for each pair.

    As of mid-2026, over 150 organizations are actively supporting A2A as a standard, and the protocol is in production use across financial services, supply chain, healthcare, and IT operations. All major cloud providers have announced or deployed A2A support.

    The Design Decision the Standards Create

    The practical implication for architects is that the 2026 enterprise multi-agent stack uses MCP for tool access and A2A for agent coordination. These are not competing choices — they operate at different layers. An agent might use MCP to call a web search tool while using A2A to delegate a research subtask to a specialized research agent that happens to be running in a different environment.

    The key design implication is that both protocols push you toward explicit interface contracts. MCP requires you to define tool schemas. A2A requires you to define agent capability cards and task schemas. This overhead in the design phase pays dividends when you need to swap out a component, debug a failure, or audit what happened in a pipeline run.

    The Six Failure Modes That Kill Multi-Agent Pipelines in Production

    Production data from 2025 and early 2026 has produced much cleaner taxonomies of multi-agent failure than were available when these architectures first emerged. The picture that emerges is that model quality accounts for a relatively small share of failures. The dominant causes are architectural and operational — which means they’re preventable with better design.

    Failure Mode 1: Specification Drift

    Specification drift happens when agents are given instructions that are underspecified, internally inconsistent, or that conflict with each other’s goals. In a single-agent system, this produces a confused output. In a multi-agent system, it produces a pipeline where each agent is confidently executing a subtask that doesn’t align with what the other agents are doing.

    The symptom is pipeline outputs that are technically complete but systematically wrong in ways that are hard to pinpoint. Each agent’s output, evaluated individually, looks reasonable. The failure is in the gap between individual correctness and collective coherence.

    Prevention requires treating agent specifications as a system-level design artifact, not as individual prompt engineering. Every agent’s role, scope, inputs, outputs, and success criteria should be designed in relation to every other agent in the pipeline. Contradictions should be resolved before deployment, not discovered in production.

    Failure Mode 2: Context Starvation

    A downstream agent produces a degraded output not because its instructions are wrong, but because it received insufficient context to work with. The handoff payload from the upstream agent was too sparse — either because the upstream agent summarized too aggressively, or because the pipeline architecture never defined what a complete handoff payload looks like.

    Context starvation is insidious because it looks like a quality problem, not a coordination problem. Teams typically respond by improving the model or the prompts on the receiving agent, when the actual fix is in the handoff contract between agents.

    Failure Mode 3: Hallucination Amplification

    Single-agent hallucinations are well understood and manageable with appropriate retrieval and verification. Multi-agent hallucinations compound in ways that are much harder to intercept. A factual error produced by Agent A is accepted by Agent B, which builds analysis on top of it. Agent C receives the compounded error as an established fact and generates confident conclusions from it. By the time the hallucination reaches the end of the pipeline, it has the authority of several independent confirmations — none of which were actually independent.

    The mitigation is explicit verification gates at each pipeline stage. Outputs that will be passed as inputs to downstream agents should be validated against source data or external checks before handoff. This adds latency but substantially reduces the probability of compounded error. Some teams run a dedicated “skeptic agent” whose only job is to challenge and verify upstream outputs before they propagate.

    Failure Mode 4: Runaway Delegation

    This failure mode is unique to multi-agent systems. An orchestrator delegates a task to a worker. The worker, lacking clear boundaries, delegates subtasks to other workers. Those workers spawn additional subtasks. The result is an exponentially growing tree of agent invocations consuming tokens and API calls without producing a useful result, and without any mechanism for the original orchestrator to recognize or interrupt the runaway.

    Prevention requires explicit delegation budgets enforced at the orchestration layer: maximum depth of delegation, maximum number of total agent invocations per workflow, and timeout mechanisms that escalate to human review rather than silently consuming resources.

    Failure Mode 5: Coordination Deadlock

    Two or more agents that depend on each other’s outputs can enter a state where neither can proceed — a classic distributed systems deadlock translated into the agent context. This is particularly common in peer-to-peer topologies where agents have been given bidirectional communication channels without explicit sequencing rules.

    The solution is the same one distributed systems engineers have applied for decades: define dependency graphs explicitly before execution, detect circular dependencies at design time, and use timeout-with-escalation rather than indefinite waiting.

    Failure Mode 6: Silent Tool Failure

    A tool called by an agent returns an error or a malformed result. The agent, not designed with robust error handling, either proceeds with the bad data or silently produces a null-equivalent response. The orchestrator has no signal that anything went wrong. The pipeline completes. The output is garbage.

    Every tool invocation in a production multi-agent pipeline needs explicit success/failure semantics: structured error returns, retry policies with backoff, and escalation paths that surface failures to the orchestrator rather than burying them inside agent context. This is basic defensive programming applied to tool calls — but it’s absent in a surprising proportion of production agent implementations.

    Fault Tolerance Without Drama: Circuit Breakers, Dead Letters, and Checkpoints

    Recognizing failure modes is the diagnosis. Circuit breakers, dead letter handling, and checkpointing are the treatment — the engineering patterns that transform a fragile chain of agents into a system that fails gracefully and recovers predictably.

    Circuit Breakers for Agent Calls

    Borrowed from distributed systems engineering, a circuit breaker monitors the failure rate of a downstream component. When failures exceed a threshold, the circuit “opens” — calls to that component are rejected immediately rather than allowed to block and consume resources. After a cooldown period, the circuit enters a half-open state where limited calls are allowed to test recovery.

    Applied to multi-agent pipelines, this means the orchestrator maintains health metrics for each worker agent: failure rate, latency, and error types. A worker agent that is consistently failing, slow, or producing malformed outputs triggers the circuit breaker, routing those tasks to a fallback agent or escalating to human review. This prevents a single degraded component from consuming the entire pipeline’s resources and producing corrupted outputs that contaminate downstream processing.

    Dead Letter Handling

    In message queue architectures, a dead letter queue captures messages that couldn’t be successfully processed after a configured number of retries. The equivalent in multi-agent pipelines is a dead letter store for tasks that have exhausted their retry budget without producing a valid output.

    Dead letter handling requires you to design your pipeline with three things: explicit retry limits per task, a structured failure payload that captures what was attempted and why it failed, and a process for handling dead-lettered tasks — whether that’s human review, an alternative agent path, or graceful degradation of the final output.

    Teams that omit dead letter handling typically discover this gap when a task quietly disappears from their pipeline — consumed by retries, never completed, and never surfaced as a failure because there was no mechanism to surface it.

    Checkpointing and Durable Execution

    A checkpoint is a persisted snapshot of workflow state at a specific point in pipeline execution. If the pipeline fails after a checkpoint, recovery resumes from the checkpoint rather than from the beginning. In long-running multi-agent workflows — which can span minutes to hours and may involve dozens of API calls and LLM invocations — the economics of checkpointing are straightforward: the cost of persisting state at each major step is a fraction of the cost of re-running the entire workflow on failure.

    The engineering implementation requires idempotent step execution: each step, if re-run from a checkpoint, should produce the same result it produced the first time. This means tool calls need idempotency keys, and LLM calls that depend on non-deterministic results need to have their outputs captured in state rather than re-generated on retry.

    Production frameworks including LangGraph and Temporal are seeing adoption specifically because they provide built-in checkpointing, durable state persistence, and replay semantics — effectively bringing durable execution patterns from workflow orchestration systems into the agent layer.

    Observability Is Not Optional: Tracing Handoffs Across Agent Boundaries

    Multi-agent observability dashboard showing hierarchical trace waterfall with orchestrator parent span, child agent spans, tool call details, error highlighting, and key metrics

    The phrase “observability” in the context of single-agent systems typically means logging LLM calls and tracking token usage. In multi-agent systems, this is wildly insufficient — because the failures that matter most happen at the boundaries between agents, not inside them.

    What Handoff-Aware Tracing Actually Requires

    Standard distributed tracing concepts apply directly to multi-agent pipelines, with some necessary extensions. A trace represents a complete pipeline execution from the initial task trigger to the final output. Spans within that trace represent individual agent invocations, tool calls, and handoffs. The critical requirement is that the trace ID propagates across every handoff — so you can reconstruct the complete causal chain of what happened and in what order, even when agents are running in parallel across different compute resources.

    Handoff-aware tracing needs to capture more than just timing: it needs the structured payload that was passed at each handoff (what data moved between agents), the decision logic that triggered the handoff (what condition in the orchestrator caused it to route to this agent), and the success/failure status of each agent’s execution. Without this, debugging a multi-agent pipeline failure is guesswork.

    OpenTelemetry is emerging as the baseline for multi-agent tracing in 2026, with GenAI-specific semantic conventions being standardized to cover LLM calls, tool invocations, and agent spans. Major APM vendors including Datadog, Honeycomb, and New Relic have shipped first-class multi-agent trace views — hierarchical UIs that show the full tree of agent invocations, collapsed by agent type, with drill-down into individual LLM calls and tool results.

    Evaluation in the Trace Loop

    The most sophisticated production teams in 2026 are coupling observability with automated evaluation — running quality assessments on agent outputs as part of the trace pipeline, not as an offline batch process. This means every agent handoff can be scored against defined quality criteria in near-real time, with quality regressions surfaced as trace annotations rather than discovered hours later through downstream complaints.

    The practical implementation is an evaluation span inserted after each significant agent output: a lightweight LLM call or rule-based check that scores the output and appends the score to the trace. When quality drops below a threshold, the orchestrator is notified immediately and can route to a fallback strategy rather than propagating a degraded result.

    What “57%” Means in Practice

    As of 2026, 57% of organizations report using AI agents in production — up from 51% the prior year. But the same surveys show that detailed multi-agent tracing and production-grade guardrails remain significant gaps in most deployments. The gap between “we have agents running” and “we can see what they’re doing and respond to problems” is where the majority of multi-agent production failures originate. Organizations that treat observability as a day-one requirement rather than a future iteration consistently report fewer production incidents and faster time-to-resolution when incidents do occur.

    Security at the Seams: Trust Boundaries in Multi-Agent Systems

    Security architecture diagram for multi-agent systems showing zero-trust trust boundaries, agent identity tokens, least-privilege tool access, and prompt injection threat blocked at perimeter

    Multi-agent systems introduce security risks that simply don’t exist in single-agent architectures. The most significant of these is cross-agent prompt injection — and it’s rapidly becoming the primary security concern for enterprise AI deployments in 2026.

    Cross-Agent Prompt Injection: Why It’s Worse Than You Think

    A prompt injection attack in a single-agent system involves a malicious instruction embedded in external data — a document, a webpage, a user message — that overrides the agent’s intended behavior. The blast radius is limited to that single agent’s actions.

    In a multi-agent system, prompt injection can cascade. Malicious instructions injected into one agent’s context can be passed forward as legitimate task data to downstream agents, which execute the injected instructions with the full authority of their role in the pipeline. An instruction injected into a research agent can travel downstream to an executor agent that has write access to production systems — bypassing every security control that was applied only at the entry point.

    The security community’s consensus in 2026 is to treat every inter-agent message as potentially untrusted data, regardless of its source. This is a zero-trust model applied to agent communication: the fact that a message came from another agent in your pipeline is not sufficient authorization to execute instructions it contains without validation.

    Agent Identity and Least-Privilege Access

    A2A v1.0 addresses the identity problem directly. Under the A2A model, agents have structured identity credentials — capability cards that define what they are authorized to do. Orchestrators can verify agent identity before delegating tasks, and agents can verify the identity and authority of the orchestrators directing them.
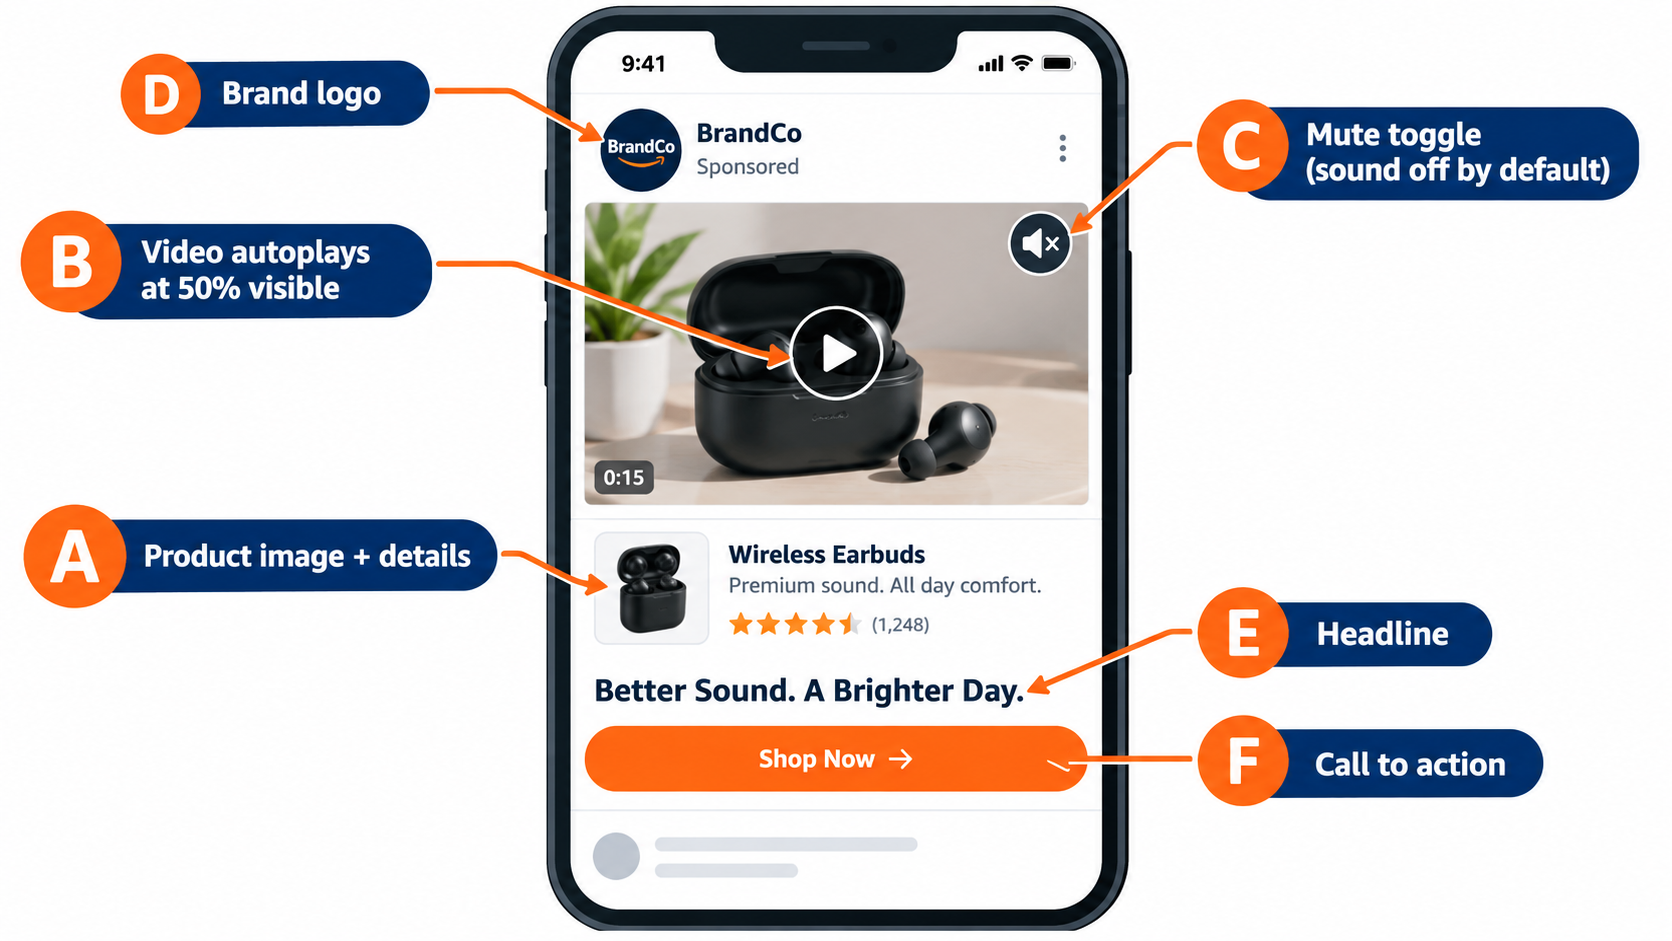
    The least-privilege principle applies to both tool access and inter-agent delegation. A research agent should have read access to the data sources it needs and nothing else. An executor agent should have the minimum write permissions necessary for its specific tasks, scoped to specific resources rather than broad categories. An agent should never be granted the authority to delegate to other agents with broader permissions than its own.

    These principles are straightforward to state and non-trivial to implement — particularly in systems that were built before these security requirements became clear. Retrofitting zero-trust agent identity into an existing multi-agent pipeline is substantially harder than designing it in from the start, which is why security architecture needs to be a first-class consideration before the first agent is deployed.

    Audit Logging as a Security Requirement

    Every inter-agent handoff, every tool invocation, every delegation decision, and every external side effect should be logged in an immutable audit trail. This is not just an observability requirement — it’s a security requirement. When a multi-agent pipeline is used as an attack vector (or when internal misuse needs to be investigated), the audit log is the primary forensic artifact.

    Audit logs for multi-agent systems should include the agent identity at each step, the authority chain (which agent authorized which action), the inputs and outputs at each boundary, and timestamps with sufficient resolution to reconstruct the sequence of events. Teams that have invested in this infrastructure consistently find it invaluable when incidents occur — and worth the engineering cost several times over in the first incident it helps resolve.

    Governance, Human-in-the-Loop, and the Autonomy Dial

    One of the harder design decisions in any multi-agent system is calibrating how much autonomy to grant the pipeline — and where to insert human judgment into the loop. This isn’t primarily a safety question (though it is that too). It’s a reliability question.

    Designing the Autonomy Spectrum

    Think of pipeline autonomy as a dial with five settings:

    • Fully Supervised: Human approves every agent action before execution. Maximum control, zero throughput at scale.
    • Step-Gated: Human approves outputs at defined checkpoints — before a task moves to the next major phase. Appropriate for high-stakes workflows.
    • Exception-Based: Pipeline runs autonomously unless a predefined condition (confidence below threshold, cost above budget, novel situation detected) triggers human escalation. The production-grade default for most enterprise workflows.
    • Audit-Only: Pipeline runs fully autonomously; humans review logs after the fact. Appropriate for low-stakes, high-volume, reversible tasks.
    • Fully Autonomous: No human in the loop. Appropriate only for tasks where errors are easily detected and corrected automatically, and where the cost of human review exceeds the cost of occasional errors.

    Most production multi-agent pipelines in 2026 operate at the exception-based level for routine tasks, with step-gating for high-stakes actions and a clear escalation path to human review. The fully autonomous setting is deployed cautiously and usually for well-understood, high-volume, low-consequence tasks where the pipeline has demonstrated sustained reliability over thousands of runs.

    What Good Human-in-the-Loop Design Looks Like

    Human-in-the-loop is often implemented as a checkbox — “we’ll add a review step before final output.” This is better than nothing but misses the point of where human judgment actually adds value in a multi-agent pipeline.

    Effective HITL design identifies the specific decision points where human judgment has a comparative advantage over the pipeline’s automated judgment. These tend to be: decisions involving novel situations the pipeline hasn’t encountered before, decisions with large, hard-to-reverse consequences, decisions involving stakeholder relationships that require human context, and decisions where the pipeline’s confidence is genuinely uncertain rather than falsely confident.

    At these specific points, the human reviewer should be given a structured interface that surfaces the relevant context, the pipeline’s proposed action, the confidence level, and the alternatives considered — not a raw dump of agent logs. The quality of human-in-the-loop oversight depends almost entirely on the quality of the interface that surfaces the decision to the reviewer.

    Governance Frameworks Are Becoming Mandatory

    As multi-agent systems grow in scope and consequence, governance is transitioning from best practice to regulatory requirement. Financial services, healthcare, and government deployments in particular are seeing explicit requirements around audit trails, decision explainability, and human oversight for consequential AI-driven actions.

    The architectures that handle this well are those that built governance in from the beginning — where audit logs are complete, where the authority chain for every action is traceable, and where human escalation paths exist and are tested regularly. The architectures that handle this poorly are those that treated governance as documentation work to be done after the pipeline was built, only to discover that the system’s decisions cannot be adequately explained or audited after the fact.

    Building Your First Production-Grade Pipeline: A Decision Framework

    Translating the above into practical guidance requires answering a specific sequence of questions before a single agent is instantiated. The following framework is designed for teams moving from prototype to production.

    Step 1: Justify the Multi-Agent Architecture

    Start with the hardest question: does this task actually require multiple agents? Anthropic’s engineering team observed that the most successful implementations they worked with started with the simplest possible architecture and added complexity only when clearly needed. A single well-designed LLM call with good retrieval will outperform a fragile multi-agent pipeline for tasks that are genuinely sequential and don’t require parallelism or specialization.

    Multi-agent architectures add justified value when: the task requires genuine specialization that would degrade under a single generalist agent, when parallelism would materially reduce latency, when the workflow is too long to fit in a single context window, or when different parts of the task have different reliability requirements that require different validation strategies.

    Step 2: Choose Your Topology Before Writing Code

    Map the task’s dependency structure. If steps are sequential and deterministic, a chain with gates may be sufficient. If steps require parallelism and a single coordination point, hierarchical orchestrator-worker is your default. If the workflow has conditional branching, merging parallel results, and loop-back conditions, design a DAG from the start — even if the initial implementation is simpler.

    Step 3: Define Your State Schema

    Write the typed schema for your workflow state before writing any agent code. What fields does the pipeline state contain? What are their types? Which agents can read which fields? Which agents can write which fields? What constitutes a valid state transition? This schema is your contract — it will surface conflicts in your design before they become runtime failures.

    Step 4: Define Handoff Contracts for Every Agent Boundary

    For every agent-to-agent transition in your pipeline, define: what structured data is passed in the handoff payload, what the receiving agent is expected to do with it, and what a valid output from the receiving agent looks like. These contracts should be validated programmatically at runtime, not just described in documentation.

    Step 5: Design Failure Handling Before You Design Happy Path

    For each agent and each tool call in your pipeline, define: what happens when it fails once, when it fails repeatedly, when it times out, and when it produces a result that fails quality validation. Build the retry policies, circuit breakers, dead letter handlers, and escalation paths before you build the primary execution logic. This inversion feels counter-intuitive but prevents the most common production failures in multi-agent systems.

    Step 6: Instrument Everything Before Deployment

    Define your trace structure, your key metrics (latency per agent hop, token cost per workflow run, failure rate per agent type), and your quality evaluation hooks before the pipeline goes to production. The cost of adding observability after the fact — especially in a system already handling production traffic — is substantially higher than building it in during initial development.

    The Shift Happening Underneath the Surface

    The most important development in multi-agent AI through 2026 isn’t any specific protocol, framework, or model capability. It’s an epistemological shift in how engineering teams think about these systems.

    The first generation of multi-agent builders asked: “What can this agent do?” The post-agentic generation asks: “How does this pipeline behave as a system?” The first question leads to impressive demos. The second question leads to reliable production systems.

    This shift is visible in how organizations are staffing these efforts. Teams that are succeeding with multi-agent pipelines in production have deliberately mixed profiles: AI engineers who understand model behavior, infrastructure engineers who understand distributed systems reliability, and platform engineers who understand tooling, observability, and developer experience. Teams staffed entirely with AI specialists consistently hit the same distributed systems problems from scratch — not because those problems are novel, but because they weren’t expecting to encounter them in an AI project.

    The systems that will define the standard for reliable multi-agent AI in the years ahead are being built right now by teams who are applying that mixed perspective — treating agent orchestration as a serious engineering discipline, not as an extension of prompt engineering. The design decisions they’re making today around topology, state management, protocols, fault tolerance, observability, and security will determine which systems are still running reliably two years from now.

    Conclusion: What Robust Actually Means for Multi-Agent Pipelines

    The word “robust” is overloaded in AI conversations. In the multi-agent context, it has a specific, testable meaning: a pipeline is robust if it produces correct outputs reliably, fails gracefully when components degrade, recovers predictably from failures without human intervention, surfaces the information needed to diagnose and fix problems when they occur, and does not create new security exposures through the coordination mechanisms it relies on.

    None of those properties emerge from building good agents. They emerge from designing good systems — systems built on explicit topologies, durable state management, standardized protocols, comprehensive fault handling, first-class observability, and zero-trust security boundaries.

    The coordination tax is real. But it is not fixed. It shrinks dramatically when the orchestration layer receives the same engineering attention that the agents themselves receive. The teams who have internalized this are building something qualitatively different from the teams still treating orchestration as plumbing — and the gap between them will only widen as multi-agent systems take on more consequential tasks.

    Actionable Takeaways

    • Audit your current topology. If you’re running linear chains without programmatic gates, you have latent cascade failure risks. Map your dependency graph explicitly.
    • Define your state schema before your next agent. Every field, every type, every write permission. This single artifact will prevent more runtime failures than any amount of prompt engineering.
    • Implement MCP for tools, A2A for agents. The protocol stack is stable enough to build on. Bespoke integrations are now technical debt.
    • Build failure handling before happy path. Retry policies, circuit breakers, dead letter handlers, and escalation paths are not optional features — they’re what separates a demo from a production system.
    • Add handoff-aware tracing on day one. The cost of retroactive instrumentation is three to five times higher than building it in during initial development.
    • Treat every inter-agent message as untrusted. Zero-trust agent identity is not paranoia — it is the appropriate security posture for systems that accept external data at any point in their pipeline.
    • Calibrate your autonomy dial deliberately. Exception-based human escalation is the production-grade default for most enterprise workflows. Fully autonomous should be earned through demonstrated reliability, not assumed.
  • Rufus-Era Image Testing: How to Build Fast Loops That Actually Ship Winners

    Rufus-Era Image Testing: How to Build Fast Loops That Actually Ship Winners

    Most Amazon sellers treat image testing like spring cleaning — something you do once, maybe twice a year, when conversion rates slide far enough to cause real pain. Then Rufus arrived. And then Rufus became Alexa for Shopping. And quietly, without a policy announcement or a seller forum explosion, the way the platform’s AI reads and ranks product listings fundamentally shifted.

    Images are no longer just conversion assets. They are data inputs. Amazon’s shopping AI now runs optical character recognition across your packaging, applies vision-language models to understand scene context, and stitches together every image in your stack to build a holistic profile of what your product actually is — independent of whatever your title and bullets say. If your images and your copy disagree, the AI notices. If your images don’t answer the questions shoppers are actually asking, you lose the recommendation slot.

    That changes everything about how image testing should work. Not just what you test, but how fast you test it, when you ship winners, and how you build programs that compound rather than plateau. Most sellers who are running image tests at all are running them too slowly, testing the wrong variables, and waiting too long to act on results they already have. The ones pulling ahead are treating image testing as a continuous operational loop — hypothesis in, data out, winner shipped, next loop started.

    This article is about building that loop. Not the theory of it — the actual mechanics: traffic thresholds, cadence decisions, stack architecture, reading MYE results without overthinking them, and building a catalog-wide program from individual test wins.

    Infographic showing how Amazon Rufus AI reads product images using OCR, vision-language models, object detection, and holistic stack analysis

    What Rufus’s Successor Actually Does with Your Images

    Amazon rebranded Rufus to Alexa for Shopping in May 2026, but the underlying multimodal AI architecture is the same, and for most sellers the rebrand is less important than understanding what the system actually does when it encounters a product listing. The short version: it reads everything, synthesizes it, and makes decisions about which products to surface based on how well the listing answers the inferred intent of a shopper’s query.

    OCR: Your Packaging Text Is Now Ranking Data

    Alexa for Shopping uses optical character recognition to extract text directly from your product images. This means the text on your label, the callouts on your infographic, the size dimensions printed on your packaging, the certifications printed in your corner badge — all of it is being read as structured data. Amazon’s computer vision stack can extract ingredient lists, feature highlights, warning labels, and dimension tables from image files with high accuracy.

    For sellers, this has an immediate implication: anything you put in text form on an image is effectively a searchable signal. A callout that reads “BPA-Free, Dishwasher Safe” on image slot three is being processed as attribute data, not just visual decoration. The question is whether that data is consistent with what your bullets and backend terms say — because inconsistencies are where the AI’s confidence in your listing drops.

    Vision-Language Models: Scene Understanding at Scale

    Beyond OCR, Amazon’s system applies vision-language models (VLMs) that jointly process the visual content of an image alongside its textual context. These models can understand that a lifestyle photo showing a woman using a yoga mat in a sunny living room signals “indoor yoga, home fitness, natural light environment” — not because of any text in the image, but because of what the model has learned about visual scenes. They understand materials, proportions, spatial relationships, and use-case contexts.

    This matters for how you structure lifestyle and context images. A lifestyle shot that shows your product in a vague, aesthetically pleasant but contextually ambiguous setting provides weak signal. A lifestyle shot that clearly communicates who uses this product, in what setting, for what purpose, provides dense signal that maps directly to shopper intent categories.

    Holistic Stack Analysis: Images Are Evaluated Together

    Perhaps the most important — and most underappreciated — aspect of how the AI processes listings is that it evaluates your images as a set, not as individual assets. The system builds a composite representation of your product from across all image slots, A+ content, and any other visual information available. This means that a strong hero image cannot compensate for a weak supporting stack. Each image either adds signal or creates noise.

    Amazon’s system handles approximately 274 million daily queries — and projections from late 2024 suggested that figure would grow to represent 35% of all Amazon searches by the end of 2025. That trajectory makes the stakes of visual optimization increasingly concrete: the AI that reads your images is mediating an enormous and growing share of product discovery.

    Funnel diagram showing why most Amazon image tests never ship winners — ideas get designed but tests never reach publication

    Why Most Sellers’ Image Testing Never Ships Anything

    Before getting into what good image testing looks like, it’s worth spending time on why the default approach fails. Because the failure isn’t random — it follows a predictable pattern, and understanding it is the fastest way to stop repeating it.

    The Production Bottleneck

    The most common failure mode is a creative production bottleneck that makes the whole loop feel impossibly slow. A seller decides to test a new hero image. They brief a designer. The brief takes a week to go back and forth. The design takes another week. Review rounds take another week. By the time the variant is ready, the original moment of urgency has passed, the budget has shifted, or someone has decided to do something else. The image sits in a Google Drive folder forever.

    This is a process problem, not a creative problem. The solution is to build a testing workflow where image variants can be produced in 48–72 hours, not 2–3 weeks. This means templatized creative briefs, pre-approved brand guidelines that don’t require executive sign-off per asset, and a design partner or internal resource that treats image variants as modular components — not bespoke creative projects.

    The Wrong Variables Being Tested

    The second failure mode is testing variables that are too subtle to move the needle. Changing the position of a logo badge from the top-left to the top-right corner is not a meaningful test. Swapping between two lifestyle backgrounds that both show the same usage context is not a meaningful test. Amazon’s Manage Your Experiments tool requires enough traffic and enough data to reach statistical significance — and subtle changes that produce tiny effect sizes require enormous sample sizes to detect reliably.

    Meaningful image tests involve clearly different hypotheses. Main image shot angle (front-facing versus angled three-quarter view) is a meaningful test. White-background product-only versus lifestyle-in-context main image is a meaningful test. Text-heavy infographic layout versus icon-driven visual layout is a meaningful test. If you can’t articulate in a single sentence what question this test is answering about shopper behavior, the test is probably not designed correctly.

    Sitting on Results Too Long

    The third failure mode — and arguably the most costly — is reaching statistical significance and then not shipping the winner. This happens for several reasons: someone wants to run additional validation, a stakeholder wasn’t looped in, the winning variant needs “a few tweaks” before going live. These delays are pure waste. The moment you have a statistically significant winner, every day you don’t ship it is a day you’re running a known-inferior image on your live listing.

    High-performing testing programs have a defined protocol for this: when the experiment declares a winner at ≥90% confidence, the winner is published within 48 hours. No committee. No additional review. Ship it, document it, and start the next loop.

    The Four-Layer Image Stack That Answers Every Shopper Question

    Before you can test effectively, you need a baseline stack that’s structured correctly. Most image stacks fail not because the individual images are bad, but because they’re not organized around the questions shoppers are actually asking. Alexa for Shopping’s AI evaluates your stack as a knowledge base — so the question is: does your knowledge base have answers to what shoppers need to know?

    The four-layer framework below isn’t the only valid structure, but it’s the one that maps most directly to how the AI processes listings and how shoppers navigate the image carousel.

    Layer 1: The Primary Hero — Machine-Readable and Click-Compelling

    The main image has two jobs that operate at slightly different timescales. In the short term, it drives click-through from search results — it needs to make a shopper stop scrolling and choose your product over the five others on screen. In the medium term, it’s the first frame Alexa for Shopping’s AI encounters, and it needs to communicate product category, form factor, and product identity clearly enough that the AI can classify your ASIN correctly.

    Amazon’s guidelines require a white background for main images in most categories, and that constraint is actually useful: it forces the product to do the visual work. Strong primary images show the product in its most recognizable form, at a size that fills 85%+ of the image frame, with no clutter that could confuse either the human shopper or the machine vision system. Color accuracy matters here — visual search queries match by color and shape, and a hero image that misrepresents your product’s actual appearance creates downstream trust problems.

    Layer 2: Feature Callout Infographics — OCR-Optimized Text in Images

    The infographic images in slots two through four are where OCR-readable signals live. These are your opportunity to embed product attributes in a format the AI extracts as structured text: dimensions, materials, certifications, key ingredients, compatibility specifications. The design principle here is legibility at machine scale, not just at human scale. Text that’s stylized, low-contrast, or set against a complex background is harder for OCR to parse cleanly.

    Strong callout infographics use high-contrast text (black on white, or white on a solid brand color), a logical hierarchy from primary claim to supporting detail, and specific language that matches how shoppers search. “Fits most 5–7 inch wrists” is more useful to both the AI and the shopper than “adjustable size.” “FDA-registered facility, third-party tested” is more useful than “premium quality.”

    Layer 3: Lifestyle and Use-Case Context — Intent Signal for the AI

    Lifestyle images serve a dual purpose that’s often misunderstood. Sellers think of them primarily as aspirational — showing the product in an attractive setting to help shoppers imagine owning it. That’s still true and still important. But in the Alexa for Shopping era, lifestyle images also provide the AI with use-case context that it maps to shopper intent categories.

    A lifestyle image showing your protein powder being used immediately after a gym session, with athletic gear visible in the frame, communicates “post-workout supplement for fitness-focused buyers.” The AI can map that scene context to queries like “protein powder for after gym” or “post-workout recovery supplement” — and use that mapping to inform recommendations. The more specifically your lifestyle images communicate who, when, where, and why, the more precisely they can match to real shopper intent.

    Layer 4: Trust and Comparison Frames — Differentiation Signals

    The final layer covers comparison images, before/after demonstrations, size reference shots, and social proof visuals. These images serve the shopper who is evaluating your product against alternatives — which is precisely the moment when Alexa for Shopping is most actively involved, since comparison queries (“which protein powder has the most protein per serving”) are a core use case for the AI assistant.

    Comparison images that clearly show how your product differs from the generic category option — on dimensions shoppers care about — provide the AI with differentiation signals it can use when answering comparison questions. This is not about bashing competitors; it’s about making your advantages legible to a system that’s trying to match products to shopper priorities.

    Circular 5-step image testing loop diagram: Hypothesize, Design, Test, Analyze, Ship — for Amazon product image optimization

    Building the Testing Loop: From Hypothesis to Live Winner

    The most important shift in how high-performing Amazon brands approach image testing in 2026 is treating it as a repeating operational loop, not a project with a start and end date. Projects get deprioritized. Loops run regardless of what else is happening. The distinction sounds abstract until you see the catalog-level performance gap between brands that have internalized it and those that haven’t.

    Step 1: Write the Hypothesis Before You Brief the Designer

    Every image test starts with a written hypothesis that follows a simple structure: “We believe that [specific change] will [specific outcome] because [specific shopper behavior rationale].” For example: “We believe that showing the product alongside a size reference object (a hand, a common household item) will increase click-through rate because search results make size ambiguous and shoppers are currently buying and returning due to size mismatch.”

    This discipline does two things. First, it forces you to connect the visual change to a shopper behavior — which prevents tests based on aesthetic preference rather than conversion logic. Second, it gives you a clear signal to look for in results. When the experiment ends, you’re not staring at a dashboard trying to decide what the data means. You know exactly what you expected and whether the data confirms or challenges it.

    Step 2: Design Two Clearly Different Variants

    Manage Your Experiments runs as an A/B test: control versus variant. Your job in the design phase is to make the variant meaningfully different from the control — different enough that the test can detect a real effect. The practical guideline is that if you can’t describe the difference in a single sentence of plain English, the variants aren’t different enough.

    Modular design systems make this fast. If your brand has pre-built template layers for callout badges, color backgrounds, text styles, and product angles, swapping between variants becomes a 30-minute Figma task rather than a multi-week design engagement. Building this infrastructure upfront is the single highest-leverage investment teams can make to accelerate their testing cadence.

    Step 3: Launch the Experiment with Guardrails

    Before launching, establish three things: the metric you’re optimizing for (conversion rate for most image tests; click-through rate for main image tests), the confidence threshold you’ll accept (90% minimum; 95% for decisions with major operational implications), and the “no-touch” rules for the test period — no pricing changes, no major PPC bid shifts, no title edits, no inventory disruptions if avoidable. Any of these changes introduce confounding variables that make results harder to interpret.

    Amazon’s MYE platform handles randomized traffic splitting automatically. Once the experiment is live, the temptation to check results daily and draw early conclusions is real — resist it. Early data is noise, not signal. Build a calendar reminder to review results at the four-week mark for high-traffic ASINs, and at the eight-week mark for mid-traffic ASINs.

    Step 4: Read the Data at Significance — Then Stop Analyzing

    MYE will tell you when a winner has been declared with statistical confidence. At that point, the analysis phase should take no more than 30 minutes: confirm the winning variant, document what changed and why it likely performed better, and record the effect size. The last point — effect size — matters because 3% conversion lift on a $2M annual revenue ASIN is a very different decision than 3% lift on a $50K ASIN.

    Step 5: Ship the Winner Within 48 Hours

    This is the step where most teams lose time and money. Once a winner is declared, publish it immediately. Assign one person the explicit responsibility of pressing the “publish winner” button within 48 hours of significance being declared, and track whether that SLA is being met. If it consistently isn’t, the workflow has a process problem that needs to be fixed at the team level.

    Traffic Thresholds and Statistical Reality: When Your ASIN Can Actually Run Tests

    One of the most common mistakes in Amazon image testing programs is applying the same cadence and approach to all ASINs regardless of traffic volume. Statistical significance in A/B testing is fundamentally a function of sample size — and your sample size is bounded by your traffic. An ASIN with 200 sessions per week cannot generate meaningful image test results in any reasonable timeframe. The math won’t allow it.

    The Minimum Viable Traffic Threshold

    Amazon’s own guidance and practitioner consensus in 2026 point to approximately 1,000 detail page views per variant per week as the threshold at which image tests can reach significance in a reasonable window. Below this threshold, tests run for 10+ weeks without clearing significance — and 10+ weeks of frozen creative is a long time in a competitive catalog environment.

    In practice, this means that most brand catalogs have a small number of ASINs that are genuinely testable in a productive timeframe, and a much larger number that are not. Accepting this reality — and concentrating testing resources on the ASINs that can actually generate clean data — is a better strategy than running underpowered tests across everything.

    Segmenting Your Catalog by Test-Readiness

    A useful exercise is to segment your catalog into three tiers based on weekly session volume:

    • Tier 1 (2,000+ sessions/week): Full MYE testing capability. These ASINs can reach significance in 4–5 weeks. Run a continuous testing program — one experiment ending, the next beginning. Target 4–6 completed tests per year per ASIN.
    • Tier 2 (500–2,000 sessions/week): MYE testing is viable but slower. Plan for 6–8 week test windows and prioritize the highest-impact variables only (main image first, then the most-viewed secondary slot). Target 2–3 tests per year.
    • Tier 3 (<500 sessions/week): Direct MYE testing is impractical for generating statistically valid results in a useful timeframe. For these ASINs, apply winning patterns learned from Tier 1 and Tier 2 tests without running independent experiments. Update images based on catalog-wide learning rather than ASIN-specific data.

    This tiered approach lets you run a disciplined program that generates real data where it’s possible, and applies that data intelligently where it isn’t.

    Bar chart showing how ASIN traffic volume determines testing timeline — high-traffic ASINs reach significance 2x faster than low-traffic ones

    Weekly vs. Quarterly Cadence: Matching Test Speed to ASIN Volume

    A question that generates a lot of debate in seller communities is how frequently you should be testing. The answer is that “testing cadence” conflates two different things that need to be treated separately: how frequently you launch new experiments, and how frequently you refresh creative assets whether or not you’re formally testing them.

    The Formal Testing Cadence

    For Tier 1 ASINs with genuinely high traffic, a continuous loop is the target state: the moment one experiment concludes and a winner is published, the next experiment is briefed and in design. In practice, this means your Tier 1 ASINs are in active experimentation roughly 80% of the time. You’re never sitting on stale creative for more than a few weeks.

    For Tier 2 ASINs, a quarterly cadence is more practical — one focused test per quarter, structured around the most impactful variable at that point in the ASIN’s lifecycle. New ASINs start with main image tests. Mature ASINs with strong main images move to secondary stack testing. Declining ASINs with competitive pressure get comparison and differentiation image tests.

    The Creative Refresh Cadence

    Separate from formal testing, many practitioners recommend a 7–14 day creative refresh cycle for Sponsored Brands and Sponsored Display ad creative — not necessarily changing what’s on the detail page, but rotating ad creative to combat performance fatigue. High-performing Amazon ad teams are testing 20–50 creative variations per week across campaigns. That’s not happening through MYE; it’s happening through ad creative rotation and sponsored ad A/B testing tools.

    The key distinction: ad creative testing moves at weekly cadence, generating directional signal fast. Detail page image testing moves at the pace of statistical validity, which is 4–10 weeks minimum. Both programs feed each other — ad creative tests often reveal which visual hooks drive click-through, informing the next main image test hypothesis.

    Building the Annual Testing Calendar

    The most mature teams build a 12-month testing calendar at the start of each year. For Tier 1 ASINs, map out the sequence of experiments: main image first, then infographic slot, then lifestyle sequence, then A+ content. Budget assumes one test is always active. For Tier 2 ASINs, slot one test per quarter around seasonal demand — don’t test lifestyle images right before peak season; complete that test before the traffic surge so you’re running the winning image during your highest-volume weeks.

    Timing matters more than most sellers account for. An image test running during a period of unusual traffic (Prime Day, Black Friday, holiday peak) produces results contaminated by atypical purchase behavior. The cleanest test windows are in the weeks surrounding — but not during — peak demand events.

    What a Winning Rufus-Aware Image Actually Contains

    With a solid understanding of the testing loop and cadence, it’s worth getting specific about the anatomy of images that tend to win both with human shoppers and with Alexa for Shopping’s AI. These aren’t aesthetic principles — they’re functional specifications derived from how the AI processes visual data.

    The Main Image: Three Technical Requirements

    First, product fill rate. The product should occupy at least 85% of the image frame. Amazon’s algorithm uses product size relative to frame as a signal of listing quality; undersized products suggest low-effort photography. From a conversion standpoint, larger products show more detail and reduce uncertainty.

    Second, color accuracy. Amazon’s visual search system matches products by color as well as shape. A hero image that makes a navy product look black, or a cream product look white, will misalign with visual search queries and create return rates from customers who received something different from what they expected. Photography conditions and post-processing should preserve actual product color.

    Third, shadow and background treatment. Clean white background with natural drop shadow is the standard, but the quality of that background matters — compressed artifacts, off-white backgrounds, or poorly masked edges all degrade the machine vision system’s ability to classify the product cleanly. Professional photography or consistent high-quality CGI rendering outperforms amateur product shots even when the exposure and composition look similar to the naked eye.

    Secondary Images: The Legibility Checklist

    For infographic and callout images, run through this checklist before uploading:

    • Text contrast ratio: Any text in the image should meet WCAG AA accessibility standards at minimum — this ensures OCR extraction reliability, not just human readability.
    • Claim specificity: “Lasts 3x longer” is weaker than “Lasts 6 hours on a single charge.” Specific claims are more useful to the AI as structured attributes and more persuasive to shoppers.
    • Visual hierarchy: The primary claim should be the largest element. Supporting details should be clearly subordinate. A visually flat infographic where everything competes equally gives both shoppers and the AI insufficient guidance on what’s most important.
    • Consistency with bullets: Every claim made visually in an image should be substantiated by the bullet copy. The AI checks for alignment between visual and text content; inconsistencies reduce confidence scores.

    Lifestyle Images: Context Density Over Aesthetics

    The single most actionable change most sellers can make to their lifestyle images is to increase context density. A lifestyle image shot in a beautiful but ambiguous setting — marble countertops, soft focus background, warm lighting — communicates atmosphere but not use-case. A lifestyle image showing the product actively being used, by a clearly defined person, in a clearly defined setting, for a clearly identifiable purpose, generates far more signal for the AI and far more confidence for the shopper.

    Context density doesn’t mean cluttered images. It means intentional specificity: choose one clear use case per lifestyle image, make it unmistakable, and make it the one that maps to your highest-converting shopper segment.

    From Data to Decision: How to Read MYE Results Without Overthinking Them

    One of the practical problems with running more experiments is that teams can develop a kind of analysis paralysis — staring at MYE dashboards, second-guessing results, and waiting for certainty that statistical testing, by its nature, can never fully provide. The goal is disciplined confidence, not certainty.

    The Three-Number Read

    When reviewing an experiment’s results, focus on three numbers: conversion rate for each variant, statistical confidence level, and effect size. That’s it. Other metrics — session counts, clickthrough rates at the ad level, revenue per session — can be informative context, but the primary decision should rest on whether the winning variant converts better at a confidence level you’ve pre-committed to accepting.

    If the experiment declares a winner at ≥90% confidence and the effect size is meaningful for your volume, ship the winner. If the experiment concludes without declaring a winner, that’s also information — it means the variants you tested aren’t sufficiently different in their impact on conversion, and your next test needs a bolder hypothesis.

    Understanding Inconclusive Results

    Inconclusive results (no winner declared) are significantly undervalued by most sellers. They tend to be treated as wasted effort, but they’re actually telling you something specific: the variable you tested doesn’t drive the conversion difference you need. This is enormously useful for prioritization. If two main image variants — one with the product on a white background and one with a complementary color background — produce no significant difference, that’s a strong signal that background treatment isn’t your conversion bottleneck, and you should move on to testing something else.

    Build a shared document that logs every experiment: hypothesis, variants, traffic volume, outcome (winner, no winner), effect size, and what you’re testing next as a result. After 8–12 experiments, patterns emerge. Certain variable categories consistently drive effects; others consistently don’t. This accumulated learning is the most valuable asset a mature testing program produces.

    The Documentation Protocol

    Document the following for every experiment, win or loss:

    1. ASIN and traffic tier
    2. Image slot tested (main, slot 2, slot 3, etc.)
    3. One-sentence hypothesis
    4. Description of control and variant
    5. Test duration and peak weekly sessions during test
    6. Outcome and confidence level
    7. Effect size (conversion rate delta)
    8. Action taken and date shipped (if winner)
    9. Next hypothesis derived from this result

    This takes 10 minutes to complete per experiment and becomes invaluable when onboarding new team members, briefing agency partners, or making the case to leadership that the testing program is generating measurable returns.

    Line chart showing the compounding effect of continuous Amazon image testing over four quarters — cumulative conversion rate lift grows from 8% to 41%

    Compounding Gains: Turning One-Off Tests Into a Catalog-Wide Program

    The difference between a seller who runs image tests and a seller who has an image testing program is compounding. Individual tests produce individual improvements. A program produces a learning infrastructure that makes each subsequent test more informed, each subsequent winner more impactful, and each dollar of testing investment worth progressively more.

    How Compounding Works in Practice

    Consider a straightforward example. A Tier 1 ASIN runs four experiments over the course of a year: main image test, infographic slot test, lifestyle variant test, and comparison image test. Each experiment, independently, produces a 6–8% lift in conversion rate. But these lifts are multiplicative, not additive — a 7% lift applied to a base that’s already been lifted 7% produces a cumulative improvement of approximately 15%, not 14%. Four experiments with 7% average lifts compound to roughly 31–35% total improvement in conversion rate over the year.

    That arithmetic is why sellers who maintain consistent testing programs accumulate structural advantages over competitors who test sporadically. The compounding effect isn’t dramatic in any single quarter, but over two to three years it creates a listing quality gap that’s very difficult for a competitor to close quickly.

    Applying Catalog-Wide Learning

    The second compounding mechanism is cross-ASIN learning. When a main image hypothesis wins consistently across multiple Tier 1 ASINs — say, product shown in use versus product shown in isolation — you can apply that winning principle to all Tier 2 and Tier 3 ASINs without running independent experiments on each. The Tier 1 tests function as the research; the rest of the catalog benefits from the findings.

    This requires treating your testing log as a shared knowledge base rather than ASIN-specific records. Build monthly or quarterly reviews where you extract cross-ASIN patterns from the past period’s experiments and update your brand image standards accordingly. Over time, your “default good image” evolves based on actual conversion data from your own catalog — not generic best practices from industry blogs (including, for the record, this one).

    Feeding Test Results Into Advertising Creative

    Image test winners from MYE should feed directly into your Sponsored Brands and Sponsored Display creative. The image that converts best on the detail page is, by definition, your strongest visual asset — it belongs in ad creative too. Teams that maintain this feedback loop between organic listing tests and paid creative see alignment benefits in both directions: organic improvements confirmed by test data, ad creative validated by conversion evidence.

    The Consistency Trap: Why Images and Copy Must Align for the AI to Trust Your Listing

    As image testing programs mature, there’s an underappreciated risk that grows alongside them: inconsistency between what your images say and what your copy says. Each time you update an image, there’s a chance that the new visual content drifts out of alignment with your bullets, title, or backend terms — and in the Alexa for Shopping era, that misalignment is a real problem.

    Why the AI Penalizes Inconsistent Listings

    Alexa for Shopping’s AI synthesizes signals from multiple sources — images, bullets, title, Q&A, reviews, and browsing behavior — to build its understanding of what a product is and what queries it should match to. When those sources conflict (an image callout says “500mg per serving” but the bullet says “400mg per serving”; an image shows the product as black but the title says “charcoal gray”), the AI’s confidence in the listing drops. Lower confidence means lower probability of being recommended for ambiguous or competitive queries.

    This isn’t theoretical. Practitioners testing listings against the AI shopping assistant have observed that listings with clean consistency between visual and text content answer shopper queries more reliably than listings with internal contradictions, even when the product is substantively the same.

    Building the Consistency Audit Into Your Testing Process

    Add a consistency check as a mandatory step before every image update, not just when launching a formal experiment. The check is simple: for every claim made in the new image, verify that claim is supported in the bullet copy. For every attribute shown visually in the new image, verify it’s represented in the backend search terms. For every lifestyle context in the new image, verify the usage context is addressed in the product description.

    If the image contains information not reflected in copy, update the copy too — or remove the claim from the image. Asymmetric information (image says more than copy supports) is a common source of AI confidence problems and, more practically, customer complaints when reality doesn’t match the image’s claims.

    The Quarterly Consistency Review

    For catalogs with more than 20 active ASINs, build a quarterly review specifically focused on listing consistency. Pull each ASIN’s current image stack alongside its current bullet copy and check for drift that has accumulated through incremental updates. This review tends to find artifacts of old test variants that were never fully cleaned up, seasonal image swaps that weren’t matched with copy updates, and product changes (formulation, packaging, sizing) that the images haven’t yet caught up to.

    Consistency isn’t just an AI optimization concern — it’s a customer experience concern. Shoppers who receive a product that matches every visual and textual promise made in the listing return less and review better. Both of those outcomes feed into the ranking signals that determine whether your ASIN keeps its position in competitive search results.

    The Operational Infrastructure That Makes All of This Possible

    Everything discussed in this article — tight testing loops, fast winner shipping, catalog-wide learning, consistency audits — requires an operational infrastructure that most sellers haven’t explicitly built. The testing strategy and the operational infrastructure are inseparable. Without the infrastructure, the strategy is aspiration.

    The Three Non-Negotiable Infrastructure Pieces

    1. A modular creative system. Your brand needs pre-approved templates for each image slot type: hero template, callout infographic template, lifestyle template, comparison template. These templates don’t eliminate creativity — they eliminate the parts of the design process that don’t add creative value (establishing brand colors, setting up file dimensions, building grid structures, exporting in correct formats). With modular templates, producing a new image variant should take hours, not days.

    2. A centralized testing log. Every experiment, documented as described in the earlier section, stored in a location that’s accessible to everyone who touches listing content — internal team, agency partners, freelance designers. Without centralized documentation, insights stay with individuals and disappear when people leave or shift roles.

    3. A defined RACI for winner shipping. Who is Responsible for pressing publish? Who is Accountable if a winner sits unshipped for more than 48 hours? Who is Consulted before a winner goes live (if anyone)? Who is Informed after a winner ships? The answer to each question should be a specific named person, not “the team.” Teams don’t ship; people ship.

    Tools That Accelerate the Loop

    Amazon’s native Manage Your Experiments platform is the primary tool for detail page testing. It’s free, it’s integrated with real listing data, and its traffic splitting and significance calculations are reliable enough for making real business decisions. The main limitation is that it requires Brand Registry and sufficient traffic — which is why the tiering framework matters.

    For ad creative testing — which moves faster and doesn’t require the same traffic thresholds — Amazon’s native creative A/B testing within Sponsored Brands campaigns provides rapid directional signal. Third-party tools like Splitly, PickFu (for pre-launch concept testing), and various listing optimization platforms can supplement native testing, particularly for lower-traffic ASINs where MYE isn’t practical.

    The tool stack is less important than the discipline of the loop. Sellers running rigorous manual testing processes with basic MYE consistently outperform sellers with sophisticated tool stacks and undisciplined processes. Tools accelerate good processes; they don’t fix bad ones.

    Conclusion: Shipping Is the Point

    Image testing in the Rufus/Alexa for Shopping era is not fundamentally different from image testing in any previous era — it’s just more consequential. The AI layer that now mediates product discovery reads your images as data, not decoration. It extracts text, understands context, and evaluates consistency. Listings that give it clear, dense, reliable signal get recommended. Listings that give it ambiguous, inconsistent, or sparse signal get passed over in favor of listings that don’t.

    The operational loop — hypothesize, design, test, analyze, ship — is the mechanism by which you systematically improve the quality and density of that signal over time. Every completed test either confirms something that works or eliminates something that doesn’t. Both outcomes advance your understanding of what your shoppers actually respond to, and both feed into a catalog that converts better next quarter than it does this quarter.

    But none of that happens if you don’t ship. A test that reaches significance and sits unshipped is not a learning — it’s a missed opportunity with a price tag attached. The fastest and highest-impact change most testing programs can make is not a better hypothesis or a smarter tool — it’s a 48-hour SLA on winner publication, enforced by whoever owns the catalog.

    Start there. Get one test running on your highest-traffic ASIN. Document it properly. Ship the winner within 48 hours of significance. Then start the next one. The compounding starts the moment you do.
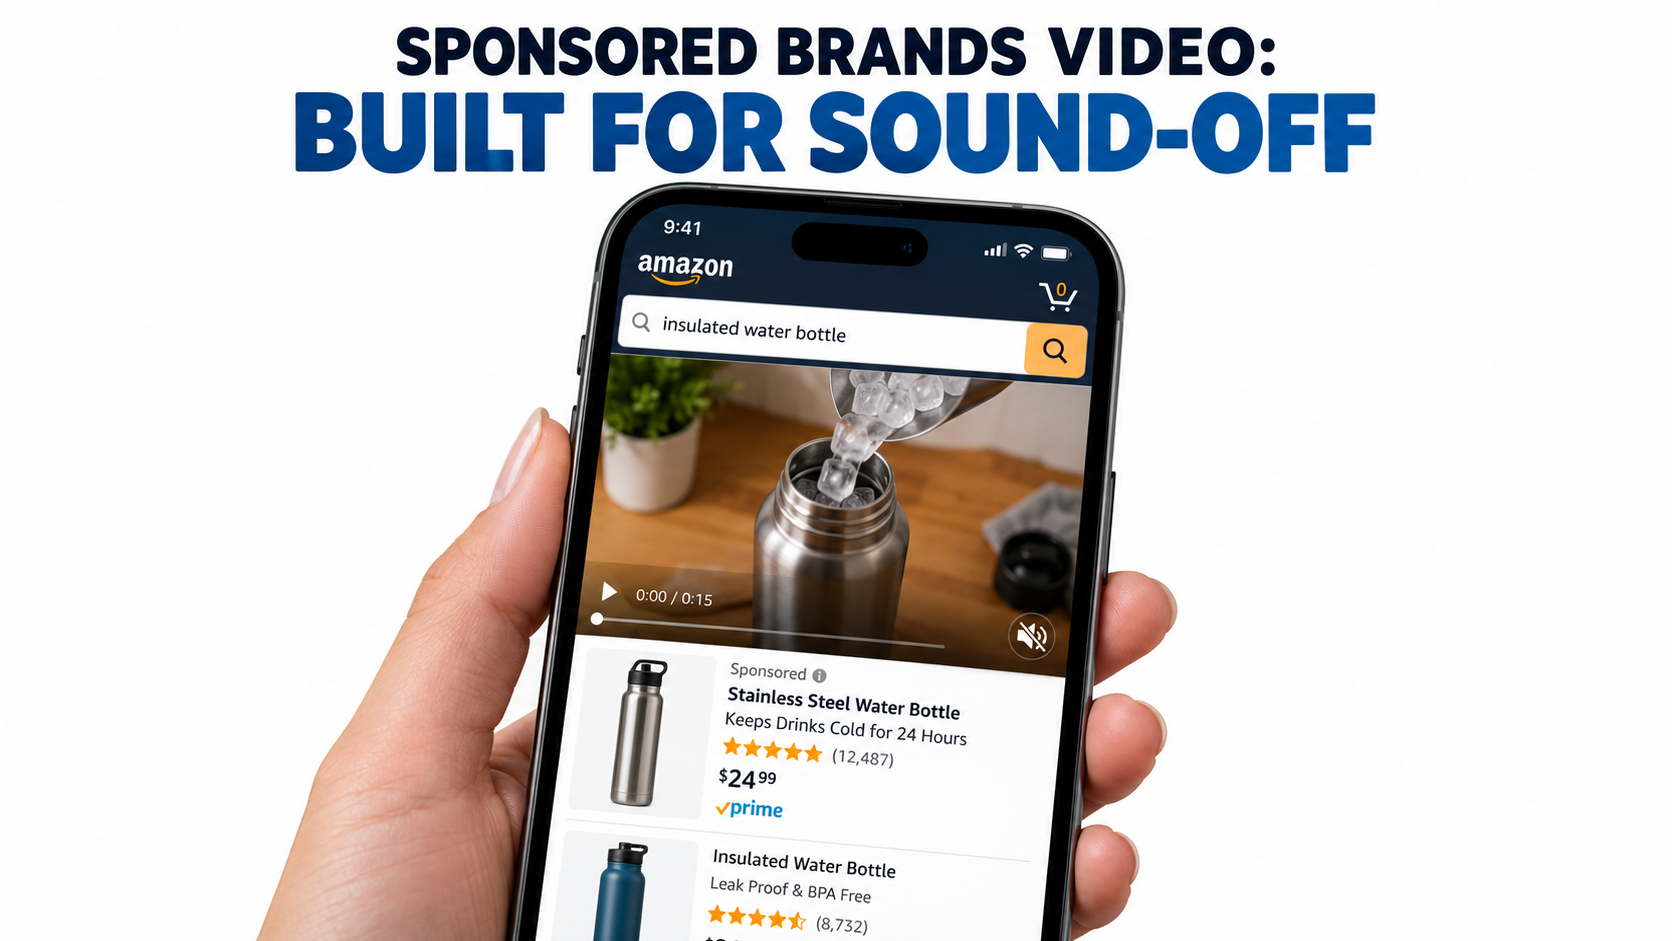
    Key Takeaways for Implementation

    • Treat images as AI data inputs, not just human-facing assets. OCR, VLMs, and holistic stack analysis mean every visual element carries signal weight.
    • Qualify your ASINs by traffic before designing tests. Below ~1,000 weekly sessions per variant, formal A/B testing produces noise, not insight.
    • Write your hypothesis before you brief the designer. Tests without hypotheses can’t generate learning even when they produce winners.
    • Build a 48-hour winner shipping SLA with a named owner. This single change produces more value than any testing tool upgrade.
    • Apply cross-ASIN learning to your full catalog. Tier 1 wins should update the image standards for Tier 2 and Tier 3 ASINs without re-running experiments on each.
    • Audit consistency between images and copy every time you update. AI confidence drops when visual and text signals conflict — and so does customer satisfaction.
    • Build modular creative templates. If producing a test variant takes more than 72 hours, the process is slower than the market is moving.
  • Why Your SP Data Is Sitting Idle While Your Competitors Scale SBV: A Search-Term-First Framework

    Why Your SP Data Is Sitting Idle While Your Competitors Scale SBV: A Search-Term-First Framework

    Split-screen showing SP winner keywords on the left being promoted with an arrow into Sponsored Brands Video placements on the right — Turn SP Winners Into SBV Scale

    Here is a scenario that plays out in Amazon advertising accounts every single week. A seller has been running Sponsored Products campaigns for six to twelve months. They have a mountain of search term data. Certain queries are converting at four, five, even six percent. ACoS is well below target. Orders are consistent. The data is telling a clear story: these terms work.

    And then nothing happens. The seller keeps bidding on those terms in the same SP campaign structure they built in month one. Maybe they raise the bids a little. Maybe they add them to a manual exact match campaign. But the idea of taking those proven search terms and building a Sponsored Brands Video campaign around them — specifically around what the data already confirmed — rarely makes it to execution.

    That gap is exactly what this article is about. Sponsored Brands Video is not a separate creative exercise you do after your SP campaigns are “done.” It is the natural next destination for search terms that have already proven their intent and their conversion value. The process of identifying which terms qualify, building the right campaign structure, crafting video creative that matches proven intent, and managing the whole system without letting it cannibalize itself — that is the Search-Term-First SBV scaling framework.

    This article walks through every layer of that framework in practical, executable detail: how to read your SP data through a video strategist’s lens, where to draw the winner threshold lines, how to build campaign architecture that isolates and controls, what your video creative should actually do at the search result level, how to measure NTB impact, and how to run a repeatable 90-day scaling cycle that compounds over time.

    What “Search-Term-First” Actually Means — and Why the Order of Operations Matters

    The phrase “search-term-first” describes a specific philosophy about how SBV campaigns should be built and funded. Most advertisers approach video advertising from the creative side: they produce a video asset, then figure out where to run it. Search-term-first inverts that logic. The data comes first. The creative follows the intent signal.

    In practice, this means your Sponsored Brands Video campaigns are not built on gut instinct about which keywords “seem right” for video. They are built on demonstrated performance evidence from your Sponsored Products account. Specifically, from the search terms — the actual queries Amazon shoppers typed — that already converted in SP. You are not guessing what shoppers respond to. You already know. You are simply extending that knowledge into a higher-engagement ad format.

    Why the Order of Operations Is Critical

    The order matters for a very specific reason: SP and SBV operate on different parts of the SERP and serve different psychological moments. Sponsored Products appear inline with organic results. They look like products. Shoppers are already in selection mode when they encounter them. Sponsored Brands Video, by contrast, appears at the top or middle of search results as a video unit — it intercepts the shopper earlier, at a higher-attention moment, before they’ve committed to scrolling through individual products.

    If you launch SBV on unproven terms, you are paying for that high-visibility slot without knowing whether the underlying intent converts. You are essentially funding a branding experiment with performance budget. The search-term-first approach resolves this problem entirely: by the time a term enters your SBV campaign, you already know it converts. You are not using SBV to test demand. You are using it to amplify demand that you already proved exists.

    The Three Jobs of SBV in a Mature Ad Stack

    Understanding the role of SBV within a full campaign structure helps clarify why this sequencing works so well:

    • Intercept before SP: SBV placement at the top of search means a shopper can see your brand and product before they reach your SP listing. This creates a brand familiarity moment that improves downstream SP click and conversion rates.
    • Capture new-to-brand buyers: SBV consistently delivers higher new-to-brand (NTB) purchase rates than Sponsored Products. Shoppers who haven’t bought from your brand before are more likely to engage with a video that demonstrates value visually than a static product tile.
    • Defend proven commercial intent: On your highest-value exact match terms, SBV gives you a second placement on the same SERP, creating a double presence that increases the probability of capturing the click even if a competitor outbids you on SP.

    Each of these jobs becomes more valuable when the underlying search term has already been validated by SP performance data. That is the core logic of the search-term-first framework.

    How to Read Your SP Search Term Report Like a Video Strategist

    Color-coded Sponsored Products Search Term Report with Winner, Watch, and Pause labels identifying high-converting search terms for SBV promotion

    The SP Search Term Report is, without exaggeration, one of the most underutilized data assets in Amazon advertising. Most sellers use it reactively — they open it when something looks wrong, find a few irrelevant queries to negate, and close it. The search-term-first approach treats it as a forward-looking intelligence document, not just a reactive cleanup tool.

    The Right Reporting Window

    Pull your SP Search Term Report for a rolling 90-day window. Shorter windows — 14 or 30 days — introduce too much variance. A term that converted twice last week might be a spike. A term that converted consistently across 90 days is a signal. You need statistical confidence, and 90 days gives you enough purchase frequency data to make defensible decisions.

    If your account is newer and 90 days doesn’t yield enough conversion data, work with 60 days and apply stricter order thresholds (covered in the next section). Do not use 14-day windows for SBV promotion decisions — the noise-to-signal ratio is too high.

    The Five Columns That Actually Matter

    Your SP Search Term Report will have many columns. For the purposes of SBV promotion decisions, narrow your focus to these five:

    1. Search Term — The actual query the shopper typed. This is distinct from your keyword. A broad or phrase match keyword like “water bottle” might have triggered the search term “BPA free insulated water bottle 32oz.” The search term is what you’re evaluating, not the keyword that triggered it.
    2. Orders — The raw count of purchases driven by that search term. This is your primary significance filter. Terms with fewer than three orders in the 90-day window are statistically thin, regardless of other metrics.
    3. ACoS (Advertising Cost of Sale) — Your cost per dollar of attributed revenue. Compare this against your target ACoS, not against a universal benchmark. A term at 25% ACoS might be a winner in a high-margin category and a disaster in a low-margin one.
    4. Conversion Rate (CVR) — Orders divided by clicks. High CVR on a search term tells you the intent is tight. A search term with 8% CVR is telling you that roughly one in twelve shoppers who click after typing that query buys your product. That is strong enough to deserve a dedicated SBV campaign.
    5. Click Volume — Total clicks in the window. This matters for scale assessment. A term with three orders and twelve clicks (25% CVR) is a potential gem but may have limited inventory. A term with three orders and three hundred clicks (1% CVR) needs creative and listing work before SBV investment.

    Segmenting by Intent Type

    Before you apply winner thresholds, segment your search terms by intent category. This matters because different intent types perform differently in SBV, and knowing which bucket a term falls into shapes your creative strategy:

    • Problem-aware queries: “how to keep coffee hot all day,” “water bottle that doesn’t sweat.” These shoppers know their problem but haven’t locked onto a solution. SBV has high leverage here because video can demonstrate the solution before they reach product listings.
    • Category-aware queries: “insulated tumbler 40oz,” “stainless steel water bottle BPA free.” Shopping intent is high but brand preference is low. SBV with a strong product demonstration wins category-aware shoppers efficiently.
    • Brand competitor queries: “[Competitor Brand] water bottle.” These are high-risk, potentially high-reward terms. SBV can intercept a competitor’s brand search, but creative must work hard — you need a clear differentiation message, not just a product display.
    • Branded queries: Your own brand name or product name. SBV on branded terms is primarily a defensive play, but it is also where you’ll see the highest CTR and lowest ACoS.

    Tagging your winner terms by intent type before building SBV campaigns gives you a creative brief for each campaign before you’ve written a single script.

    The Winner Threshold Framework — Setting Your Promotion Criteria

    The winner threshold is the decision rule that determines which search terms graduate from SP data into SBV campaigns. Getting this right is critical. Too strict, and you end up with a handful of terms and limited scale. Too loose, and you’re funding SBV on terms that haven’t proven themselves, which defeats the entire purpose of the search-term-first approach.

    The Standard Promotion Criteria

    Based on current practitioner guidance, the following thresholds represent a well-calibrated starting point for most accounts. Adjust based on your category economics, margins, and account maturity:

    • Minimum orders: 3 or more orders in the 90-day window. This is a non-negotiable floor. Below three orders, you don’t have enough signal to trust the data.
    • ACoS threshold: At or below your target ACoS. If your target is 25%, the term’s ACoS must be 25% or lower. Some practitioners use a stricter threshold — promoting only terms at 20% below target ACoS — to ensure the highest-confidence winners get the SBV slot.
    • CVR floor: Minimum 3% conversion rate. This ensures the term is converting at a rate that justifies the typically higher CPCs of SBV placements.
    • Click volume ceiling check: If a term has very high click volume (500+ clicks) but only three to five orders, CVR is below 1%. Flag these for listing optimization before SBV promotion — the problem is likely on the product page, not the ad targeting.

    Tiered Winner Classification

    Not all winners are equal. A tiered classification system helps you prioritize which terms get resources first:

    • Tier 1 — Scale Now: 5+ orders, ACoS 20%+ below target, CVR above 5%. These terms get their own single-keyword SBV campaign immediately, with aggressive top-of-search bid adjustments.
    • Tier 2 — Promote and Monitor: 3-4 orders, ACoS at or below target, CVR above 3%. These terms enter a shared SBV campaign (2-4 terms per ad group) with a more conservative bid strategy while you gather more video-specific data.
    • Tier 3 — Watch: 2 orders, ACoS below target, CVR above 3%. These terms are not yet ready for SBV but should be flagged for review in 30 days. If they cross the minimum order threshold, promote them to Tier 2.

    This tiered approach prevents you from over-investing in terms that are borderline while ensuring your genuine Tier 1 winners get the dedicated campaign control they deserve.

    Frequency of Review

    Run your winner threshold analysis on a weekly or bi-weekly cadence, not monthly. Amazon advertising data moves quickly. A term that hit Tier 2 criteria last week might cross into Tier 1 this week. The faster you promote winners, the faster you compound SBV’s advantage on those terms. Weekly review also gives you early warning when a previously “winning” term starts to degrade — useful for bid and creative decisions.

    Campaign Architecture — Building Your SBV Stack from Proven Search Terms

    Waterfall campaign architecture diagram showing the flow from SP auto/broad discovery through winner threshold filtering into SP exact SKC and SBV exact match campaigns, with negative keyword blocks preventing overlap

    Campaign architecture is where most sellers make their biggest structural mistakes. They add winning search terms as keywords to existing SBV campaigns, mixing them with broad or phrase match targeting, sharing budgets with other terms, and losing the bid control and measurement clarity that the whole framework depends on. The search-term-first approach requires a specific architecture that isolates, controls, and measures correctly.

    The Four-Layer Campaign Stack

    A well-built search-term-first SBV architecture has four distinct layers, each with a defined job:

    Layer 1: Discovery (SP Auto / Broad)
    This is where new search terms are found. Auto campaigns and broad match SP campaigns generate search term data across a wide range of queries. Their job is discovery, not efficiency. You should expect higher ACoS here — that’s the cost of finding winners. Budget these campaigns modestly and accept the inefficiency as investment in intelligence.

    Layer 2: SP Exact Match SKC (Single Keyword Campaigns)
    When a search term hits Tier 1 criteria, it enters its own dedicated SP Exact Match Single Keyword Campaign. One keyword, one match type, one campaign. This gives you complete bid control, placement control (Top of Search multiplier), and clean performance data attributed to that single term. This layer is your SP performance baseline for the corresponding SBV campaign.

    Layer 3: SBV Exact Match Campaigns
    Tier 1 winner terms get their own SBV Exact Match campaign or a tightly controlled ad group within a segmented SBV campaign. Tier 2 terms share campaigns with 2-4 other Tier 2 terms that share similar intent profiles. Both structures use exact match targeting — no broad or phrase match in your winner SBV campaigns. Broad and phrase match belong in a separate SBV discovery layer if you want to expand SBV reach independently.

    Layer 4: SBV Discovery / Expansion (Optional)
    Once your winner-based SBV campaigns are stable and profitable, you can add a separate SBV campaign using broad match or category targeting to discover new search terms from the video format itself. SBV sometimes surfaces conversion data on terms that SP never found — particularly for intent clusters that respond better to visual demonstration than to product tiles. Mine this campaign’s search term report using the same winner threshold framework and promote its winners into exact match SBV campaigns.

    Single Keyword SBV Campaigns: When to Use Them

    A Single Keyword Campaign (SKC) for SBV — one keyword, exact match, one campaign — is the right structure for Tier 1 winners that meet all of the following:

    • Monthly search volume high enough to spend your target daily budget (Amazon’s keyword targeting in SBV works best when there is sufficient impression volume to learn from)
    • Strategic importance: brand defense, top category query, or competitor brand term where search page dominance has disproportionate value
    • Distinct creative needs: if this search term’s intent requires a different creative angle than your other terms, isolation allows creative-level control

    For most Tier 2 terms, grouping 2-4 similar-intent terms into a single ad group within a shared campaign is more efficient. Amazon’s algorithm performs better with more data, and thinly traded SKCs can be slow to optimize.

    Bid Strategy for SBV Exact Match Winner Campaigns

    SBV bids and SP bids are set independently and should not be anchored to each other mechanically. However, a useful starting point: set your SBV exact match bid at 10-20% above your corresponding SP exact match bid for the same term. Rationale: SBV placement (top/middle of search, video unit) commands higher CPCs than inline SP placement. If your SP bid is $1.50 for a term and the SP campaign is profitable, start SBV at $1.65-$1.80 and optimize from there.

    Enable Top of Search bid adjustments for your SBV winner campaigns — typically 30-50% above base bid. SBV’s performance advantage is concentrated at the top-of-search placement. Product page placements for SBV tend to underperform relative to search placement, so watch your placement report closely and reduce bids for placements that aren’t delivering.

    Creative Strategy — What to Show When You Know the Intent

    Smartphone showing a 15-second Sponsored Brands Video ad with timestamp callouts: 0-3s Hook showing problem, 4-10s product demo, 11-15s CTA with offer badge

    The search-term-first framework gives you something most advertisers don’t have when they create video ads: a clear content brief derived from real conversion data. You know which queries convert. That knowledge tells you exactly what the shopper was thinking when they searched, what problem they were solving, and what product feature closed the sale in your SP campaign. Your video creative should be built directly from those insights.

    Mapping Intent Types to Creative Structures

    Recall the intent segmentation from the search term analysis section. Each intent type maps to a different creative structure:

    Problem-aware queries → Problem-first structure
    Open with a relatable problem scenario (visually, not just text). Show the frustration. Then introduce the product as the resolution. Close with the specific benefit that solves the problem. Example: for a search term like “coffee stays hot all morning,” open with someone pouring a coffee that’s gone cold by 9am, then cut to your insulated tumbler keeping coffee hot at 11am. The hook is the shared experience, not the product.

    Category-aware queries → Feature demonstration structure
    These shoppers know what category they want. They’re comparing options. Your video should lead with the specific differentiating feature — the thing that makes your product the right choice within the category. Don’t waste the first three seconds on brand imagery. Get to the feature immediately. Show it functioning. Make the claim specific (“keeps drinks cold for 24 hours”) rather than general (“great insulation”).

    Competitor brand queries → Differentiation structure
    This is the highest-stakes creative scenario. The shopper is already considering a competitor. Your video has about two seconds to interrupt that intention. Lead with your key differentiator — price, a specific feature the competitor lacks, a notable rating or social proof element. Do not disparage the competitor directly, but make the differentiation unmistakable. “12,000 five-star reviews” next to your product image is a different signal than a competitor’s generic brand shot.

    Branded queries → Confidence-building structure
    Shoppers searching your brand already know you. Don’t re-introduce yourself. Use this placement to reinforce decision confidence — highlight your best review quote, your primary differentiator, or a promotional offer. Keep it tight. Branded SBV is about removing the last friction before purchase, not generating awareness.

    The 15-Second Structure That Works at Search

    Amazon’s SBV format is autoplay and muted at launch. Shoppers see the video in motion before they choose to engage audio. This constraint is actually a creative advantage: if your video makes sense on mute, it works. If it only works with audio, you’ve already lost most of your audience.

    The structure that consistently performs at search-level SBV placement:

    • 0-3 seconds: Visual hook — the problem, the product in action, or a compelling visual that matches the search intent. Text overlay with the key benefit (reads on mute). No logos, no brand intros, no animated title cards. Start mid-action.
    • 4-10 seconds: Product demonstration — show the feature or benefit in use. Text overlays reinforcing specific claims: dimensions, materials, ratings, key stats. Movement matters: a static product shot surrounded by motion graphics performs significantly worse than actual in-use footage.
    • 11-15 seconds: Call to action — “Shop Now,” “See All Colors,” “Limited Time Offer.” Pair with a reason to click: a badge (Amazon’s Choice, #1 Best Seller), a price point, or a promotional offer if running one. The CTA text should be on screen, not just spoken.

    If your search terms span multiple intent types, produce separate creatives for each — don’t try to build one video that satisfies all of them. The production investment in a second or third creative version is almost always recovered in improved CTR and CVR on the terms it specifically serves.

    Video Specifications and Common Creative Mistakes

    Amazon’s SBV creative requirements are well-documented but frequently misapplied:

    • Video length: 6 to 45 seconds. The sweet spot for search-level placement is 15-30 seconds. Shorter formats (under 10 seconds) often don’t give enough time for the product to register. Longer formats (over 30 seconds) see attention drop sharply after the first 15.
    • Aspect ratio: 16:9 for standard SBV. Vertical (9:16) is increasingly available and relevant for mobile placements — if your product research shows heavy mobile traffic, test a vertical creative version.
    • The most common creative mistake: opening with a logo animation or brand name screen. This burns two to three seconds before showing anything the shopper cares about. Start with the product, the problem, or the feature. The brand will register through the product itself.
    • Second most common mistake: no text overlays. On autoplay muted video, text is your copy. Every key claim, feature, and CTA should appear as on-screen text, not just in the audio.

    Negative Keyword Discipline — Preventing the Cannibalization Trap

    One of the most technically critical aspects of the search-term-first framework is negative keyword management. When you promote a search term from SP discovery into a dedicated SBV exact match campaign, you must prevent your other campaigns from competing against the new SBV campaign for the same query. Without systematic negative keyword control, you end up bidding against yourself — inflating CPCs, splitting data between campaigns, and losing the measurement clarity that the entire framework depends on.

    The Cannibalization Problem in Concrete Terms

    Imagine you have a broad match SP campaign running the keyword “insulated water bottle.” That campaign discovered the search term “40oz insulated water bottle wide mouth” — now a Tier 1 SBV winner that has its own dedicated SBV exact match campaign. If you don’t add “40oz insulated water bottle wide mouth” as a negative exact match to your broad SP campaign, both campaigns will bid on that query simultaneously. Amazon runs an internal auction between your own campaigns. Your SBV campaign might win sometimes and your SP campaign might win other times. Your performance data is split between two campaigns, making neither readable. Your effective CPC on that query rises because you’re competing with yourself.

    The solution: when a search term graduates to a dedicated SBV exact match campaign, add it as a negative exact match keyword to every campaign that could trigger on it — the broad SP discovery campaign, any phrase match campaigns, and any SBV broad or category campaigns you’re running in the discovery layer.

    The Negative Keyword Workflow

    Implement negative keywords at the same time you launch the new SBV campaign. Don’t let it run for a week and add negatives later. The promotion decision and the negative keyword addition should happen in the same session:

    1. Identify the winner term from the SP Search Term Report.
    2. Create the SBV exact match campaign or add the term to the appropriate SBV ad group.
    3. Immediately add the term as a negative exact keyword to the source SP campaign (the one that was triggering on it).
    4. Check all other running campaigns — SP broad, SP phrase, SP auto, SBV broad, SBV category — and add the term as a negative exact match to any that could trigger on it.
    5. Leave the corresponding SP exact match SKC running (if you have one). SP and SBV can and should both run on the same exact term — they serve different SERP positions and different shopper moments. This is not cannibalization; this is intentional dual presence.

    Campaign-Level vs. Ad Group-Level Negatives

    Apply negatives at the campaign level wherever possible, not just the ad group level. Campaign-level negatives block the term from triggering any ad group within that campaign, which is a cleaner control than ad group-level negatives which only block within a single ad group. For accounts with many ad groups within campaigns, campaign-level negatives prevent terms from slipping through to ad groups you may have forgotten to exclude.

    Budget Allocation — How Much to Invest in SBV vs. SP Once You Scale

    Bar chart comparing Sponsored Products vs Sponsored Brands Video performance: CTR 0.4% vs 1.1%, CVR 9% vs 11%, and NTB customers 22% vs 57% — showing SBV drives 2.6X more new-to-brand customers

    There is no universal budget split between SP and SBV that works for every account. But there are principles that guide intelligent allocation decisions, and they are rooted in what each format is actually doing for your business at different stages of scaling.

    The Early-Stage Allocation (Months 1-3 of SBV)

    In the early stages of building your SBV stack, keep SP as the dominant budget holder. Your SBV campaigns are still in the learning phase — they need impression volume to optimize bids, and they may not yet have enough performance data to justify large budget commitments. A reasonable starting split in the early stage is 80-85% of total advertising budget to SP campaigns and 15-20% to SBV.

    Within that 15-20% SBV allocation, prioritize your Tier 1 winner campaigns. They will have the best initial ROAS and provide the data you need to justify increasing SBV budget over time. Tier 2 winner campaigns should run on modest daily budgets until they accumulate enough performance history to evaluate.

    The Scaling-Stage Allocation (Months 4-6 of SBV)

    Once your SBV winner campaigns have 60-90 days of performance data, evaluate them against the same ACoS and CVR benchmarks you use for SP. If a SBV campaign is matching or beating your SP performance on the same terms, it warrants a budget increase. A common scaling-stage split is 70% SP, 30% SBV — though accounts with strong SBV performance and high NTB value can push SBV to 40% or beyond without sacrificing overall account efficiency.

    The new-to-brand metric is particularly important in this budget decision. If your SBV campaigns are driving NTB rates above 50% (industry benchmarks suggest SBV commonly outperforms SP on NTB by a significant margin), the long-term customer lifetime value justification for SBV budget is stronger than a pure ROAS comparison would suggest. A customer acquired at 25% ACoS who has never bought from your brand before is more valuable than the same ACoS on a repeat buyer from SP.

    Budget Pacing and Daily Cap Management

    SBV campaigns can exhaust daily budgets faster than SP campaigns, particularly at top-of-search placement with competitive bids. Set daily budget caps that are realistic for your impression volume — a campaign that runs out of budget by 2pm is not actually serving your top-of-search strategy through the highest-traffic hours.

    Monitor your hourly impression data and adjust daily caps if campaigns are regularly hitting their budget limit before the end of day. Amazon’s budget management tool can automate some of this, but manual monitoring during the first 30 days of a new SBV campaign gives you much better intuition for that campaign’s traffic patterns.

    Measuring What Matters — NTB, VTR, and the Metrics Most Sellers Ignore

    SBV campaigns report differently than SP campaigns, and sellers who apply SP measurement habits to SBV miss the metrics that actually tell the story of how video is performing. Understanding which metrics matter — and why — prevents bad decisions based on incomplete data.

    New-to-Brand (NTB) Metrics: The Underweighted Signal

    New-to-brand data is available in your Sponsored Brands reporting and it is one of the most strategically important metrics in your entire advertising stack. NTB measures how many of your SBV-driven sales came from customers who had not purchased from your brand on Amazon in the past 12 months. This is not just a branding metric — it is a business growth indicator.

    An account scaling profitably on SP but with low NTB rates is largely re-converting existing customers and brand-aware shoppers. SBV’s primary job is to capture the shoppers that SP isn’t reaching. If your SBV NTB rate is below 30%, your video campaigns are likely targeting too many branded or already-converted intent terms. Push more budget toward non-branded, category-level search terms where the NTB opportunity is larger.

    If your NTB rate is above 50% in SBV campaigns — which is achievable on well-structured category and competitor query campaigns — you can make a strong internal case for increasing SBV budget even if the immediate ROAS looks slightly below SP efficiency. The downstream LTV of new customers justifies the gap.

    View-Through Rate (VTR): The Creative Quality Signal

    VTR measures the percentage of impressions where shoppers watched your video to completion (or to 15 seconds on longer videos). It is a direct signal of creative quality and intent-message alignment. A video that appears on the right search terms but has a 10% VTR is telling you the creative isn’t holding attention. A video with a 40%+ VTR is connecting well with the intent behind the query.

    Low VTR (under 20%) → revisit your hook. The first three seconds are losing people before they see the product.
    Moderate VTR (20-35%) → the hook works, but mid-video engagement is dropping. Shorten the creative or improve the pacing in the 4-10 second zone.
    Strong VTR (35%+) → creative is working. Diagnose any conversion gap at the product detail page level, not the ad level.

    Branded Search Lift: The Halo You Can’t Ignore

    SBV exposure drives branded search — shoppers who see your video and don’t click immediately sometimes come back later and search directly for your brand. This halo effect shows up as branded search growth in your SP campaigns and as direct traffic increases, neither of which get attributed to the SBV campaign that created the intent. It is a real but measurement-invisible contribution.

    Track your branded SP search volume and your direct-traffic conversion rates over the same periods when you scale SBV spend. Month-over-month branded search growth that correlates with SBV scaling is a meaningful downstream signal, even if the attribution model doesn’t connect them directly.

    The Metrics You Can Safely Deprioritize in SBV

    ROAS in isolation is a misleading primary metric for SBV. Because SBV has a longer attribution window, influences downstream branded searches, and drives NTB customers who don’t always reconvert within the 7 or 14-day attribution window, ROAS underweights SBV’s actual contribution. Use ROAS as a guardrail (don’t let campaigns run below a minimum threshold) but not as the primary optimization target. Use NTB rate, CVR, and VTR as your primary optimization signals for SBV, then validate total account efficiency at the macro level.

    The 90-Day Scaling Cycle — A Repeatable Process for Continuous Expansion

    90-day SBV scaling cycle timeline with three phases: Build (Days 1-30), Test and Optimize (Days 31-60), and Scale (Days 61-90) with continuous cycle arrows

    The search-term-first SBV framework isn’t a one-time setup. It’s a repeating cycle that continuously feeds new winners from your SP data into your SBV stack, retires underperformers, and expands the SBV footprint methodically. Understanding the cycle — and building the operational habits to execute it — is what separates accounts that scale SBV sustainably from accounts that launch a few video campaigns and then wonder why performance plateaued.

    Days 1-30: Build

    In the first 30 days, the primary work is structural. Pull your 90-day SP Search Term Report, apply the winner threshold framework, classify terms into Tier 1, Tier 2, and Watch buckets, and build the initial campaign architecture. Launch your Tier 1 SBV exact match campaigns with appropriate bids and Top of Search adjustments. Add all necessary negative keywords across the account. Set daily budgets conservatively — you need data, not maximum spend.

    Produce your initial creative assets during this phase. If budget allows, produce intent-specific creatives for your top two or three Tier 1 term clusters. If budget is constrained, produce one strong general creative and plan to produce intent-specific versions in the Test and Optimize phase.

    End of Day 30 checkpoint: confirm campaigns are serving impressions, CTR is reasonable (above 0.5% is a positive early signal), and negative keyword isolation is working (check for search term overlap between SP discovery and SBV winner campaigns).

    Days 31-60: Test and Optimize

    With 30 days of SBV data, you now have enough information to make meaningful optimization decisions. In this phase:

    • Review VTR by campaign. Identify which creatives are holding attention and which are losing viewers early. Test revised hooks on low-VTR campaigns.
    • Review CVR relative to your SP CVR for the same terms. SBV CVR should be directionally similar to SP CVR on the same search terms, with some variance due to different shopper mindsets at different SERP positions. Large CVR gaps suggest landing page or listing issues, not ad issues.
    • Adjust bids based on initial ACoS data. If ACoS is above target, reduce bids 10-15%. If ACoS is well below target and impression share is limited, increase bids.
    • Pull your SBV Search Term Report for this period. Even in exact match campaigns, you may see close variations triggering. Decide whether to expand targeting to include those variations or add them as negatives.
    • Promote any Tier 2 terms that have accumulated enough SBV-specific conversion data to cross into Tier 1 criteria.

    Days 61-90: Scale

    Campaigns that are meeting performance targets by Day 60 are ready for deliberate budget increases. The scaling decision should be data-driven: increase daily budgets by 20-30% on campaigns that are hitting ACoS targets and have consistent impression share — not campaigns that are hitting daily budget caps due to high spend on underperforming terms.

    During the Scale phase, also run your next SP Search Term Report analysis to identify newly qualified winner terms. The 90-day window you established in the Build phase will now include more data as your account matures, and additional terms may have crossed the winner threshold since you last analyzed. Add new winners to appropriate SBV campaigns and start the process again.

    At the end of Day 90, the cycle resets. The next 90-day period begins with a fresh SP data pull, updated winner classifications, and a review of SBV campaign structures to prune underperformers and add new entrants. This is the compounding mechanism of the framework: each 90-day cycle adds more validated search terms to the SBV stack, increases the total impression footprint of your video advertising, and deepens the dataset for optimization decisions.

    Common Mistakes That Stall SBV Scaling

    The search-term-first framework is sound in theory, but execution errors are common — and a few of them specifically undermine the logic of the whole system. Understanding where accounts go wrong gives you a checklist for avoiding the same pitfalls.

    Mistake 1: Using Broad Match in SBV Winner Campaigns

    This is the most frequent structural error. Sellers build what they think is a winner-based SBV campaign, but use broad match targeting. Broad match means the campaign is triggering on dozens or hundreds of related queries beyond the specific winner search term, none of which have been validated. ACoS spikes. Data becomes unreadable. The campaign is blamed for underperformance when the real problem is the match type. Winner campaigns must use exact match. Full stop.

    Mistake 2: Launching SBV Without Intent-Specific Creative

    Running a single generic product video across all SBV winner campaigns means your creative is misaligned with the specific intent behind different search terms. A shopper who searched “yoga mat for bad knees” needs to see joint support messaging. A shopper who searched “thick yoga mat” needs to see dimension and density information. One creative cannot serve both intents equally well. If producing multiple creatives isn’t immediately feasible, at least separate your campaigns by intent cluster so you can introduce intent-specific creatives incrementally.

    Mistake 3: Ignoring VTR as an Optimization Signal

    Most sellers check CTR and ACoS, then stop. VTR is the signal that tells you whether your creative is holding attention past the first second. A campaign with good impressions and CTR but poor VTR (under 20%) is winning clicks on the strength of the hook alone — and those clicks may not be converting well because the shopper didn’t see enough of the product to be convinced before clicking. Optimize for VTR alongside CTR and ACoS.

    Mistake 4: Skipping the Negative Keyword Layer

    The account cannibalization trap described earlier is a genuine performance problem, not a theoretical one. Sellers who skip systematic negative keyword management after promoting terms to SBV find their performance data muddied within weeks. When the data is muddy, the right optimization decisions become impossible to make. Negative keyword management is not optional in this framework — it is foundational to everything else working correctly.

    Mistake 5: Measuring SBV Like SP

    Applying SP measurement habits to SBV leads to premature campaign termination. SBV’s NTB contribution, branded search halo, and longer attribution journey mean that ROAS comparisons between SBV and SP at the campaign level consistently undervalue SBV. Sellers who cut SBV campaigns after 30 days because “ROAS isn’t as good as SP” are making a decision based on an incomplete accounting of what SBV is delivering. Give SBV campaigns 60-90 days before making final performance judgments, and include NTB metrics in that evaluation.

    Mistake 6: Setting It and Forgetting It

    The 90-day cycle only works if you actually run it. SBV campaigns that were built thoughtfully but haven’t been reviewed in six months are operating on stale winner criteria. Your SP search term data will have evolved — new winners will have emerged, some old winners will have softened, market CPCs will have shifted. The repeating cycle is the mechanism that keeps the system current and compounding. Treat it as a standing operational cadence, not a one-time setup.

    Where This Framework Fits in Your Broader Amazon Advertising Strategy

    The search-term-first SBV scaling framework is not a replacement for a full-funnel Amazon advertising strategy. It is a specific, high-leverage layer within one. Understanding where it sits helps you see how it interacts with your other advertising decisions.

    The Relationship to Sponsored Display and DSP

    As your SBV stack matures and you have NTB data showing which search terms are bringing new customers, you can use that intelligence to inform Sponsored Display retargeting. Shoppers who clicked your SBV ad but didn’t convert are good candidates for SD remarketing. The search-term-first framework generates the first-party audience data that makes downstream retargeting more precise and cost-efficient.

    For accounts with DSP access, SBV winner terms and their associated NTB audiences can be used to build lookalike segments for prospecting — extending the reach of your highest-converting search term intent into programmatic inventory beyond Amazon’s on-platform search.

    The Relationship to Listing Optimization

    Your SP Search Term Report winner analysis will occasionally surface terms with high click volume and low CVR — terms that convert well enough to show up as Tier 3 candidates but aren’t crossing the order threshold because the product detail page is losing too many clicks. These terms are a diagnostic signal: the shopper intent exists, but the listing isn’t converting it. Before promoting these terms into SBV, optimize the listing for those specific search queries — title, main image, bullet points, and A+ content. Fix the conversion problem first, then amplify with video.

    The Long-Term Competitive Advantage

    The compounding advantage of running a systematic search-term-first SBV operation over 12 or 24 months is significant. Your competitors who run SBV without a structured winner-promotion process are buying impressions on unvalidated terms. Their creative is generic. Their measurement is incomplete. You, operating a weekly winner review cycle with intent-matched creatives and tight negative keyword management, are making better decisions faster with less wasted spend. The gap between your account performance and theirs widens with every cycle.

    This is particularly meaningful in competitive categories where CPCs are high and margin for error is thin. Systematic search-term-first SBV is not a clever tactic — in high-competition environments, it becomes a durable structural advantage that compounds as the framework matures.

    Conclusion: Stop Treating Your SP Data as a Static Report

    Your Sponsored Products search term data is not a historical record. It is a forward-looking signal about what your best customers are searching for, what intent converts, and where your next advertising dollars should go. The search-term-first SBV scaling framework is the operational system that converts that signal into action.

    The core insight is simple but underexecuted: Sponsored Brands Video should not be built from creative instinct alone. It should be built from proven search term performance. The specific queries that already converted in SP are the exact queries that should drive your SBV targeting, your creative briefs, and your bid strategy.

    Here are the six most important actions to take immediately if you want to implement this framework:

    1. Pull your 90-day SP Search Term Report today and apply the winner threshold criteria (3+ orders, ACoS at or below target, CVR above 3%). See how many Tier 1 and Tier 2 terms you have right now.
    2. Audit your existing SBV campaigns for match type discipline. If you have broad or phrase match in winner campaigns, switch them to exact match and add the newly excluded terms to a separate SBV discovery campaign.
    3. Tag your winner terms by intent type (problem-aware, category-aware, competitor, branded) and assess whether your current SBV creative matches the intent of each cluster.
    4. Implement negative keyword isolation immediately if you have terms that exist in both SP discovery and SBV exact match campaigns. The cannibalization cost compounds daily.
    5. Add NTB metrics to your weekly SBV review. If you haven’t been tracking NTB rate by campaign, start now. It will change how you allocate budget between SP and SBV.
    6. Commit to the 90-day cycle cadence. Block time on your calendar for the Build, Test and Optimize, and Scale phases. The framework only compounds if you run it consistently.

    The data is already in your account. The search terms are already there. The only question is whether you act on them systematically or leave them sitting in a report while your competitors scale SBV around your proven intent clusters.

  • Agentic Stack Wars: Who Actually Controls Your Automation Future — LLMs, RPA, or APIs?

    Agentic Stack Wars: Who Actually Controls Your Automation Future — LLMs, RPA, or APIs?

    Three competing factions — LLMs, RPA, and APIs — battle for control of the enterprise agentic automation stack

    Every enterprise automation conversation in 2026 eventually arrives at the same three-way standoff. LLM vendors promise that language models can now reason through any workflow. RPA incumbents argue their bots aren’t going anywhere — they’re just getting smarter. And API platform teams quietly remind everyone that none of it moves without them.

    All three are right. And all three are wrong about who’s in charge.

    The real battle isn’t between tools — it’s between layers. Whichever vendor or framework controls the orchestration layer, owns your stack. Whoever owns your stack, owns your automation roadmap for the next five to eight years. That’s not a technology question. That’s a strategic one.

    This post maps the fight layer by layer. Not from the perspective of “which tool should I pick” — that framing is already obsolete. Instead, it examines what each layer actually does, where the genuine architectural leverage sits, which vendors are quietly cementing control, and what the compounding costs of bad layer decisions look like in production. By the end, you’ll have a clearer picture of the battlefield than most of the vendors currently trying to sell you a seat at the table.

    One critical framing note before we begin: this is not about which AI model wins. Model wars are largely over as a decision-making variable. GPT-4o, Claude 3.5, Gemini 1.5 Pro — they’re all capable enough for most enterprise workflows. The models are commoditising. The stack around the models is not.

    The Stack Is Not a Tool — It’s a Power Structure

    The five layers of a modern agentic AI stack — from API gateway to governance — stacked as floors of a building

    Most teams approach the agentic stack as a shopping list. Pick an LLM. Choose an orchestration framework. Bolt on some RPA bots for legacy system access. Wrap it in an API gateway. Ship it. This approach produces demos that look impressive and production systems that break in ways nobody anticipated.

    The reason is that an agentic stack isn’t a collection of tools — it’s a layered power structure, where each layer makes decisions that constrain the layers below and depend on the layers above. If you pick those layers without understanding who controls them, who can change them, and what it costs to replace them, you’re not building automation infrastructure. You’re accumulating technical debt with a very impressive-looking interface.

    The five load-bearing layers

    A mature enterprise agentic stack in 2026 has five distinct layers, each with its own failure modes, vendor dynamics, and lock-in profile:

    • Layer 1 — Reasoning: The LLM or model ensemble responsible for planning, decision-making, and natural language understanding. This is the layer most people obsess over — and the layer that matters least for long-term architecture decisions.
    • Layer 2 — Orchestration: The runtime that coordinates agent tasks, manages state, handles retries, and routes decisions between agents and tools. This is the highest-stakes architectural decision in any agentic stack.
    • Layer 3 — Execution: Where actual work happens — API calls, RPA bot triggers, database writes, file operations, browser automation. The execution layer is often inherited from existing infrastructure, which creates the RPA integration problem explored below.
    • Layer 4 — Tool & API Access: The standardised interface through which agents discover, call, and authenticate against external systems. This layer has been fundamentally reshaped by the Model Context Protocol (MCP).
    • Layer 5 — Governance & Observability: Audit logs, access controls, human-in-the-loop gates, cost monitoring, and behavioural evaluation. In 2026, this layer is frequently the difference between an agent that scales and one that gets shut down after its first major error.

    Gartner projects that roughly 40% of enterprise applications will embed task-specific AI agents by the end of 2026 — up from under 5% in 2025. Most of those deployments will be decided by layer 2 choices made in the next 12 months. That’s the battlefield.

    Why “which LLM” is the wrong first question

    It’s tempting to anchor your stack decision to a model choice. In practice, well-architected stacks are model-agnostic at the reasoning layer — routing between GPT-4o, Claude, Gemini, and smaller fine-tuned models depending on task type, latency requirements, and cost targets. If your stack is deeply coupled to a single model provider at the reasoning layer, that’s not a feature — it’s a fragility.

    The decision that locks you in isn’t which model you use. It’s which orchestration runtime you build your workflow logic inside. Everything downstream inherits that choice.

    Layer 1: The Reasoning Brain — Model Routing Over Model Loyalty

    The first question most teams ask when building an agentic stack is: “Which LLM do we use?” It’s a reasonable starting point — but in 2026, treating it as a binary decision is a sign of architectural immaturity.

    Multi-model routing is now the baseline

    Enterprise teams that have moved from pilot to production consistently describe the same progression. They start with a single model (usually OpenAI or Anthropic), get good demo results, move to production, then realise they need different models for different task types. A large context window model for document analysis. A smaller, faster model for real-time classification. A fine-tuned domain-specific model for compliance checks. A cheap open-source model for high-volume preprocessing.

    Multi-model routing — dynamically selecting which model handles which task within a single workflow — has become a standard pattern. The orchestration layer handles this routing, which means your model provider diversification strategy is actually an orchestration layer design decision.

    What the reasoning layer is actually responsible for

    Within an agentic stack, the LLM reasoning layer performs four distinct functions that are worth separating in your architecture:

    1. Planning: Breaking a high-level goal into a sequence of sub-tasks. This is where LLM quality most directly impacts workflow success rates.
    2. Tool selection: Choosing which tool or API to call for each sub-task. Tool-calling reliability varies significantly across models and is often the most common source of workflow failures.
    3. Context management: Maintaining relevant context across multiple steps without hallucinating or losing track of prior state. This is a context engineering problem as much as a model quality problem.
    4. Exception handling: Recognising when a step has failed and deciding whether to retry, escalate, or reroute. Weaker models tend to loop silently; stronger models tend to escalate appropriately.

    The practical implication: you don’t need your most expensive model doing all four. Planning and exception handling benefit from the strongest available model. Tool selection and preprocessing can often use smaller, cheaper alternatives — cutting per-workflow costs by 40–60% without meaningful quality loss.

    Context engineering: the silent performance variable

    One of the most underappreciated variables in reasoning layer performance is context design — what information the agent receives, in what order, and how it’s structured. A well-orchestrated context pipeline can make a mid-tier model outperform an expensive one on a specific task. This is why “context engineering” is increasingly discussed as a first-class skill alongside prompt engineering — and why it sits at the intersection of the reasoning layer and the orchestration layer.

    Layer 2: The Orchestration Battlefield

    Orchestration framework showdown 2026 — LangGraph vs AutoGen vs CrewAI vs Temporal: No clear winner

    If you want to understand where the real architectural power in an agentic stack is concentrated, watch which layer is generating the most VC investment, the most open-source activity, and the most enterprise vendor anxiety. That’s the orchestration layer. And in 2026, it’s genuinely contested terrain.

    What orchestration actually does

    Orchestration is the control plane of the agentic stack. It decides:

    • Which agent runs next
    • What state gets passed between agents
    • When to call a tool vs. when to ask a human
    • How to handle failures, timeouts, and retries
    • How to route tasks across a multi-agent network
    • How to enforce cost limits and governance policies

    Get the orchestration layer wrong and no amount of model quality or RPA investment can save you. Get it right and you have a system that can absorb changes in models, tools, and business logic without requiring a full rebuild.

    The main frameworks — and what they’re actually for

    The four frameworks that dominate enterprise conversations in 2026 are LangGraph, AutoGen, CrewAI, and Temporal. They are not direct competitors in the way vendors sometimes present them. They solve different orchestration problems.

    LangGraph (LangChain) is the closest thing to a general-purpose production orchestration runtime. Its graph-based state machine model gives teams precise control over workflow branching, cycle detection, and state persistence. LangSmith provides integrated observability. The trade-off is a steeper learning curve and strong coupling to the LangChain ecosystem — a lock-in risk that deserves deliberate consideration.

    AutoGen (Microsoft) is optimised for conversational multi-agent systems and code-executing agents. It excels in research environments and developer tool workflows where agent-to-agent dialogue drives decision-making. The Microsoft backing means tight integration with Azure AI services — convenient if you’re already Azure-native, a significant constraint if you’re not.

    CrewAI offers the fastest time-to-prototype for role-based multi-agent teams. Its abstraction model — where agents are assigned roles, goals, and backstories like members of a team — makes it accessible to developers who aren’t deep experts in graph theory or distributed systems. The downside is that this simplicity creates ceilings. Complex, stateful enterprise workflows tend to outgrow CrewAI’s abstractions.

    Temporal is not strictly an AI orchestration framework — it’s a durable execution engine that has been widely adopted for agentic workflows requiring long-running, fault-tolerant processes. Where LangGraph manages agent reasoning graphs, Temporal manages the reliability of the execution itself: ensuring that a workflow that runs for hours or days doesn’t lose state when a server fails. Many mature production stacks use both — LangGraph for agent logic, Temporal for durability.

    The convergence trap

    In early 2026, the frameworks have been converging on similar abstractions: stateful graphs, tool registries, memory management, human-in-the-loop gates. This convergence makes it tempting to treat them as interchangeable. They are not. The differences that matter aren’t feature lists — they’re operational maturity, ecosystem depth, observability support, and most importantly, which cloud vendor controls the runtime’s long-term direction. Choosing AutoGen is, in practice, a partial bet on Microsoft’s AI roadmap. That may be exactly the right bet for your organisation. But it should be made explicitly, not by accident.

    Layer 3: Where RPA Actually Belongs in a Cognitive Stack

    Traditional RPA versus cognitive agentic automation — a hybrid stack bridges both sides

    The hottest take in enterprise automation circles in 2026 is “RPA is dead.” It makes for a compelling vendor narrative — particularly from LLM-native automation startups pitching against UiPath and Automation Anywhere. The reality is substantially more complicated, and the organisations that act on the “RPA is dead” thesis without nuance are discovering it through expensive production failures.

    Why traditional RPA isn’t going anywhere — yet

    Traditional RPA bots have a specific set of properties that make them genuinely irreplaceable for a class of enterprise workflows:

    • Deterministic execution: A well-built RPA bot does exactly what it’s scripted to do, every time. In compliance-sensitive workflows — payroll, regulatory filings, audit trails — this predictability isn’t a limitation. It’s a requirement.
    • Structured system integration: Many enterprise systems — particularly legacy ERP platforms, mainframes, and COBOL-era applications — don’t expose APIs. RPA bots interact with their UIs directly. Until those systems are modernised (a multi-year effort in most large organisations), RPA is the only practical access mechanism.
    • Existing investment: The average large enterprise has hundreds to thousands of deployed RPA bots. Replacing them wholesale isn’t a technology decision — it’s a budget, risk, and operational continuity decision. The deprecation curve for mature RPA infrastructure is measured in years, not quarters.

    The cognitive promotion: what agentic AI actually adds to RPA

    The most accurate framing isn’t “agents replace RPA” — it’s “agents give RPA a manager.” In a well-architected hybrid stack, RPA bots remain the execution workers for deterministic, high-volume, rules-based tasks. Agentic AI handles the higher-level work that RPA can’t: interpreting unstructured inputs, handling exceptions, making contextual decisions, and coordinating across multiple systems.

    Consider a practical example: invoice processing in accounts payable. A traditional RPA bot can extract structured data from a standard PDF invoice and enter it into an ERP system with high speed and reliability. But it fails immediately when the invoice is a scanned image with unusual formatting, or when it requires a decision about whether a line item qualifies for a specific cost centre, or when there’s a discrepancy that needs negotiation with the vendor. These exceptions previously required human intervention.

    In a hybrid agentic stack, the LLM-powered agent handles the exception — reading the unstructured input, querying relevant policy documents via RAG, making a contextual decision, and then handing a structured instruction back to the RPA bot for execution. The bot does what it’s good at. The agent does what the bot can’t.

    The three-tier execution model

    The most effective enterprise automation architectures in 2026 use a three-tier execution model:

    1. Deterministic tier (RPA bots): High-volume, rules-based, stable-format tasks. Zero tolerance for variability. Compliance-critical paths.
    2. Adaptive tier (LLM agents): Exception handling, unstructured data interpretation, multi-step decisions, cross-system coordination.
    3. Human-in-the-loop tier: Decisions above a defined confidence threshold, novel situations outside training data, high-stakes irreversible actions.

    The RPA vendor ecosystem has responded to this reality. UiPath, Automation Anywhere, and Blue Prism are all shipping agentic AI integrations — positioning their bot infrastructure as the execution layer of agentic stacks rather than a competing paradigm. This is the correct architectural framing. It’s also a smart commercial survival strategy.

    Layer 4: APIs as the Action Layer — Why Gateways Now Run the Show

    The least glamorous layer of the agentic stack is the one that increasingly runs it. API gateways — long understood as security and traffic management tools — have become the functional nervous system of any enterprise agent deployment. In 2026, this shift has become too significant to treat as an infrastructure detail.

    The action layer problem

    An agentic system’s value is entirely determined by what it can do. Reading data is useful. Writing to a database, triggering a workflow, sending a notification, updating a CRM record, initiating a payment — that’s where automation value is actually realised. All of that happens through APIs. Which means every action an agent takes is an API call. And every API call is a governance event.
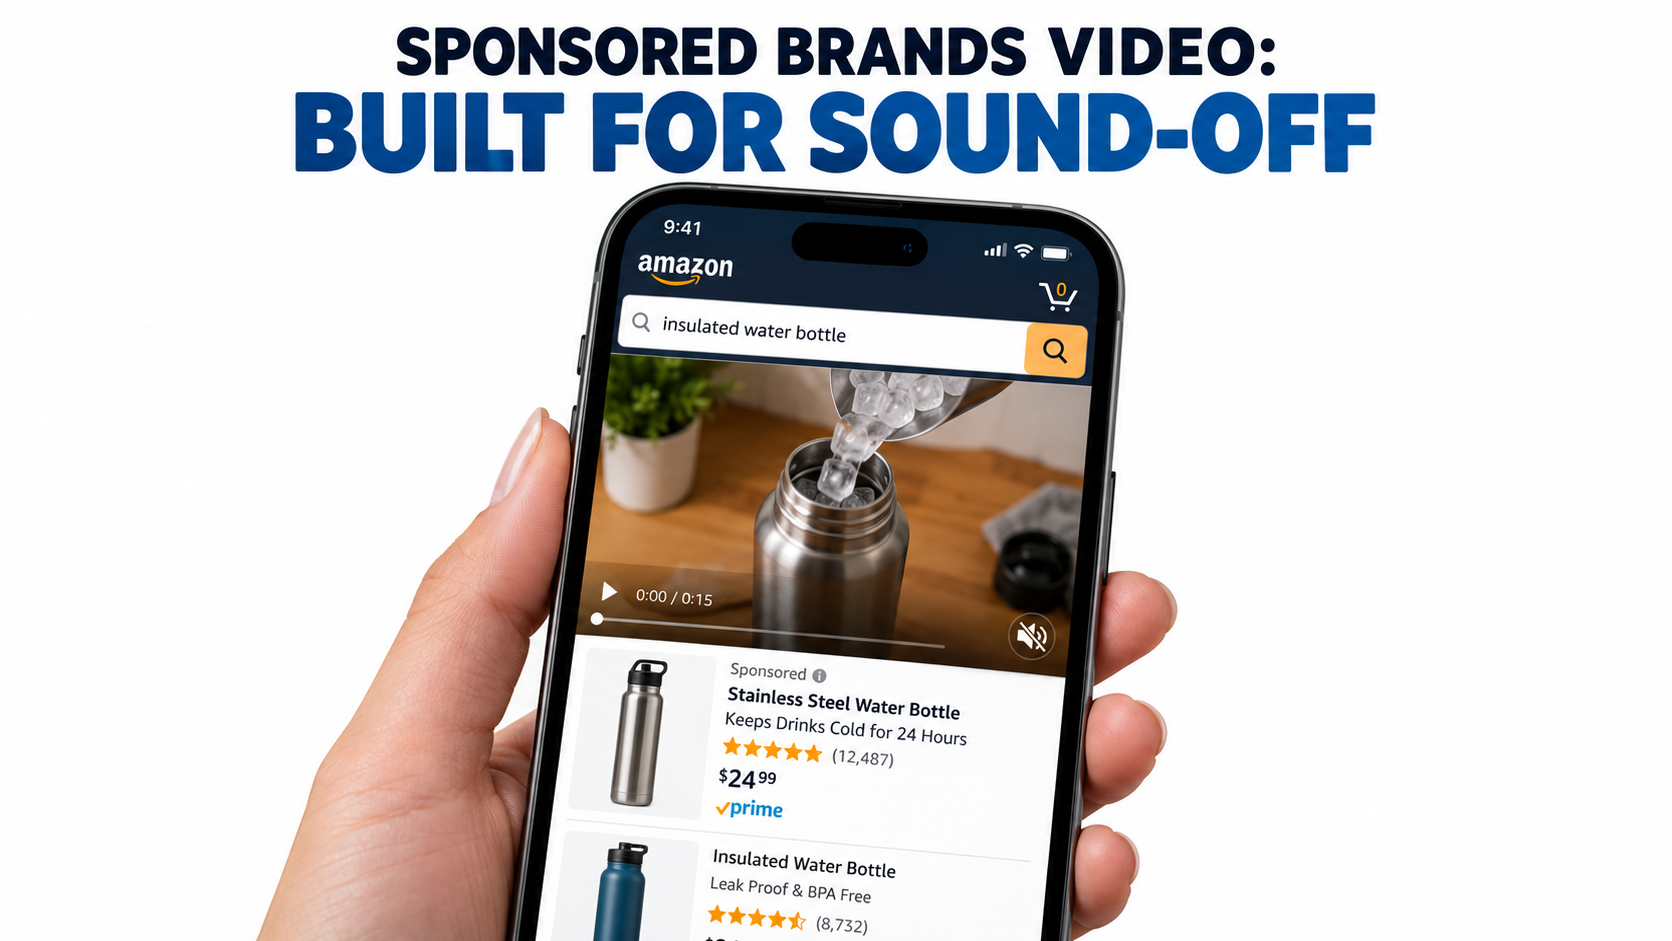
    In a traditional application, API traffic is relatively predictable. A human user triggers an action; the application makes a call. Volume is bounded by human interaction speed. In an agentic stack, agents can make hundreds or thousands of API calls per minute, across dozens of endpoints, with tool selection driven by probabilistic LLM inference rather than deterministic code paths. The governance requirements are fundamentally different.

    What the modern AI gateway does

    The AI gateway — distinct from a traditional API gateway in its awareness of LLM-specific traffic patterns — now handles five distinct functions in the agentic stack:

    • Tool discovery: Exposing a catalogue of available APIs to agents in a structured format they can reason about. Rather than agents being hardcoded with specific endpoints, they query the gateway for what’s available.
    • Identity and access control: Enforcing which agents can call which APIs, under what conditions, and with what rate limits. This is especially critical in multi-agent systems where one agent might spawn sub-agents that inherit (or shouldn’t inherit) its permissions.
    • Semantic routing: In advanced deployments, the gateway routes tool calls to the most appropriate backend based on the call’s intent — not just its endpoint. This enables fallback logic, load balancing across equivalent services, and graceful degradation.
    • Cost and latency tracking: Logging the token cost, latency, and error rate of every tool call. Without this, there is no reliable way to track the true cost of an agent workflow or identify which tool calls are responsible for performance problems.
    • Audit trail generation: Creating an immutable record of every action an agent took. In regulated industries, this audit trail isn’t optional — it’s a compliance requirement.

    The gateway as the choke point of agent governance

    Here’s the uncomfortable strategic reality: in an agentic stack without a well-configured AI gateway, there is no reliable way to control what your agents do. You can write governance policies at the orchestration layer, but if an agent can make direct API calls that bypass the gateway, those policies are advisory, not enforced. The gateway is the enforcement point. Building governance into the prompt is theatre. Building governance into the gateway is architecture.
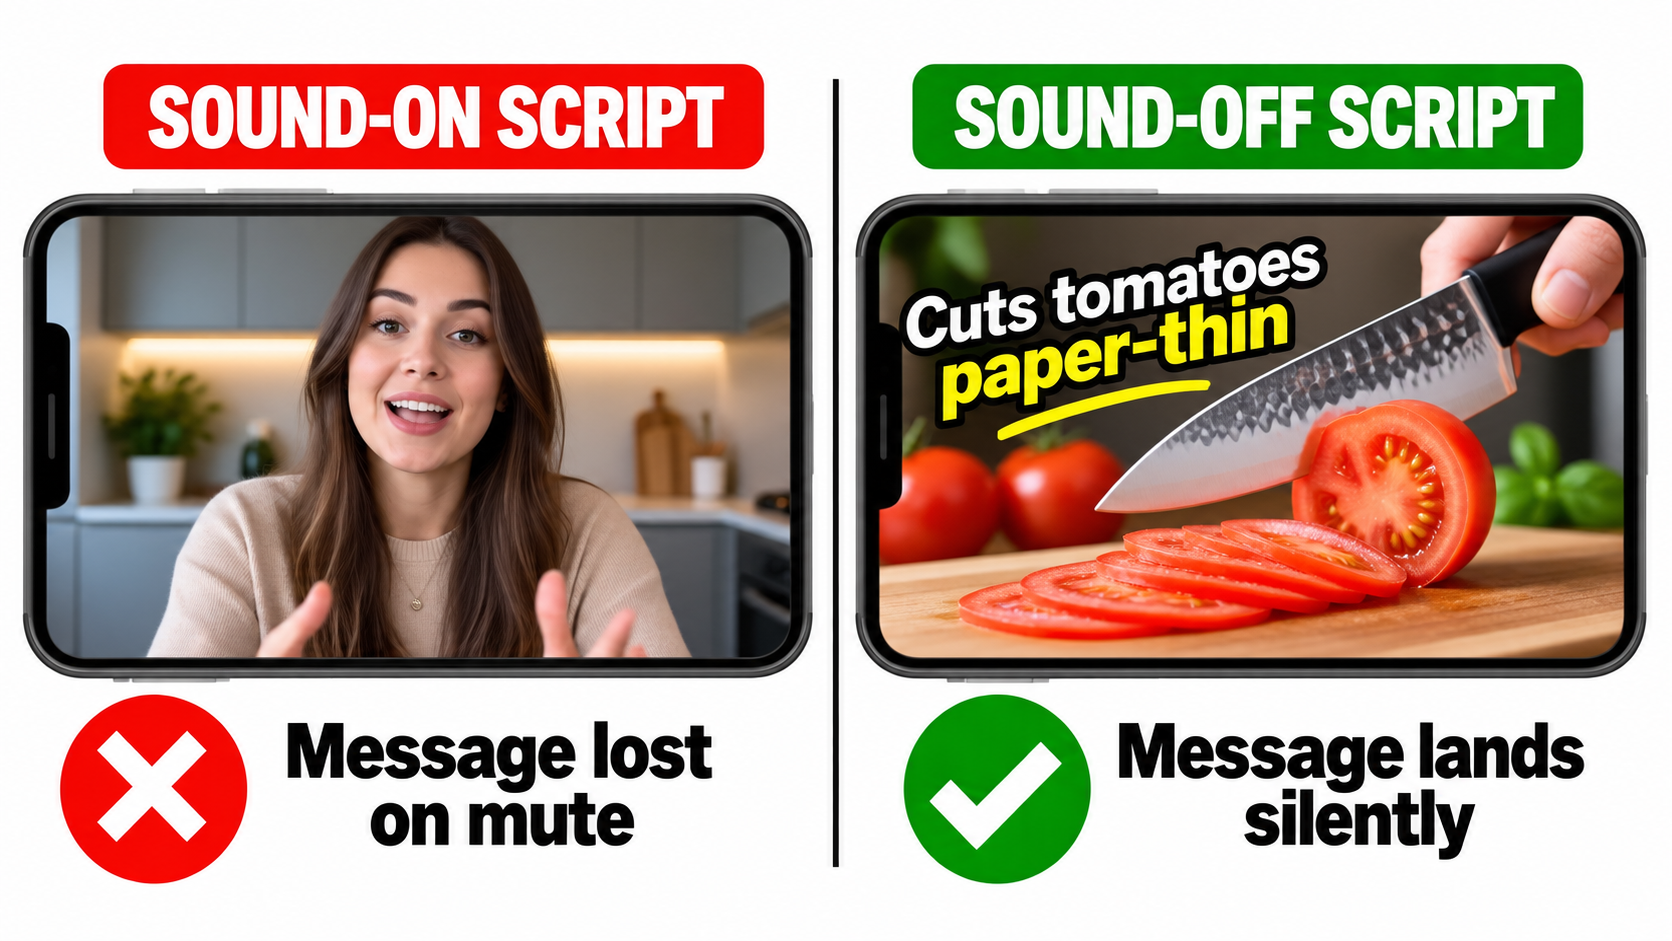
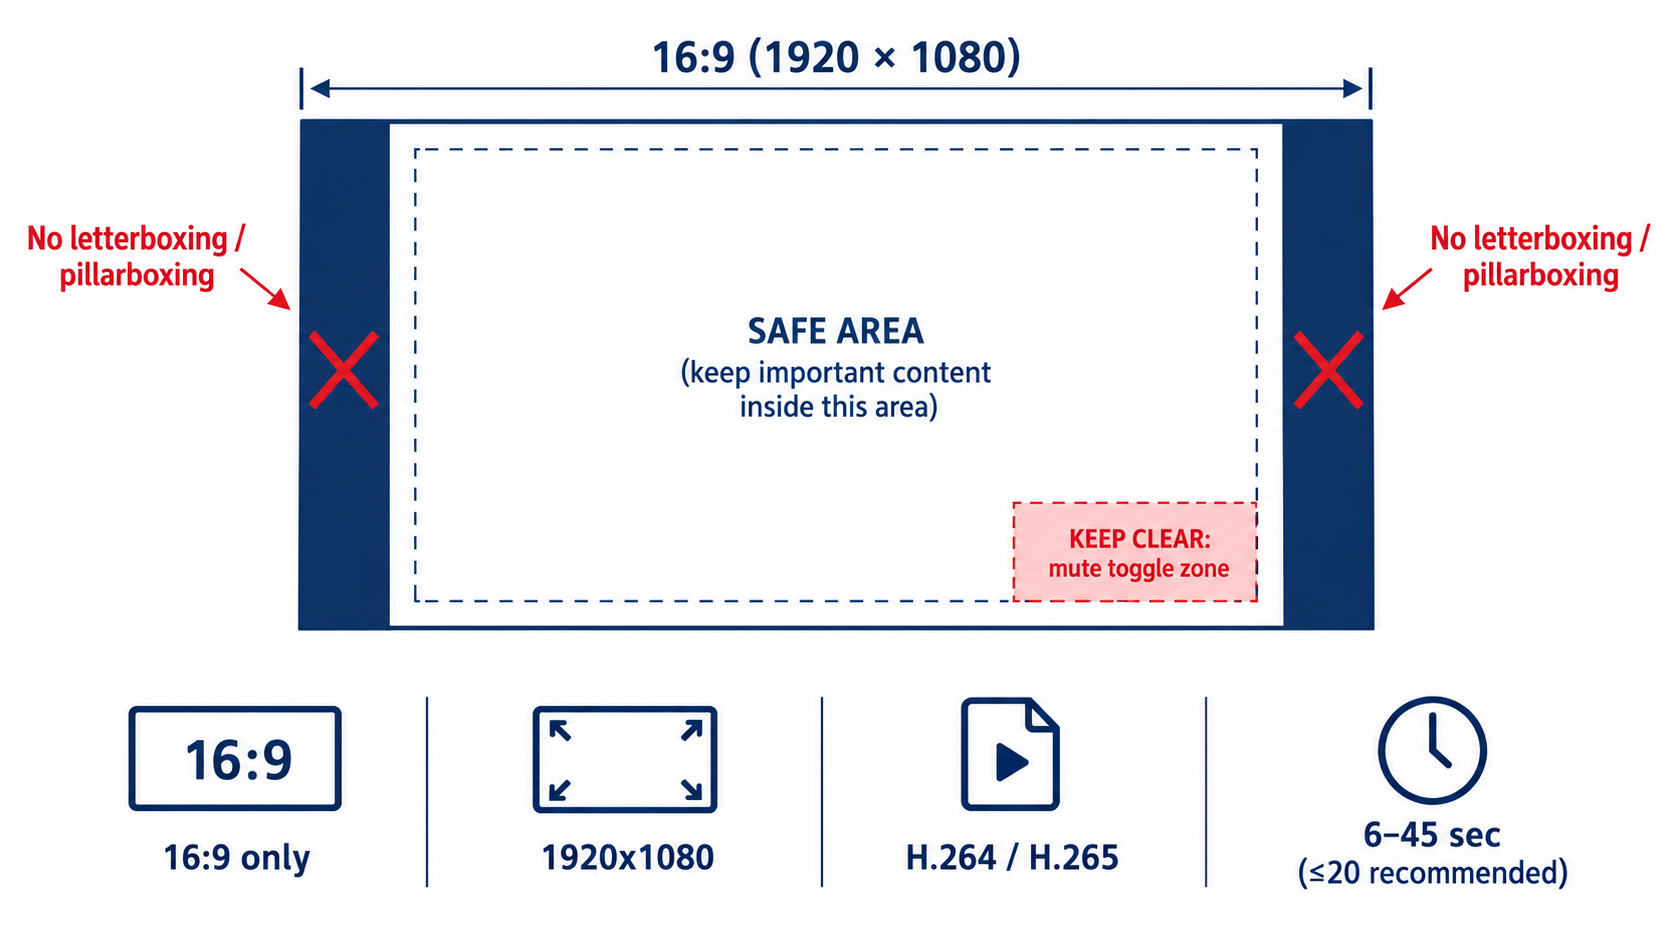
    The MCP + A2A Protocol Shift That Changes Everything

    If there’s a single technical development in 2026 that most practitioners are underweighting, it’s the rapid standardisation of the Model Context Protocol (MCP) and the Agent-to-Agent (A2A) coordination protocol as the foundational communication standards of the agentic stack.

    What MCP actually is — and why it matters beyond the hype

    MCP, originally developed by Anthropic and now adopted broadly across the ecosystem, solves a specific and genuinely painful problem: how does an agent discover, authenticate against, and call external tools in a standardised way? Before MCP, every agent-to-tool integration was bespoke. Building an agent that could use Salesforce, Jira, a custom database, and a payment processor required four separate integration implementations, each with its own authentication handling, error management, and data serialisation logic.

    MCP defines a standard protocol for this. An MCP server wraps an external tool or data source, exposes a standardised interface, and handles the translation between the agent’s requests and the tool’s native API. The agent doesn’t need to know whether it’s talking to Salesforce or a legacy internal database — it makes the same type of MCP call either way.

    The practical impact: teams that have migrated their tool integrations to MCP report dramatically reduced integration maintenance overhead and the ability to swap underlying tools without rewriting agent logic. This is the portability benefit that matters most for long-term stack governance.

    A2A: the agent-to-agent coordination layer

    While MCP handles agent-to-tool communication, A2A (Agent-to-Agent protocol, championed by Google) handles a different problem: how do agents from different systems, built by different teams or vendors, coordinate with each other?

    In a multi-agent enterprise workflow, you might have a procurement agent built on one framework, a compliance checking agent built by a vendor, and a financial approval agent built on a different platform entirely. A2A provides a standard protocol for these agents to discover each other, delegate tasks, and return results — without requiring a shared underlying runtime.

    The emerging consensus is that MCP and A2A are complementary rather than competing standards. MCP is the agent’s interface to the tool layer. A2A is the agent’s interface to other agents. Together, they form what is beginning to look like a genuine interoperability standard for the agentic ecosystem — which would be significant if adoption continues at its current pace.

    The gateway-as-MCP-broker pattern

    The most architecturally elegant deployment pattern emerging in 2026 is the AI gateway functioning as an MCP broker — sitting between agents and MCP servers, adding governance, security, and observability to every tool call without requiring agents to handle those concerns themselves. This pattern cleanly separates the agent’s reasoning responsibility from the platform’s governance responsibility, which is exactly the separation you want for maintainability and compliance.

    The Hidden Cost Stack Nobody Shows You at Demo Day

    The agentic AI stack cost iceberg — hidden costs of orchestration, governance, and observability dwarf the quoted LLM token price

    Vendor demos of agentic AI are, almost universally, cost-optimistic. This isn’t dishonesty — it’s the natural consequence of showing a system at demo scale rather than production scale, in a controlled environment rather than an enterprise one, with happy-path scenarios rather than exception-heavy real workloads. The TCO gap between a compelling demo and a sustainable production deployment is one of the most consistent sources of agentic AI project failure in 2026.

    What vendors quote vs. what you actually pay

    The visible costs in any agentic AI proposal are LLM token costs, software licensing, and cloud infrastructure. These are real costs — but in a mature enterprise deployment, they typically represent 20–30% of total spend. The 70–80% sits below the waterline:

    • Orchestration engineering: Building, testing, and maintaining the workflow logic that coordinates agents is a significant engineering investment. Every edge case in a business process becomes an orchestration decision. Typical enterprise deployments require 2–4 senior engineers working on orchestration full-time for the first 6 months.
    • Data preparation: Agents require clean, well-structured, contextually appropriate data. In most enterprises, data is messy, inconsistent, and scattered across siloed systems. Getting data to a state where agents can reliably use it is often the longest phase of any deployment — and it’s rarely in the vendor quote.
    • Governance and compliance engineering: Building the audit trails, access controls, human-in-the-loop workflows, and policy enforcement mechanisms required for regulated industries is a separate engineering project running parallel to the agent development itself.
    • Evaluation and quality assurance: Unlike traditional software, agentic systems require continuous behavioural evaluation — not just unit tests. Building evaluation frameworks, defining success metrics for agent behaviour, and running regular evals against those metrics is an ongoing operational cost.
    • Human oversight infrastructure: Even well-performing agents need human review mechanisms for edge cases. Designing, building, and staffing those review workflows — the “human in the loop” — is a cost that’s often underestimated until the first major production incident.

    The TCO multiplier in practice

    Research across enterprise deployments in 2026 suggests that total cost of ownership for agentic AI stacks runs 2–3× naive initial estimates. For a mid-sized deployment initially quoted at $200,000 for the first year, realistic TCO including all the above layers is typically $400,000–$600,000. Upfront implementation costs for enterprise-grade stacks typically range from $40,000 to $200,000+, with ongoing operational costs of $5,000–$25,000 per month depending on scale and complexity.

    This doesn’t mean agentic AI is a bad investment — the ROI data is compelling for well-scoped deployments. But it does mean that organisations evaluating proposals on quoted cost rather than realistic TCO are systematically underestimating the commitment they’re making.

    The FinOps discipline for agentic stacks

    The operational response from mature teams is treating agentic AI costs with the same rigour as cloud infrastructure costs — a FinOps discipline applied to the agent layer. This means per-workflow cost attribution, token budget controls enforced at the gateway layer, regular cost-per-outcome tracking, and explicit ROI review cycles tied to specific workflow automations rather than the program as a whole.

    Teams that implement this discipline early consistently report better cost control and higher stakeholder confidence in continued investment. Those that don’t tend to experience the classic pattern: exciting early results, cost shock at the first renewal conversation, difficult internal justification battles.

    Failure Modes That Don’t Show Up Until Production

    Agentic AI production failure cascade — context overflow, tool hallucination, infinite loops, and state corruption hit in sequence

    The failure modes of agentic AI stacks are categorically different from those of traditional software. Traditional software fails in predictable, reproducible ways: a specific input triggers a specific error. Agentic systems fail in probabilistic, context-sensitive, sometimes-undetectable ways. Understanding this failure profile is essential for building production systems that survive first contact with real workloads.

    The six failure categories that actually kill production deployments

    1. Context overflow and information loss. As a workflow lengthens, the agent’s context window fills with accumulated task history, tool outputs, and intermediate results. When that window is exceeded — or when the agent is poorly designed and loses track of earlier context — it begins making decisions based on incomplete information. This produces outputs that are locally coherent but globally wrong, and they’re often extremely hard to detect without workflow-level tracing.

    2. Tool call hallucination. Agents occasionally invoke tools with incorrect parameters, against endpoints that don’t exist, or with fabricated authentication credentials. Unlike a traditional software bug, this failure mode doesn’t throw an obvious error — it generates a plausible-looking API call that simply fails. Without comprehensive tool-call logging at the gateway layer, these failures are nearly invisible.

    3. Infinite retry loops. When a tool call fails, a well-designed agent should either try an alternative approach or escalate to a human. A poorly designed one retries the same call indefinitely, or cycles between two failed approaches. Without hard timeout limits and loop-detection logic at the orchestration layer, this can exhaust both token budgets and downstream API rate limits before anyone notices.

    4. State memory corruption in multi-agent systems. When multiple agents share access to a state store and one agent writes incorrect or malformed state data, every downstream agent that reads that state inherits the corruption. In a five-agent pipeline, a state corruption in agent two can silently invalidate the outputs of agents three, four, and five. This is the multi-agent equivalent of a database transaction failure — and it requires explicit state validation logic to catch.

    5. Goal drift in long-running workflows. In workflows that run over hours or days, agent behaviour can drift from the original objective as accumulated context shifts the model’s interpretation of the task. This is especially pronounced in workflows where agents interact with external systems that return evolving data. The goal the agent is optimising for at step 50 may not be the same goal it was given at step 1.

    6. Inter-agent trust escalation. In multi-agent systems, agents often delegate tasks to sub-agents. If permissions aren’t explicitly scoped at each delegation level, a sub-agent may inherit (or claim) permissions beyond what its principal intended. This is the agentic equivalent of a privilege escalation attack — and it’s a genuine security risk in any system where agents can create other agents.

    Observability as a first-class design requirement

    The common thread across all these failure modes is that they are invisible without purpose-built observability. Standard application monitoring — uptime checks, error rate dashboards, response time percentiles — does not capture the failure signatures of agentic systems. You need session-level tracing that records every agent decision, every tool call, every state transition, and every model inference, along with the ability to replay and inspect any workflow after the fact.

    Teams that treat observability as a nice-to-have tend to discover these failure modes from user complaints or system incidents. Teams that build observability as a first-class infrastructure component discover them from their monitoring dashboards — a distinction that is the difference between proactive and reactive operations.

    The Lock-In Map: Where You’re Already Trapped

    Lock-in risk map for agentic stacks — hyperscaler territory, open orchestration zones, and MCP neutral ground

    One of the most consistent findings from enterprise architecture reviews in 2026 is that teams dramatically underestimate lock-in risk in their agentic stack decisions. This isn’t because they’re naive — it’s because the lock-in in these systems is structural and often invisible until you try to change something.

    Where the real lock-in lives

    Contrary to popular assumption, model-level lock-in is now the easiest to escape. Switching from GPT-4o to Claude or Gemini is largely an API and prompt engineering exercise — meaningful work, but achievable in weeks. The lock-in that actually constrains organisations for years is concentrated in different places.

    Orchestration runtime lock-in is the most significant. Once you’ve built complex multi-agent workflows inside LangGraph’s state machine model, migrating that logic to a different orchestration framework is effectively a rewrite. Your workflow definitions, state schemas, memory patterns, and tool integrations are all expressed in the framework’s abstractions. That’s not porting — it’s rebuilding.

    Memory and state layer lock-in is emerging as a critical new category. Agents that maintain long-term memory about users, processes, and organisational context accumulate that memory in specific formats tied to specific databases and retrieval systems. As these memory stores grow, they become increasingly difficult to migrate without data loss or quality degradation.

    Hyperscaler platform lock-in is the most familiar pattern, and arguably the most dangerous. Microsoft’s Azure AI Foundry and Google’s Vertex AI are both building comprehensive agentic platforms that bundle orchestration, model access, storage, and governance into a single offering. The convenience is real. So is the eventual pricing power once switching costs are high enough to deter exit.

    Proprietary agent platform lock-in from newer startups selling “complete agentic platforms” presents a different risk profile: these companies are early-stage, potentially less stable, and their platforms are less battle-tested in enterprise environments. The appeal is a faster time-to-value. The risk is platform instability, acquisition, or pivot.

    The open vs. closed architecture decision

    The strategic question isn’t whether to accept any lock-in — some is inevitable in any technology stack. The question is which lock-in you can afford and which you can’t. Teams that have navigated this most successfully in 2026 use the following framework:

    • Keep the reasoning layer model-agnostic by design. Use routing abstractions that allow model swapping without workflow changes.
    • Prefer open orchestration frameworks (LangGraph, Temporal) over proprietary platforms for complex workflows. Accept proprietary platforms only for well-scoped, contained use cases.
    • Insist on MCP-compliant tool integrations as a procurement requirement. Non-MCP tool integrations create integration debt that compounds as the stack grows.
    • Design the governance and observability layer to be cloud-agnostic. Audit logs, policy definitions, and evaluation frameworks should be portable — not stored in a hyperscaler’s proprietary format.

    How to Architect for Composability, Not Just Speed

    The instinct in any competitive technology adoption cycle is to move fast and standardise later. In enterprise agentic AI, this instinct is actively dangerous. The architectural decisions made in the first 6–12 months of a deployment define the composability ceiling for everything built on top of them.

    The composability principle in agentic stacks

    A composable agentic stack is one where new capabilities — new agents, new tools, new models, new workflow patterns — can be added without requiring changes to existing components. This sounds obvious. It’s surprisingly rare in practice, because the shortcuts taken during fast-moving initial development tend to produce coupling between layers that should be independent.

    The most common composability failure: agents that are tightly coupled to specific tool implementations rather than to standardised tool interfaces. When the tool changes — the underlying API is updated, the vendor is replaced, the integration is refactored — agents that hold references to specific implementation details break. Agents that call through an MCP-standardised interface are insulated from those changes.

    Design patterns for composable agentic architecture

    The specialist-coordinator pattern: Design agents as specialists — narrow, deep, highly capable within a specific domain. Then build coordinator agents whose sole function is to route tasks to the appropriate specialist and aggregate results. This pattern mirrors how effective human organisations work, and it produces systems that are easier to extend (add a new specialist) without modifying existing components.

    Explicit state contracts: Define the shape of the data that flows between agents as explicit schema contracts — not implicit conventions. Every agent publishes what state it expects to receive and what state it will produce. This contract becomes the interface that allows agents to be replaced or upgraded without breaking downstream consumers.

    Graceful degradation by design: Every agent should have a fallback behaviour when its primary approach fails: retry with a different model, route to a simpler rule-based fallback, or escalate to human review. Systems designed with graceful degradation produce much more predictable failure modes and are dramatically easier to operate under adversarial real-world conditions.

    Evals as the acceptance test: Before any agent component is promoted to production, it should pass a defined evaluation suite that tests its behaviour across representative edge cases. This is not optional quality assurance — it’s the mechanism that ensures the composable stack remains composable as it grows. Components without evals are components whose behaviour is undefined, and undefined components poison composability.

    The governance-by-design imperative

    One of the most consistent findings from organisations that have successfully scaled agentic stacks is that governance built into the architecture from the start is dramatically cheaper than governance retrofitted after deployment. Audit trails designed as a core feature cost a fraction of audit trails bolted on after the system is in production. Access controls defined at the orchestration level require a tenth of the engineering effort of access controls that have to intercept existing tool calls retroactively.

    This isn’t just a technical observation — it’s a strategic one. Organisations that architect for governance from day one are consistently better positioned for the regulatory scrutiny that enterprise AI is beginning to face in 2026. Those that treat governance as a deployment-phase concern tend to face painful retrospective engineering when the audit or the regulator arrives.

    Stop Choosing Tools — Start Owning Layers

    The agentic stack wars are not going to be resolved by a single winning framework, a single winning model, or a single winning vendor. The enterprise automation landscape in 2026 is genuinely pluralistic — and that’s not a temporary state of market immaturity. It’s the permanent condition of an infrastructure layer that runs across too many different industries, regulatory environments, and legacy system profiles to be served by any monoculture.

    What will be resolved, one enterprise at a time, is the question of which organisations have made deliberate, strategic choices about their stack architecture — and which have accumulated a collection of well-intentioned point solutions that don’t compose, don’t scale, and don’t survive the next vendor pivot.

    The strategic reframe: layer ownership over tool selection

    The most useful mental shift for engineering leaders, architects, and technology executives working through agentic stack decisions in 2026 is this: stop asking “which tool should I choose?” and start asking “which layers do I want to own?”

    Owning a layer means having the architectural control to swap the underlying implementation without breaking dependent systems. It means your governance policies are expressed in your infrastructure, not in a vendor’s SaaS platform. It means your evaluation frameworks, observability systems, and state contracts are yours — not licensed from a third party who can change the terms.

    You may choose to outsource some layers entirely — and that can be the right call for specific components at specific stages of maturity. But it should be a deliberate choice made with eyes open to the lock-in implications, not a default outcome of defaulting to whatever the most convenient vendor includes in the package.

    Five actionable decisions to make before your next build sprint

    1. Declare your model-agnosticism policy. Before writing a line of orchestration code, decide which models you’ll route between and design the routing abstraction. This is a 2-day architectural decision that saves months of rework later.
    2. Choose your orchestration runtime deliberately, not by default. Evaluate LangGraph, Temporal, and your hyperscaler’s native offering against a specific rubric: lock-in profile, observability depth, stateful workflow support, and ecosystem stability. Make the decision in writing and document the trade-offs you accepted.
    3. Set an MCP compliance requirement. New tool integrations go through MCP-compliant interfaces. No exceptions. This creates the portability infrastructure you’ll thank yourself for in two years.
    4. Build your governance layer before you need it. Design the audit trail, access control, and human-in-the-loop mechanisms before the first production workflow goes live. The cost of doing this as a first-class design activity is a fraction of the cost of retrofitting it.
    5. Deploy eval-first. Every agent component gets an evaluation suite before it touches production data. Define what “good behaviour” means in measurable terms, test against it, and gate promotion on it. This is the discipline that keeps a composable stack composable as it scales.

    The longer view

    The organisations that emerge from the agentic stack wars with durable competitive advantage won’t be the ones that moved fastest. They’ll be the ones that moved deliberately — building composable, governed, observable infrastructure that can absorb the inevitable model upgrades, framework evolutions, and vendor pivots that characterise any technology layer in early maturity.

    The stack wars are real. The battleground is your orchestration layer, your API governance, your memory architecture, and your lock-in decisions. The outcome — whether you own your automation future or rent it from vendors who do — depends entirely on the architectural choices you make in the next 12 months.

    The good news: those choices are still mostly in your hands. That window won’t stay open indefinitely.