
Category: Uncategorized

  • Amazon’s Expanded Video Ad Ecosystem: What the New SBV, Prime Video, and Twitch Placements Actually Change for Advertisers in 2026

    Amazon’s Expanded Video Ad Ecosystem: What the New SBV, Prime Video, and Twitch Placements Actually Change for Advertisers in 2026

    SBV, Prime Video, and Twitch combined video advertising ecosystem in 2026

    For most of its history, Amazon’s video advertising story was simple: put a short autoplay clip into shopping search results, point it at your product detail page, and let the purchase intent of the search context do the heavy lifting. Sponsored Brands Video (SBV) was efficient precisely because it was narrow — a single-surface, purchase-ready placement where budget efficiency was almost guaranteed.

    That story changed in 2026. Amazon’s video ad stack now spans three meaningfully different surfaces — SBV in search, Prime Video’s ad-supported streaming tier, and Twitch’s live-content ecosystem — and the way these surfaces interact has created both significant opportunity and significant confusion for advertisers who haven’t recalibrated their thinking.

    This isn’t a change at the margin. Prime Video now delivers over 315 million monthly ad-supported viewers globally, with 130 million in the U.S. alone. SBV now accounts for approximately 58% of total Sponsored Brands ad spend across many advertisers. Twitch offers CPMs that are materially below the rest of the Amazon video stack, but with audience profile and interaction mechanics that work differently from anything else on the platform. Together, these three surfaces form something that hasn’t existed on Amazon before: a genuine full-funnel video environment with closed-loop purchase attribution across all layers.

    What changes when that’s true? Quite a lot. Budget logic changes. Creative requirements diverge sharply across surfaces. Measurement frameworks that worked in a search-only video context break down. Attribution models built on last-click radically undercount the contribution of upper-funnel placements. And the audience targeting possibilities, because all three surfaces run on Amazon’s first-party purchase data, create combinations that no other platform can currently replicate.

    This post works through what’s actually different, what the data says about each surface, and how advertisers need to think about the combined stack — not surface by surface, but as a connected system with distinct roles for each channel.

    SBV’s New Footprint: From Search Rows to a Wider Discovery Surface

    Amazon Sponsored Brands Video placement expansion showing 58% of Sponsored Brands spend is now video with 42% CTR increase

    Sponsored Brands Video entered 2026 as the dominant format within the Sponsored Brands product — not because Amazon mandated it, but because advertiser performance data pushed it there. SBV now accounts for roughly 58% of total Sponsored Brands spend across many accounts, a shift driven by consistently higher click-through rates and conversion performance compared to static creative alternatives.

    Where SBV Actually Appears Now

    SBV’s core placement remains the shopping results row: autoplay video ads appearing above, alongside, or within search results on both desktop and mobile, triggered by keyword and product targeting. That foundation hasn’t changed. What has changed is how Amazon treats that placement in the broader context of its video inventory.

    In 2026, Amazon introduced a dedicated video-only Sponsored Brands creative type under the Grow Brand Impression Share goal, which is explicitly eligible for top-of-search placements only. This matters because it separates SBV’s placement auction from standard Sponsored Brands, giving video campaigns their own bidding and targeting logic without competing directly with image-based SB formats for the same inventory slice.

    Beyond core search rows, SBV now surfaces in several additional contexts that didn’t exist two years ago. These include placement within Amazon’s AI-powered discovery surfaces — including the Rufus AI shopping assistant, which has begun incorporating video assets into product recommendations — and vertical video inventory that mirrors the autoplay streaming behavior familiar from social platforms. For mobile users in particular, this creates a video experience that feels less like a search ad and more like a discovery feed.

    The Performance Numbers Behind the Shift

    Amazon’s own case studies document the impact clearly. HP’s SBV campaigns showed impressions growing 224% year-over-year with a 142% YoY increase in clicks and a 42% improvement in clicks specifically for Sponsored Brands video placements. These aren’t outliers — they reflect a broader pattern of SBV outperforming static alternatives on almost every engagement metric when creative quality is controlled for.

    The practical implication for campaign structure is significant. Advertisers running Sponsored Brands campaigns with primarily static or store spotlight creatives should now treat SBV as the default starting point, not an optional add-on. The question has shifted from “should I use SBV?” to “which surfaces should my SBV be optimized for, and how does it connect to what I’m running on Prime Video and Twitch?”

    Vertical vs. Horizontal: A Creative Fork in the Road

    One structural change that deserves specific attention: SBV now supports both horizontal and vertical video assets. Horizontal (16:9) remains the standard for desktop search results. Vertical (9:16) is increasingly served in mobile placements and the discovery feed surfaces that Amazon has been quietly expanding.

    Most advertisers haven’t adapted. The majority of SBV assets in circulation are horizontal, cut from brand videos originally produced for other purposes. Advertisers who invest in native vertical SBV creative for mobile placements are finding materially better performance in those inventory types — largely because vertical video occupies significantly more screen real estate on mobile devices and doesn’t require the viewer to mentally re-frame a landscape-oriented asset.

    Prime Video’s Ad Tier by the Numbers — The Scale That Changes Everything

    Prime Video ad-supported tier reaches 315 million monthly viewers globally with 130M+ in the US

    When Amazon introduced ads to Prime Video in January 2024, the initial advertiser reaction was cautiously optimistic but uncertain. The inventory was new, CPMs were untested, and the question of whether premium streaming viewers would tolerate advertising — or would simply upgrade to the ad-free tier — was unresolved.

    In 2026, those questions have answers, and the answers are meaningful.

    The Audience Reality

    Prime Video’s ad-supported tier now reaches over 315 million monthly viewers globally, up from approximately 200 million in April 2024 — representing roughly 58% growth in under two years. In the United States specifically, Amazon reports 130 million monthly viewers in the ad-supported tier, up from 115 million a year earlier.

    The demographic profile of this audience matters as much as its size. An estimated 88% of Prime Video ad-supported viewers are also active Amazon shoppers. This is the stat that separates Prime Video from every other streaming ad platform: it’s not just reach, it’s reach among people whose purchase behavior Amazon has directly observed and can use for targeting and attribution.

    For comparison, a brand running the same creative on a traditional broadcast or cable network reaches viewers whose shopping behavior is entirely opaque. On Prime Video, Amazon can tell you not just how many people saw the ad, but how many subsequently searched for the brand, viewed the product detail page, added to cart, and completed a purchase. That closed loop is the structural advantage that justifies Prime Video’s premium CPM.

    The CPM Reality

    Prime Video CPMs in 2026 range from approximately $25–$45 for standard inventory, with premium placements around tentpole content — Thursday Night Football, original series premieres, and live events — reaching $40–$65. Guaranteed inventory runs at mid-$30s CPMs; preemptible placements are available in the low-$30s range. Q1 2026 saw CPMs approximately 18% below the Q4 2025 peak, suggesting that initial premium pricing is being absorbed by increased inventory supply as Amazon scales the ad tier.

    These CPMs are meaningfully above what most advertisers pay for SBV in search results, which creates a real budget allocation question. The answer isn’t that Prime Video is more expensive and therefore less efficient — it’s that Prime Video and SBV are measuring different things, and comparing their CPMs directly is like comparing the cost of a billboard to the cost of a search keyword.

    Brand Lift Performance

    Amazon’s own data on Prime Video brand lift is strong, and while advertisers should always apply appropriate skepticism to platform-supplied metrics, the directional signals are consistent across multiple documented cases. Prime Video campaigns show 2.3x higher ad awareness compared to standard video ad campaigns. Brand favorability lifts 4x. Purchase intent lifts 3x.

    Interactive video formats add another layer: interactive ads on Prime Video have driven +30% brand awareness and +36% orders versus non-interactive control groups. These numbers reflect not just passive viewing but active engagement — viewers using their remotes to interact with pause screen ads, QR codes, or shoppable overlays are expressing a level of intent that standard impression delivery can’t capture.

    Ad Load and Frequency Management

    Prime Video’s ad load runs approximately four to six minutes of ads per hour of content. For context, traditional broadcast television runs 14–16 minutes per hour; premium cable runs 8–10 minutes. Prime Video’s lighter load is a deliberate choice to preserve perceived content quality, but it also constrains total inventory supply — which is one reason CPMs remain at premium levels rather than normalizing downward quickly.

    Frequency management has become an important operational concern as Prime Video inventory scales. Because 88% of viewers are active Amazon shoppers with unified profiles, it’s technically possible to reach the same person across Prime Video, Sponsored Brands, Sponsored Display, and Sponsored Products within a single day. Without frequency caps that account for the full cross-surface view, advertisers risk burning through budget against an audience that has already seen their messaging multiple times.

    Twitch’s Unique Role: Not Just Smaller Prime Video

    Twitch vs Prime Video advertising comparison showing CPM ranges, audience demographics, and shared Amazon measurement capabilities

    Twitch occupies an unusual position in Amazon’s video ad ecosystem. It’s smaller than Prime Video by most reach metrics, commands lower CPMs, and targets a meaningfully different audience. But characterizing it as “lower-tier” misreads what Twitch actually does for advertisers who understand the platform.

    What Makes Twitch Different

    The fundamental difference between Twitch and Prime Video as an ad environment is the nature of the viewing experience. Prime Video viewers are leaned back, passively watching scripted or unscripted content they’ve chosen. Twitch viewers are actively engaged with a live stream, often simultaneously participating in chat, watching gameplay or IRL content, and reacting to what they’re seeing in real time.

    This creates an entirely different attention dynamic for advertising. A standard pre-roll or mid-roll on Prime Video interrupts a passive experience that the viewer expects to resume. A pause screen ad or interactive overlay on Twitch surfaces during a moment when the viewer is already in an active, responsive state. The interaction mechanics are different. The emotional register is different. The creative that performs on Prime Video is not the same creative that performs on Twitch.

    Twitch CPMs and Audience Profile

    Twitch CPMs in 2026 sit in the $12–$22 range for standard video placements, with non-interruptive overlay formats available at $4–$10+ CPM depending on placement and seasonality. This is materially below Prime Video’s pricing, but the audience profile commands a different kind of value.

    Twitch skews younger (18–34 is the dominant age band) and male-skewed relative to Prime Video, with heavy indexing in gaming, tech, entertainment, and lifestyle categories. For brands targeting these demographics, Twitch’s lower CPMs with precise contextual targeting can deliver cost-efficient reach that would be significantly more expensive on other premium video platforms.

    Critically, Twitch viewers are still connected to Amazon’s purchase data infrastructure. A viewer engaging with a Twitch ad can be attributed back to subsequent Amazon purchases with the same closed-loop accuracy as Prime Video — a capability that no other gaming or live-streaming platform can match.

    Twitch-Specific Ad Formats

    Amazon has been expanding Twitch’s ad format portfolio in ways that reflect the platform’s live, interactive nature rather than simply porting TV ad formats onto a gaming stream. The current active format slate includes:

    • Pause screen ads: Display or video ads that surface when a viewer pauses the stream, capturing attention during a deliberate moment of re-engagement without interrupting live content.
    • Pre-roll and mid-roll video: Standard interruptive video with skippable and non-skippable variants, primarily relevant for broad-reach objectives.
    • Interactive overlays: Non-interruptive units that appear over the stream, allowing viewers to interact with branded content, polls, or commerce actions without leaving the stream.
    • Shoppable livestream formats: Early-stage interactive units that allow viewers to browse and purchase products directly during creator-led commerce streams, integrating creator content with Amazon’s catalog.

    Amazon has also introduced a sentiment analysis tool for Twitch chat tied to sponsored content — a capability that allows advertisers to see how a live audience reacts to branded moments in real time. This is genuinely novel: it’s the first Amazon advertising measurement tool that captures audience sentiment rather than just behavioral signals.

    The New Placement Hierarchy: How SBV, Sponsored TV, and DSP Actually Interact

    One of the most consistent sources of confusion in 2026’s Amazon video stack is the relationship between its three primary video buying paths: Sponsored Brands Video (a self-serve, auction-based product), Sponsored TV (a self-serve CTV product that buys Prime Video and streaming inventory), and Amazon DSP (a programmatic platform that can access all of the above plus third-party inventory).

    These aren’t interchangeable. Understanding what each layer does and where it sits in the funnel is essential for structuring a coherent strategy.

    Sponsored Brands Video: The Search Performance Layer

    SBV operates in keyword and product-targeted auctions within Amazon’s search results. It’s the lowest-funnel video format in the stack — reaching shoppers who are actively searching for relevant products and are therefore closest to purchase. SBV should be evaluated on ROAS, conversion rate, and new-to-brand customer acquisition metrics. It’s the layer where video drives direct, measurable commerce outcomes in the shortest attribution window.

    Sponsored TV: The Self-Serve Streaming Layer

    Sponsored TV allows brands to buy video inventory across Prime Video, Freevee, Fire TV, Twitch, and third-party streaming apps via a self-serve interface, typically with lower minimum commitments than DSP. It’s positioned between pure-performance SBV and the high-investment DSP layer, making it accessible to mid-market brands that want streaming video reach without an enterprise-level managed service commitment.

    Sponsored TV is optimized for reach and brand awareness metrics rather than direct conversion. Measurement is primarily through Amazon Brand Lift studies, search lift reports, and new-to-brand metrics tracked via Amazon Marketing Cloud.

    Amazon DSP: The Full-Stack Programmatic Layer

    DSP provides access to the full Amazon video inventory plus partner publisher networks, with advanced audience segmentation, sequential messaging capabilities, and the deepest integration with AMC for cross-campaign measurement. DSP campaigns on Prime Video and Twitch can be coordinated with SBV campaigns to create sequenced messaging — for example, serving a brand awareness video on Prime Video to a defined audience segment, then targeting that same segment with SBV in search results 24–72 hours later.

    This sequencing capability is arguably the most powerful feature of the combined stack. It mirrors the way broadcast TV + radio retargeting worked in traditional media, but with first-party purchase data enabling attribution that was impossible in analog media environments.

    Creative Requirements Have Diverged — What Works on Which Surface

    Three different creative strategies required for SBV search ads, Prime Video shoppable ads, and Twitch interactive ads

    The single most underestimated implication of Amazon’s expanded video stack is what it demands from creative production. Many advertisers are attempting to run one video asset across all three surfaces, then wondering why performance is inconsistent. The problem is structural: SBV, Prime Video, and Twitch require fundamentally different creative approaches because they reach viewers in fundamentally different mental states.

    SBV Creative: Product-First, Decision-Optimized

    SBV viewers are in search mode. They typed a query, and a video interrupted their results row. They are not there to be entertained — they are there to find the right product. SBV creative that works leads with the product, demonstrates a clear benefit or differentiator in the first two seconds, and gets to a reason to click before the viewer scrolls past.

    Effective SBV lengths run 15–30 seconds. Auto-captions are essential because most search browsing happens with audio off. Background should be simple and product-forward. The call to action should be explicit. Any storytelling or brand narrative should be compressed to the final few seconds, after the product case has been made.

    Amazon’s technical specs require SBV assets to be 6–45 seconds in length, 16:9 or 1:1 aspect ratio (with 9:16 now available for mobile placements), and a minimum resolution of 1920×1080 for horizontal. Importantly, logos or text cannot appear in the bottom 14 pixels of the frame, where Amazon’s branding and pricing overlay appears.

    Prime Video Creative: Cinematic, Brand-Led, Emotionally Resonant

    Prime Video viewers are in entertainment mode. They’ve chosen a show or film, settled in, and the ad represents an interruption to an experience they value. The creative imperative is almost opposite to SBV: instead of getting to the point immediately, Prime Video ads benefit from building a narrative moment, establishing brand personality, and earning attention before making a product claim.

    Cinematic production quality matters more on Prime Video than on any other Amazon surface. A product-demo video that performs well in SBV’s search context can feel jarring and cheap against the production quality of the content surrounding it on Prime Video. Advertisers who repurpose SBV assets directly to Prime Video are not just leaving performance on the table — they’re potentially damaging brand perception by appearing low-budget in a premium environment.

    Interactive formats on Prime Video add another creative dimension: assets designed for pause screen engagement or remote-enabled interaction need to account for the fact that the viewer is on a TV screen, using a remote control, at distance from the screen. Designs optimized for mobile tap interaction don’t translate to 10-foot TV UI. Text needs to be larger, CTAs need to be simpler, and the interaction model needs to feel native to a TV remote rather than a touchscreen.

    Twitch Creative: Live-Aware, Community-Fluent, Fast

    Twitch creative has different rules still. Twitch viewers are attentive and reactive, but they’re also community-aware — they know what advertising looks like, they recognize when they’re being sold to, and they will respond negatively to creative that feels out of touch with gaming or live-streaming culture. Brands that speak Twitch’s visual and cultural language perform. Brands that import polished broadcast TV spots unmodified tend to underperform relative to the platform’s capability.

    For pause screen ads and interactive overlays specifically, Twitch creative benefits from humor, directness, and acknowledgment of the platform context. A pause screen ad that says “You paused your stream. Here’s something worth adding to cart” works better than a brand manifesto. Twitch viewers respect brevity and irreverence in ways that Prime Video’s more passive audience does not require.

    Amazon’s AI creative tools — including the Creative Agent and AI video generation capabilities introduced in 2026 — can dramatically reduce the cost of versioning creative across these three surfaces. Rather than producing three separate campaigns from scratch, brands can now prototype surface-specific creative variants faster than ever, though the creative strategy still requires human direction to ensure each version aligns with its surface’s behavioral context.

    CPMs, Bidding, and Budget Allocation Across the Three-Surface Stack

    One of the practical questions advertisers ask most frequently is how to allocate budget across SBV, Prime Video, and Twitch when they can’t run everything at full scale. The answer requires a clear-eyed view of what each surface is being asked to do and what return metric is being used to evaluate it.

    The CPM Comparison in Context

    The surface-level CPM story looks like this: SBV CPMs in search typically run significantly below Prime Video’s $25–$45 range; Prime Video runs at $25–$45 for standard inventory and higher for premium; Twitch runs at $12–$22 for standard video, with overlay formats at $4–$10+.

    On a pure cost-per-impression basis, Twitch looks cheapest and Prime Video looks most expensive. But this comparison is almost meaningless without accounting for where each surface sits in the purchase journey. An SBV impression delivered to someone actively searching for your product category is worth far more than an equivalent Prime Video or Twitch impression delivered to someone watching a show — even at a higher absolute CPM — because the SBV viewer’s intent is categorically different.

    The right comparison isn’t CPM across surfaces. It’s cost-per-outcome, where “outcome” is defined differently for each surface: cost-per-click for SBV, cost-per-new-to-brand customer for Sponsored TV/Prime Video, and cost-per-brand-lift-point for Twitch awareness campaigns.

    Budget Allocation Models That Make Sense

    For brands with limited video budgets (under $20K/month), the evidence strongly favors concentrating spend in SBV first, building brand familiarity through consistent search-surface video presence before layering in the higher-CPM awareness surfaces. SBV’s combination of purchase intent and video engagement delivers the strongest short-term ROAS, which generates the proof-of-concept needed to justify upper-funnel investment to stakeholders.

    For brands with moderate video budgets ($20K–$100K/month), a hybrid allocation makes sense: approximately 60–70% into SBV and Sponsored Products video for conversion performance, with the remaining 30–40% allocated to Sponsored TV across Prime Video and/or Twitch for reach building and brand lift measurement. At this level, the Sponsored TV spend is generating data about audience behavior that informs SBV targeting and creative iteration.

    For brands at scale ($100K+/month video budgets), the full three-surface strategy with DSP orchestration becomes viable and measurable. DSP’s ability to sequence messaging — awareness on Prime Video, retargeting via SBV in search — creates a flywheel where upper-funnel impressions feed directly into lower-funnel conversions in a way that AMC can track and quantify. The attribution data from scale campaigns consistently shows upper-funnel video contributing meaningfully to conversion outcomes that last-click models credit entirely to Sponsored Products.

    Bidding Mechanics: What’s Changed for SBV Specifically

    SBV uses a separate placement and auction from standard Sponsored Brands, which means bidding strategy should be managed independently rather than grouped with static SB campaigns. In 2026, SBV bids should be set based on the expected contribution of the video impression to the full purchase path, not just the direct click-through conversion — which means using AMC data to understand the halo effect of SBV impressions on organic search performance and Sponsored Products conversion rates before deciding whether to scale bids up or down.

    Full-Funnel Attribution: Why AMC Changes the Measurement Game

    Amazon Marketing Cloud full-funnel attribution connecting Prime Video awareness through SBV consideration to Sponsored Products conversion

    The expanded video stack creates a measurement problem that SBV-only advertisers never had to solve: how do you attribute a purchase that was influenced by a Prime Video impression, an SBV click, and a Sponsored Products click that happened across three days and two devices?

    Last-click attribution — still the default in Amazon Campaign Manager’s standard reporting — credits the final Sponsored Products click and ignores everything that came before it. In a world where advertisers only ran SBV and Sponsored Products, this was an acceptable simplification. In 2026’s three-surface environment, it’s a systematic misrepresentation of how customers actually decide to buy.

    Amazon Marketing Cloud: The Attribution Layer That Changes Everything

    Amazon Marketing Cloud (AMC) is Amazon’s clean room analytics environment, which allows advertisers to run SQL-based queries across their full campaign dataset — including event-level data from SBV impressions, Prime Video ad exposures, Sponsored TV, Sponsored Display, and Sponsored Products — to build multi-touch attribution models that reflect the actual customer journey.

    When AMC data is queried across combined video and search campaigns, the impact of upper-funnel video on lower-funnel conversion is consistently measurable and almost always positive. The typical finding: customers who were exposed to a Prime Video or Twitch ad before engaging with SBV in search convert at a higher rate and with a higher average order value than customers who encountered SBV without prior video exposure. Last-click reports credit the SBV campaign; AMC reveals that the Prime Video exposure was doing meaningful preparatory work.

    This changes the budget case for Prime Video and Twitch investment significantly. An advertiser looking at last-click ROAS for their Sponsored TV campaigns will see numbers that appear unimpressive compared to SBV. An advertiser using AMC to measure the full-path contribution of that awareness spend will often find that the incremental ROAS contribution — factoring in the downstream effect on SBV and Sponsored Products performance — is substantially higher than the surface metrics suggest.

    Conversion Lift and Brand Lift Studies

    For advertisers who aren’t yet set up for AMC analysis, Amazon’s native Brand Lift and Conversion Lift studies provide a more accessible window into upper-funnel performance. Brand Lift studies use Amazon Shopper Panel data to measure changes in awareness, favorability, consideration, and purchase intent among exposed versus unexposed audiences. Conversion Lift studies use a holdout methodology to measure incremental sales driven by specific campaign exposure.

    These tools are available through Amazon Ads for Prime Video and Twitch campaigns and represent a significant improvement over the prior state of play, where streaming video ad spend on Amazon sat in a measurement black box. Brands running Sponsored TV or DSP video campaigns without activating lift measurement studies are effectively flying blind — and missing the data needed to justify ongoing streaming investment.

    Key Attribution Metrics for Each Surface

    A practical AMC measurement framework for the three-surface stack should track distinct primary KPIs for each layer:

    • SBV: Branded search lift, new-to-brand purchase rate, detail page view rate, ROAS on a 14-day attribution window
    • Prime Video/Sponsored TV: Incremental ROAS (from conversion lift), new-to-brand customer percentage, purchase intent lift (from brand lift studies), downstream Sponsored Products conversion lift for exposed audiences
    • Twitch: Brand awareness lift, purchase intent lift (via Brand Lift beta), engagement rate on interactive formats, post-exposure search lift for brand terms

    Audience Targeting: Where the Overlap Gets Genuinely Interesting

    All three surfaces in Amazon’s video stack draw from the same first-party data foundation: Amazon’s customer purchase history, browsing behavior, search patterns, and demographic data across its hundreds of millions of active shoppers. This common data layer creates targeting possibilities that are structurally impossible on platforms that don’t have the same commerce data depth.

    In-Market and Lifestyle Audiences Across Surfaces

    Amazon’s in-market audiences — segments of shoppers who have recently shown buying signals in specific product categories — can be applied across SBV, Sponsored TV, and DSP campaigns. This means an advertiser can reach people who have purchased competitive products in the past 30 days simultaneously in search results (SBV), on their streaming TV (Prime Video), and in live content (Twitch), with a sequenced message tailored to each context.

    The targeting continuity across surfaces is what makes the sequencing strategy viable. On a traditional media plan, reaching the same consumer on TV, digital video, and social requires stitching together third-party data from multiple sources, with inevitable signal loss at each handoff. On Amazon’s stack, the consumer is identifiable across all three surfaces with first-party accuracy.

    Lookalike Audiences and New-to-Brand Acquisition

    For new-to-brand customer acquisition — a priority metric for most Amazon advertisers in 2026 — the ability to build lookalike audiences based on existing buyer data and deploy them across Prime Video and Twitch is particularly powerful. Upper-funnel streaming exposure to lookalike audiences who haven’t yet purchased the brand creates incremental awareness that eventually converts through lower-funnel search campaigns.

    Amazon’s NTB (new-to-brand) measurement, available across all three surfaces, allows advertisers to track whether their video investment is growing their customer base or simply recycling existing buyers. Brands finding that a high percentage of their conversions are repeat purchases should prioritize Prime Video and Twitch for acquisition-oriented creative targeting NTB lookalike segments, rather than using streaming inventory to reach people who already know the brand.

    The Frequency Overlap Problem

    The same data infrastructure that enables powerful targeting also creates a frequency management challenge. Because Amazon’s user profiles are unified across shopping, streaming, and gaming, an active shopper might receive SBV impressions throughout their Amazon browsing session, Prime Video ads during their evening viewing, and Twitch overlay ads during weekend gaming — all from the same brand, on the same day, without the advertiser having set any cross-surface frequency controls.

    Managing cross-surface frequency requires either DSP-level control (which enables unified frequency capping across all placements) or explicit cap settings within each self-serve product, with manual coordination between campaign managers. For advertisers running SBV through Campaign Manager and Sponsored TV through its own interface simultaneously, this coordination is a manual process — and one that many teams currently neglect.

    What to Expect From Interactive and Shoppable Formats

    Interactive and shoppable video formats are the area where Amazon’s stated ambition most clearly outpaces current advertiser adoption. The formats exist, the early data is encouraging, and the potential — turning a passive TV viewing moment into an instant purchase — is commercially compelling. But the operational reality is more complex than the marketing materials suggest.

    Prime Video Interactive Formats

    Prime Video’s interactive ad formats include pause screen ads (which surface when a viewer pauses content), remote-enabled CTAs (which allow Fire TV remote interaction with ad content), QR code integration for second-screen engagement, and shoppable carousel units that allow product browsing without leaving the viewing interface.

    The performance data on interactive formats versus standard video is striking: interactive ads have shown +30% brand awareness lift and +36% order volume versus non-interactive controls in Amazon’s own studies. However, these numbers come from campaigns where the interactive mechanic was genuinely well-integrated with the creative — not simply a “Shop Now” button appended to an awareness spot.

    Interactive Prime Video creative needs to be designed with the interaction in mind from the outset, not retrofitted. The viewer’s decision to interact with an ad in a TV viewing context is a high-friction action relative to a mobile tap — they need a compelling reason to reach for the remote, and the purchase path after interaction needs to be seamless enough to reward the effort.

    Twitch Shoppable Formats: Early Stage, High Potential

    Twitch’s shoppable formats are earlier in their development than Prime Video’s interactive inventory. The most promising emerging format is the shoppable livestream unit, which integrates creator-led product demonstrations with direct purchase capability — essentially bringing the shopping livestream model that has dominated Asian e-commerce into Twitch’s live-content environment.

    Early case studies from beauty brand e.l.f. and other early adopters have shown strong engagement with Twitch shoppable formats, particularly when creator talent is authentically integrated with the product rather than reading from a script. The format works best when the creator’s audience has genuine overlap with the product’s target consumer — and when the purchase mechanic is simple enough that it doesn’t require the viewer to context-switch out of their gaming or viewing flow.
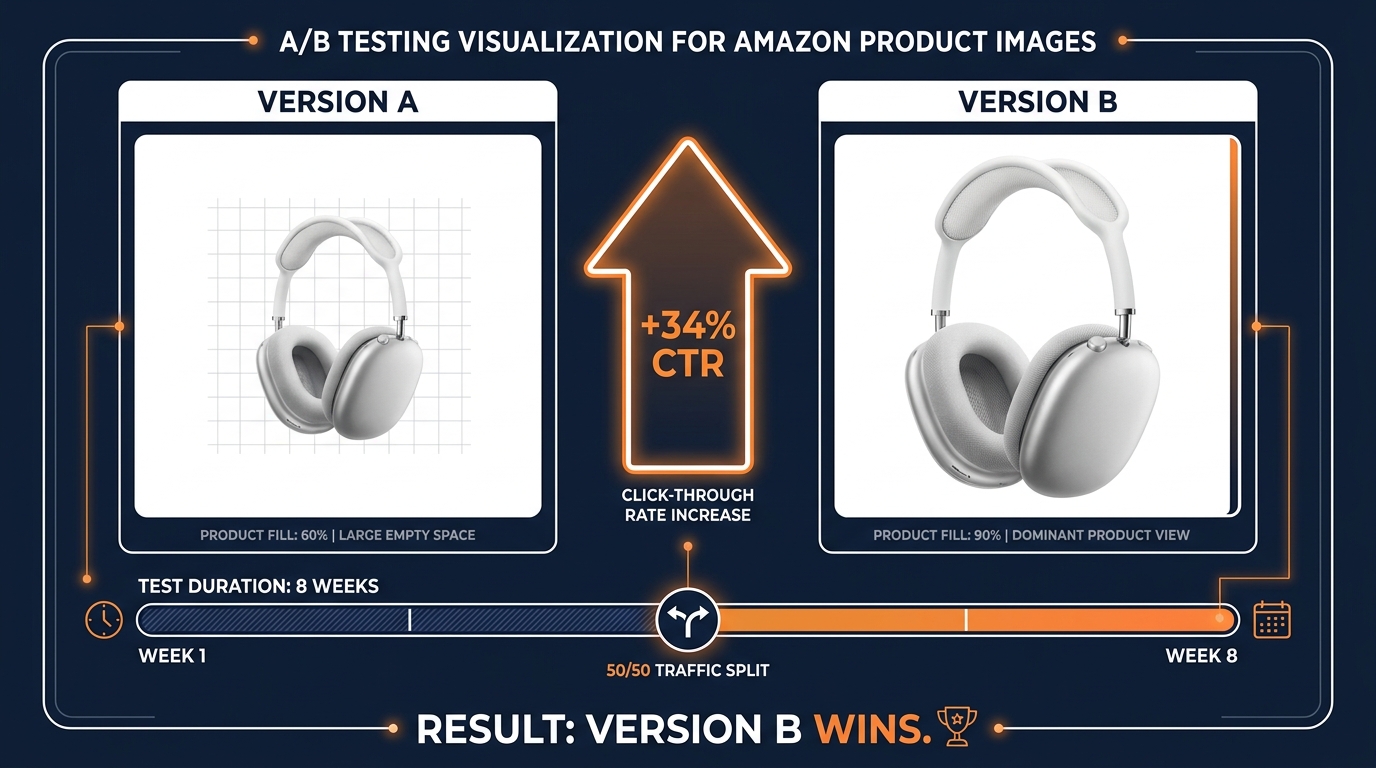
    Amazon’s new sentiment analysis tool for Twitch chat adds a measurement dimension that doesn’t exist anywhere else: real-time audience reaction data that tells brands how their sponsored content is landing with a live community. This is still an early capability, but it represents the kind of measurement innovation that can make Twitch a more defensible media choice for brands willing to invest in genuinely platform-native creative.

    Who Should Be Running What: A Practical Tier Framework

    Not every advertiser on Amazon needs to be running all three video surfaces simultaneously. The right configuration depends on budget, category, brand maturity on the platform, and the specific outcomes being prioritized. Here’s a practical framework for matching advertiser profile to platform strategy.

    Tier 1: SBV-First (Monthly Video Budget: Under $15K)

    For brands with limited video budget, SBV remains the highest-priority allocation. The combination of purchase-intent context, direct conversion attribution, and relatively accessible CPMs makes SBV the strongest short-term ROAS driver in the video stack. At this budget level, Prime Video and Twitch will generate insufficient impression volume to drive statistically meaningful lift measurements, which means spending there before SBV is optimized is premature.

    The Tier 1 priorities are: build a library of SBV assets in both horizontal and vertical formats, establish keyword and product targeting that covers the full relevant search landscape, and run ongoing A/B creative testing to understand which messaging approaches drive the highest detail page conversion rate.

    Tier 2: SBV + Sponsored TV (Monthly Video Budget: $15K–$75K)

    At this budget level, adding Sponsored TV for Prime Video and/or Twitch reach becomes viable. The recommended split is roughly 65% SBV / 35% Sponsored TV, with the streaming allocation oriented primarily toward awareness objectives and new-to-brand customer acquisition. Brand Lift studies should be activated on all Sponsored TV campaigns to generate measurement data that can justify or rebalance the streaming allocation over time.

    Twitch is worth testing at this tier if the brand’s product category has meaningful relevance to gaming, tech, entertainment, or lifestyle audiences. For categories with weak Twitch audience overlap (home improvement, certain food categories, B2B products), Prime Video will typically deliver stronger results at similar spend levels.

    Tier 3: Full-Stack Video with DSP Orchestration (Monthly Video Budget: $75K+)

    At scale, the full three-surface strategy with DSP coordination becomes viable. This is where sequential messaging — Prime Video or Twitch for awareness, SBV for search-stage consideration, Sponsored Products for conversion — can be implemented with proper frequency management and end-to-end AMC attribution.

    Brands at this tier should invest in AMC setup and analysis as a first priority. The attribution data that AMC provides is the foundation for every subsequent optimization decision: which surfaces are contributing incrementally, which audience segments show the strongest path-to-purchase behavior, and where budget reallocation would improve total campaign efficiency.

    Interactive and shoppable formats on both Prime Video and Twitch become worth testing at this budget level, where impression volume is sufficient to generate statistically meaningful interaction rate and lift data within reasonable testing windows.

    The Window Before CPMs Reflect the Reality

    There’s a pattern that recurs every time a major ad platform opens new high-reach inventory: early movers gain access to audiences at CPMs that don’t yet reflect competition. Prime Video CPMs are premium now — $25–$45 is not cheap. But they are almost certainly lower than they’ll be in 12–18 months as advertiser adoption scales and the auction becomes more competitive. Twitch CPMs, still in the $12–$22 range, represent meaningful underpriced access to a specific audience cohort that may prove difficult to reach as efficiently later.

    The 2026 window for Amazon’s three-surface video stack is analogous to the early periods of Sponsored Products adoption (2013–2015), Sponsored Brands adoption (2018–2020), and even early Prime Video ad inventory testing. In each case, the brands that built operational and creative competency early captured a period of below-equilibrium pricing before competition normalized CPMs upward.

    What Builds Durable Advantage Now

    The durable advantage being built by sophisticated advertisers in 2026 isn’t just reach — it’s data. Running Prime Video and Twitch campaigns now generates AMC data on how streaming exposure affects downstream Amazon purchase behavior for your specific brand, audience, and product category. That data builds a proprietary understanding of your customer’s path to purchase that competitors who wait another year to enter the market won’t be able to replicate.

    Similarly, creative learning is cumulative. Brands that are now iterating on Prime Video interactive formats, Twitch pause screen creative, and mobile-vertical SBV assets are building a production and testing infrastructure that gets better over time. The brands entering these surfaces in 2027, when CPMs are higher and competition is stiffer, will be doing so without the creative and measurement foundation that early movers are establishing now.

    Key Takeaways for Advertisers Acting on This Now

    • Don’t conflate surfaces. SBV, Prime Video, and Twitch require different creative, different measurement frameworks, and different success metrics. Running the same asset across all three and evaluating all three on the same KPI is a structural mistake.
    • Set up AMC before you need it. Multi-touch attribution data is only useful if you’ve been collecting it. Brands that activate AMC after building a streaming + search video stack have clean historical data to analyze; brands that activate it after the fact are starting from scratch.


    • Invest in surface-specific creative production. The cost of under-performing creative on Prime Video isn’t just missed impressions — it’s brand exposure in a premium context that damages perception. Budget for creative quality that matches the environment.
    • Test interactive formats now. The brands learning how to convert pause-screen and shoppable ad interactions today are building a competency that becomes a real advantage as Amazon continues to push these formats into wider inventory.
    • Manage cross-surface frequency actively. The same data that makes Amazon’s targeting powerful makes frequency overlap a genuine risk. Build explicit cross-surface frequency management into campaign architecture from the outset.

    Conclusion

    Amazon’s video advertising stack in 2026 is not three separate products that happen to live on the same platform. It’s a connected ecosystem where search-level intent signals (SBV), premium streaming reach (Prime Video), and live-content engagement (Twitch) can be orchestrated together, measured in a closed loop via AMC, and targeted with first-party purchase data that no other platform can match.

    The implication isn’t that every Amazon advertiser needs to be running all three surfaces at full investment immediately. It’s that the logic for how you structure, budget, and measure Amazon video has fundamentally changed. SBV is no longer just a search ad with a video creative. Prime Video is no longer just a TV-style awareness play that can’t be measured in commerce terms. Twitch is no longer a niche platform too small to warrant serious budget allocation.

    What they are, collectively, is the most complete first-party video advertising stack available to commerce brands anywhere — one that reaches over 315 million streaming viewers, tens of millions of live-content viewers, and hundreds of millions of active shoppers, all connectable through a single attribution infrastructure.

    Getting the most out of that stack requires treating it as a system rather than a collection of individual placements. The brands doing that in 2026 are building advantages — in creative capability, measurement infrastructure, and audience understanding — that will compound as the ecosystem matures and the window of below-competition CPMs closes.

  • AI-Generated Visuals Without Suppression: A Practical Playbook

    AI-Generated Visuals Without Suppression: A Practical Playbook

    Split-screen showing suppressed AI image on left with red stamp and lost reach versus verified AI image on right with green checkmark and full distribution — AI Visuals That Don't Get Buried, the 2026 Platform Suppression Map

    You followed the tutorials. You used the right tools. You generated a batch of clean, professional AI visuals, scheduled them across your platforms, and waited for the reach to roll in. Instead, your posts flatlined. Impressions were a fraction of normal. Engagement barely moved. No violation notice, no appeal link — just silence.

    This is not a niche problem. Across Instagram, TikTok, LinkedIn, and YouTube, AI-generated visual content is running into a new and poorly understood set of suppression mechanisms in 2026. Some of these are explicit policy rules — label requirements, disclosure mandates, outright bans on deepfakes. But the more consequential suppression is quieter: algorithmic downranking based on authenticity signals, engagement quality scoring, metadata fingerprinting, and account trust tiers that platforms rarely document publicly.

    Most of the advice circulating about this problem is either too vague (“just be authentic!”) or too focused on the obvious violations — the realistic deepfakes, the political impersonations, the NSFW content that platforms are clearly targeting. What’s missing is practical, technical guidance for the creators and brands operating in the legal middle ground: people generating product images, marketing visuals, conceptual illustrations, and branded content with AI tools, only to find that their content is being quietly buried.

    This playbook is for that group. It covers how platform detection actually works, where the false positive problem is causing real damage, what the C2PA and watermarking standards mean in practice, and how to build a workflow that produces AI visuals capable of reaching the audience they were made for — without triggering the systems designed to suppress the ones that weren’t.

    How Platforms Actually Detect AI Visuals (It’s More Than Just Metadata)

    Infographic flowchart showing the four detection layers platforms use to screen AI-generated images in 2026: metadata scan, visual pattern analysis, behavioral signals, and engagement quality

    The common assumption is that platforms detect AI-generated images by checking for a specific tag or watermark embedded in the file. That’s one layer — but it’s far from the whole picture. In 2026, the detection infrastructure across major platforms is multi-layered, and each layer operates on different signals with different levels of reliability.

    Layer 1: Metadata and Provenance Signals

    The most straightforward detection check is metadata. AI-generated images typically lack the EXIF data that camera-captured photographs carry — information like camera model, GPS coordinates, aperture, shutter speed, and lens data. Platforms including LinkedIn have been reported to flag images as probable AI when EXIF camera metadata is absent and the visual characteristics match AI generation patterns.

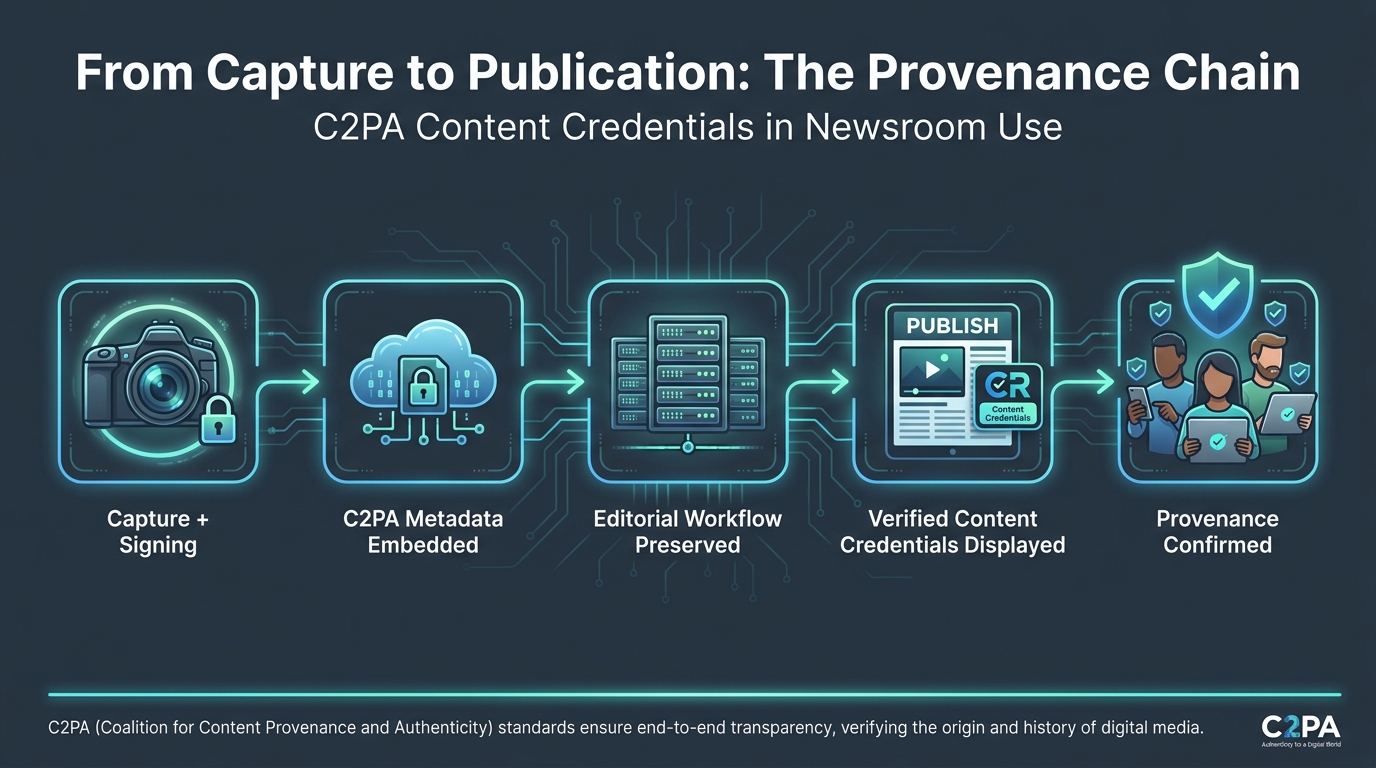
    More structurally, platforms are increasingly reading C2PA Content Credentials — a cryptographically signed metadata standard that logs the origin, tools used, and editing history of an image. If an image was generated by Adobe Firefly or exported from a C2PA-compliant tool, that provenance chain is readable by platforms that have integrated the standard. The absence of any provenance metadata on an image that has the visual fingerprint of AI generation is itself a signal.

    Layer 2: Visual Pattern Analysis

    Beyond metadata, platforms and their third-party detection partners run visual analysis on uploaded images. AI image generators — even the most advanced 2026 models — still produce statistically detectable artifacts under certain conditions. These include unnaturally perfect symmetry in faces, anomalous texture rendering in hair and fabric, subtle geometry errors in hands and backgrounds, and frequency domain patterns that differ from optical lens captures.

    Benchmark accuracy for AI image detection tools in clean, unedited conditions reaches 85–95% according to 2026 evaluations. However, this figure drops sharply under real-world conditions. When images are compressed during upload, resized, filtered, or run through any additional editing step, detection accuracy in practice falls to the 60–85% range. This degradation is significant: it means platforms cannot reliably distinguish AI from human-made content purely on visual grounds, which is one reason they increasingly combine visual signals with other data layers.

    Layer 3: Behavioral and Account Trust Signals

    This is the layer most creators don’t think about — and arguably the one with the most practical impact. Platform algorithms assess not just the individual image but the behavioral context surrounding it. Key signals include:

    • Posting frequency and content diversity: Accounts that suddenly post high volumes of visually similar content are flagged for potential spam or mass AI generation. TikTok reporting in 2026 indicates that five or more flagged AI videos within a seven-day window can trigger automated posting restrictions.
    • Account age and historical trust: Newer accounts with no engagement history posting AI content face steeper suppression thresholds than established accounts with strong track records.
    • Content variation patterns: Uploading images that share telltale similarities — identical aspect ratios, matching lighting temperatures, near-identical compositions — signals mass generation even if individual images appear clean.
    • Negative feedback rates: Users who click “not interested” or report content as misleading signal to the algorithm that the content is low-quality or inauthentic, which compounds any existing AI-related suppression.

    Layer 4: Engagement Quality Scoring

    The final and increasingly dominant detection layer is not really about AI detection at all — it’s about content quality as measured by audience behavior. Saves, shares, comments, and dwell time all signal that content is worth distributing. Scrolls, skips, and low watch time do the opposite. In 2026, platforms are explicit that “originality” and “authentic human value” are ranking criteria — language that creates systematic headwinds for mass-produced AI content regardless of its visual quality.

    Understanding that these four layers operate simultaneously and independently is the foundation of any suppression-avoidance strategy. Passing one layer is not enough. Compliant metadata won’t save low-engagement AI content. Strong engagement won’t protect an account that’s posting at spam-like volume with zero content variation.

    The False Positive Crisis: When Real Photos Get Buried Too

    Real photograph incorrectly flagged as AI-generated by a detection system showing 87% confidence, illustrating the false positive crisis — 13% of real photos flagged as AI and 435 false positives per 436 flags in one audit

    Before diving into how to protect AI-generated content from suppression, it’s worth examining a problem that complicates this entire conversation: platform detection systems are wrongly flagging authentic, human-made photos at rates that should concern any creator — AI or otherwise.

    The Numbers Are Worse Than Most People Know

    A 2026 audit of leading AI image detection tools found that approximately 13% of genuine photographs were misclassified as AI-generated. A separate evaluation of a cloud-based image safety system produced what may be the most striking data point of 2026: 435 false positives out of 436 total flagged images in a single moderation run — an accuracy rate of less than 0.3% in that specific dataset context.

    Broader 2026 research puts real-world false positive rates for practical creator workflows in the 10–40% range, depending on the type of imagery, the editing history, and the detection tool. These are not edge cases. Stock photographers using HDR processing, product photographers using studio lighting rigs that produce “too-perfect” results, and photographers shooting with modern mirrorless cameras that apply heavy in-body processing are all generating images with visual characteristics that overlap with AI generation signatures.

    Why This Matters for AI Content Creators

    The false positive problem has two direct implications for creators working with AI visuals.

    First, it means that suppression cannot be reliably predicted by looking at your content and deciding “this doesn’t look AI.” Detection systems don’t work the way human eyes do. An image that looks obviously hand-crafted to a person can look statistically AI-like to a pattern-matching algorithm. This makes understanding the underlying signals — not just the surface appearance — essential.

    Second, it means that the suppression problem is not a matter of platforms cleanly separating “authentic” from “fake” content. The detection layer is imprecise by design, which shifts the practical burden to creators. Passing the detection filter is not about making your AI images look less like AI images — it’s about surrounding your content with signals that increase algorithmic confidence in its legitimacy, regardless of how it was made.

    The Practical Response

    The most reliable response to false positive risk — whether you’re shooting real photos or generating AI visuals — is to build a content presence with strong provenance signals. This means consistent EXIF data where applicable, C2PA credentials on AI-generated work, account-level trust built over time, and engagement patterns that demonstrate genuine audience value. The false positive problem is largely unsolvable at the image level. It’s much more manageable at the workflow and account level.

    The C2PA and Watermarking Stack: What It Actually Does for You

    Diagram of the dual-layer C2PA Content Credentials and SynthID invisible watermarking system showing how they create a trusted AI content zone across the workflow from Adobe Firefly to Instagram upload

    In January 2026, the Content Authenticity Initiative published its State of Content Authenticity report, marking what CAI called “a turning point for Content Credentials, interoperable provenance, and trust in an AI-driven media world.” By mid-2026, the organization had grown to over 5,000 members, and the Singapore Content Authenticity Summit brought together nearly 200 policymakers, technologists, and platform representatives to align on implementation.

    If you’re working with AI visuals at any scale, understanding what C2PA actually does — and what it doesn’t do — is now a practical requirement, not an optional technical deep-dive.

    What C2PA Content Credentials Are

    C2PA (Coalition for Content Provenance and Authenticity) is an open technical standard for attaching a cryptographically signed provenance record to a digital file. When you generate an image with a C2PA-compliant tool like Adobe Firefly, the image is embedded with a manifest that records what tool created it, what inputs were used, when it was created, and any subsequent editing steps. This manifest is cryptographically signed, meaning it can’t be retroactively altered without breaking the signature.

    Platforms that integrate C2PA can read this manifest and use it to display provenance information to viewers — the “Made with AI” labels you see on Instagram and YouTube are increasingly being populated from C2PA data rather than user self-disclosure. For platforms, this shifts the disclosure burden from creator compliance to technical verification, which is more reliable and more scalable.

    What Invisible Watermarking Adds

    The practical limitation of C2PA metadata is that it’s stored in the file container, not in the image pixels themselves. Social platforms routinely strip metadata during upload and recompression. An image that carries a clean C2PA manifest when you download it from Firefly may arrive at Instagram’s servers without that manifest, depending on the platform’s image processing pipeline.

    This is where invisible watermarking — primarily Google’s SynthID for AI-generated content — becomes important. SynthID embeds an imperceptible signal directly into the image pixels, not in the metadata layer. This watermark survives typical compression, resizing, and resampling operations. It can be read by platforms that have integrated SynthID detection even after the EXIF and C2PA metadata have been stripped.

    The 2026 industry standard that’s emerged is the dual-layer approach: C2PA credentials for platforms and viewers that can read them, plus watermarking for resilience against the metadata stripping that happens routinely in upload pipelines. The two technologies solve different parts of the provenance problem.

    The Practical Takeaway for AI Visual Creators

    If you’re generating images with Adobe Firefly, DALL-E 3 via API, or other C2PA-compliant generators, your content already carries credentials. The key decisions you control are:

    • Don’t strip metadata before uploading. If you’re running images through editing tools before posting, verify that your workflow preserves the C2PA manifest. Some third-party editors break provenance chains.
    • Choose generators that output SynthID-compatible watermarks where available. For content that will go through heavy reprocessing, the watermark layer provides resilience that metadata can’t.
    • Understand that credentials don’t prevent all suppression — they prevent misclassification. C2PA marks your content as “declared AI” not as “high-quality content.” The distribution benefits come from accurate labeling allowing the algorithm to treat your content appropriately rather than penalizing it for being unidentifiable synthetic media.

    Platform-by-Platform Suppression Triggers in 2026

    Comparison grid showing AI visual content suppression rules across Instagram, TikTok, LinkedIn, and YouTube — covering label requirements, detection methods, penalties for unlabeled content, and safe content types

    Platform policies on AI-generated visual content diverged significantly in 2026. Understanding that Instagram, TikTok, LinkedIn, and YouTube each have distinct suppression triggers — and distinct levels of enforcement — is essential for anyone managing content across multiple channels.

    Instagram and Meta

    Meta’s publicly stated position is that AI-generated content labeled with the “AI Info” disclosure is not algorithmically penalized. This is technically accurate but practically incomplete. What Meta does suppress is AI content that is unlabeled, misleading, or that falls into the “Made with AI” detection threshold without a matching disclosure. The system applies a label — and potentially restricted distribution — when its automated detection concludes an image is AI-generated and the creator hasn’t disclosed it.

    The more significant suppression pathway on Instagram is quality-based rather than AI-specific. Instagram’s recommendation algorithm has moved firmly toward “originality” as a ranking criterion. Mass-produced AI content — even if labeled — that generates high skip rates and low save rates will see suppressed distribution in Reels, Explore, and feed recommendations. Creator accounts posting large volumes of visually similar AI-generated images have reported engagement declines of 30–50% on affected posts, though Meta has not published specific penalty data.

    Key rules to follow on Instagram: Use the AI label proactively via the Creator tool at upload rather than waiting for automated detection to apply it. Avoid batching identical-style AI images into a rapid posting cadence. Anchor AI visuals to strong captions and calls-to-action that generate comments and saves, since engagement quality significantly mediates any detection-related reach impacts.

    TikTok

    TikTok’s Synthetic Media Policy in 2026 is among the most detailed and actively enforced of any major platform. The platform requires a creator-applied label for any “realistic” AI-generated or heavily AI-manipulated video or image content. Automated detection runs independently and can apply labels or restrict distribution even if creators don’t self-disclose. TikTok also reads C2PA metadata where present.

    The most consequential enforcement mechanism on TikTok isn’t individual post suppression — it’s account-level throttling triggered by repeated violations. Five or more AI-content issues within a seven-day window can activate posting restrictions that limit distribution across an entire account, including content that has nothing to do with AI generation. This cascading effect makes TikTok the highest-stakes platform for AI visual workflow design.

    Key rules to follow on TikTok: Always apply the AI label for any content that depicts realistic people, locations, or events synthetically. For clearly stylized or illustrated AI content — artwork, animations, abstract product visuals — the risk of automated flagging is lower, but when in doubt, label. Never mass-upload AI content batches; space AI-generated posts across multiple days and mix them with non-AI content to avoid behavioral suppression triggers.

    LinkedIn

    LinkedIn’s AI content moderation is less formally documented than Instagram or TikTok, but in practice it operates through a combination of EXIF-based metadata analysis and engagement quality signals. LinkedIn’s algorithm has been reported to flag images lacking camera metadata and displaying visual characteristics associated with AI generation, with reduced distribution in feed and search surfaces.

    LinkedIn’s audience also skews toward professional skepticism around AI-generated content, which creates an organic engagement headwind. AI-generated imagery in LinkedIn posts tends to generate lower saves and shares than real photography among professional audiences, compounding any algorithmic suppression with an audience-behavior suppression effect.

    Key rules to follow on LinkedIn: Use AI visuals for conceptual illustration rather than for depicting realistic professional scenarios. When using AI-generated images of people, use clearly non-photorealistic styles. Supplement AI visuals with authentic context — real company data, actual quotes, genuine expertise — so the content value is clearly human-generated even if the visual is AI-assisted.

    YouTube

    YouTube’s approach to AI-generated visual content is primarily disclosure-focused in the context of Shorts and video thumbnails. The platform requires creators to disclose when AI has been used to generate realistic content that could be mistaken for real. Thumbnail images generated by AI are subject to the same disclosure requirements as video content in 2026.

    YouTube’s suppression mechanism for AI content is more closely tied to click-through rate and audience retention than to detection per se. AI-generated thumbnails that don’t match video content — or that appear misleading — trigger negative audience feedback that algorithmically reduces distribution. The enforcement is behavioral first, policy-based second.

    The Human-in-the-Loop Principle: Why AI-Only Workflows Keep Getting Penalized

    Circular workflow diagram of the Human-in-the-Loop AI visual content pipeline showing the five stages: Creative Brief, AI Generation, Human Review, AI Refinement, and Final QA — with 40-60% faster production and 20% higher engagement results

    The most consistent finding across 2026 research into AI visual content performance is that hybrid human-AI workflows outperform AI-only pipelines on every measurable dimension — reach, engagement, brand safety incidents, and suppression rates. The data suggests hybrid approaches deliver 40–60% faster production than traditional creative workflows while achieving 20% higher engagement than AI-only visual strategies.

    This isn’t a coincidence. Platform suppression systems are explicitly designed to target the content patterns that emerge from fully automated AI pipelines.

    What AI-Only Workflows Get Wrong

    When a team builds an AI visual pipeline that runs from brief to published content without meaningful human intervention, several suppression-triggering patterns emerge almost inevitably.

    Volume without variation. Automated pipelines optimized for throughput generate large batches of visually similar content. Even when individual images are technically distinct, the compositional and stylistic similarity across a batch creates behavioral fingerprints that platform algorithms associate with spam and low-quality content generation.

    No quality gates. AI generators don’t know when an image is off-brand, culturally inappropriate for a specific audience, or visually bland. Without human review, below-threshold content reaches audiences and generates the negative engagement signals (skips, “not interested” reports, low saves) that compound into algorithmic suppression.

    Missing contextual judgment. Platform safety systems increasingly evaluate whether content makes sense in context — whether it’s being posted by an account that has historically created relevant, value-adding content. AI-only pipelines that generate and post content without strategic editorial judgment break the contextual coherence that trust-scoring systems look for.

    What Human-in-the-Loop Actually Means in Practice

    The hybrid loop is not about adding a rubber-stamp review step at the end of an AI pipeline. The research on what works points to human involvement at specific high-leverage stages:

    Brief and creative direction (fully human-led). The strategic framing of what you’re trying to communicate, to whom, and why. This sets the context that makes AI-generated content feel intentional rather than generic.

    Generation filtering (human selects from AI outputs). Rather than automatically posting the first AI output, humans select from a batch — choosing the images that have genuine visual interest, brand alignment, and a quality that’s likely to generate saves rather than skips.

    Editorial refinement (human edits AI output). Even light editing — a crop, a color adjustment, an added text element — does two things. It improves the visual and creates a mixed-provenance signal that reduces the AI-detection confidence score. Images that have clearly been touched by human editing are harder to classify as purely AI-generated.

    Disclosure and contextual copy (human-authored). The caption, the disclosure label, the surrounding copy — these are the human layer that platforms and audiences read to make sense of a visual. Strong, specific, genuine captions are one of the most effective suppression shields available.

    Building the Loop Into Your Team Structure

    The practical question is where human review sits in a workflow that’s trying to maintain speed and volume. The answer depends on what you’re producing. For high-volume social content, a single experienced editor reviewing and selecting from AI batches can process 30–50 images per hour, which is fast enough to maintain meaningful oversight without creating a bottleneck. For brand-critical or audience-facing content, deeper review cycles with specific brand safety checklists are worth the additional time. The key is that “human-in-the-loop” doesn’t mean “slow” — it means thoughtful at the right stages.

    Prompt Engineering for Platform Safety

    Most prompt engineering advice focuses on getting better-looking images from AI generators. Very little of it addresses a different goal: generating images that are less likely to trigger platform suppression systems. These are not always the same objective — and understanding the difference matters.

    What Makes an Image Algorithmically Safe

    Platform suppression at the visual analysis layer is triggered by specific image characteristics. The following prompt engineering principles reduce exposure to those triggers:

    Reduce photorealism where you don’t need it. The highest-risk visual category for AI content suppression is photorealistic images of people, places, and events that could be mistaken for real. Prompts that push into illustration, stylized rendering, graphic design, or clearly conceptual territory generate images that are less likely to be flagged as misleading synthetic media, and less likely to confuse platform detection systems. “Illustrated,” “infographic-style,” “watercolor,” “vector art,” and “flat design” are useful style modifiers for content that doesn’t require photorealism.

    Avoid prompting for real identifiable locations and people. Even when you’re not intentionally generating deepfake content, prompts that include recognizable architecture, brand logos, or characteristics of real individuals create output that can be flagged under impersonation and misleading content rules. Keep your prompts in clearly synthetic territory.

    Use consistent style anchors across your content series. Paradoxically, consistency in visual style is both a suppression risk (if it signals mass generation) and a brand safety asset (if it signals intentional design). The key is establishing a distinctive visual identity — a specific color palette, a particular rendering style, a consistent compositional approach — rather than generating visually varied images from the same generic prompt. Branded consistency reads differently to platform algorithms than cookie-cutter mass output.

    Build in imperfection intentionally. Platform research has identified that the most suppressed AI content tends to be visually “over-perfect” — images with too-smooth textures, impossibly perfect lighting, and zero contextual noise. Adding intentional imperfection through prompts (natural lighting variations, slight depth of field, candid-style compositions) produces output that is both more visually interesting and less algorithmically suspicious.

    The Prompt Review Checklist

    Before submitting any prompt at scale, run it through these four questions:

    1. Does this prompt require generating realistic humans? If yes, shift to illustration or use model-released AI avatar tools specifically designed for this use case.
    2. Does this image need to depict a real place or event? If yes, use clearly stylized or clearly labelled representation rather than photorealistic recreation.
    3. Am I generating a batch of 10+ visually similar images? If yes, introduce deliberate variation in composition, palette, and framing — don’t use the same base prompt repeatedly.
    4. Does this output serve a clear audience value? If the honest answer is “it fills space,” it will perform like filler — low engagement, high suppression risk, brand damage.

    The Engagement Gap: Why AI Visuals Underperform and What Fixes It

    Bar chart comparing 2026 engagement rates across four visual content types: pure AI visuals at 1.8%, AI plus stock blend at 2.4%, AI plus human edit at 3.6%, and human UGC style at 4.2% — with callout noting real photos outperform pure AI by 42% on organic reach

    The most consistent data point in 2026 research on AI visual content is one that many AI enthusiasts don’t want to hear: authentic human-made photos still outperform purely AI-generated images by approximately 42% in organic engagement rate across platforms and industries. This isn’t a trivial gap — it’s the difference between content that the algorithm distributes and content that it quietly deprioritizes.

    Understanding why this gap exists is more useful than arguing about whether it does. Because once you understand the mechanisms, you can address them specifically.

    Why the Gap Exists

    The engagement gap between AI and human visuals in 2026 is driven by three reinforcing factors that are distinct from detection and suppression.

    Audience intuition. People don’t need to consciously identify an image as AI-generated to respond differently to it. The subtle uncanny valley effects in AI imagery — the too-smooth skin, the slightly-off shadows, the backgrounds that don’t quite cohere — register below conscious awareness and reduce the emotional response that drives saves and shares. Audiences interact with AI content more passively than with content that feels human and contextually real.

    Context mismatch. Human-created content tends to carry authentic contextual signals — a real location, a specific moment, an identifiable person — that AI content typically lacks. On social platforms where audiences are looking for genuine experiences and relatable perspectives, the absence of authentic context creates a fundamentally weaker emotional hook.

    Quantity effect. The low marginal cost of AI image generation has flooded feeds with AI visuals. Audience fatigue with generic AI aesthetics is measurable in 2026 engagement data. The visual styles that AI generators defaulted to in 2024 and 2025 — the hyperpolished product shots, the luminous landscape renders, the idealized portrait styles — are now overrepresented to the point of invisibility. Content that looks like everyone else’s AI content gets scrolled past at the same rate as content that is everyone else’s AI content.

    How to Close the Gap

    The engagement gap is not a reason to abandon AI visuals — it’s a brief for using them differently. The data on what performs well points in a clear direction.

    Hybrid production for flagship content. Use AI as a starting point and human editing, real photography overlays, or genuine context-addition as the closing step. Images that combine AI generation with human editorial touch perform closer to authentic human photography than to pure AI output on engagement metrics. The AI provides the efficiency; the human provides the authenticity signal that engagement algorithms reward.

    AI visuals for functional content. AI-generated images perform well — and sometimes outperform human-created alternatives — in specific content categories: product visualization, infographic illustration, conceptual diagram, and abstract brand imagery. These are use cases where photorealism and emotional authenticity are less critical than clarity and visual impact. This is where AI visual investment delivers the best return without fighting the engagement gap.

    Style distinctiveness over aesthetic quality. Generic high-quality AI visuals underperform because they’re indistinguishable from other generic high-quality AI visuals. Developing a distinctive visual style — a specific color palette, a signature compositional approach, an unusual rendering technique — creates content that stands out in feeds even when viewers can identify it as AI-generated. Distinctiveness, not quality alone, is what drives the saves and shares that protect distribution.

    Pair visuals with strong editorial content. Across every platform, the single most consistent engagement driver for AI visual content is high-quality written or spoken context that surrounds the image. Captions that provide specific information, personal perspective, or genuine expertise compensate for the emotional distance that AI visuals sometimes create. Think of the visual as the stop-scroll mechanic and the surrounding content as the engagement driver.

    Building a Compliant AI Visual Workflow in 2026

    The practical question for most teams isn’t “should we use AI visuals?” — that decision is effectively made for most content operations by the time and cost advantages. The real question is how to build an AI visual workflow that is compliant with platform policies, resilient to detection errors, capable of producing engaging content, and sustainable at scale without creating suppression debt that compounds over time.

    The Core Workflow Architecture

    A compliant AI visual workflow in 2026 has six components, each of which addresses a specific suppression risk:

    1. Tool selection with provenance in mind. Choose AI image generators that are built on licensed datasets, that output C2PA Content Credentials by default, and that are either SynthID-compatible or use an equivalent transparent watermarking approach. Adobe Firefly is the current benchmark for this combination. DALL-E 3 via the OpenAI API supports C2PA credentials in its current configuration. Generators with no provenance output create content that arrives at platforms with no authenticity signal — which is a suppression risk by default.

    2. Metadata preservation in your editing pipeline. If you use Photoshop, Lightroom, Canva, or any other editing tool between generation and upload, verify that C2PA credential chains are preserved. Adobe’s tools maintain C2PA manifests through their native editing pipeline. Third-party tools vary — some explicitly strip metadata as a processing step. Run test images through your full editing workflow and check the metadata output before deploying at scale.

    3. Human review gates at generation and pre-publish. Establish two mandatory review points: once immediately after batch generation (to select and reject), and once immediately before publishing (to verify compliance, caption quality, and contextual appropriateness). These gates prevent the low-quality output that drives engagement-based suppression.

    4. Content calendar design that avoids behavioral flags. Structure your AI visual content in your publishing calendar to avoid the rapid-batch-posting patterns that trigger account-level suppression. A maximum of two to three AI-generated visual posts per week per platform is a conservative guideline for accounts without established high-trust signals. Interleave AI content with non-AI content — photography, video, text-based posts — to create the behavioral diversity that distinguishes an editorial content operation from an AI content farm.

    5. Disclosure as a standard operating procedure. Apply AI disclosure labels at upload for any content generated primarily by AI. Do this proactively rather than waiting for automated detection to apply it, for two reasons: proactive disclosure builds audience trust and demonstrates editorial integrity, and it prevents the scenario where automated detection applies a label to unlabeled content, which can trigger additional scrutiny and restrict distribution.

    6. Performance monitoring with suppression-awareness. Track not just engagement metrics but distribution metrics — impressions relative to follower count, reach rate, and exploration vs. follower reach split. Early suppression signals show up in distribution data before they appear in engagement data. Establishing baseline distribution benchmarks for your accounts lets you detect suppression events quickly and trace them to specific content variables.

    Tool Stack Recommendations

    For a compliant 2026 AI visual stack, consider this configuration based on current platform compatibility:

    • Primary generation: Adobe Firefly (best-in-class C2PA support, trained on licensed data, native Creative Cloud integration for metadata preservation)
    • Supplementary generation: DALL-E 3 via API with C2PA output enabled for content requiring different aesthetic capabilities
    • Editing and finalization: Adobe Photoshop or Lightroom with C2PA chain preservation enabled
    • Content scheduling: Platforms that don’t strip metadata during scheduling — verify this for any scheduling tool you use; some third-party schedulers reprocess images in ways that strip provenance data
    • Provenance verification: Adobe’s Content Credentials Verify tool (verify.contentauthenticity.org) to check credential chains before publishing

    Disclosure Done Right: How to Label AI Content Without Killing Your Reach

    The instinct among many creators when facing new disclosure requirements is to comply minimally — apply the required label in the least visible way, with the least informative text, as late in the process as possible. This is exactly the wrong approach, both strategically and practically.

    Why Proactive Disclosure Outperforms Reactive Compliance

    Platform suppression systems in 2026 increasingly distinguish between content that is transparently disclosed as AI-generated and content where AI labels are applied by automated detection after the fact. The latter category triggers additional scrutiny and restricted distribution at higher rates than the former — partly because unlabeled AI content that gets auto-labeled has already demonstrated an intent signal that algorithms read as potentially deceptive.

    More practically, audience reception of AI-disclosed content has shifted significantly in 2026. The widespread awareness that AI visual tools exist means audiences aren’t shocked by disclosure — they expect it. What builds trust is not hiding AI generation but being honest about it while being clear about the human value being added. A disclosed AI visual accompanied by a strong expert caption performs better than an undisclosed AI visual accompanied by generic filler text, in both audience trust and algorithmic distribution.

    How to Write AI Disclosure That Works

    Disclosure language that preserves trust and engagement should do three things: acknowledge the AI tool, state the human purpose it serves, and make clear what genuine value the content provides.

    Generic: “Created with AI.”
    Better: “Visual created with Adobe Firefly to illustrate this data — the analysis and recommendations are ours.”

    Generic: “AI-generated image.”
    Better: “We used AI to visualize this concept — here’s why it matters in practice: [substantive insight].”

    The pattern is consistent: lead with the AI disclosure, follow immediately with the human contribution. This framing positions AI as a tool in service of human expertise rather than a replacement for it — which is how audiences read trustworthy AI content in 2026.

    Platform-Specific Disclosure Mechanics

    Instagram: Use the “AI Info” creator label at upload time via the advanced settings menu. This populates the platform label and prevents automated detection from applying a different label later. In your caption, optional but recommended: a brief one-line acknowledgment.

    TikTok: Apply the “AI-generated content” toggle at upload. For video content that uses AI-generated still images, this applies to the video post overall.

    LinkedIn: LinkedIn does not currently have a native AI disclosure tool. The community norm and best practice is a brief caption disclosure. A parenthetical “(visual created with AI)” at the end of your caption is sufficient and increasingly standard among professional creators on the platform.

    YouTube: Use the AI Disclosure option in the YouTube Studio details panel at upload. This is required for realistic content and best practice for any AI-assisted visual in thumbnails or within videos.

    The Account Trust Investment: Building the Suppression Resistance That Takes Time

    Platform algorithms don’t evaluate every piece of content in isolation. They evaluate it in the context of the account that posted it — its history, its consistency, its audience relationship, and its track record of producing content that audiences value. This account-level trust score functions as a suppression modifier: high-trust accounts get more distribution benefit of the doubt; low-trust or new accounts face tighter suppression thresholds.

    This creates a counterintuitive reality for AI visual strategy: the most important investment you can make in protecting AI-generated content from suppression is not in the AI content itself. It’s in the non-AI content that builds the account trust that protects all of your content.

    How to Build Account Trust Alongside AI Production

    Anchor accounts in authentic human content first. Accounts that launch with exclusively AI-generated visuals have no authenticity history. Platforms signal the inverse — human-made content that establishes authentic engagement patterns creates a trust buffer that makes subsequent AI content less likely to be aggressively suppressed.

    Maintain consistent publishing behavior. Erratic posting patterns — long dormancy followed by sudden high-volume AI content batches — are among the strongest behavioral suppression signals. Consistency in posting frequency, even at lower volume, builds the account regularity that trust-scoring systems reward.

    Engage with your audience genuinely. Platform algorithms measure not just how audiences respond to your content but how you respond to your audience. Accounts that reply to comments, engage with followers, and demonstrate active community participation have higher trust scores than passive broadcast accounts. This is particularly important for accounts that post AI visuals at scale — the human engagement signal compensates for the potentially automated-feeling content pipeline.

    Protect negative feedback rates. The “not interested” report and the unfollow triggered by low-quality content are among the most damaging suppression signals available to audiences. For AI visual content, this means ruthlessly filtering low-quality AI output before it reaches your audience. One batch of poorly-received AI content can erode account trust that takes months to rebuild.

    What Staying Visible Actually Requires: The Honest Summary

    The suppression challenge for AI-generated visual content in 2026 is real, multi-layered, and not going away. Platforms are not accidentally catching AI content in their moderation nets — they are deliberately moving toward authenticity-biased ranking systems that favor content with strong provenance signals, genuine audience value, and human editorial intentionality.

    The creators and brands navigating this successfully are not doing so by hiding the AI provenance of their content or by finding suppression loopholes to exploit. They’re doing it by building workflows that make AI generation serve genuinely human creative and editorial purposes — and by making that human purpose visible to both audiences and algorithms.

    The Non-Negotiable Foundation

    If you take nothing else from this playbook, these five practices are the foundation of suppression-resilient AI visual content in 2026:

    1. Use C2PA-compliant generators and preserve provenance through your editing pipeline. This is not optional bureaucracy — it’s the technical foundation that allows platforms to accurately classify your content rather than suppressing it for ambiguity.
    2. Build human review into your workflow at the selection stage, not just the approval stage. Humans choosing from AI outputs perform better than humans rubber-stamping AI outputs. The selection judgment is where editorial quality gets built.
    3. Disclose AI use proactively and frame it around the human value being added. This is both ethically correct and algorithmically advantageous. Transparency and reach are not in conflict when disclosure is done well.
    4. Design your content calendar to avoid behavioral suppression patterns. Volume, velocity, and variation matter as much as individual image quality. A thoughtful content calendar is part of your suppression defense.
    5. Invest in non-AI content to build the account trust that protects all of your content. AI visual strategy is not separable from overall account health strategy. The trust you build with authentic content protects the AI content you produce alongside it.

    Where This Is Heading

    Platform policies on AI visual content are tightening, not loosening. India’s 2026 regulatory amendments on synthetic content, the Singapore Content Authenticity Summit’s cross-platform provenance alignment, and the rapid growth of C2PA adoption across tool and platform ecosystems all point toward a future where provenance is table stakes, not a differentiator. The creators who build compliant, human-grounded AI visual workflows now will be operating in an environment they understand when the next round of policy tightening arrives. The ones who don’t will be navigating each new restriction reactively — and losing distribution every time.

    AI-generated visuals are a permanent and powerful part of the content creation toolkit. The question was never whether they’d survive platform scrutiny — it was always about building the right workflow to make them thrive within it.

  • What Rufus Actually Sees in Your Image Stack — And Why Most Stacks Are Built Backwards

    What Rufus Actually Sees in Your Image Stack — And Why Most Stacks Are Built Backwards

    Split-screen showing Amazon Rufus AI on a smartphone alongside a structured 7-frame product image stack — What Rufus Sees in Your Image Stack

    There’s a quiet assumption baked into most Amazon image strategies: images are for humans. You shoot a clean hero, drop in some lifestyle photos, maybe add a spec callout or two, and call it a complete listing. The buyer scrolls through, decides they like what they see, and clicks Add to Cart. Job done.

    That model worked fine for keyword-driven search. It’s increasingly wrong for the way Amazon’s AI surfaces and recommends products in 2026.

    Amazon’s Rufus — now integrated into the broader Alexa for Shopping experience — handles roughly 274 million queries per day and has driven an estimated $10 billion in incremental annualized sales. It doesn’t browse listings the way a shopper does. It parses them. It reads your image text through OCR. It classifies lifestyle context through computer vision. It generates embedding vectors from your visuals and matches them against what shoppers describe in natural language. And then it decides whether your product is worth surfacing in a conversational recommendation — or quietly skipping.

    Most image stacks aren’t built for that. They’re built for a human browsing session, laid out in a sequence that feels intuitive to a product photographer but communicates almost nothing to a multimodal AI model trying to answer “What’s a good BPA-free water bottle for hiking that fits in a cup holder?”

    This piece isn’t about making your images prettier. It’s about understanding what Rufus and Catalog Intelligence 2.0 actually extract from your visual stack — and restructuring your images so that extraction produces the right signals. Frame by frame.

    The Shift Nobody Announced: From Keyword Matching to Visual Embeddings

    Amazon didn’t publish a changelog when it started treating images as structured data. There was no seller announcement, no help doc update, no Seller Central notification. The shift happened gradually — and then, with the June 2026 rollout of Catalog Intelligence 2.0, significantly all at once.

    To understand why this matters, it helps to understand what changed architecturally. Before Catalog Intelligence 2.0, Rufus primarily relied on three data sources to match products to conversational queries: listing text (titles, bullets, descriptions), customer review language, and structured catalog attributes (brand, category, dimensions, material). Images were decorative — included in the listing but not meaningfully parsed for discovery purposes.

    The Three-Layer Stack Now Running Under the Hood

    Catalog Intelligence 2.0 introduced a fundamentally different architecture. Rather than treating product matching as a text retrieval problem, Amazon now runs three parallel layers:

    • Conversational/Agent Layer: This is the Rufus interface itself — the natural language understanding engine that processes shopper questions and determines intent. “What sunscreen won’t break me out?” is matched to product attributes using semantic understanding, not keyword presence.
    • Structured Catalog Layer: Traditional catalog data — category, attributes, ASINs, parent-child relationships, brand registry data. This is the backbone of how products are filed and retrieved.
    • Visual Similarity Layer: The new addition. Image embeddings — dense numerical vectors generated from your product photos — are used for grouping, similarity matching, and visual retrieval. When a shopper uploads a photo to Amazon Lens, or when Rufus tries to find “something that looks like this but comes in black,” the visual layer takes precedence.

    The critical implication: image embeddings now influence product retrieval in ways that are completely decoupled from your text copy. A listing can have perfectly optimized bullet points and still rank poorly in visual queries because the images themselves don’t communicate the right signals to the embedding model.

    Diagram showing Amazon's three-layer Catalog Intelligence 2.0 search architecture with visual image embeddings as a primary ranking signal

    What “Image Embeddings” Actually Means in Practice

    An image embedding is a compressed mathematical representation of visual content. When Amazon’s models process your product photo, they’re not saving the pixels — they’re generating a vector that encodes what the image represents: shape, color, texture, context, objects in the scene, spatial relationships, and yes, any text that appears in the frame.

    These vectors are then stored and compared. A shopper describing “a minimalist matte black desk lamp that’s adjustable” generates a query embedding. Amazon’s retrieval system finds ASINs whose image embeddings are closest to that query vector. If your lamp’s images show a cluttered workspace, heavy shadows, and no clear demonstration of the adjustable arm, your embedding won’t match — even if your bullet points say “minimalist, matte black, adjustable” three times.

    This is the core mechanic most sellers are missing: what your images say visually now determines whether you appear in AI-driven searches, independent of what your text copy says.

    How Rufus Processes an Image (Step by Step)

    Understanding the processing pipeline helps you make better creative decisions. Rufus doesn’t evaluate your image stack the way a shopper scrolls through it. It runs multiple passes, each extracting different data.

    Pass 1: Object and Category Recognition

    The first pass identifies what category of product is in the image and extracts primary attributes: product type, dominant colors, visible materials, approximate dimensions relative to context objects. This is where your hero image does its heaviest lifting. A clean white background isn’t just a visual convention — it removes noise from this classification step. Background objects, shadows, and clutter introduce competing signals that degrade classification confidence.

    At this stage, Amazon’s vision model is answering: “What kind of product is this, and what are its primary visible attributes?” The cleaner and more unambiguous your main image, the higher the confidence score on this classification — which correlates directly with how accurately your product is indexed and grouped.

    Pass 2: Context and Use-Case Extraction

    Secondary images are analyzed for scene context. A product photographed in a kitchen registers differently from the same product on a hiking trail. This context isn’t decorative — it’s used to answer questions like “Is this appropriate for outdoor use?” or “Would this work in a home office?” without requiring that information to be explicitly stated in your bullet points.

    This is the pass where lifestyle images contribute to discovery. A running shoe photographed only on a white background misses the opportunity to register “outdoor running” as a contextual signal. The same shoe photographed on a trail, in motion, in natural lighting generates a context embedding that ties it to queries about trail running, outdoor footwear, and active lifestyle categories.

    Pass 3: OCR — Reading Your Image Text

    This is arguably the most underutilized signal in most image stacks. Amazon’s OCR pipeline reads text that appears in your product images — callout boxes, spec tables, feature annotations, claim headers — and adds that text to the product’s indexed data. This is separate from and additive to your listing copy.

    A feature callout saying “48-Hour Battery Life” in your infographic frame is read as text, indexed, and can influence whether your product surfaces for conversational queries like “wireless headphones that last more than two days.” If that claim only appears in your bullets and not in your images, you’re getting half the signal strength you could have.

    Pass 4: Semantic Consistency Check

    Perhaps the most sophisticated pass: Rufus cross-references what it extracts visually against what your listing copy claims. Misalignment between the two — products that appear to be one thing in images but are described differently in text — lowers confidence scores and can suppress your listing in AI-driven placements. This is partly a quality signal, and partly a trust/accuracy signal that feeds into how reliably Amazon thinks your listing represents the actual product.

    The Conversion Data Behind Rufus-Optimized Stacks

    None of this optimization work matters if it doesn’t move conversion. Fortunately, the data is compelling — though it requires some context to interpret correctly.

    Rufus-engaged shoppers convert at roughly 2.7x the rate of non-Rufus shoppers. Sessions where Rufus is actively involved in the discovery path show conversion rates in the 8–14% range, compared to the 6–9% baseline for traditional search. For products with fully optimized visual stacks, practitioners report conversion lifts in the 20–35% range versus listings with minimal or unstructured images.

    Side-by-side comparison showing Traditional Stack with 6-9% CVR versus Rufus-Ready Stack with 20-35% CVR lift — The Conversion Gap

    Why the Lift Is So Large

    The magnitude of the conversion lift is worth examining. A 20–35% CVR increase from image optimization alone is a substantial number — larger than most A/B tests on copy variations or pricing experiments. There are two mechanisms driving it.

    First, Rufus-engaged shoppers have higher purchase intent to begin with. They asked a specific question, got a curated answer, and your product was surfaced as relevant to that specific need. You’re not just getting a browse — you’re getting a qualified referral. When someone lands on your listing because Rufus told them “this matches what you described,” they arrive pre-sold on the category fit.

    Second, a well-structured image stack does conversion work that your text copy can’t fully replicate on mobile. With more than 70% of Amazon traffic now mobile, shoppers frequently scan images before reading a single bullet. A stack that visually communicates use case, scale, key features, and differentiation in the first three frames converts shoppers who never scroll to your bullets. The image stack is doing independent conversion work — and Rufus optimization forces you to build stacks that are genuinely information-dense, which benefits human shoppers too.

    The Visibility Prerequisite

    It’s important to be precise about causality here. Image optimization doesn’t guarantee a conversion lift in isolation — it first has to generate a discovery lift. A beautifully optimized stack on a suppressed or low-visibility listing will show minimal conversion improvement because the traffic volume is too low to move the needle.

    The sequence is: better image embeddings → improved AI-driven discovery → higher-quality traffic → elevated conversion rate → stronger sales velocity → improved organic ranking. Each step depends on the previous one. Sellers who report the largest lifts from visual stack optimization are typically those who saw meaningful increases in impressions from Rufus-driven placements first, followed by the conversion rate improvement on that incremental traffic.

    The 7-Frame Architecture Built for AI Parsing

    Amazon allows up to nine images in most categories. Most sellers use somewhere between four and six. The research consistently points to seven as a high-performing configuration — enough to cover each functional category of visual information without padding the stack with redundant shots that dilute signal quality.

    Here’s how a Rufus-ready 7-frame stack should be structured, and why each position exists.

    The 7-Frame Rufus-Ready image stack showing all seven frames labeled from Hero to Trust Signal

    Frame 1: The Compliance Hero

    This is non-negotiable: pure white background (RGB 255,255,255), product filling at least 85% of the frame, no props, no people, no text overlays. Amazon’s main image policy hasn’t changed, and neither has its function. Frame 1 is your classification anchor — the primary input to Amazon’s object recognition pass. Every deviation from compliance introduces noise into that classification step and risks suppression.

    Resolution matters here more than most sellers realize. Amazon requires a minimum of 1,000 pixels on the longest side to enable zoom, but Catalog Intelligence 2.0 image embedding models produce more accurate, higher-confidence vectors from images at 2,000 × 2,000 pixels or above. Higher resolution gives the model more pixel data to work with, which produces richer embeddings. Shoot at 2,500+ pixels and downscale for upload — don’t shoot at spec.

    Frame 2: The Lifestyle Context Shot

    This is where most stacks make their first mistake. Convention says Frame 2 is a second angle of the product, still on white. That’s the wrong call for Rufus-era optimization. Frame 2 should establish scene context — where this product lives, who uses it, and in what setting. This is the primary input to Rufus’s use-case extraction pass.

    The scene should be unambiguous and specific. “A kitchen” is weaker than “a modern kitchen counter at breakfast time.” “Outdoors” is weaker than “a trail runner on a mountain path.” The more precisely the scene context communicates a specific use case, the more accurately your product gets categorized for related conversational queries. Natural light, realistic settings, and human interaction all strengthen context signal — provided the product remains clearly visible and central to the composition.

    Frame 3: The Primary Feature Infographic

    Frame 3 carries the heaviest informational load. This is your main OCR-indexed frame — a clean product shot overlaid with callout text highlighting two to four primary features or differentiating claims. The text in this frame is machine-read and indexed as searchable data, so the language matters as much as the design.

    Write callouts the way a shopper would ask for them. “BPA-Free” is good. “Dishwasher Safe” is good. “Professional-Grade Stainless Steel” is marginal — it’s a vague claim that doesn’t map well to specific queries. Think about the exact questions shoppers ask Rufus (“Is this safe to put in the dishwasher?”) and write callouts that answer them literally.

    Frame 4: The Scale Reference

    Size misrepresentation is one of the top return reasons across most categories. A dedicated scale reference frame — showing the product next to a common object (hand, coffee cup, laptop, ruler) — reduces return risk and gives the AI a dimensional anchor for image embedding accuracy. It also directly answers one of the most common conversational queries: “How big is this actually?”

    Frame 5: The Close-Up Detail

    Material texture, build quality, connection ports, threading, stitching, screen quality — whichever physical detail drives purchase confidence in your category should be isolated here. Close-up shots improve embedding specificity for material and quality attributes, which matters for queries filtering by build quality or material composition (“real leather,” “heavy duty,” “medical grade”).

    Frame 6: The Secondary Use-Case Scene

    A second lifestyle frame showing a different use scenario broadens the contextual footprint of your listing. If Frame 2 shows the product in a home kitchen, Frame 6 might show it in an office break room or outdoor camping setting. Each distinct use-case scene adds to the contextual diversity of your image embeddings, which increases the range of conversational queries your product can surface for.

    Frame 7: The Trust Signal Frame

    The final frame should communicate proof — awards, certifications, warranties, compatibility standards, sustainability claims, or a social proof summary (star rating callout, review count). This frame is less about AI parsing and more about finalizing the human conversion journey, but it also provides indexed claim data for certification-specific queries (“FDA approved,” “Certified organic,” “Compatible with Alexa”).

    Infographics as Machine-Readable Data — Not Just Design Assets

    Most sellers think of infographic frames as visual aids for shoppers who won’t read bullet points. That’s true — but it’s only half the story. In a Rufus-era stack, an infographic frame is also a structured data input for OCR indexing. How you design it determines how much indexed data you’re generating.

    AI scanner reading OCR text from Amazon product infographic image — showing machine-parseable claims like BPA-Free, 48hr Battery Life, Waterproof IPX7

    The Text Legibility Threshold

    Amazon’s OCR pipeline performs significantly better on text that meets specific legibility standards. Minimum effective font size in a 2,000-pixel image is approximately 30 points — smaller text is frequently missed or misread. High contrast between text and background is critical: black on white or white on dark backgrounds produce the most reliable reads. Styled or decorative fonts with unusual letterforms have lower recognition rates than clean sans-serif typefaces.

    This isn’t just about design aesthetics — it’s about whether the claims in your infographic actually get indexed. A beautifully designed frame where “Hypoallergenic Formula” appears in a 20pt italic script over a gradient background may look great in the gallery but generate zero indexed text. The same claim in a 36pt bold sans-serif with adequate contrast gets read, indexed, and cross-referenced against conversational queries about hypoallergenic products.

    Claim Specificity and Query Matching

    The language of infographic callouts should be optimized for the way shoppers phrase queries, not the way marketers write features. There’s an important difference. Marketing language tends toward the aspirational: “Superior Performance,” “Advanced Formula,” “Engineered for Excellence.” Query language is functional and specific: “lasts all day,” “won’t cause irritation,” “fits in a backpack.”

    Rufus answers natural language questions. The closer your infographic text matches the natural language patterns shoppers use, the more directly it contributes to query matching. Run your top-performing search terms through a conversational filter — ask yourself how a real person would phrase that need as a question — and rewrite your callouts to match those phrasings where possible.

    Spec Tables Versus Feature Callouts

    Both work for OCR indexing, but they serve different query types. Spec tables — formatted grids showing dimensions, weight, capacity, voltage, compatibility — are optimized for attribute-specific queries (“What voltage does this run on?” “How much does it weigh?”). Feature callouts are optimized for benefit-driven queries (“Will this fit in a carry-on?” “Is this waterproof?”).

    A high-performing infographic frame for complex products often combines both: a feature callout header with a compact spec table below. This satisfies both query types from a single indexed frame and works well for categories like electronics, sporting goods, and kitchen appliances where shoppers ask both types of questions.

    Lifestyle Images: Context Signals for Conversational Queries

    Lifestyle photography has always served a conversion purpose — showing the product in use creates aspiration and reduces imagination friction. In the Rufus era, it’s doing something additional: providing context embeddings that determine which conversational queries your listing surfaces for.

    Scene Composition as Keyword Strategy

    Everything in a lifestyle scene generates signal. The demographic of the model using the product suggests who the product is for. The setting establishes use-case context. Props and background objects add category and occasion signals. This means lifestyle scenes should be composed with the same strategic intent as keyword research — because in a multimodal search environment, they’re performing the same function.

    Before shooting a lifestyle scene, list the top three to five conversational queries you want your product to surface for. Then ask: does this scene communicate the context, demographic, and use case that a shopper would describe in those queries? If someone asks Rufus for “a gift for a dad who likes camping,” does your camping-adjacent lifestyle scene feature a middle-aged man? If not, you’re missing a demographic context signal that could be generating relevant traffic.

    The Difference Between Scene-Rich and Scene-Cluttered

    More context is not always better. Lifestyle images that are visually crowded — too many competing objects, overly complex backgrounds, poor product-to-scene ratio — generate noisier embeddings. The AI has more objects to classify, more scene relationships to parse, and a lower confidence score on what the image is actually communicating about the product.

    The product should occupy at least 40% of the visual frame in any lifestyle shot. Background complexity should support rather than compete with the product’s visual presence. A single clear contextual message per frame — this product, this setting, this use — outperforms multi-message scenes that try to communicate everything at once.

    Mobile-Optimized Composition

    With over 70% of Amazon sessions happening on mobile, lifestyle images need to read clearly at 375–414 pixels wide — typical smartphone screen widths. This means foreground subjects should be large enough to be recognizable at thumbnail scale, text overlays (if any) should be readable without zooming, and the primary subject should be unambiguous in the first half-second of viewing.

    A useful test: view all your images in the Amazon app at natural scroll speed. Whatever you can’t process in roughly one second per frame is too visually complex for the average mobile browsing session. Simplify compositions until each image communicates its primary message at a glance.

    The OCR Factor: Writing Image Text That AI Can Read and Index

    OCR indexing through product images represents one of the clearest, most actionable opportunities in current Amazon optimization — and it’s almost entirely overlooked. The mechanism is straightforward: Amazon reads text in your images, indexes it, and uses it to match your listing to relevant queries. But getting that mechanism to work reliably requires understanding its constraints.

    What Gets Read and What Gets Missed

    Amazon’s OCR pipeline performs well on standard Latin characters in common typefaces at adequate size and contrast. It struggles with: stylized or script fonts, text on complex or gradient backgrounds, text rotated beyond approximately 15 degrees from horizontal, text smaller than roughly 30pt in a 2,000px frame, and text that overlaps with the product itself in ways that create visual interference.

    A practical approach: for any text claim you want indexed, test it by photographing the image at a reasonable distance, then running a standard OCR tool (Google Vision, AWS Textract, or similar) against the exported JPG. If a standard commercial OCR tool misreads or misses your text, Amazon’s pipeline likely will too. Fix legibility issues before uploading.

    The Additive Indexing Benefit

    The reason OCR indexing is so valuable is that it’s additive to your listing text. You’re capped on bullet point space. Your title has character limits. Your product description can only say so much before it becomes walls of text that shoppers won’t read. Your image text has no direct character limits (beyond practical legibility), and it indexes as additional data for your listing’s search profile.

    A listing with seven infographic-rich images can effectively double or triple the amount of indexed claim text associated with the ASIN compared to a listing relying only on text copy. For competitive categories where the top ten listings share similar keyword coverage in their text fields, that additional indexed image text can provide meaningful differentiation in AI-driven matching.

    Consistency Between Image Text and Listing Copy

    Amazon’s semantic consistency check — the fourth processing pass described earlier — compares what image OCR extracts against listing copy. Claims that appear in images but nowhere in your listing text aren’t necessarily problematic, but claims that contradict your listing text or appear only in images with no supporting copy create lower confidence scores in cross-modal validation.

    Best practice: every claim in your infographic text should be reflected somewhere in your listing copy, even if not in identical language. “48-Hour Battery Life” in your infographic should be supported by at least a mention of battery duration in your bullets or description. This reinforces the consistency signal and ensures both text and image data point in the same direction for the claims you most want matched.

    A+ Content and the Metadata Layer Rufus Also Reads

    The image stack in the main gallery isn’t the only visual layer Rufus processes. A+ Content — enhanced brand content below the fold — contains its own set of images, and those images come with an often-ignored feature: alt text fields.

    A+ content optimization checklist for Rufus showing alt text fields, image description boxes, and connection to Rufus AI chat window

    A+ Alt Text: The Least-Used Optimization in Seller Toolkits

    Every image module in Amazon’s A+ Content builder has an alt text field. The vast majority of sellers either leave these blank or fill them with generic placeholders like “product image 1.” This is a significant missed opportunity.

    Alt text in A+ Content modules is indexed by Amazon’s search and AI systems. It’s essentially free structured text tied directly to specific visual contexts. A 150-character alt text description for a comparison chart image — “Comparison table showing Model X at 48-hour battery life, 32oz capacity, and waterproof IPX7 rating versus competitor models” — adds indexable claim data that neither your main listing text nor your gallery images may cover.

    The framework for writing effective A+ alt text: describe what the image shows (the visual content), what it demonstrates (the product attribute or claim being communicated), and why it matters to the shopper (the benefit or use case). This three-part structure ensures the alt text contributes to discovery, conversion, and accessibility simultaneously.

    Module Structure and the AI Reading Order

    Amazon’s A+ module templates have different visual layouts, but they all share one common characteristic from a data perspective: the text fields and alt text fields associated with each module are processed in order, creating a sequential narrative that Amazon’s AI can follow. The order in which you present modules matters — not just visually, but structurally.

    A+ modules should follow the same information architecture logic as your main image stack: lead with use-case context, progress through feature specifics, provide comparison data mid-way, and close with trust and brand signals. This creates a coherent narrative that the AI can follow and summarize — which matters because Rufus sometimes generates product summaries from A+ content for conversational responses.

    Premium A+ and Video Consideration

    Premium A+ content (available to brand-registered sellers who meet eligibility thresholds) includes additional module types, including video embeds, interactive hotspot images, and comparison carousels. From a Rufus optimization perspective, these are valuable primarily because they increase the amount of parseable, indexable content below the fold.

    Video in A+ is worth special attention: Amazon can extract both visual frames and audio transcriptions from embedded product videos, adding another data layer. A product demonstration video with clear narration — “I’m placing the 32-ounce bottle upside down to show the leak-proof seal” — generates both visual scene context and indexed text from the transcript. Sellers in competitive categories with strong Premium A+ programs are building meaningful informational advantages that pure text or gallery optimization can’t replicate.

    Testing Your Stack for Rufus Readiness — A Practical Audit Framework

    Optimization without measurement is just guesswork. Here’s a structured approach for auditing your existing image stacks and prioritizing improvements.

    The Five-Question Audit

    Run each ASIN’s image stack through these five questions before deciding what to change:

    1. Does Frame 1 meet technical compliance without ambiguity? Pure white background, 85%+ product fill, minimum 2,000px resolution, no text or props. If not, this is your first fix — gallery suppression or deprioritization in object classification costs everything downstream.
    2. Do Frames 2–6 collectively cover all major use cases for this product? Map each frame to a specific query type: demographic use, setting context, feature claim, dimensional reference, material quality. Missing categories mean missing query coverage.
    3. Is every text claim in your infographic frames readable by a standard OCR tool? Export your infographic frames as JPGs and test them. Fix legibility issues before worrying about anything else in the infographic design.
    4. Is there semantic consistency between your image text and listing copy? Every claim in your images should have a corresponding mention in your text fields. Identify gaps and patch them in bullets or description.
    5. Are your A+ alt text fields populated with descriptive, claim-specific content? If not, this is often the fastest, lowest-effort optimization available — it requires no reshooting, no design work, just writing.

    Using Rufus Itself as a Diagnostic Tool

    One of the most underused testing approaches is simply asking Rufus (now Alexa for Shopping) about your own products. Log in with a test account, open the AI assistant, and ask the kinds of questions your target shoppers would ask. Does your product surface? What does Rufus say about it? Does its summary accurately reflect your key claims, or does it describe your product in ways that suggest the AI parsed it differently than you intended?

    Pay attention to which features Rufus mentions in product summaries. Those are the signals it successfully extracted from your listing and images. Features it doesn’t mention — even if they’re prominent in your bullets — may indicate extraction failures that image optimization can address. This diagnostic approach can reveal specific gaps much faster than broad optimization testing.

    Prioritizing Changes by Impact

    Not all image stack changes deliver equal ROI. In order of expected impact based on available practitioner data:

    1. Hero image compliance and resolution upgrade — Highest impact, affects all downstream AI processing.
    2. OCR legibility fixes on existing infographic frames — High impact, low cost, no reshooting required.
    3. A+ alt text completion — High impact, zero cost, purely a writing task.
    4. Moving lifestyle context to Frame 2 — Medium-high impact, may require reshooting or reordering.
    5. Adding missing use-case frames — Medium impact, requires new photography.
    6. Claim language optimization in infographic text — Medium impact, requires design iteration.

    Start with the highest-impact, lowest-cost interventions. Items 1–3 can often be completed without any new photography, making them week-one priorities. Items 4–6 require production investment but deliver the most significant long-term improvement to AI-driven discovery.

    What This Means for Product Launch Strategy

    The implications of Rufus-era image optimization extend beyond existing listings. For new product launches, the image stack is now a pre-launch strategic asset — not a post-launch optimization task.

    Building the Stack Before the Shoot

    The most efficient approach for new launches is to define your image stack architecture before booking the photo shoot. Identify which queries you want to surface for. Map those queries to scene contexts, feature claims, and demographic signals. Then brief your photographer on specific scenes, compositions, and prop requirements derived from that query mapping — not from generic “Amazon photography best practices.”

    This reverses the traditional workflow where photography happens first and then gets optimized for listing requirements. In a Rufus-optimized workflow, listing requirements (specifically, AI query coverage) drive photography briefs. The difference in outcomes is substantial: a photographer briefed to “shoot lifestyle scenes that answer specific shopper questions” will produce very different images than one briefed to “shoot the product in use.”

    Category-Specific Stack Considerations

    Different product categories have different AI parsing priorities. In electronics, spec legibility and compatibility signals dominate — a buyer asking “Does this work with my MacBook?” needs to find that compatibility claim in your image text. In apparel, fit, material, and styling context matter most — lifestyle scenes need to communicate how the item looks on real bodies in real settings. In supplements and health products, certification and ingredient claim visibility is primary — “Third-party tested,” “No artificial colors,” “NSF certified” need to be OCR-indexed and not just buried in description copy.

    Audit the top-performing listings in your category (not your current competitors — the category leaders) and analyze what their image stacks are doing. What types of claims appear most consistently in infographic frames? What scene contexts do their lifestyle images share? What trust signals appear in Frame 7? This competitive visual analysis will give you a category-specific optimization template that goes beyond generic best practices.

    Conclusion: Your Image Stack Is a Data Structure, Not a Photo Gallery

    The fundamental shift Rufus and Catalog Intelligence 2.0 require is a change in how you think about product images. A gallery is passive — it waits for a shopper to scroll through it and decide whether the product looks appealing. A data structure is active — it communicates specific signals to an AI system that uses those signals to match your product to shopper queries you may never see directly.

    Sellers who continue to build image stacks as galleries will see increasing marginalization in AI-driven discovery. Sellers who rebuild their stacks as structured visual data — with each frame serving a specific parsing function, text claims optimized for OCR legibility and query matching, lifestyle context deliberately mapped to target queries, and A+ metadata populated with indexed claim text — are building a compounding advantage in how Rufus surfaces and recommends their products.

    The 274 million daily Rufus queries aren’t going away. The $10 billion in incremental sales they represent will flow disproportionately to listings that communicate clearly to AI — not just to shoppers. The conversion data is clear: Rufus-engaged sessions convert at 2.7x the baseline rate, and optimized stacks drive 20–35% CVR lifts on top of that. The only question is whether your image stack is earning those recommendations or being quietly skipped.

    Actionable Takeaways

    • Audit Frame 1 for compliance and resolution first. Everything downstream depends on accurate object classification. Upgrade to 2,500px minimum and ensure pure white background compliance.
    • Move lifestyle context to Frame 2. Scene context extraction happens early in the processing pipeline. Don’t waste that position on a second angle shot.
    • Test all infographic text with a commercial OCR tool before uploading. If it can’t be read by standard OCR, Amazon’s pipeline likely misses it too.
    • Write infographic callouts in query language, not marketing language. Think “How would someone ask for this feature in a Rufus chat?” and write to match.
    • Complete every A+ alt text field with descriptive, claim-specific copy. It’s the fastest, zero-cost optimization currently available and almost universally neglected.
    • Audit your own ASINs through Rufus/Alexa for Shopping. What Rufus says about your product tells you exactly what signals it successfully parsed — and what it missed.
    • Brief photography shoots from query mapping, not generic best practices. Build the stack architecture before the shoot, not after it.

    The image stack has always been a conversion asset. In 2026, it’s also a discovery asset, a data structure, and increasingly, the primary input to AI-driven product matching. Build accordingly.

  • The Discipline of Less: How to Ship Multi-Agent Workflows Without Tool Sprawl Killing Them

    The Discipline of Less: How to Ship Multi-Agent Workflows Without Tool Sprawl Killing Them

    Diagram contrasting chaotic tool sprawl in a single AI agent versus a clean hierarchical multi-agent architecture with scoped tools

    There is a particular kind of confidence that hits engineering teams around the six-week mark of a multi-agent build. The orchestrator is wired up. The sub-agents are firing. The demo runs clean. And because it runs clean, someone — usually the person closest to the product — asks: Can we also add the Salesforce connector? And maybe pull in Jira? And while we’re at it, the billing system needs to be in scope too.

    This is how tool sprawl starts. Not with a bad decision, but with a series of individually reasonable ones.

    By the time the system hits production, it is not uncommon to find a single agent wired to thirty, forty, sometimes sixty tools it will never actually call on any given task. The context window is bloated before a single token of real work is generated. The agent’s tool-selection logic — never perfect to begin with — degrades under the weight of too many options. Latency climbs. Costs balloon. And when something goes wrong, the trace spans read like a map of a city no one designed.

    The engineering community has a name for this now: tool sprawl. And in 2026, it has become one of the most documented, most discussed, and most underestimated failure modes in production multi-agent systems. A Q1 2026 survey of enterprise AI deployments found that the average large enterprise runs approximately 12 distinct AI agents, with nearly half operating in silos and exhibiting overlapping, poorly governed tool access. The percentage of multi-agent pilots that fail within six months of production deployment sits at roughly 40%.

    The fix is not better models. It is not a smarter orchestration framework. It is discipline — architectural discipline around what tools exist, which agents can see them, and when they are loaded. This post is about building that discipline before you ship, and recovering it if you already haven’t.

    What Tool Sprawl Actually Looks Like in Production

    Tool sprawl does not announce itself. It accumulates. The pattern typically unfolds in three distinct phases, and recognizing them early is the fastest way to avoid the mess they create.

    Phase One: The Generous Scope

    In early development, it feels safe — even sensible — to give agents broad access. You are still discovering what the workflow needs. Restricting tools at this stage feels like premature optimization. So the agent gets everything: the CRM, the database, the file system, the email client, the calendar API, the internal knowledge base, the billing system, and a handful of MCP servers someone found on GitHub.

    This is fine for prototyping. It becomes a structural liability the moment you stop prototyping.

    Phase Two: The Feature Creep Multiplier

    Every stakeholder who touches a multi-agent workflow eventually asks for one more integration. The support team wants ticket creation. Finance wants expense categorization. The data team wants a direct hook into the warehouse. Each request is legitimate in isolation. Each one adds another tool to the agent’s manifest. No one removes the tools that were added for previous use cases, because removal feels risky — what if something depends on it?

    The MCP ecosystem has made this dramatically worse. A Q1 2026 census of MCP servers across public registries found 17,468 distinct MCP servers available for agent integration. The barrier to adding a new tool has never been lower. That accessibility is genuinely useful. It is also the reason tool lists metastasize.

    Phase Three: The Silent Degradation

    This is the phase most teams notice too late. The system is in production. It mostly works. But accuracy on complex tasks has quietly dropped. Certain prompts return wrong tool calls — the agent reaching for a search API when it should be writing to a database, or calling a read endpoint when a write was intended. Token costs are higher than projected. Response times are inconsistent.

    None of these symptoms trigger an obvious alert. There is no “too many tools” exception in your logs. The degradation is statistical, not categorical. And that makes it extraordinarily hard to diagnose without purpose-built observability from the start.

    The core mechanism is straightforward: when you give an LLM more tools to choose from, tool-selection accuracy drops. Research across production deployments consistently identifies a practical ceiling of roughly 5 to 8 tools per agent before selection errors become a meaningful reliability risk. Above 15 tools, the signal-to-noise ratio in tool descriptions degrades to the point where the model frequently selects plausible-but-wrong options — a failure mode that compounds across multi-step workflows in ways that are difficult to trace.

    The Compounding Reliability Math Nobody Likes to Run

    Staircase infographic showing compounding failure rates in multi-agent chains from 95% reliability at one agent to below 60% at ten agents in sequence

    One of the most uncomfortable facts in multi-agent engineering is that system reliability is multiplicative, not additive. Every agent in a sequential chain introduces its own failure probability. Those probabilities compound.

    If each agent in your pipeline has a 95% step-level success rate — which is optimistic for complex real-world tasks — the math looks like this:

    • 1 agent: 95.0% end-to-end success
    • 3 agents in sequence: 85.7%
    • 5 agents: 77.4%
    • 8 agents: 66.3%
    • 10 agents: 59.9%

    A ten-agent workflow where every individual step is 95% reliable will fail to complete successfully four times out of ten. In production, that is not a reliability problem. It is an unusable system.

    Tool Sprawl Degrades the Per-Step Rate

    The compounding math becomes even more damaging when tool sprawl is involved, because sprawl directly lowers the per-step success rate. An agent that calls the wrong tool does not get a partial credit — the error propagates downstream, carrying corrupted context into the next step. Recent analysis of production multi-agent systems found that when agent topology does not match task shape, collapse rates can reach 90.7%.

    This is the core reason tool discipline matters so much in multi-agent systems specifically: a single poorly scoped agent in the middle of a pipeline can corrupt the reliability of every agent that follows it. The failure is not local; it is systemic.

    The Coordination Overhead Tax

    Beyond individual step failures, tool sprawl adds a coordination overhead that compounds latency at scale. Every time an agent must select from a large tool set, that selection requires more context processing, more model inference, and in some architectures, multiple sampling passes. Multiply that overhead across every step in a workflow, across every concurrent workflow run, and the cost trajectory becomes nonlinear fast.

    One documented 2026 production consolidation effort found that simplifying agent topology — reducing trace spans from 18–34 down to 5–8 per run — dropped median task cost from $0.62 to $0.11 and median latency from 47 seconds to 14 seconds. The model did not change. The underlying tools did not change. The architecture around them did.

    Context Window Contamination: The Hidden Token Tax

    Infographic showing how tool descriptions, schemas, and prior tool results consume the majority of an LLM context window before any actual task content is processed

    Here is a test worth running on any multi-agent system you are currently operating: count the tokens consumed by tool definitions before the first meaningful user-task token is processed. The results are often alarming.

    Tool definitions in an LLM context are not free. Each tool requires a name, a description, a parameter schema, and often example invocations. A well-documented tool might consume 300–500 tokens. An agent wired to 30 tools is starting every single call with 9,000–15,000 tokens of overhead — before the system prompt, before conversation history, before the actual task content. On a 128K context model, that is already 7–12% of the available window consumed by tool schema alone.

    The Cascade Effect on Long-Running Workflows

    The contamination problem compounds in long-running agentic workflows. Frameworks like LangGraph and CrewAI, by default, append every step’s output — including full tool call records and responses — to the agent’s state. In a ten-step workflow where each step involves two or three tool calls with verbose JSON responses, the accumulated state can consume the majority of the context window before the final steps execute. This produces one of the most frustrating failure modes in multi-agent systems: the silent degradation at the end of a long workflow.

    The model does not announce that it is operating on compressed context. It does not throw an exception when it hits the window limit. It simply begins to reason less accurately, hallucinating tool behaviors, misremembering earlier steps, or selecting actions that contradict decisions made earlier in the same run. The output looks plausible. It is wrong.

    What This Means for Tool Design

    Every tool you add to an agent’s context is a permanent tax on every call that agent makes. The discipline here is treating tool descriptions the same way good engineers treat code comments: concise, precise, purposeful, and regularly pruned. Verbose tool documentation that reads beautifully in a README is costly overhead when it runs in a context window ten thousand times a day.

    There is also a second-order consideration that most teams miss: the quality of tool descriptions affects selection accuracy more than the quantity. An agent with ten tightly written, clearly differentiated tool descriptions will outperform an agent with thirty loosely described tools every time. The investment in schema quality pays compound returns across the entire system’s operational life.

    The Topology Trap: Why Architecture Shape Matters as Much as Tool Count

    Multi-agent workflows fail not only because of too many tools, but because the structure of the agent graph does not match the structure of the underlying task. This mismatch — what practitioners now call the topology trap — is one of the least discussed root causes of multi-agent production failures.

    Task Shape vs. Agent Shape

    Every task has a natural shape. Some tasks are sequential: output A feeds input B, which feeds input C, with strict ordering. Others are parallel: five independent subtasks that can be executed simultaneously and merged at the end. Still others are hierarchical: a planner decomposes a goal into subgoals, each handled by a specialist, with results synthesized back up. When your agent architecture mirrors the task’s natural shape, coordination overhead is minimized and tool routing is clear. When it does not, you get bottlenecks, redundant work, and agents calling tools they should not need.

    The most common mismatch in practice is building parallel architectures for sequential tasks. Teams reach for parallelism because it sounds faster. But if task step B requires the output of step A to determine which tool to call, forcing parallelism means either guessing or re-doing work. The apparent speed gain evaporates, and the tool call surface expands because each parallel agent must defensively cover multiple branches of the task instead of one narrowly scoped path.

    The Orchestrator Bottleneck

    Many teams default to a centralized orchestrator — one manager agent that routes all work to sub-agents. This pattern is sound in principle but creates a specific failure mode at scale: the orchestrator becomes a single point of both performance bottleneck and context accumulation. Every delegated task result flows back through the orchestrator’s context. If the orchestrator is also the entity managing tool selection across the entire workflow, you have effectively concentrated all the tool-sprawl risk into a single agent.

    The fix is not to eliminate the orchestrator, but to make it deliberately narrow. The orchestrator should know which sub-agent to call, not which tools those sub-agents use. Tool knowledge belongs inside the sub-agent boundary, scoped to its domain. The orchestrator should never need a direct connection to a tool it does not personally invoke.

    Matching Topology to Task: A Practical Heuristic

    Before building any multi-agent architecture, map the task’s dependency graph explicitly. If the graph is a straight line, build a sequential chain with prompt chaining, not a full multi-agent system — the single-agent baseline will likely be cheaper and more reliable. If the graph has genuine parallelism (truly independent subtasks), parallelize. If the graph is hierarchical, build a one-level hierarchy and resist the urge to add additional layers unless the data explicitly requires them. Each additional orchestration layer adds coordination overhead and multiplies the tool-management surface.

    The Least-Privilege Principle, Applied to Agent Tools

    Architectural diagram showing least-privilege tool design with specialized sub-agents each enclosed in security boundaries containing only 3-4 scoped tools, contrasted with a bad single-agent pattern holding 40+ tools

    Security engineers have enforced the principle of least privilege for decades: a process should have access to only the resources it needs to complete its current task, and nothing more. It is time for multi-agent architects to apply the same discipline to tool access.

    The instinct in most multi-agent builds is to be generous with tool access because it feels safer. What if the agent needs this tool for an edge case? What if we restrict too much and the workflow breaks? This instinct is precisely backwards. Generous tool access creates more failure modes, not fewer, because it increases the space of wrong actions an agent can take.

    Defining the Minimum Viable Tool Set

    Every agent in a well-architected multi-agent system should be able to answer the question: What is the exact set of tools I need to complete my assigned task? If the answer includes tools needed by other agents in the same system, that is a boundary problem — those tools belong with those agents, not shared across the graph.

    The practical exercise is to enumerate each agent’s core task, then work backward to the minimal set of tools that task requires. This exercise consistently reveals two things. First, most agents need far fewer tools than they were initially given. Second, many “tools” that appear in the initial list are actually multi-step operations that should themselves be broken into smaller, more precisely scoped tool definitions.

    A research agent, for instance, might be given a generic “web access” tool that can search, retrieve, parse, and summarize arbitrary web content. Decomposing that into a targeted search tool, a URL fetch tool, and a text extraction tool — each with tight parameter schemas — dramatically improves selection accuracy and makes failures much easier to attribute and debug.

    Read vs. Write Permissions as a First-Order Concern

    One of the fastest wins in agent tool design is enforcing read/write separation explicitly. Most agentic tasks spend the majority of their steps reading: gathering information, retrieving context, validating current state. Write operations — creating records, sending messages, triggering actions in external systems — are typically a small fraction of total steps but carry the majority of risk.

    Giving every agent read/write access to every system because “they might need to write eventually” violates least privilege and creates serious security and reliability exposure. An agent that can write to the CRM, send email, and create support tickets has a much larger blast radius when it makes a wrong tool selection than one that can only read from those systems and must hand off to a dedicated action agent for writes.

    Building this separation into the architecture — not just into prompts or guidelines, but into the actual tool permissions assigned to each agent — gives you a genuine safety layer that does not depend on model behavior. That matters, because model behavior under edge-case inputs is never fully predictable.

    Tool Registry and Agent Gateway: The Control Plane That Actually Works

    Architecture diagram showing an Agent Gateway control plane handling auth, policy, routing, and audit between agents and a Tool Registry containing approved tools with schema versions and access policies

    For teams operating at any real scale — multiple agents, multiple workflows, multiple teams contributing tools — ad hoc tool management becomes unworkable fast. The solution that has emerged across 2026 production deployments is a two-component control plane: a tool registry paired with an agent gateway.

    The Tool Registry: Single Source of Truth for Agent Capabilities

    A tool registry is a centralized catalog of every approved tool available to agents in a system. Each entry contains the tool’s name, schema, ownership, version history, access policy, and production readiness status. Agents do not hard-code their tool lists — they query the registry to discover what is available to them, filtered by their assigned permissions and the current task context.

    The registry pattern solves several problems simultaneously. It eliminates the “which version of this tool does this agent use?” confusion that plagues ad hoc multi-agent systems. It gives platform and security teams a single point of control for approving, deprecating, or restricting tools without touching agent code. And it provides an audit surface: if a tool is called unexpectedly in production, the registry log tells you exactly which agent called it, when, and in what context.

    The scale of the problem this addresses is significant. That Q1 2026 census of MCP servers found 17,468 servers across public registries — with only a fraction production-ready under enterprise governance standards. Without a registry layer, every team in an organization can independently wire their agents to any of those servers. With one, the catalog of approved, tested, policy-compliant tools is defined once and enforced everywhere.

    The Agent Gateway: Policy Enforcement at the Boundary

    If the registry is the catalog, the gateway is the door. An agent gateway sits between all agents and all tools, intercepting every tool call and enforcing authentication, authorization, rate limits, and policy rules before the call is allowed through. No tool call happens outside the gateway’s visibility.

    This architectural pattern has clear analogues in API management and service mesh design — it is the same principle as an API gateway in microservices, applied to the agent-to-tool interaction layer. The gateway does not contain business logic. It enforces policy. That separation of concerns is what makes it maintainable: security policies change independently of agent behavior, and neither side needs to know the internal details of the other.

    Production implementations of this pattern — including work done with Solo.io’s agentgateway project — have shown that centralizing MCP and LLM traffic through a gateway improves cost visibility, enables governance across heterogeneous agent types, and removes the need to modify individual agents or MCP servers when policies change. The gateway abstracts the policy layer entirely.

    What This Architecture Does Not Solve

    It is worth being direct about the limitations. A registry and gateway control plane is an infrastructure-layer solution. It does not fix poorly designed tool schemas. It does not prevent an agent from making a logically wrong tool call when the tool is technically permitted. And it adds an operational surface that must itself be maintained, monitored, and versioned.

    Teams that implement this pattern without also investing in schema quality and agent-level tool minimization will find that they have built an excellent auditing layer over a still-sprawling tool estate. The control plane is necessary but not sufficient. It works best as the enforcing layer around sound architectural decisions already made upstream.

    Dynamic Tool Loading vs. Static Tool Injection: A Decision Framework

    One of the most important architectural decisions in multi-agent tool management is whether each agent receives its tool set statically at initialization or dynamically at the point of each task. Both patterns have legitimate use cases, and choosing the wrong one for your workload has meaningful consequences for both cost and reliability.

    Static Tool Injection: When It Makes Sense

    In static injection, agents are initialized with a fixed, predetermined set of tools. Every call that agent makes sees the same tool manifest. This is the simpler pattern and the right default for workflows where the task domain is well-defined and the tool set is small — ideally under eight tools.

    Static injection is predictable. The context overhead per call is constant and known. Testing is straightforward because tool availability does not vary across runs. And for agents that always operate in the same domain — a customer support agent that only ever queries tickets, reads account records, and creates follow-up tasks — the fixed set is not a constraint; it is a design feature.

    The failure mode of static injection is when it gets applied to general-purpose agents. A general-purpose agent with a static 40-tool manifest is paying the full context tax on every call, regardless of what the current task actually needs. The math makes this untenable at scale.

    Dynamic Tool Loading: The Right Pattern for General Agents

    Dynamic loading — retrieving tool definitions at task time based on the current context, intent, or task metadata — solves the context bloat problem for general-purpose agents. Instead of including all tool schemas in every call, the agent’s orchestration layer queries the registry for the relevant subset, fetches only those definitions, and injects them into the context for that specific call.

    This pattern requires more infrastructure. The retrieval mechanism itself needs to work reliably, quickly, and with semantic understanding of the task context — a tool retrieval step that adds 500ms of latency before every agent call defeats much of the purpose. The most effective implementations use embedding-based semantic search over tool descriptions, retrieving the top-k most relevant tools for the current intent rather than pattern-matching on keywords.

    Expert guidance in 2026 consistently favors dynamic loading over static injection for any agent that will operate across more than one domain or handle task variety beyond a narrow scope. The retrieval overhead is real but manageable; the context savings across thousands of daily runs are substantial.

    A Practical Decision Heuristic

    The framework is simple: if your agent does one thing and does it consistently, static injection with a minimal tool set is correct. If your agent handles varied requests across multiple domains, dynamic loading with a centralized registry is worth the infrastructure investment. And if you find yourself justifying static injection for a general-purpose agent because dynamic loading “sounds complicated,” that is typically a signal that the agent’s scope is too broad to begin with.

    MCP as the Consolidation Layer: What It Solves and What It Doesn’t

    Model Context Protocol has become the dominant standard for tool access in multi-agent systems in 2026, with adoption across OpenAI, Google, Microsoft, and AWS and 97 million monthly SDK downloads reported at its peak. MCP’s promise is real: a standardized way for models to access tools, data sources, and external services without every integration requiring bespoke glue code.

    For teams wrestling with tool sprawl, MCP appears at first glance to be a direct solution. One protocol, one integration model, one way to connect any agent to any tool. If everything speaks MCP, the proliferation problem should solve itself.

    It does not. And understanding why is important for any team treating MCP adoption as a tool-sprawl mitigation strategy.

    What MCP Actually Standardizes

    MCP standardizes the interface between models and tools. It defines how a model requests tool invocation, how parameters are passed, how results are returned, and how errors are communicated. It does not standardize what tools exist, how many an agent should use, what they should be permitted to do, or how they should be governed across an organization.

    In practice, MCP makes it dramatically easier to add new tools to an agent’s repertoire — which, without accompanying governance, makes tool sprawl faster, not slower. The Q1 2026 census of 17,468 MCP servers is partly a testament to MCP’s success as a standard and partly a warning label. Most of those servers were created by developers exploring the protocol’s possibilities. A significant portion have no security posture, no versioning discipline, and no organizational ownership structure suitable for production use.

    The 2026 Spec Changes That Matter

    The 2026-07-28 MCP release candidate addresses some of this by introducing a stateless core designed to scale on standard HTTP infrastructure. This makes multi-agent, multi-tool topologies more operationally tractable — stateless tool servers are simpler to deploy, scale, and recover than stateful ones. The spec also strengthens OAuth/OIDC-aligned authentication, tightening the security posture that earlier MCP deployments left under-specified.

    The clearest architectural guidance from 2026 MCP practice is a division of responsibility: use MCP for the model-to-tool layer (standardizing how agents invoke capabilities), and use a separate agent-to-agent (A2A) protocol for agent-to-agent coordination (delegation, negotiation, result sharing between agent nodes). Conflating these two layers — trying to make MCP do both — creates architectural confusion and governance gaps that are difficult to remediate after the fact.

    The Right Way to Think About MCP and Sprawl

    MCP is a tool for integration quality, not tool quantity. Adopting MCP reduces the cost of each individual integration. The discipline of deciding which integrations to make, how many an agent should access, and under what governance they operate — that discipline is entirely separate from the protocol and must be enforced at the architecture and policy level. MCP is necessary infrastructure. It is not a substitute for the harder organizational work of tool governance.

    Observability-First Shipping: Measuring What Actually Matters

    Before-and-after comparison showing production metrics after tool consolidation: latency from 47s to 14s, cost per task from $0.62 to $0.11, eval pass rate from 71% to 84%, incident resolution from 45 minutes to 8 minutes

    One of the clearest markers of teams that successfully ship multi-agent workflows — versus teams that ship and then spend months firefighting — is the presence or absence of purpose-built observability from day one. Observability in multi-agent systems is not optional, and it is not the same as the observability you already have for monolithic services or single-LLM deployments.

    Why Standard Monitoring Falls Short

    Traditional application monitoring tells you whether services are up, whether requests are succeeding, and how long they are taking. Multi-agent workflows require a different category of instrumentation because the most important failures are semantic, not technical. The service can be up. Requests can succeed. Latency can be within spec. And the agent can still be consistently selecting the wrong tool, producing subtly wrong outputs, and propagating errors downstream through a pipeline that looks, from the outside, like it is working fine.

    The documented improvement in mean time to root-cause — from 45 minutes down to roughly 8 minutes in the consolidation case study cited earlier — came primarily from trace span reduction, not from better monitoring tools. Fewer spans meant that when something went wrong, the failure was localized in a smaller search space. Observability quality is a direct function of architectural simplicity. You cannot instrument your way out of a system that is too complex to reason about.

    The Metrics That Matter

    In multi-agent production systems, the metrics worth tracking fall into four categories:

    • End-to-end task success rate: Not per-agent accuracy, but the rate at which complete workflows produce correct, usable outputs. This is the number that reflects actual user value, and it is the number most teams measure too late.
    • Tool call accuracy: For each agent, what percentage of tool calls are to the correct tool? This metric, tracked over time and segmented by agent and task type, is the earliest signal of tool-selection degradation from context bloat or scope creep.
    • Token cost per successful task completion: Total token cost normalized to successful completions. This denominates cost by value, not just by volume, and surfaces the hidden cost of failed runs that consume tokens without producing usable output.
    • Trace span count per run: A high and rising span count is a leading indicator of architecture complexity growth. The teams that caught tool sprawl early were tracking this metric and setting alert thresholds on it before problems became visible in downstream metrics.

    Human-in-the-Loop Checkpoints as Observability Tools

    Beyond instrumentation, the most operationally mature multi-agent deployments in 2026 use human-in-the-loop checkpoints not just as safety mechanisms but as signal collection points. Every time a human reviews and approves or overrides an agent decision, that event is a labeled data point about the accuracy of that agent’s behavior in that context.

    Teams that track override rates by agent and by tool type are building a continuously updated picture of where their workflows are unreliable. That picture, reviewed weekly, often reveals that specific tools are being called correctly 99% of the time — and certain other tools are being misused chronically. The fix is either better schema descriptions, narrower agent scope, or, frequently, the recognition that a tool should not be in that agent’s manifest at all.

    The discipline of treating human feedback as structured observability data — rather than one-off corrections — is one of the clearest differentiators between teams shipping reliable multi-agent systems and teams perpetually fighting fires in them.

    The “Agents as Tools” Inversion That Changes Everything

    There is a counterintuitive architectural pattern that deserves more attention than it typically gets: treating entire agents as tools that other agents can invoke, rather than building monolithic multi-agent systems where every agent has direct access to the full tool surface.

    In this pattern, a specialist agent — say, a data retrieval agent with deep access to your warehouse, your CRM, and your analytics layer — is exposed to an orchestrator not as a peer participant in the workflow, but as a callable capability. The orchestrator calls data_retrieval_agent(query=...) the same way it would call a tool. The specialist agent handles its own tool access internally, exposing only a clean interface to the outside world.

    Why This Pattern Reduces Sprawl

    The “agents as tools” inversion naturally enforces the scoping that least-privilege design requires. Because each specialist agent is encapsulated behind an interface, the orchestrator never needs to know — or have access to — the tools that specialist uses internally. The orchestrator’s tool manifest contains only the callable agents it coordinates, not the underlying capabilities each one wraps. This single architectural choice can reduce the orchestrator’s effective tool surface from dozens of specific capabilities to a handful of well-defined agent interfaces.

    It also dramatically simplifies debugging. When a workflow fails, the failure trace points to a specific agent-as-tool invocation. The failure is contained within that agent’s scope and diagnosable in isolation, without needing to trace through the full workflow graph to understand which underlying tool call was the actual root cause.

    Versioning and Upgrading Agent Capabilities

    The encapsulation benefit extends to lifecycle management. When a specialist agent’s underlying tool set changes — a new API version, a deprecated endpoint, a revised data schema — none of that change propagates to the orchestrator or to other agents in the system. The interface stays stable; the internals change independently. This is the same modularity principle that makes microservices maintainable, applied to the agent layer.

    Teams that have adopted this pattern consistently report that it dramatically reduces the coordination cost of upgrading individual components of a multi-agent system, because interface stability means changes are local by default.

    Building the Habit Before You Need It: An Engineering Checklist

    The most effective time to prevent tool sprawl is during initial system design, before the first agent makes its first tool call in production. The patterns described throughout this post are significantly harder to retrofit than they are to build from the start. The following checklist captures the key decision points where architectural discipline prevents future pain.

    Before You Build

    • Map the task dependency graph. Write out every step of the workflow explicitly. Identify which steps can run in parallel, which are strictly sequential, and which require human review. Let the task structure determine the agent structure — not the other way around.
    • Default to single-agent. Ask honestly whether a single well-prompted LLM with a minimal tool set could handle this workflow. If the answer is yes, that is your starting point. Add agents only when you have measured evidence that the single-agent approach is insufficient.
    • Define each agent’s minimum viable tool set before writing any code. For each agent in your planned architecture, document: what is its single responsibility, what specific tools it needs to fulfil that responsibility, and what tools it should explicitly not have access to. Treat this document as a design constraint, not a suggestion.
    • Separate read tools from write tools at the permission level. Do not rely on prompt instructions to keep agents from writing when they should only be reading. Enforce this at the tool permission layer.

    Before You Ship

    • Count your trace spans in staging. If a workflow produces more than 8–10 spans per run for a single task, that is a signal worth investigating before production. It often reveals redundant agent invocations or unnecessary tool calls that can be eliminated without changing workflow outcomes.
    • Run a tool utilization audit. After a week of staging traffic, produce a count of how often each tool in each agent’s manifest is actually called. Tools called in fewer than 5% of runs are candidates for removal from that agent’s default manifest — and possibly for dynamic loading if they are genuinely needed for edge cases.
    • Establish baseline eval pass rates and cost-per-completion targets. Ship with pre-committed alert thresholds on these metrics. Without targets established before launch, there is no objective basis for distinguishing normal operational variance from systematic degradation.
    • Document the governance owner for every tool in the registry. Every tool in production should have a named owner responsible for its schema, its uptime, and its deprecation. Tools without owners become orphaned liabilities that no one is willing to remove.

    After You Ship

    • Review tool utilization monthly. Agent workflows drift. New task patterns emerge. Tools that were once frequently called become rarely used. Tools that were added for edge cases become load-bearing for common cases. Monthly review catches this drift before it becomes architectural debt.
    • Treat rising span counts as a primary incident trigger. A significant increase in average trace spans per run — even without a corresponding increase in error rates — indicates that the workflow is doing more coordination work to accomplish the same task. That is almost always a warning sign worth investigating.
    • Run quarterly “can we remove this?” reviews on the tool registry. The default organizational inertia is to add tools and never remove them. A deliberate removal practice — requiring justification for keeping a tool rather than for removing it — counteracts this inertia.

    Conclusion: Narrow First, Expand Deliberately

    The multi-agent AI landscape in 2026 is characterized by a growing gap between ambition and operational reality. The ambition — autonomous, interconnected agent systems that handle complex enterprise workflows end to end — is legitimate and achievable. The operational reality — sprawling tool estates, cascading reliability failures, context windows consumed by schema before real work begins, and debugging experiences that resemble archaeology more than engineering — is also legitimate and widespread.

    The gap between the two is not filled by better models, smarter frameworks, or more expressive protocols. It is filled by engineering discipline: the willingness to start narrow, to enforce scoping as a design constraint rather than an optimization, to measure what matters rather than what is easy, and to resist the gravitational pull of adding one more tool because it might come in handy.

    The data is consistent. Teams that ship reliable, cost-effective multi-agent workflows in production share a common trait: they treat architectural simplicity as a first-class concern, not an afterthought. They run fewer agents with fewer tools. They instrument before they scale. They audit regularly and remove aggressively. They build agents as encapsulated modules with clean interfaces, not as sprawling processes with broad permissions.

    This is not a limitation on what multi-agent systems can do. It is the foundation that makes it possible for them to do it reliably, at scale, over time.

    Build narrow first. Measure everything. Expand only where the data says to. That is the architecture that ships — and keeps shipping — in production.

    Key Takeaways

    • Keep each agent’s tool set to 5–8 tools maximum. Above 15, selection accuracy degrades materially and context costs compound nonlinearly.
    • Model your agent topology on your task dependency graph — not on your organizational structure or your instinct for parallelism.
    • Enforce read/write separation at the permission layer, not the prompt layer. Prompts are not a security boundary.
    • Implement a tool registry + agent gateway control plane before you scale beyond three agents or two teams contributing tools.
    • Use dynamic tool loading for general-purpose agents operating across multiple domains. Static injection only for narrow, domain-specific agents.
    • MCP standardizes the interface to tools, not the discipline around their use. Governance must be built separately and deliberately.
    • Trace span count is a leading indicator of architectural complexity growth. Set thresholds before launch, not after problems appear.
    • Treat every human override of an agent decision as structured observability data. Review override rates by agent and tool type monthly.
  • AWS Agent Marketplace: What It Actually Takes to Ship Your First Revenue-Ready AI Agent

    AWS Agent Marketplace: What It Actually Takes to Ship Your First Revenue-Ready AI Agent

    Developer at a command center with AWS Marketplace AI Agents console dashboards and an approved listing badge

    The hype cycle around AI agents has been deafening. Announcements pile up, demos proliferate, and LinkedIn is full of screenshots showing “autonomous” agents doing things that took entire teams before. But somewhere between a demo and a dollar, most AI agent projects stall.

    AWS Marketplace’s new AI Agents & Tools category changes that calculus — at least on paper. It offers a formal, structured path to turn an AI agent into a product that enterprise buyers can discover, purchase, and integrate directly into their AWS environments. No cold email sequences. No six-month procurement negotiation from scratch. Just a listing with a buy button attached to the most trusted B2B software marketplace on the planet.

    The catch: the path to a live, revenue-generating listing is more technically and operationally demanding than most builders expect. AWS has published detailed requirements, and the review process is neither automatic nor lenient. At the same time, the incentives for getting it right — a $75,000 MDF stack, enterprise co-sell motions, and Express Private Offers that can close five-figure deals in days — are genuinely compelling.

    This guide is for builders, ISVs, and technical founders who want the unvarnished facts: what listing tracks exist, what the technical contracts actually look like, how to price without leaving money on the table, and what a realistic first-90-day revenue ramp looks like on this platform. No fluff, no vendor cheerleading — just the mechanics you need to ship something that sells.

    What the AWS AI Agents & Tools Marketplace Actually Is (and Isn’t)

    Before diving into requirements, it’s worth being precise about what you’re dealing with. AWS Marketplace is not an app store in the consumer sense. It is a B2B procurement channel where enterprise buyers — particularly those already running workloads on AWS — can find, evaluate, and purchase third-party software. Transactions flow through existing AWS billing relationships, which is a significant adoption accelerator: the buyer doesn’t need to open a new vendor account, negotiate new payment terms, or get a new purchase order approved through a separate procurement process.

    In late 2025 and accelerating into 2026, AWS formally created an AI Agents & Tools category within this marketplace. This isn’t just a cosmetic label change. The category introduced specific product types, listing requirements, and technical integration paths that didn’t exist for standard SaaS software. It also aligned directly with Amazon Bedrock and the new Bedrock AgentCore runtime, meaning buyers can now deploy your agent directly into their Bedrock environment — the same environment where they’re already running foundation models.

    Product Types Now Available

    Within the AI Agents & Tools category, sellers can list four distinct product types:

    • API-based (SaaS) AI agents and tools — Agents exposed via REST or other HTTP APIs, billed as SaaS subscriptions or metered usage.
    • Container-based AI agents — Packaged as container images, deployed into buyer infrastructure via Amazon Elastic Container Service or AWS Bedrock AgentCore Runtime.
    • MCP servers — Model Context Protocol servers that expose tool capabilities to any MCP-compatible orchestrator, including Bedrock Agents.
    • A2A servers — Agent-to-Agent servers built on JSON-RPC 2.0, enabling interoperability between agents in multi-agent pipelines.

    What AWS Marketplace Is Not

    It’s equally important to understand what the platform doesn’t do. AWS Marketplace will not market your agent for you. Discovery relies on buyers actively searching within a category, and the Marketplace doesn’t run outbound campaigns on your behalf. It’s a distribution and transaction layer, not a demand generation engine. Sellers who treat listing approval as the finish line routinely see flat revenue curves. The listing is the starting gun, not the trophy.

    AWS Marketplace also doesn’t validate that your agent actually delivers business value. Listing approval confirms technical and security compliance; it does not certify ROI claims. Buyers have become savvier about this distinction, which means your listing copy and documentation need to carry the value story that the platform itself won’t tell.

    Two-column comparison split: SaaS API-based agent listing track vs Container-based agent listing track for AWS Marketplace

    The Two Core Listing Tracks — and How to Choose the Right One

    The most consequential decision you’ll make before writing a single line of listing copy is which track your product belongs on. Choosing incorrectly means rework, delayed approval, and pricing models that don’t fit your delivery architecture. AWS has made the distinction reasonably clear, but the implications for your engineering and go-to-market motion are often misunderstood.

    Track One: SaaS / API-Based AI Agents and Tools

    This track is for agents that run in your infrastructure and expose their capabilities through an API. The buyer subscribes to access that API; they don’t run your code in their own AWS account. Think of this as the classic SaaS model, but with AWS handling billing, metering, and entitlement checks on your behalf.

    Operationally, this track requires you to maintain the availability, scalability, and security of your agent backend. If your agent goes down, your customers lose access. The tradeoff is control: you own the runtime, you can iterate quickly, and you don’t have to worry about packaging your agent to run in arbitrary customer environments.

    This track suits agents where the model weights, proprietary pipelines, or data connections that make the agent valuable are things you deliberately do not want to hand over to the buyer’s environment. Legal AI agents that connect to your proprietary case law database, for example, or market intelligence agents that require real-time feeds you control.

    Track Two: Container-Based AI Agents (Including AgentCore Runtime)

    The container track is for agents that run inside the buyer’s AWS environment. You package your agent as a container image — typically ARM64-compatible, given AgentCore’s architecture requirements — and the buyer deploys it into their infrastructure. This gives enterprise buyers the security and data-residency guarantees they often require: your agent processes their data without it ever leaving their VPC.

    This track includes the MCP and A2A server sub-types, which are specifically designed to participate in larger, multi-agent ecosystems running on Amazon Bedrock. If your agent is designed to be a component in an orchestrated pipeline rather than a standalone product, the container track with A2A capability is almost certainly where you belong.

    Decision Criteria That Actually Matter

    The real decision factors are three-fold. First: where does the sensitive data live? If the buyer’s data needs to stay in their environment, containers win. Second: how tightly coupled is your agent to your own proprietary infrastructure? If the magic is in your backend systems, SaaS wins. Third: who is your target buyer? Enterprise security teams nearly always prefer container deployments for agents that will process regulated data. Mid-market buyers often prefer the simplicity of an API subscription they can activate immediately.

    Many sellers ultimately build both, launching with the SaaS track for faster time-to-listing and then adding a container SKU once they understand what their enterprise buyers actually need. This is a legitimate sequencing strategy, but plan for it deliberately rather than discovering it after your first enterprise deal requires data residency guarantees you can’t meet.

    Amazon Bedrock AgentCore Runtime architecture diagram showing MCP server on port 8000, A2A server on port 9000, SigV4 and OAuth 2.0 authentication

    The Technical Requirements You Cannot Ignore Before Submitting

    This is where many first-time sellers lose weeks. The AWS Marketplace technical requirements for AI agent listings are specific, non-negotiable, and not fully surfaced until you’re deep in the submission flow. The following is a consolidated view of what must be true before you click submit — particularly if you’re targeting the container track or AgentCore integration.

    MCP Server Requirements

    If you’re listing an MCP server for the AI Agents & Tools category — a tool that exposes capabilities to MCP-compatible orchestrators — your container must meet these exact runtime specifications:

    • Host binding: The server must listen on 0.0.0.0 (not localhost or a specific IP).
    • Port: MCP servers must expose port 8000.
    • Path: The MCP endpoint must be accessible at /mcp.
    • Protocol: Stateless streamable HTTP. AWS added support for stateful MCP in a March 2026 update, but stateless remains the default expectation unless you explicitly document stateful requirements.
    • Methods: Must implement both tools/list and tools/call at minimum.
    • Architecture: ARM64 container images are strongly preferred and required for native AgentCore Runtime deployment.

    A2A Server Requirements

    Agent-to-Agent servers follow a related but distinct set of requirements, designed for peer-to-peer agent communication in multi-agent pipelines:

    • Host binding: Again, 0.0.0.0.
    • Port: A2A servers run on port 9000 — distinct from port 8000 (MCP) and port 8080 (plain HTTP).
    • Path: Root path /.
    • Protocol: JSON-RPC 2.0 over HTTP.
    • Health checks: Must support GET /ping endpoint returning a valid health response.
    • Agent Card: An agent card JSON document must be published at /.well-known/agent-card.json. This is how other agents discover your agent’s capabilities in a multi-agent environment.
    • Authentication: Must support either SigV4 or OAuth 2.0 for inbound authentication. AgentCore injects a session header (X-Amzn-Bedrock-AgentCore-Runtime-Session-Id) which your agent must handle correctly.

    Session and State Management

    One subtlety that catches builders off guard: AgentCore passes A2A requests as a transparent proxy. It does not modify the JSON-RPC payload. This means your agent is responsible for parsing the session ID from the injected header and managing any stateful context itself — AgentCore won’t do it for you. Builders expecting the runtime to handle session continuity across multi-turn conversations will need to architect explicit session stores, typically using DynamoDB or ElastiCache, before the listing will function correctly in real-world usage.

    Documentation Requirements

    Technical functionality alone isn’t enough. AWS reviewers also assess your listing documentation. At minimum, your listing must include:

    • A clear description of the specific autonomous task your agent performs — generic descriptions citing “AI capabilities” without specifying the job to be done are a common rejection trigger.
    • Usage documentation explaining how buyers integrate and invoke the agent.
    • A description of what data the agent accesses, stores, and transmits, with explicit statements about buyer data handling.
    • Relevant security certifications or posture documentation (SOC 2 Type II is the benchmark most enterprise buyers expect).

    AWS Marketplace AI agent pricing models: Subscription, Usage-Based Metering, and Hybrid Contract plus Overage with 70-80% seller revenue share

    Pricing Your Agent for Revenue, Not Vanity Metrics

    Pricing is where the most money gets left on the table in AI agent listings. Many sellers default to a flat monthly subscription because it feels safe and familiar. But AWS Marketplace’s metering infrastructure is genuinely sophisticated, and using it strategically — rather than ignoring it in favor of simplicity — is often the difference between a listing that generates mid-five-figures per month and one that plateaus at a few thousand dollars.

    The Three Core Pricing Models

    Contract-based pricing gives buyers an upfront entitlement — a defined quantity of agent use over a defined term. This might be a set number of conversations, documents processed, API calls, or agent-hours. Contracts are attractive for enterprise procurement because they fit into budget cycles. They’re predictable. The downside for sellers: if you underestimate usage, you’re leaving money on the table. If you overestimate, buyers feel overcharged and don’t renew.

    Usage-based metering charges buyers per unit of actual consumption. AWS’s metering infrastructure supports granular dimensions: per-request, per-inference call, per page processed, per generic compute unit. The advantage is alignment — buyers only pay for what they use, which reduces friction at the initial sale. The risk is unpredictability from the buyer’s budgeting perspective, which can slow enterprise procurement.

    Hybrid pricing — a base contract plus metered overages — has emerged as the dominant model for serious AI agent sellers in 2026. Buyers get the budget predictability of a contract for baseline consumption; they pay usage rates for anything above the committed tier. This model simultaneously reduces procurement friction, captures upside when agents deliver more value than expected, and creates natural expansion revenue as buyers scale usage.

    The Platform Fee Math

    AWS Marketplace charges sellers a platform fee that typically runs 20–30% of booked revenue, leaving sellers with 70–80%. For many sellers, this is a reasonable tradeoff given that the platform delivers qualified, AWS-credentialed buyers with existing billing relationships — but it must be factored into your unit economics from day one. An agent priced at $10,000 per month on Marketplace delivers $7,000–$8,000 to the seller after fees, not $10,000.

    Pricing Dimensions That Map to Agent Value

    One of the most common pricing mistakes is choosing dimensions that measure your costs (inference calls, compute time) rather than dimensions that map to buyer value (documents processed, decisions made, hours of human work replaced). A legal contract review agent, for example, creates value per contract reviewed — not per LLM inference call. Pricing per document reviewed aligns your revenue to the value the buyer perceives, which makes renewals and expansions far easier to justify.

    AWS’s metering system supports custom dimensions, which means you’re not locked into generic units. Define your dimension based on what the buyer cares about, then build the metering instrumentation in your agent to track and report that dimension to the Marketplace Metering Service. This requires integration work, but it’s among the highest-ROI technical decisions you’ll make before launch.

    Private Offers for Non-Standard Deals

    For enterprise deals with custom pricing, volume discounts, or negotiated terms, Private Offers are the mechanism. A Private Offer is a customized listing that you extend to a specific buyer, with pricing, terms, and entitlements tailored to that deal. AWS’s Express Private Offers automation has shortened the time to create and deliver a Private Offer significantly — sellers can now generate and send customized offers without the manual back-and-forth that characterized earlier versions of the system.

    Do not underestimate the enterprise procurement value of Private Offers. Large organizations that cannot approve a new vendor spend through a self-service click often can process a Private Offer through their existing AWS Enterprise Agreement. This is a significant procurement shortcut that removes one of the most common reasons large enterprise deals stall.

    The Approval Process: What AWS Actually Reviews

    The listing approval process for AI Agents & Tools has two distinct phases, and understanding the difference between them changes how you prepare your submission.

    Phase One: Automated Listing Validation

    The first phase is automated. AWS Partner Central runs checks against your listing metadata — title, description, category tags, pricing configuration, and product type selection. Common automated rejection triggers include:

    • Product descriptions that don’t demonstrate “autonomous” capability (the system looks for evidence the agent operates without constant human input).
    • Pricing configurations where the metered dimensions are not properly mapped to supported unit types.
    • Missing or incomplete documentation fields that are marked required for the AI Agents category.
    • Incorrect product type selection (for example, listing an A2A server under the SaaS track when it requires the container track).

    As of June 2026, AWS has added AI-assisted listing creation within Partner Central. The Partner Assistant can generate and validate listing content from existing product assets — documentation, GitHub READMEs, architecture diagrams. This materially reduces the time required to produce a compliant first draft, but it does not guarantee approval. Human review still follows.

    Phase Two: Human Review

    The human review phase covers security posture, compliance documentation, and functional verification of agent capabilities. AWS reviewers are looking for three things that no automated system can fully assess:

    First, whether the agent actually does what the listing claims. Functional verification means AWS will test the agent against its stated capabilities. Listings that over-claim autonomous behavior for what is effectively a glorified chatbot with a prompt wrapper get flagged here.

    Second, whether the data handling practices described in the listing accurately reflect what the agent actually does with buyer data. This is where many agents with poor security architecture fail — not because they’re insecure per se, but because the listing documentation doesn’t match the actual data flows.

    Third, whether the seller account and product setup meet the security requirements for the seller tier. This includes IAM role configuration, key management practices, and authentication implementation for the listed endpoints.

    The Most Frequent Rejection Reasons

    Based on ISV practitioner reports, the most common grounds for rejection are:

    1. Generic capability descriptions — Failing to specify precisely what autonomous task the agent performs.
    2. Security documentation gaps — Missing or vague statements about buyer data handling.
    3. Pricing model mismatch — The chosen pricing model doesn’t technically match the agent’s delivery architecture.
    4. Using personal or root AWS accounts rather than properly configured business seller accounts with IAM roles.
    5. Container images that don’t meet the AgentCore port/protocol specifications — A technical detail that seems minor but is a hard blocker.

    Build a pre-submission checklist against these five items and you’ll eliminate the most common first-pass rejections. The review cycle takes time; getting it right on the first submission is materially faster than iterating through rejections.

    AWS Agentic AI MDF Stack 2026: $50K base plus $25K Agentic AI category bonus equals $75K total available, with partner growth from 45 to 360 partners

    Co-Sell, Private Offers, and the MDF Incentive Stack

    Here’s the part that separates sellers who generate serious Marketplace revenue from those who collect listing badges. The AWS co-sell program and the MDF (Market Development Fund) incentive structure represent real money for sellers who engage with them — but the vast majority of new listers never activate them properly.

    The Agentic AI Partner Growth Story

    AWS’s AI Competency (launched as the Generative AI Competency in March 2024) has grown from 45 to 360 partners, supported by more than $115 million in AWS partner investment. In 2026, AWS formalized three new specialization categories within the AI Competency specifically for agentic AI:

    • Agentic AI Applications — End-to-end agent products serving specific business functions.
    • Agentic AI Tools — Components, infrastructure, and enabling technology for agent development.
    • Agentic AI Consulting Services — Professional services for agent deployment and customization.

    Partners who achieve validation in one of these agentic categories can access an additional $25,000 in MDF on top of the existing $50,000 base MDF pool — a total potential of $75,000 in co-marketing funds. This is not automatically distributed; it requires a formal MDF application and approved marketing activity plan. But for sellers willing to engage with the program, it represents a significant subsidy for demand generation activities that would otherwise come entirely out of the seller’s own marketing budget.

    The Co-Sell Motion

    Co-sell means partnering with AWS’s internal sales team to jointly pursue enterprise deals. The mechanism works through AWS Partner Central, where you register opportunities and request AWS seller involvement. When a qualified AWS account executive engages with your co-sell opportunity, they can introduce you to enterprise buyers through channels you cannot access independently — particularly buyers who have Enterprise Discount Program agreements with AWS and prefer transacting through Marketplace to maximize their committed spend.

    AWS has deployed AI agents within Partner Central itself to accelerate co-sell motions as of 2026. Automated opportunity scoring, recommended engagement plays, and AI-assisted proposal generation are now part of the Partner Central workflow. Sellers who engage with these tools — rather than treating Partner Central as a reporting burden — get meaningfully faster deal velocity.

    How Express Private Offers Change the Enterprise Sales Motion

    Enterprise deals that don’t fit standard Marketplace pricing tiers used to require long manual negotiation cycles. Express Private Offers automation changes this. Sellers can now configure pricing templates and eligibility rules in advance, then generate customized Private Offers rapidly when a specific deal requires negotiated terms.

    The practical impact: enterprise procurement cycles that previously took months because they required custom contract negotiations can now close in days, once the buyer has agreed on commercial terms. The Private Offer handles the procurement mechanics — billing integration, entitlement setup, contract terms — inside the buyer’s existing AWS billing relationship. Partners who have used this feature report meaningfully shorter time-to-close on large deals, with some citing five-figure transactions completing within a week of commercial agreement.

    Using Your MDF for Demand Generation That Actually Works

    MDF funds are not restricted to AWS-branded activities. Approved uses typically include field events, digital advertising targeting AWS customer segments, content production (webinars, technical white papers), and partner-led solution workshops. The most effective MDF deployment pattern for AI agent sellers in 2026 is investing in technical workshops where prospective buyers can integrate with a live version of your agent against their own data in a sandbox environment. This converts at significantly higher rates than traditional awareness marketing because it surfaces the agent’s value against the buyer’s actual use case.

    Common GTM Mistakes That Stall Revenue in the First 90 Days

    Even technically strong agents with well-structured listings can sit dormant for months if the go-to-market motion is poorly executed. These are the patterns that consistently stall revenue for first-time AWS Marketplace AI sellers.

    Mistake One: Treating the Listing as the Product

    The listing is a shop window, not a product. Enterprise buyers who discover your agent through Marketplace search rarely purchase without additional validation. They want documentation, case references, a free trial experience, or a technical call with someone who can answer integration questions. Sellers who optimize their listing copy but neglect to build the support infrastructure around it — trial environments, technical documentation, integration guides — consistently see high listing view rates with low conversion to paid subscriptions.

    Mistake Two: Wrong Pricing Model for the Delivery Architecture

    Choosing a subscription model for an agent that fundamentally delivers value per-task creates misalignment that buyers notice. A document intelligence agent priced at a flat $2,000/month doesn’t feel like good value to a buyer who processes 50 documents. The same capability priced at $40/document or $800 for a 20-document contract tier with overage rates suddenly makes the value transparent and the expansion path natural. Match the pricing dimension to what the buyer experiences as value, not to what’s administratively convenient for you to track.

    Mistake Three: Neglecting the Free Trial

    AWS Marketplace supports free trials natively. AI agent listings without a trial option face significantly higher purchase friction — particularly for mid-market buyers who can’t justify an enterprise procurement process for a product they’ve never run against their own data. A time-boxed or usage-capped trial that lets buyers experience the agent against their actual documents, queries, or workflows is among the highest-conversion assets you can build. Building it into your submission is a strategic decision, not an optional nicety.

    Mistake Four: Ignoring Keyword Discoverability

    AWS Marketplace’s search works on listing metadata — title, description, category tags, and use case labels. Sellers who write listing descriptions for human readers without considering how enterprise buyers actually search for agents miss early organic discovery. Concrete use case language (“automates Tier-1 customer support ticket routing,” “extracts structured data from unstructured legal documents”) consistently outperforms abstract capability language (“leverages large language model reasoning to…”) in both search ranking and conversion.

    Mistake Five: Not Registering Co-Sell Opportunities Early

    The co-sell motion requires registering opportunities in Partner Central. Sellers who wait until a deal is far advanced — or who don’t register at all — miss the AWS co-sell multiplier effect. AWS account executives cannot help you with deals they don’t know about. Register early, even for deals in early pipeline stages, and you create the opportunity for AWS to surface the relationship from their side.

    Mistake Six: Underestimating Operational Readiness

    An agent that gets approved and starts attracting buyers will generate support requests, integration questions, and usage edge cases that your development team isn’t ready for. Sellers who go live without documented integration guides, a support SLA, and at least basic monitoring on their agent’s availability and response quality often see early subscribers churn before the first renewal. Enterprise buyers who pay for an agent that breaks without clear support channels are not forgiving in their Marketplace reviews.

    90-day AWS Marketplace revenue ramp timeline: Days 1-30 list and validate, Days 31-60 activate co-sell, Days 61-90 scale private offers, with 3x qualified opportunities and $500K+ private offer transactions

    The 90-Day Revenue Ramp Framework

    Based on patterns from ISVs who have launched successfully in the AI Agents & Tools category, a realistic 90-day framework looks like this. Note that “revenue” in this context means the framework for creating revenue conditions — not a guarantee that any specific revenue amount materializes, which depends heavily on agent quality, market fit, and seller execution.

    Days 1–30: Technical Readiness and Listing Submission

    The first month is almost entirely technical and administrative. Priority activities:

    • Finalize your listing track decision (SaaS vs. container) and build accordingly.
    • Complete technical requirements: port/protocol specs, agent card, authentication, health check endpoints.
    • Set up your seller account correctly: business entity, IAM roles, billing registration. Do not use a personal or root account.
    • Write and validate listing documentation against the rejection checklist above.
    • Build a free trial environment, even a limited one.
    • Submit for review and be available to respond quickly to reviewer questions — slow response to reviewer queries is a common reason approvals take four to six weeks instead of two to three.

    The goal at the end of Day 30 is a submitted listing with no outstanding technical blockers, not necessarily an approved listing. Approval timing varies and is outside your control; your documentation quality is inside your control.

    Days 31–60: Activation and Early Co-Sell

    Once approved — or while awaiting approval — begin activating the co-sell motion. This phase is about pipeline creation, not revenue collection:

    • Apply for AWS AI Competency validation if you haven’t already. The Agentic AI category validation is the unlock for the $25K incremental MDF.
    • Register your first five pipeline opportunities in Partner Central, even if they’re early-stage.
    • Configure Express Private Offer templates for your most common enterprise deal structures.
    • Run at least one live technical workshop with a prospective enterprise buyer using your trial environment.
    • Submit your MDF application with a concrete demand generation plan.

    Partners who execute this phase thoroughly consistently report three-fold increases in qualified sales opportunities relative to those who list and wait. The pipeline you build in Days 31–60 is what generates revenue in Days 61–90 and beyond.

    Days 61–90: Private Offer Execution and Optimization

    With pipeline established and co-sell motions active, Days 61–90 focus on converting opportunities to transactions:

    • Move qualified co-sell opportunities toward Private Offers for enterprise buyers.
    • Use Express Private Offers to shorten time-to-close on deals where commercial terms are agreed.
    • Analyze trial conversion rates and identify friction points in the free trial experience.
    • Collect and publish the first Marketplace customer review — social proof affects conversion rates for subsequent buyers.
    • Refine your listing keywords and description based on actual search query data from the Marketplace seller dashboard.

    ISV partners who execute all three phases report transaction volumes ranging from a handful of small subscriptions to individual Private Offer transactions exceeding $500,000 in the first 90 days. The range is wide because it depends entirely on the agent’s market fit and the seller’s co-sell execution — not on anything intrinsic to the platform itself.

    Enterprise AI agent security architecture: IAM role scoping, auditable approval gates, buyer data handling policies, with security as competitive advantage

    Security and Compliance as a Competitive Sales Advantage

    Most sellers treat security requirements as compliance overhead — a checklist to clear before they can get to the real work of selling. This framing is costly. In the enterprise market for AI agents, security posture is increasingly the primary purchase criterion, and sellers who lead with security evidence rather than burying it in a documentation tab close deals faster and at higher prices.

    What Enterprise Buyers Are Actually Worried About

    The enterprise security concerns around AI agents are distinct from those for traditional SaaS software. Standard software security means protecting data from unauthorized external access. Agents add a new dimension: the risk of the agent itself taking unauthorized actions on behalf of the buyer. An agent that has write access to a production database, for example, poses risks that a read-only analytics dashboard never did. Enterprise security teams are asking questions that didn’t exist two years ago:

    • What actions can the agent take that cannot be undone?
    • How is the agent’s access scope limited (IAM least-privilege, for example) to prevent it from accessing systems it doesn’t need?
    • Is there an audit trail of every action the agent takes, in a format that the buyer’s compliance team can review?
    • Can the buyer revoke the agent’s access without disrupting their production environment?

    Agents that have clear, documented answers to all four questions close faster. Agents that require enterprise security teams to ask these questions during due diligence — and wait for answers — lose deals to competitors who already have the answers ready.

    IAM Scoping: The Non-Negotiable

    Implementing least-privilege IAM roles for your agent’s AWS access is both a Marketplace requirement and a sales enabler. Your listing documentation should explicitly state what IAM permissions your agent requires, why each permission is necessary, and what permissions it explicitly does not require. Many enterprise security architects review this list before the agent ever gets to a demo — agents with unexplained or broad permission scopes often get screened out before the sales team is even engaged.

    Audit Logs as a Product Feature

    Building comprehensive, queryable audit logs into your agent — and making those logs accessible to the buyer through their existing AWS CloudTrail or CloudWatch infrastructure — transforms a security requirement into a product feature. Buyers who can see exactly what their agent did, when, and on what data are far more likely to expand agent usage into sensitive workflows. Buyers who can only see aggregated metrics are cautious about giving agents access to anything critical.

    Compliance Certifications and When They Matter

    SOC 2 Type II is the baseline certification most enterprise buyers require. It does not make your agent secure; it demonstrates that your security practices have been independently audited. For healthcare and life sciences buyers, HIPAA Business Associate Agreement capability is often a requirement. For financial services, SOC 2 plus relevant financial services compliance frameworks matter. Map your certification roadmap to your target buyer profile — not to a generic enterprise standard — to avoid spending compliance budget on certifications your actual buyers don’t require.

    Positioning Your Agent for Discovery in a Crowded Category

    The AI Agents & Tools category is growing fast. AWS’s agentic AI partner base has expanded from 45 to 360 validated partners. Self-service listings are growing faster still. As the category fills, discoverability becomes the scarcest resource. Sellers who think carefully about how their agent is categorized, described, and positioned before day one have a structural advantage that is very difficult to recover later.

    Category Tags and Use Case Labels

    AWS Marketplace allows sellers to select industry vertical and use case tags for their listings. Many sellers select broad tags (“IT & Developer Tools,” “Machine Learning”) because they feel safer. In practice, narrower, more specific tags surface your listing to buyers who are actively looking for exactly what you do — which is far more valuable than broad exposure to buyers who aren’t specifically looking for your capability.

    A document intelligence agent listed as “Legal Tech / Contract Review Automation” will show up for buyers actively searching in that category. The same agent listed as “Machine Learning Tools” competes with every ML tool in the Marketplace. Precision in categorization is a discoverability decision, not a limitation.

    The Role of Marketplace Reviews

    Customer reviews on AWS Marketplace carry significant weight for subsequent buyers, particularly in enterprise procurement contexts where peer validation matters. The first review is the hardest to get — it requires asking satisfied early customers to publish their experience, which many won’t do without a direct request. Build the review ask into your post-deployment customer success motion, ideally after the buyer has had a measurable success experience they can describe specifically. Generic positive reviews (“great product, easy to use”) add credibility but limited detail; specific reviews that describe the use case, the integration experience, and the measurable outcome are the ones that convert skeptical buyers.

    Agent Mode and Conversational Discovery

    AWS Marketplace is evolving toward conversational, agent-driven discovery — where buyers describe what they need in natural language and an AWS agent surfaces relevant listings. This changes the optimization logic for listing copy. Title and description need to match the natural language queries buyers will use when describing their problem to an agent, not just the keyword strings they’d type into a traditional search box. Writing your listing description as if explaining your agent to an intelligent but non-technical enterprise buyer — “this agent automatically reviews incoming vendor contracts for non-standard terms and flags them for legal review” rather than “LLM-powered contract analysis tool with NLP” — prepares you for both traditional search and conversational discovery.

    The Honest Assessment: What This Platform Can and Cannot Do for You

    AWS Marketplace’s AI Agents & Tools category is a genuinely valuable distribution channel for AI agents targeting enterprise buyers. The co-sell program, Private Offer mechanics, and procurement integration are real advantages that reduce the cost of enterprise sales. The MDF incentives are substantial. The buyer pool — enterprises with existing AWS relationships and committed spend — is among the highest-quality enterprise markets available.

    But the platform has real limitations that sellers need to account for. Discovery is not guaranteed by listing. Demand generation is your problem. The platform fee is a permanent line item in your unit economics. Approval is not fast, especially for first-time sellers navigating the requirements for the first time. And the technical requirements for container-based and AgentCore-integrated agents are demanding enough that many agents that work perfectly well as standalone products need significant rearchitecting to meet the AgentCore runtime contract.

    The sellers who thrive here are those who treat AWS Marketplace as one pillar of a broader go-to-market motion — not as a set-it-and-forget-it distribution magic trick. They use the Marketplace for procurement mechanics and buyer credibility, the co-sell program for pipeline development, Private Offers for deal execution, and their own demand generation for awareness. The platform amplifies that motion; it doesn’t replace it.

    The agents that generate the most revenue in the first 12 months share a common pattern: they do one thing very well, they price that one thing in a way that makes the value obvious, and their documentation is good enough that enterprise security teams don’t have to ask basic questions. None of that requires an exotic technical stack. It requires deliberate, systematic execution against requirements that are, to their credit, clearly documented.

    Pre-Launch Checklist: Before You Hit Submit

    Use this consolidated checklist before submitting your AI Agents & Tools listing. It incorporates the most common rejection triggers, the technical requirements for AgentCore-compatible agents, and the GTM setup that determines whether your listing generates revenue or collects dust.

    Technical Requirements

    • ☐ Container images built for ARM64 architecture (if container track)
    • ☐ MCP server listening on 0.0.0.0:8000/mcp with tools/list and tools/call implemented
    • ☐ A2A server listening on 0.0.0.0:9000/ with JSON-RPC 2.0 and GET /ping health check
    • ☐ Agent Card published at /.well-known/agent-card.json
    • ☐ SigV4 or OAuth 2.0 inbound authentication implemented
    • ☐ Session header (X-Amzn-Bedrock-AgentCore-Runtime-Session-Id) handled correctly
    • ☐ IAM roles configured with least-privilege access
    • ☐ Business seller account with proper IAM setup (not personal/root account)

    Listing and Pricing

    • ☐ Listing title names the specific task, not just a capability category
    • ☐ Description explains autonomous operation clearly
    • ☐ Pricing model matches the agent’s delivery architecture and buyer value perception
    • ☐ Metered dimensions map to buyer-observable value units (documents, decisions, tasks)
    • ☐ Free trial configured with sufficient scope for buyers to validate against real data
    • ☐ Data handling practices documented explicitly
    • ☐ Security certifications (SOC 2 Type II minimum) referenced in listing

    Go-to-Market Readiness

    • ☐ Integration guide published (not just API documentation)
    • ☐ Support SLA defined and resourced
    • ☐ Monitoring and alerting active on agent availability and quality
    • ☐ AWS AI Competency validation application initiated or completed
    • ☐ Partner Central account configured for co-sell opportunity registration
    • ☐ Express Private Offer templates configured for common enterprise deal structures
    • ☐ MDF application plan prepared

    Conclusion: The Platform Is Ready. Is Your Agent?

    AWS’s investment in the AI Agents & Tools category is not tentative. The $115 million committed to partner AI development, the formal Agentic AI specialization tracks, the AgentCore Runtime technical infrastructure, and the Express Private Offers automation all point to a platform that AWS is treating as a long-term enterprise distribution channel — not an experiment.

    For builders with genuinely capable agents, this creates a meaningful commercial opportunity. The procurement infrastructure is there. The enterprise buyer pool is there. The co-sell and MDF mechanisms are there. What’s not guaranteed is your share of it.

    The agents that will define this category over the next 12–24 months will not be the most technically complex. They will be the ones that did the unglamorous work — the precise documentation, the security architecture that reduces enterprise friction, the pricing design that makes value tangible, the co-sell engagement that creates qualified pipeline rather than waiting for organic discovery. That work is available to any seller willing to do it. It just requires treating the Marketplace as seriously as you treat the engineering.

    Ship something specific. Price it honestly. Document it thoroughly. Engage the co-sell motion early. The platform will handle the rest of the mechanics — but only if you give it something worth selling.

  • 2026 Image Policy Traps: How to Suppression-Proof Your Entire Amazon Portfolio

    2026 Image Policy Traps: How to Suppression-Proof Your Entire Amazon Portfolio

    Amazon image policy traps 2026 — suppressed listings with red warning stamps and compliance checkmarks across a product catalog

    For most of Amazon’s history, image policy violations were a nuisance. You got a warning, you fixed the image, you moved on. The penalty was a temporary inconvenience — annoying, but contained.

    That dynamic has fundamentally changed in 2026. Amazon’s image enforcement is now faster, more automated, and more sweeping than anything sellers have dealt with before. What used to be a listing-level problem has become a portfolio-level risk — one that can suppress multiple ASINs simultaneously, pause ad delivery across your entire account, erode months of organic rank, and trigger account health flags, all from a batch of images that were perfectly acceptable eighteen months ago.

    The sellers who are getting hurt most aren’t the ones deliberately cutting corners. They’re brands that uploaded compliant imagery, forgot about it, and never realised that retroactive enforcement sweeps can catch old assets that no longer meet tightened standards. They’re growing accounts that used AI image tools without understanding the specific disclosure and accuracy rules Amazon now applies. They’re multi-ASIN operators who treated image compliance as a launch-day checkbox rather than an ongoing operational function.

    This post is not a recap of Amazon’s published image requirements. Those are widely documented elsewhere. Instead, this is a systematic look at the mechanisms by which compliant-seeming portfolios get caught, the cascade of consequences that follows, and the operational systems that actually keep a catalog clean under 2026’s enforcement regime — not just at launch, but over the long run.

    Why Image Policy Has Become a Portfolio-Level Risk, Not a Listing-Level Problem

    The shift isn’t in the written policy. Amazon’s core image requirements — pure white main image background at RGB 255,255,255, product filling approximately 85% of the frame, no text or graphic overlays on the main image, no watermarks or logos, accurate representation of the actual item being sold — haven’t dramatically changed in structure. What has changed is how those rules are applied and at what scale.

    Automated Enforcement at Catalog Scale

    Amazon’s image validation systems now operate more like continuous audit loops than one-time upload gatekeepers. In earlier years, an image might pass at upload because the automated check was relatively permissive, only to be flagged later if a human reviewer happened to look at the listing. In 2026, enforcement sweeps are faster, more frequent, and algorithmically driven — meaning an image that passed six months ago can be re-evaluated against updated detection thresholds and suppressed without a new upload or any action on the seller’s part.

    This retroactive enforcement is the trap most sellers don’t see coming. Your catalog isn’t static in Amazon’s eyes, even when you haven’t touched it. Periodic automated re-audits of existing listings mean that compliance isn’t a one-time achievement — it’s a continuous requirement that must be actively maintained.

    From Warning to Suppression Without Gradual Escalation

    The older enforcement model gave sellers a reasonable grace period. A non-compliant image might generate a fix-it notification, remain live during the remediation window, and only disappear from search if the seller ignored the warning repeatedly. The 2026 model, as reported consistently across third-party seller communities and agency analyses, is considerably less forgiving. Listings are being suppressed from search results much more quickly after an image violation is detected — in some cases without a prior warning notification arriving before the suppression takes effect.

    For a single-ASIN account, that’s painful. For a multi-hundred ASIN catalog, a batch enforcement event can create simultaneous suppression across a significant portion of the inventory — with ad campaigns burning impressions on ASINs that are no longer visible in organic search, and sales velocity crashing before the account owner even knows there’s a problem.

    Account Health Is Now Downstream of Image Compliance

    The previously clean separation between “image compliance” and “account health” is blurring. Repeated or severe image violations — particularly those that involve misrepresentation of the actual product — are increasingly feeding into account health scoring mechanisms. A high enough volume of suppressed listings, or violations that Amazon interprets as intentional misrepresentation rather than innocent non-compliance, can generate account-level flags that affect selling privileges well beyond the impacted ASINs.

    This is the portfolio-level risk that demands a portfolio-level response. Treating each ASIN’s image as its own isolated compliance problem is no longer an adequate operating model.

    The Six Hidden Suppression Triggers Amazon’s AI Catches That Sellers Don’t Expect

    Six hidden Amazon image suppression triggers in 2026 — infographic showing off-white background, text overlays, frame fill, props, watermarks, and AI misrepresentation violations

    Every seller knows the headline rules. What gets brands into trouble in 2026 isn’t ignorance of the obvious requirements — it’s the subtle violations that look compliant to the human eye but trip the automated detection systems Amazon has built.

    1. Off-White That Doesn’t Look Off-White

    The requirement is RGB 255,255,255. Not 254,254,254. Not 250,250,250. Not a creamy, soft white that looks perfectly clean on your monitor under warm studio lighting. Amazon’s automated detection can distinguish between true white and near-white backgrounds, and the threshold is being applied with increasing precision in 2026. Backgrounds that were accepted without issue at upload are being flagged during re-audit sweeps because the detection sensitivity has been raised.

    The practical source of this problem is often the photography workflow itself. Lightbox setups that use slightly warm-toned LED lighting, paper backdrop materials that have a natural texture or slight color cast, and editing workflows that stop at “looks white” rather than verifying the exact RGB values in post-production can all produce backgrounds that fail the threshold even though they appear compliant to the photographer’s eye.

    2. Shadows and Reflections as Background Violations

    A drop shadow beneath a product, a surface reflection on a glossy table, or a soft gradient created by the product’s own shape against the background — all of these introduce non-white pixels into the main image, and all of them are treated as background violations by Amazon’s image analysis. This is a widely reported trap that catches brands whose product photography is otherwise high quality. A beautiful, professionally lit image with a subtle shadow is still a suppression risk.

    3. Props and Context Objects “Not Included in Sale”

    Amazon’s policy is clear that the main image should show only the item being purchased. Lifestyle elements, complementary products, styling accessories, and contextual props that suggest scale or usage but aren’t included in the box are policy violations for the main image. The trap here is that many sellers use a “hero lifestyle” image as their main image — a decision that was sometimes tolerated historically but that 2026’s enforcement systems are now much more aggressive in flagging.

    Multi-piece sets and bundle products require particular care: the main image must accurately reflect exactly what’s in the box, and the grouping shown must exactly match the purchase. An image that shows a set of four items when the listing is for a set of three — even if it’s a photographic shorthand the seller never intended to be misleading — is a violation.

    4. Faint Watermarks and Edge Logos That Survived Cropping

    Brands that have used third-party image services, stock photography with embedded licensing marks, or photography vendors who added subtle branded watermarks as part of their standard delivery package can find that images contain low-opacity marks that are invisible to casual review but detectable by Amazon’s systems. Similarly, image files that were cropped from larger compositions may contain partial logos or graphic elements near the frame edge that weren’t visible in the pre-upload preview.

    5. Resolution Failures After Platform Compression

    Amazon recommends a minimum of 1,000 pixels on the longest side, with 2,000 pixels or more preferred to enable the zoom function. The trap occurs when sellers upload images that technically meet this threshold but whose effective resolution is degraded by compression artifacts, JPEG quality settings, or platform-side resizing. An image that uploaded at 1,050 pixels may display at a quality level that fails the zoom-enabled clarity standard — and Amazon’s systems can flag this during image quality audits.

    6. Inset Images, Callout Boxes, and Bundled Secondary Visuals in the Main Slot

    A surprisingly common violation involves main images that are actually composites — a primary product shot combined with a smaller inset image showing a detail, a bundled accessory, or a “what’s in the box” visual. From a seller’s perspective, this feels like useful communication. Amazon’s policy treats it as a graphics overlay violation, regardless of whether the inset contains any text. The automated detection for composite images — where the main frame contains a visually distinct embedded sub-image — has become sharper in 2026.

    The Cascade Effect — How One Suppressed ASIN Can Destabilize Your Entire Catalog

    Amazon suppression cascade diagram showing how one suppressed ASIN triggers organic rank drops, ad pauses, Buy Box loss, and account health deterioration

    Understanding suppression as a cascade rather than an isolated event is the conceptual shift that separates reactive sellers from genuinely protected portfolios. The cascade mechanics are worth understanding in detail because they explain why recovery is so much slower than the initial suppression.

    The Organic Rank Problem

    Amazon’s A10 algorithm uses sales velocity — among other signals — as a core input to organic ranking. A suppressed listing generates zero sales velocity, because it’s no longer appearing in search results for buyers to find and purchase. Depending on how long the suppression lasts before correction, the organic rank for that ASIN will decay. When the listing is restored after a compliant image is submitted, the organic rank doesn’t automatically reset to its previous level. It starts rebuilding from wherever it fell to — which means suppression recovery often involves not just fixing the image but re-earning rank that took months to establish.

    Ad Campaign Disruption

    Sponsored Products campaigns tied to a suppressed ASIN stop delivering impressions. This is straightforward and expected. What sellers often miss is the campaign learning disruption this causes. Advertising algorithms build performance models based on cumulative impression, click, and conversion data. A suppression-caused pause in delivery resets or degrades that accumulated learning, meaning the campaigns that restart after the listing is restored may underperform for days or weeks while the algorithm re-establishes its baseline.

    For accounts running Sponsored Brands or Sponsored Display campaigns that include the suppressed ASIN as part of a broader creative, the ripple extends further — those campaign types may see delivery disruptions or performance anomalies even for the ASINs that weren’t directly suppressed.

    Variation Parent and Child ASIN Interdependencies

    Many Amazon listings operate within variation families — a parent ASIN connected to multiple child ASINs representing different colors, sizes, or configurations. The suppression of a parent ASIN or a high-velocity child ASIN creates visibility and data problems for the entire variation family. Review aggregation, search ranking signals, and Buy Box mechanics at the variation level are all affected when a key node in the family goes dark.

    The reverse also applies: if a variation child is suppressed and its image issue is on the variation-specific image (the photo that shows the specific variant being sold), the brand may not notice as quickly because the parent listing appears to still be live. Meanwhile, customers clicking through to the suppressed variant see an incomplete listing experience, conversion suffers, and the data bleed affects the whole family’s performance signals.

    Inventory and Fulfillment Knock-Ons

    For FBA sellers, a suppressed listing that continues to hold inventory at Amazon fulfillment centers is still incurring storage fees while generating zero revenue. Extended suppression periods create a particularly damaging financial pressure: costs accumulate while the income that was supposed to offset them has stopped. For sellers operating near long-term storage fee thresholds, a suppression event can push inventory into penalty territory faster than expected.

    Category-Specific Traps That Generic Guides Never Cover

    Amazon’s image policy contains category-specific rules that layer on top of the universal requirements. These category rules are the compliance details that generic seller education typically glosses over — and that enforcement systems apply with precision.

    Apparel and Footwear: The Model and Mannequin Rules

    Amazon’s policy for most apparel categories requires that the main image show the garment on a human model or a “clean” invisible mannequin — not flat-lay photography, not folded product shots, and not display on a standard visible clothing form. This creates a compliance trap for brands that use flat-lay as their main image for aesthetic or cost reasons. The enforcement threshold for apparel main images has tightened considerably, and flat-lay images that appeared on detail pages for extended periods without issue have been swept in recent re-audit cycles.

    For footwear, the angle and orientation requirements add further specificity: shoes should generally be shown in a specific angled view that displays the upper, sole profile, and overall silhouette. Main images showing only the sole, only a side view, or only the toe box don’t meet the standard, even if the background and framing are technically perfect.

    Electronics and Technical Products: Accuracy of Included Accessories

    Electronics listings are particularly exposed to the “props not included in sale” violation because product photography in this category routinely includes cables, adapters, cases, and complementary devices for visual context and scale. If the main image shows a pair of headphones next to a smartphone for scale, but the smartphone is not included — that’s technically a violation. If the image shows a charging cable that’s included with one product variant but not another, and the same image is applied to both variants, that’s a misrepresentation violation on the variant that doesn’t include the cable.

    Grocery and Health Products: Label Legibility as Compliance

    For consumable products — supplements, food, beverages, personal care — Amazon’s content accuracy requirements intersect with image compliance in a specific way. The product label shown in the image must match the actual product label. Label updates that change ingredients, warnings, dosage instructions, or net weight create a window where the existing listing images show the old label while the actual product has the new label. This is an image accuracy violation even if the photography itself is otherwise perfectly compliant.

    Toys and Children’s Products: Safety Claim Restrictions

    Secondary images for toys and children’s products that include safety certifications, age-appropriateness badges, or compliance marks (ASTM, CPSC, CE, and similar) run into a specific content restriction: promotional badges and certification marks are prohibited in secondary images in ways that create ambiguity about what is and isn’t a compliance mark versus a promotional badge. The safe approach is to communicate safety certifications in the text content of the listing rather than embedding badges or certification logos in the images themselves.

    AI-Generated Images and the Compliance Grey Zone Sellers Are Walking Into

    Amazon does not ban AI-generated or AI-assisted product images. The policy is output-based, not tool-based — what matters is whether the final image accurately represents the actual product, meets technical specifications, and complies with content restrictions. This permissive-sounding policy is creating a false sense of safety among sellers who are using AI image generation extensively in 2026.

    The Accuracy Problem Is the Core Risk

    AI image generation tools produce images that look like the product being described, not necessarily like the actual product being sold. Generated images may alter proportions, modify colors, simplify details, add or remove design elements, or create a version of the product that is visually appealing but materially different from what the customer will receive. Amazon’s accuracy requirement — that images must truthfully represent the physical item being sold — applies with the same force to AI-generated images as to traditional photography.

    This creates a specific workflow risk: a seller who uses an AI tool to generate a “product image” for a listing that hasn’t been physically photographed, or who uses AI to produce imagery for product variants that differ only slightly from photographed versions, can end up with images that are technically accomplished but fundamentally misrepresent what’s in the box. The enforcement consequence is classification as a misrepresentation violation — a more serious category than a technical spec failure.

    AI Enhancement vs. AI Generation — A Distinction That Matters

    There’s a practical compliance difference between using AI tools to enhance a photograph of the real product (background removal, background replacement with pure white, color correction, upscaling) and using AI to generate a product image without a real photographic source. The former is generally lower risk as long as the enhancement doesn’t alter the product’s appearance in ways that misrepresent it. The latter is inherently higher risk because the output is a synthetic creation rather than a record of the actual product.

    For AI background removal and replacement specifically — a very common use case for achieving the pure white main image standard — sellers need to verify that the removal process didn’t clip the product edges, alter its apparent dimensions, or introduce artifacts that change the perceived product color or finish. These are easily introduced errors in AI-based background tools that human review of the output often misses.

    Disclosure Requirements and Evolving Expectations

    Amazon is moving toward requiring disclosure for AI-generated content in some contexts. The practical advice for 2026 is to treat AI-generated imagery with the same documentation discipline as traditional photography: keep records of what was generated, for which ASINs, using which prompts, and what accuracy verification was performed before upload. If enforcement questions arise, documented verification that the AI output accurately represents the physical product is the strongest defense available.

    Image Hijacking — The Suppression Risk You Didn’t Create But Still Own

    Image hijacking is one of the most underappreciated suppression threats in multi-seller marketplaces, and 2026’s enforcement environment has made it significantly more consequential. The mechanics are specific: in Amazon’s catalog architecture, a product detail page is shared infrastructure. Sellers listing on the same ASIN contribute to a shared content pool, and Amazon’s systems make judgments about which contributed content to display. This creates a vector for unauthorized content substitution.

    How Non-Brand Sellers Replace Your Main Image

    A third-party seller who attaches an offer to your ASIN can contribute content to that ASIN’s detail page — including images. If Amazon’s system evaluates their submitted image as higher quality, more compliant, or simply more recent than yours, it may display their image as the main image on your product detail page. This means a seller offering a counterfeit, grey-market, or materially different version of your product may effectively be showing their image — which may show a different product — as the main image for your ASIN.

    The catastrophic scenario is when the substituted image is non-compliant with Amazon’s policies. Your listing gets suppressed for a policy violation on an image you didn’t upload, didn’t approve, and may not even know exists on your product page. The suppression impact falls on your ASIN, your sales velocity, your organic rank, and potentially your account health.

    Brand Registry and Catalog Lock as Primary Defenses

    Amazon’s Brand Registry provides qualified brand owners with tools to assert control over the content displayed on their branded ASINs. The Catalog Lock feature — available to Brand Registry members — allows restriction of changes to key listing fields including the main image. When catalog lock is applied, only the brand-authenticated account can change the main image, regardless of what other sellers contributing to that ASIN submit.

    Applying catalog lock to high-revenue ASINs is not optional in 2026 — it’s a basic operational requirement. The risk of not doing so is an uncontrolled image substitution event that you may not discover until suppression has already occurred and rank has already started decaying.

    Monitoring for Unauthorized Image Changes

    Catalog lock prevents changes going forward but doesn’t retroactively notify you of changes that have already occurred. A monitoring workflow that checks the main image displayed on each high-value ASIN against a stored reference image on a regular cadence is the mechanism that catches hijacking events before they extend into suppression territory. This can be done manually for small catalogs, but for accounts with dozens or hundreds of ASINs, automated tools that screenshot product pages and compare against a reference library are operationally necessary.

    Building a Suppression-Proof Image QA System Before Launch

    Pre-launch image QA system flowchart for Amazon 2026 compliance — step-by-step checklist from background verification to upload approval

    Prevention is categorically cheaper than recovery in the Amazon suppression context. A listing that never gets suppressed doesn’t lose rank, doesn’t pause ad delivery, doesn’t trigger account health flags, and doesn’t require the operational scramble of emergency remediation. The investment in a pre-launch QA system pays back every time it prevents a suppression event.

    The Pre-Upload Technical Checklist

    A systematic pre-upload technical check should verify every image before it enters the Amazon catalog. For the main image specifically, this checklist should be non-negotiable:

    • Background verification: Open the image in a color-accurate editing environment and use the eyedropper tool to sample multiple background points. Confirm RGB values of 255,255,255 across the full background area. Pay particular attention to areas near the product edge, which are most likely to show gray fringing from background removal tools.
    • Frame fill measurement: Using a grid overlay or selection tool, verify that the product occupies at least 85% of the image canvas by area. For high-value listings, aiming for 90–95% coverage reduces the risk of failing stricter re-audit thresholds.
    • Element check: Verify absence of text, logos, badges, watermarks, inset images, and graphic overlays. Check at 100% zoom, not at thumbnail scale — violations that are invisible at thumbnail size are still policy violations.
    • Shadow and reflection audit: Zoom into the base of the product and check for ground shadow, cast shadow, or reflective surface elements. These are the most commonly overlooked non-white background elements.
    • Resolution confirmation: Check the actual pixel dimensions of the file, not the upload dialogue — confirm 2,000+ pixels on the longest side and appropriate file size for the format being used.
    • Accuracy verification: Compare the image against the physical product for color accuracy, included accessories, packaging match, and variant-specific details. For AI-enhanced images, this comparison must be done against the actual physical product, not the source image.

    Building a Category-Aware Review Layer

    Generic technical checks aren’t sufficient for category-specific compliance. For each product category you operate in, the QA system should include a category-specific module that checks against the additional requirements that apply to that category. For apparel, this means confirming model or invisible mannequin presentation for the main image. For electronics, this means verifying that every item shown in the image is included in the purchase. For consumables, this means confirming that the label shown matches the current product formulation and packaging.

    This layer of the QA system requires someone who actually knows the category-specific rules — which is itself an argument for centralized image compliance expertise within organizations managing multi-category catalogs, rather than relying on product managers or graphic designers to self-assess compliance.

    Version Control and Asset Management

    Every image that enters the Amazon catalog should have a documented record: the file, the date it was uploaded, the ASIN it was applied to, the slot it occupies (main vs. secondary slot number), who approved it, and any notes about the version history. This documentation serves two functions: it enables fast identification and replacement when an image fails a re-audit, and it enables quick detection of unauthorized image substitutions by comparing the currently displayed image against the documented approved version.

    When You’re Already Suppressed — A Recovery Playbook That Works in 2026

    Despite best prevention efforts, suppression events happen. The recovery process in 2026 has some specific characteristics that sellers need to understand to navigate it efficiently — because the wrong remediation approach can extend the suppression duration significantly.

    Triage by Revenue Impact First

    When a batch suppression event affects multiple ASINs simultaneously, the instinct is to work through a list systematically. The 2026 reality is that speed of recovery is more important for some ASINs than others, and limited internal resources need to be directed at the ASINs where suppression is causing the greatest revenue loss and rank decay. Sort the suppressed ASIN list by average monthly revenue or sales velocity and address the top items first.

    For the highest-revenue ASINs, consider whether you have a compliant backup image already prepared. This is the argument for maintaining a “compliance-ready” version of every main image as part of your asset management system — a pre-verified, technically perfect version that can be uploaded immediately during an emergency without requiring a photography or editing workflow to execute under time pressure.

    Understanding the Suppression Cause Before Fixing the Image

    Uploading a replacement image without first diagnosing why the original image was suppressed is a common and costly mistake. If the replacement has the same underlying issue — off-white background, subtle shadow, wrong frame fill — it will fail again, restarting the suppression clock and potentially triggering escalated enforcement attention. Seller Central’s listing quality dashboard and the suppression notification details (when available) should be reviewed to identify the specific violation category before any replacement image is prepared.

    The Right Way to Submit the Replacement

    Image replacement in 2026 works best when the corrected image is submitted through the most authoritative channel available. For Brand Registry sellers, this means using the Brand content submission tools rather than standard Seller Central image upload — brand-authenticated submissions are typically evaluated faster and carry higher confidence weighting in Amazon’s system. For sellers without Brand Registry, standard image upload through the listing edit interface is the only option, but ensuring the file metadata, filename format, and upload format all meet specifications reduces processing friction.

    Contacting Seller Support in parallel with a replacement upload is advisable for high-revenue ASINs where every day of suppression represents material revenue loss. A support case creates a documented record of the remediation effort and sometimes accelerates the system’s processing of the replacement image. Be specific in the support case about what change was made and why the new image is compliant — generic “please fix my listing” messages generate slower and less useful responses than precise technical explanations.

    Post-Recovery Monitoring

    Lifting a suppression doesn’t mean the underlying system risk is resolved. After a listing is restored, monitor it daily for the following two weeks to confirm that the replacement image is stable, that the listing’s search visibility has been restored, and that ad delivery has resumed and is rebuilding toward pre-suppression performance. Watch the variation family if applicable — sometimes restoring one ASIN reveals a secondary suppression on a sibling ASIN that wasn’t immediately visible.

    Continuous Monitoring — Tools, Cadences, and What to Actually Track

    Compliance is not a one-time achievement. Amazon’s enforcement environment in 2026 requires ongoing monitoring as a permanent operational function — not because the rules change constantly, but because retroactive enforcement sweeps, image hijacking attempts, and catalog drift (where product changes make formerly accurate images inaccurate) create ongoing risk that no initial audit can permanently eliminate.

    Daily Monitoring: Account Health and Suppression Alerts

    The Account Health dashboard in Seller Central is the primary real-time signal for policy violations and enforcement actions. Checking it daily — not weekly — is the baseline for any multi-ASIN operation. Suppression notifications, policy violation alerts, and image removal notices all surface here first. Many third-party tools integrate with Seller Central APIs to send automated alerts when account health metrics change, which reduces the response time from a daily manual check to near-real-time notification.

    Specific metrics to watch daily: account health score, listing quality score changes, new policy violations, and any notifications under the “Listing Issues” section of the inventory management view.

    Weekly Monitoring: Image Integrity Checks

    A weekly check of main images displayed on all active ASINs, compared against the approved reference image in your asset management system, catches hijacking-based substitutions before they have time to generate suppression events. For accounts with large catalogs, this is where automated screenshot comparison tools become necessary rather than optional — manual verification of hundreds of product pages weekly is not a sustainable operational workflow.

    Quarterly Audits: Full Catalog Compliance Review

    Every 90 days, conduct a full catalog compliance review against current Amazon image standards. The purpose of the quarterly cadence is to catch two types of drift: enforcement threshold drift (where Amazon’s automated detection becomes stricter, making previously-accepted images newly vulnerable) and product accuracy drift (where product updates, label changes, or packaging modifications have made existing images inaccurate).

    The quarterly audit should use the same comprehensive checklist as the pre-launch QA process, applied to every image in the active catalog. Prioritize the audit by revenue impact — high-revenue ASINs first — but complete the full catalog review within the quarter. Any images identified as potentially non-compliant during the quarterly audit should be scheduled for replacement before they become active suppression triggers.

    Tools Worth Using in 2026

    Several third-party tools have developed specific capabilities for image compliance monitoring and suppression detection in the Amazon context. Datahawk, SellerApp, and Jungle Scout all offer suppression monitoring features that alert sellers when listing status changes. For image accuracy and consistency verification across large catalogs, tools that can perform pixel-level comparison between reference images and current displayed images are increasingly available within broader catalog management platforms. Amazon’s own Listing Quality Dashboard — available to Brand Registry members — surfaces image-specific quality flags that can serve as early warning indicators before formal suppression occurs.

    The Opportunity Hidden in Compliance — How Strict Policy Creates Competitive Gaps

    Competitive advantage bar chart showing compliant brands gaining organic rank and ad impressions while non-compliant sellers face suppression in 2026

    There’s a strategic dimension to Amazon’s stricter image enforcement that most sellers, understandably focused on their own compliance risk, don’t fully consider. When enforcement creates suppression events at scale across a category, it disproportionately affects sellers who are least equipped to manage the operational demands of compliance — and that creates measurable opportunities for brands that maintain clean catalogs.

    Competitive Search Visibility When Rivals Go Dark

    When competing ASINs are suppressed from search results — whether for image violations or any other reason — the search result pages your customers are using don’t disappear. They just become less crowded. Organic rankings that were previously competitive become less contested, and brands with compliant, optimized listings move into visibility positions they couldn’t achieve organically against a full competitive field.

    This is not a minor effect. Category-level suppression events have been associated with measurable increases in organic rank and organic session traffic for remaining visible listings — particularly in competitive product categories where multiple sellers are battling for the same keyword positions. A brand that monitors competitor listing status and has ads pre-positioned to capture increased search traffic during competitor suppression events can generate meaningful incremental revenue from other sellers’ compliance failures.

    Ad Auction Dynamics During Suppression Events

    When competing ASINs are suppressed, their Sponsored Products campaigns stop delivering — because ads can’t drive traffic to suppressed listings. This removes their bidding pressure from the ad auction for shared keywords. For an advertiser with remaining live, compliant listings, the practical effect is lower cost-per-click for the keywords those competitors were previously contesting, at the same or higher impression volume. This is a direct ROAS improvement opportunity that requires no change to your own bidding strategy.

    The brands that capture this opportunity most effectively are those who monitor category-level suppression events as a standard part of their competitive intelligence, and who maintain adequate advertising budgets and bid structures to capitalize on the brief windows when competitor suppression creates more favorable auction conditions.

    Long-Term Brand Quality Signaling

    Amazon’s algorithm evaluates listing quality as an input to organic search ranking. Listings with consistently high image quality scores, stable compliance status, and strong click-through and conversion metrics are treated as higher-quality results and are rewarded with ranking advantages over time. The brands that build and maintain genuinely compliant, high-quality image assets aren’t just avoiding suppression — they’re accumulating a sustained ranking advantage that compounds over time relative to competitors who manage compliance reactively.

    This is the less-discussed dimension of image compliance investment: it’s not purely defensive. Done well, it’s an offensive capability that builds durable organic rank advantages and reduces the cost of maintaining visibility in competitive categories.

    Putting It Together: The 2026 Portfolio Protection Framework

    The operational reality that sellers need to internalize is that image compliance in 2026 is a permanent, ongoing cost of doing business on Amazon — not a one-time setup task. The brands that are building suppression-resilient catalogs are doing so through systems, not through one-off audits. Here’s the framework that holds up:

    Layer 1: Prevention (Pre-Launch QA)

    Every image that enters the catalog passes through a documented, category-aware technical checklist before upload. No exceptions for time pressure, budget constraints, or “this one looks fine.” The checklist covers RGB background verification, frame fill measurement, element audit, shadow check, resolution confirmation, and accuracy verification against the physical product. This layer eliminates preventable suppression events before they happen.

    Layer 2: Protection (Asset Control and Brand Registry)

    Catalog lock is applied to every high-revenue branded ASIN via Brand Registry. Approved images are stored in a version-controlled asset library with documented metadata. Brand Registry’s monitoring tools are configured to alert for unauthorized content changes. This layer eliminates the hijacking-based suppression category.

    Layer 3: Detection (Continuous Monitoring)

    Daily account health checks, weekly image integrity verification for high-value ASINs, and quarterly full-catalog compliance audits form a monitoring cadence that catches enforcement issues as early as possible. Automated alerts from Seller Central integrations reduce detection latency. This layer minimizes the duration of any suppression events that do occur despite prevention and protection efforts.

    Layer 4: Recovery (Rapid Remediation)

    Pre-prepared compliance-ready backup images for all high-revenue ASINs enable same-day replacement when suppression occurs. A documented escalation process — who does what, in what order, using which tools — means the response to a suppression event is a procedure rather than a crisis. This layer minimizes the organic rank and revenue loss from unavoidable suppression events.

    Together, these four layers create a portfolio-level system that doesn’t eliminate suppression risk entirely — Amazon’s enforcement environment is too dynamic for absolute guarantees — but that dramatically reduces both the frequency and the duration of suppression events, and positions compliant brands to capture competitive advantage when the market around them is affected by enforcement actions they’re protected against.

    Key Takeaways

    • Suppression is now retroactive and portfolio-wide. Images that passed upload checks months ago can be re-flagged during automated re-audit sweeps. Treating compliance as a launch-day task is no longer adequate.
    • The six most dangerous non-obvious triggers are off-white backgrounds that look white, product shadows, props not included in the sale, hidden watermarks, post-compression resolution failures, and composite/inset images in the main slot.
    • The cascade from a single suppressed ASIN can destroy organic rank, pause ad delivery, disrupt variation family performance, and generate account health flags — all from one non-compliant image.
    • Category-specific rules are where experienced sellers get surprised. Apparel, electronics, grocery, and children’s products all carry additional image requirements that generic compliance guides don’t fully address.
    • AI-generated images are allowed but not safe by default. The accuracy requirement applies equally to AI-generated imagery — synthetic images that don’t accurately represent the physical product are a misrepresentation violation, not just a technical one.
    • Image hijacking is a suppression risk you didn’t create but are responsible for recovering from. Catalog lock via Brand Registry is the operational control that prevents it.
    • Four-layer portfolio protection — prevention, protection, detection, and recovery — is the operational framework that makes suppression management systematic rather than reactive.
    • Compliance is competitive advantage. Every competitor suppression event is an organic rank and ad auction opportunity for brands that remain visible and compliant.
  • ChatGPT Connectors: What’s Actually Working in Real Workflows Right Now

    ChatGPT Connectors: What’s Actually Working in Real Workflows Right Now

    ChatGPT Connectors workflow automation hub showing multiple app integrations connected to a central ChatGPT interface

    There is a version of ChatGPT Connectors that gets talked about in press releases — a polished story about AI unifying your entire stack, eliminating app-switching, and turning natural language into cross-platform action. Then there is the version that teams are actually using week to week in 2026: messier, more specific, and genuinely more interesting.

    The reality is that Connectors have quietly moved from a novelty to a production layer for a growing slice of knowledge workers. The shift did not happen in a single feature drop. It accumulated — through better deep research integration, the slow expansion of write actions, and the Model Context Protocol (MCP) giving enterprise teams a path to build connectors that can actually touch their own internal systems in ways the native integrations cannot.

    This post is not an explainer on what Connectors are. It is a ground-level account of what is working right now, for which teams, under what conditions, and where the real friction points still live. If you are trying to figure out whether to build or expand a Connectors-based workflow in the next 30 days, this is the article you need to read first.

    We will cover the ecosystem in its current state, the underused combination of Deep Research mode with live connectors, the write actions that finally give the platform some teeth, the MCP architecture layer for teams that need to go beyond native integrations, and the honest limitations that trip up otherwise well-designed workflows. We will also spend time on the governance question — because what data your connected apps expose depends heavily on which plan you are running, and that distinction matters far more than most teams realise until something goes wrong.

    The Connector Ecosystem at Mid-2026: What 500+ Apps Actually Means in Practice

    ChatGPT Connectors ecosystem diagram showing 500+ connected apps organized by category including CRM, cloud storage, email, collaboration tools, and automation platforms

    OpenAI’s connector count crossed 500 integrated applications for ChatGPT 5, spanning cloud storage, email, calendars, CRMs, code repositories, and automation platforms. That headline figure is accurate, but it requires some unpacking before it translates into workflow strategy.

    Coverage is Uneven by Design

    The most battle-tested connectors — the ones that have been in production the longest and carry the fewest edge-case surprises — cluster in a predictable group: Google Workspace (Drive, Gmail, Calendar, Docs), Microsoft 365 (SharePoint, OneDrive, Outlook, Teams), GitHub, Slack, and Notion. These cover the daily surfaces where most knowledge work actually happens, and they are the connectors where the deep research integration and sync/indexing features are most mature.

    CRM connectors occupy a different tier. HubSpot is listed as a native built-in CRM connector in ChatGPT Enterprise’s framework, and it works well for retrieval — pulling contact records, deal stages, and activity history into a chat context without leaving the interface. Salesforce access, by contrast, tends to run through MCP-based or third-party bridges rather than a fully native connector, which changes the setup complexity significantly. If your RevOps team is planning Salesforce workflows assuming native connector simplicity, that gap will surface early.

    The automation platform integrations — Zapier, Make, Microsoft Power Automate — sit in a third category. These are less about data retrieval and more about triggering. When you connect ChatGPT to Zapier, you are not just reading from Zapier; you are using ChatGPT as the reasoning layer that decides what Zapier should execute. This distinction between ChatGPT as a retrieval tool versus ChatGPT as an orchestration layer is the most important conceptual shift for teams designing their first serious connector workflows.

    Search vs. Sync: Two Modes That Teams Confuse

    There are two fundamentally different ways ChatGPT can interact with a connected app: real-time search and pre-synced indexed knowledge. Real-time search pulls current data from the connected app at query time — it is slower and depends on live API access, but the data is always fresh. Pre-synced indexed knowledge uploads a snapshot of your connected content (documents, wikis, knowledge bases) and lets ChatGPT query that index instantly without hitting the live API on every request.

    The choice between these two modes matters for both performance and data freshness. Teams building customer support workflows typically want real-time search so agents always get current ticket status and contact data. Teams building research workflows or internal knowledge assistants often prefer indexed sync for speed, accepting that the data might be hours or days old depending on their sync schedule.

    Getting this wrong — expecting indexed freshness when you have set up real-time search, or expecting live pricing data when you are querying a weekly sync — is one of the most common causes of early frustration with Connectors. It is not a product failure; it is a configuration decision that needs to be deliberate.

    Plan Availability Shapes What You Can Actually Build

    Not all features are available on all plans. The full connector suite, write actions, and MCP custom connector support are concentrated in ChatGPT Team, Business, Enterprise, and Edu plans. Free and Plus users have access to a narrower set of connectors with more restricted capabilities. If you are evaluating Connectors for a team deployment, the feature-to-plan mapping is worth auditing before you build any workflow assumptions around capabilities that may not be available at your current tier.

    Deep Research Mode + Connectors: The Combination Most Teams Are Leaving on the Table

    Before and after comparison showing manual tab-switching workflow versus ChatGPT Connectors deep research mode saving 40-60 minutes per worker per day

    ChatGPT’s Deep Research mode was designed to conduct extended, multi-source research tasks autonomously. When it launched, the primary use case was web-based — pulling together publicly available information on a topic, synthesising it into a structured report, and surfacing citations. That was useful. What is significantly more useful, and less discussed, is running Deep Research across your own connected data.

    What Happens When Deep Research Hits Internal Data Sources

    When you activate Deep Research mode with connectors enabled — particularly Google Drive, SharePoint, or a Notion workspace — the model does not just search one source. It can be instructed to pull from multiple connected repositories simultaneously, cross-reference findings, and synthesise a coherent output that would have required an analyst several hours to assemble manually.

    The practical example that illustrates this well is competitive intelligence preparation. A team preparing for a quarterly business review might need to compile: recent customer feedback from a Notion CRM notes database, product development updates from GitHub commit summaries, and sales deal notes from HubSpot. Before connected Deep Research, that synthesis meant three separate logins, manual copy-paste into a document, and then a drafting session. With connectors configured and Deep Research prompted correctly, a single well-structured query can pull from all three sources and return a formatted briefing document in the time it used to take just to open the tabs.

    Teams running this pattern consistently report time savings in the range of 40 to 60 minutes per worker per day on research-heavy tasks. That figure comes from OpenAI’s own enterprise productivity data and is consistent with independent analyst estimates. On a ten-person team doing daily research tasks, that is the equivalent of recovering a full-time employee’s working hours every week — without headcount change.

    The Prompt Architecture That Makes It Work

    Deep Research across connectors does not work as well with vague prompts as it does with scoped, structured ones. The prompts that produce the most consistent results tend to follow a pattern: specify the data sources explicitly (“from my Google Drive project folder and HubSpot deal notes”), define the output format (“give me a bulleted executive summary with a risk flag section”), and set a time boundary (“for the past 30 days”).

    Vague prompts like “summarise what happened in the business this month” will return something, but it will be inconsistent and harder to act on. The teams getting the most out of Deep Research with connectors have built prompt templates — stored in a shared Notion page or a ChatGPT custom instruction set — that every team member uses as a starting point. Prompt standardisation is not glamorous, but it is the operational practice that separates teams with high connector ROI from teams with mediocre connector ROI.

    Connector-Augmented Research for External Competitive Work

    The combination also works outward. Teams using the web search connector alongside internal data connectors can instruct Deep Research to synthesise internal pipeline data alongside publicly available competitor announcements, industry reports, and pricing pages. The output is a research brief that blends proprietary internal context with external market intelligence — something that previously required a dedicated analyst function to produce at any reasonable frequency.

    Write Actions: Where Connectors Finally Get Some Teeth

    For most of their life, ChatGPT Connectors have been fundamentally about reading data — fetching, searching, and summarising content from connected apps without touching anything on the other side. Write actions change that equation, and they represent the most significant recent evolution in what Connectors can do.

    What Write Actions Currently Cover

    Write actions allow ChatGPT, when connected to supported apps, to take actions rather than just report on them. In practice, the most mature write action implementations in mid-2026 include: drafting and sending emails via Gmail or Outlook (with user confirmation), creating calendar events, creating and updating Notion pages and database entries, creating GitHub issues and pull request comments, and triggering actions in connected automation platforms like Zapier or Power Automate.

    The key qualifier is “with user confirmation.” Most write action implementations include a confirmation step before execution — ChatGPT shows you what it is about to do and asks you to approve. This is not an arbitrary friction point; it is a deliberate design choice that addresses one of the central governance concerns about giving an AI model write access to production systems. Teams that find the confirmation step annoying often have workflows where the write volume is high enough that the confirmation becomes a bottleneck, which is a signal that those workflows should be moved to a fully automated pipeline via Zapier or Make rather than handled interactively in ChatGPT.

    The Workflows Where Write Actions Are Actually Earning Their Keep

    Meeting preparation and follow-up is the workflow category where write actions are delivering the most consistent value in practice. The pattern looks like this: a sales rep finishes a call, opens ChatGPT, prompts it to pull the call notes from their connected CRM, generate a follow-up email summarising next steps, create a calendar event for the agreed follow-on meeting, and update the deal stage in HubSpot. What used to take 20 to 30 minutes of fragmented admin work after every call now takes two to four minutes with connector-enabled write actions.

    Multiply that across a 15-person sales team with four to six customer calls per day per rep, and the arithmetic becomes compelling quickly. One reported outcome from a sales operations team using this pattern was a 23% increase in closed deals — attributed specifically to the elimination of dropped follow-ups that previously fell through the cracks in the manual admin process.

    Content creation workflows are the second area of strong adoption. Marketing teams are using write actions to take a research output produced by Deep Research, have ChatGPT transform it into a draft blog post or email campaign, and push that draft directly to a Google Doc or Notion page for editorial review. The human still edits, approves, and publishes — but the first draft, historically the most time-intensive part of the content production cycle, is handled by the connected workflow.

    Where Write Actions Are Still Immature

    It is worth being direct about the gaps. CRM write-back — the ability for ChatGPT to update deal records, contact properties, and pipeline stages directly in Salesforce or HubSpot based on conversation context — is inconsistent and limited outside of explicitly supported operations. Delete actions remain largely unavailable across the connector ecosystem; ChatGPT will not delete your emails or your files. Bulk write operations (updating 200 records at once rather than one at a time) are not reliable through the native connector interface and require the MCP layer or a separate automation platform for anything at scale.

    Real Workflow Wins: Sales Operations and CRM Pipelines

    Of all the functional areas where Connectors have been adopted in production, sales operations has the most clearly quantified outcomes and the most repeatable workflow patterns. This is partly because RevOps teams tend to have cleaner metrics for measuring impact — deal velocity, follow-up rates, CRM data quality — and partly because the pain points that Connectors address in sales ops are among the most acute across knowledge work.

    Pipeline Hygiene at Scale

    One of the most common and highest-ROI connector use cases in sales is automated pipeline hygiene review. The workflow: connect ChatGPT to the CRM (HubSpot natively, Salesforce via MCP), prompt it weekly to identify all deals past their expected close date, deals with no activity in the past two weeks, and deals missing required data fields. ChatGPT synthesises this into a prioritised cleanup list, flags the highest-risk deals, and drafts outreach messages for each stalled opportunity.

    The manual version of this task — typically performed by a sales manager or RevOps analyst — takes two to four hours per week. The connector-assisted version takes under 20 minutes, including the time to review and approve the drafted outreach. More importantly, it happens consistently. Manual pipeline reviews are the first thing to get skipped when a team is busy. Connector-automated pipeline reviews happen on schedule regardless of how many fires are burning.

    Lead Enrichment and Routing

    A second high-value sales ops workflow combines CRM connectors with web search connectors for lead enrichment. When a new lead arrives in HubSpot, a connected workflow can instruct ChatGPT to research the company (size, funding stage, recent news, tech stack signals from public sources), score the lead against your ideal customer profile, draft a personalised first-touch email, and route the lead to the appropriate sales rep based on territory or vertical rules.

    Teams implementing this workflow report near-zero data entry errors (because the enrichment is automated) and significant improvements in first-touch response quality. The personalised emails drafted by the enrichment workflow outperform generic sequence templates because they reference specific, current company context rather than generic industry messaging.

    Meeting Brief Automation

    Pre-call research is another workflow category where the time savings are immediate and the quality improvement is tangible. A connected brief generation workflow pulls the last three months of deal activity from CRM, any email thread history from Gmail, and recent news about the prospect company from web search, then synthesises a two-page meeting brief with talking points, known objections, and recommended next steps. Reps who use this workflow consistently report feeling more prepared and handling objections more confidently — not because the AI is doing the thinking, but because it is ensuring that relevant context is always surfaced before the call, rather than only when the rep happens to remember to look.

    Real Workflow Wins: Knowledge Work, Documentation, and Internal Comms

    Beyond sales, the second most impactful category of Connector deployment is in organisations with high volumes of internal knowledge work — professional services firms, product teams, research functions, and any operation where people spend significant time either finding information or documenting what they know.

    The Internal Knowledge Base Problem

    Most organisations accumulate knowledge in scattered, poorly organised repositories. Confluence wikis that no one updates. Notion databases where search returns 40 results for any query. SharePoint folders that have been added to for eight years by people who no longer work there. The standard solution — periodic knowledge audits, better tagging taxonomies, dedicated knowledge managers — is expensive and rarely sustained.

    ChatGPT Connectors offer a different approach: rather than organising the knowledge base, you use ChatGPT as an intelligent interface on top of it. Connect ChatGPT to Notion, Confluence, or SharePoint, index the content, and let team members query the accumulated knowledge in natural language rather than through a search interface that requires them to know what to look for. The knowledge base does not get cleaner, but it becomes dramatically more accessible.

    Teams running this pattern report reducing average information-retrieval time from 15 to 20 minutes (digging through docs) to two to three minutes (querying the connected index). Over a week of work, that adds up to context-switching reduction of up to 70% on knowledge-retrieval tasks — a figure consistent with productivity research on the cost of app-switching in knowledge-intensive roles.

    Document Drafting and Iteration Workflows

    The second major knowledge work use case is iterative document drafting. The workflow: retrieve relevant existing documents from Google Drive or SharePoint via connector, use them as context for drafting a new document (proposal, report, policy update, technical spec), and push the resulting draft back to the document store for review. The key here is that the connected context makes the drafts significantly better than prompting ChatGPT without access to internal references. When the model can read your existing proposal templates, client history, and pricing guides before drafting a new proposal, the output is calibrated to your organisation’s standards rather than generic.

    Internal Comms and Status Reporting

    Project status reporting is one of the most universally disliked administrative tasks in knowledge work. It is time-consuming, it is often written by people who would rather be doing the actual work, and it is frequently repetitive — summarising the same data that already exists in project tools. Connected ChatGPT workflows are changing this for teams running their projects in tools like Asana, GitHub, or Notion. A weekly status prompt can pull current task status, blocking issues, and completion metrics from the connected project tool, then draft a formatted status update ready for the team lead to review and send. The time savings per week per project manager run between 45 minutes and two hours depending on project complexity.

    Real Workflow Wins: Engineering Teams and Code Repositories

    Engineering teams were early adopters of AI coding tools via GitHub Copilot, but the ChatGPT Connectors integration with GitHub represents a different use case — less about autocomplete in the IDE and more about connecting code context to broader operational workflows.

    Code Review Summarisation and Context Bridging

    Large pull requests are a well-known productivity bottleneck in engineering organisations. A senior engineer reviewing a 2,000-line PR needs context on what the change is doing, why it was made, what tests cover it, and what risks it introduces. Historically, gathering that context means reading the commit history, the linked issue, the PR description (if one was written), and the diff itself. Connected ChatGPT can pull the GitHub PR, linked issue, and relevant documentation from a connected Confluence or Notion space and produce a structured review brief in under a minute. Reviewers still do the actual code review; they just arrive at it with context already assembled.

    Incident Response and Post-Mortems

    Incident response is another area where cross-system context is critical and time is scarce. When something breaks, engineers need to correlate information from monitoring tools, Slack threads, GitHub commits, and deployment logs simultaneously while also trying to fix the problem. Connected ChatGPT workflows can assist by pulling the recent commit history, the active incident Slack thread, and any linked issues into a single context window, then helping draft the timeline and contributing factors analysis for the post-mortem. Teams that have piloted this report significant reductions in post-mortem documentation time — from four to six hours to under two hours — while improving the accuracy and completeness of root cause analysis.

    Developer Onboarding

    Perhaps the most structurally impactful engineering workflow enabled by Connectors is developer onboarding. New engineers typically spend their first two to four weeks finding information about codebases, internal tools, processes, and conventions — primarily by asking colleagues and searching internal docs. A connected ChatGPT deployment that indexes the GitHub codebase, internal engineering wiki, architecture decision records, and runbooks dramatically compresses this ramp-up. Rather than waiting to find the right person to ask, a new hire can query the connected system directly. Teams report reducing effective onboarding time by 30 to 40% using connected knowledge systems — a significant saving given the cost of engineering talent.

    The MCP Layer: Building Custom Connectors That Can Actually Do Things

    Custom MCP connector architecture diagram for ChatGPT Enterprise showing layered stack from ChatGPT interface through authenticated MCP server to internal CRM, data warehouse, and legacy ERP systems

    The native ChatGPT Connectors catalogue covers a wide range of applications, but it will never cover everything an enterprise uses. Legacy ERP systems. Custom internal databases. Proprietary data warehouses built on Snowflake or Databricks. Industry-specific tools in healthcare, finance, or manufacturing that are not on any SaaS connector list. This is where the Model Context Protocol (MCP) layer becomes essential.

    What MCP Actually Is and Why It Matters

    The Model Context Protocol is an open standard that defines how AI agents fetch data and perform actions through tool servers. In plain terms, it is the technical specification that allows you to expose any internal system — if you can build an HTTPS-authenticated API endpoint for it — as a connector that ChatGPT can read from and, with the right configuration, write back to.

    For enterprises, this resolves the fundamental limitation of native connectors: the dependency on OpenAI to build and maintain an integration with every system you use. With MCP, you build the server layer yourself, you control the scope of what the model can access and do, and you can implement your own authentication, rate limiting, and audit logging in the process. The MCP connector (now formally called an “app” in ChatGPT’s Enterprise developer mode) is registered with your ChatGPT Enterprise deployment and becomes available to your team as if it were a native connector.

    The Architecture in Practice

    A typical enterprise MCP connector architecture for ChatGPT runs in three layers. The top layer is the ChatGPT interface — the Enterprise plan deployment that your team uses. The middle layer is your MCP server: an HTTPS-authenticated endpoint you build and host, which translates ChatGPT’s requests into queries or actions against your underlying systems. The bottom layer is your internal infrastructure — the CRM, the data warehouse, the ERP, the proprietary database — which the MCP server accesses using your existing internal credentials and access controls.

    The middle layer is where most of the engineering effort lives. A well-built MCP server will implement: scoped access controls (so ChatGPT can only access the data the user is authorised to see), input validation (to prevent prompt injection attacks from reaching your internal systems), action confirmation for write operations, and comprehensive audit logging for compliance. A poorly built MCP server — one that passes raw user inputs directly to internal systems without validation — introduces the same prompt injection risks that make native connectors a concern in sensitive data environments.

    What Custom MCP Connectors Enable That Native Connectors Do Not

    The most significant capability gap that MCP connectors close is bidirectional, unrestricted write access. Where native connectors are largely read-only or limited to specific write operations, a custom MCP connector can expose any action your underlying system supports — updating records, triggering workflows, submitting transactions, even calling external APIs — subject only to the constraints you build into your server logic.

    This opens up workflow categories that are simply not accessible through native connectors: procurement workflows that update ERP purchase orders, finance workflows that query and update budget tracking systems, compliance workflows that pull audit trails from multiple internal systems and generate regulatory reports. The build investment is higher than configuring a native connector, but the capability ceiling is also substantially higher.

    The teams getting the most value from custom MCP development in 2026 are those who have identified two to three high-volume internal workflows where the ROI on build time is clear — typically workflows that combine information retrieval with a specific action that runs hundreds or thousands of times per month — and built focused, purpose-specific connectors rather than trying to expose every internal system at once.

    The Limitations Teams Keep Hitting — An Honest Account

    Any assessment of ChatGPT Connectors that does not spend real time on limitations is either a marketing document or a productivity post written before anyone tried to use the feature in anger. Here is where the real friction lives.

    Read-Only Is the Default — and It Bites

    For most native connectors, read-only is not a setting you can turn off — it is the default mode of operation. GitHub, Google Drive, Calendar, and similar integrations are described in OpenAI’s own documentation as essentially read-only in their native form. You can search, fetch, and summarise, but you cannot directly edit a Google Doc through the connector, you cannot delete a GitHub issue, and you cannot update a SharePoint page.

    This surprises teams who assume connector access means full programmatic access. It does not. If your workflow requires write access to these systems natively — outside of the specific write actions that are explicitly supported — you need to route through an automation platform integration (Zapier, Make, Power Automate) or build the write capability into a custom MCP connector.

    Context Window Size and Multi-Connector Queries

    When you query multiple connectors simultaneously, the data returned from each connector competes for space in the model’s context window. For most straightforward queries this is not an issue. For complex deep research prompts that try to pull large volumes of data from three or four connected sources simultaneously, you can hit context limits that cause the model to truncate or miss data from later sources in the retrieval chain. The mitigation is to structure complex multi-connector queries as sequential focused queries — one connector at a time — rather than attempting to pull everything in a single prompt.

    Connector Reliability Varies by Source

    Native connector reliability is not uniform. Connectors for Google Workspace and Microsoft 365 tend to be the most stable and fastest. Third-party and less common connectors can be slower, hit rate limits, or return inconsistent results depending on the source system’s API reliability. Teams building time-sensitive workflows — anything that runs as part of a meeting or a live customer interaction — should test their specific connector configuration under realistic load before relying on it in production.

    Single-Source Search Limitation

    A commonly cited operational frustration is that connector search queries, outside of the Deep Research mode, tend to work best one source at a time rather than simultaneously across all connected sources. The multi-source synthesis that Deep Research mode enables is not the default behaviour in standard chat mode with connectors active. Standard chat with connectors enabled will typically search the most recently active or most contextually relevant connector for a given query, not all connected sources in parallel. Teams that discover this after assuming all queries would span all connectors often need to revisit their workflow design.

    Regional Availability Gaps

    Not all connectors are available in all regions. Enterprise deployments in certain geographies — particularly in parts of the EU, APAC, and the Middle East — may find that specific connectors are unavailable or operate under data residency constraints that affect what can be connected and how data is handled. This is an operational constraint that should be checked early in any regional deployment planning rather than discovered after contracts are signed.

    Data Privacy and Governance: What Your Plan Tier Actually Determines

    Data privacy risk infographic for ChatGPT Connectors showing four key concerns: read-only limitations, prompt injection risk, data training policy by plan tier, and regional availability gaps

    The governance question around ChatGPT Connectors is not abstract. It has concrete implications for whether the data your team feeds through connected apps can end up training OpenAI’s models, who within your organisation can access what through a shared ChatGPT deployment, and how you would demonstrate compliance if a regulator asked you to account for how sensitive data was processed.

    The Plan-Tier Data Policy Split

    OpenAI’s data use policy creates a clear divide by plan. For Business, Enterprise, and Edu plans, data processed through connected apps is not used to train OpenAI’s models. That is a firm commitment that enterprise teams can cite in their data processing agreements and vendor assessments. For Free, Plus, and Pro plans, data may be used to improve models if the user has model improvement enabled in their settings — the default varies and should be checked explicitly.

    This is not a subtle distinction. If your team is running connector workflows on a Pro or Plus plan and model improvement is enabled, information from your connected Google Drive, HubSpot, or Slack workspace is potentially being used as training data. For most personal productivity workflows this is acceptable. For anything touching customer data, proprietary business information, financial data, or regulated personal information, it is likely not acceptable and may violate your obligations under GDPR, CCPA, HIPAA, or sector-specific regulations.

    The practical governance advice is straightforward: use Enterprise or Business plan for any connector deployment that touches business-sensitive data. Document that decision as part of your AI governance framework. Do not allow team members to replicate Enterprise-level workflows on personal Plus accounts to work around the plan cost.

    Prompt Injection: The Risk That Scales With Connector Scope

    Prompt injection — where malicious content in a connected data source attempts to override the model’s instructions — is a real and growing concern as connector scope expands. The attack vector is simple to describe: a bad actor plants a specially crafted instruction in a document, email, or database record that ChatGPT is likely to read through a connector. When the model ingests that content, the injected instruction attempts to alter the model’s behaviour — exfiltrating data to an external URL, generating misleading outputs, or bypassing confirmation steps for write actions.

    Native connectors mitigate this to some degree through content sandboxing, but the risk does not disappear. For custom MCP connectors, input validation in the server layer is the primary defence — never passing raw retrieved content directly into the model context without sanitisation. For native connectors, keeping connector scope narrow (connecting only the specific data sources a workflow needs, not every possible source) reduces the attack surface. Teams with high-sensitivity data environments should treat prompt injection as a genuine threat model, not a theoretical concern.

    Access Control and Least Privilege

    A principle of least privilege applies to connector configuration just as it does to any other access control framework. Connectors should be granted the minimum scope of access required for the specific workflow they support. A connector built to support sales pipeline review does not need access to HR documents or financial records. A connector supporting engineering onboarding documentation does not need write access to the production code repository.

    In practice, teams often connect the broadest available scope during setup (because it is easier) and then leave it wide. This is the connector governance equivalent of giving every employee admin access because it is less work than configuring individual permissions. It creates unnecessary risk and complicates compliance documentation. Building narrow, purpose-specific connector configurations from the outset is more work upfront and significantly better practice.

    ChatGPT Connectors vs. Zapier, Make, and Power Automate: Choosing the Right Layer

    Comparison chart showing ChatGPT Connectors vs Zapier vs Make vs Power Automate with app ecosystem size, best use cases, and AI-native capabilities for 2026

    This comparison comes up in almost every conversation about deploying ChatGPT Connectors at scale, and it is usually framed as a competition — which platform should you use? The more useful framing in 2026 is about layers: these tools are not competing for the same function, and the most effective workflow architectures often use more than one of them simultaneously.

    What Each Platform Is Actually Good At

    Zapier leads the automation platforms on breadth. With over 9,000 connected apps, the fastest setup for non-technical users, and AI-assisted workflow design, Zapier is the right choice when the priority is connecting the widest possible range of tools with minimum engineering effort. If your workflow involves an app that is not in ChatGPT’s native connector catalogue, Zapier probably has it. The limitation is cost at high-volume automation scenarios and the relative complexity of multi-step, conditional logic-heavy workflows.

    Make (formerly Integromat) is the strongest option for complex, high-volume automation with sophisticated conditional logic. Its visual workflow builder handles branching, looping, and error handling more elegantly than Zapier for multi-step workflows, and its pricing model is more favourable for high-operation-count scenarios. Teams with custom, non-standard workflow logic that would require a Zapier “Paths” configuration with multiple nested conditions typically find Make more maintainable.

    Power Automate is the native choice for Microsoft 365-centric enterprises and any organisation with significant governance and compliance requirements. Its deep integration with the Microsoft stack — Teams, SharePoint, Dynamics, Azure — makes it the obvious default for organisations that have standardised on Microsoft. Its AI Builder component is increasingly capable, and its governance controls are more mature than the other options for regulated industries.

    ChatGPT Connectors are not a replacement for any of these. They are the AI reasoning and orchestration layer that sits on top of them. When you connect ChatGPT to Zapier, you are using ChatGPT’s language understanding to decide what Zapier should execute. When you connect ChatGPT to Power Automate, you are adding natural language control and synthesis capability to workflows that Power Automate runs. The most powerful implementations in 2026 use ChatGPT as the intelligent interface layer while relying on dedicated automation platforms for the actual cross-system execution at scale.

    When ChatGPT Connectors Alone Are Sufficient

    There is a class of workflow where ChatGPT Connectors alone — without an underlying automation platform — are the right and sufficient choice. These tend to share three characteristics: they are human-in-the-loop (a person is reviewing and approving at each step), they are moderate volume (not thousands of operations per day), and they benefit significantly from natural language generation in the output (not just data transfer).

    The sales pipeline review, meeting brief generation, and knowledge base query workflows described earlier all fit this profile. They are tasks where a human is present in the workflow, the volume is manageable, and the quality of the synthesised language output matters. Automated lead routing that processes 500 inbound leads per day does not fit this profile — it needs an automation platform underneath it.

    The Layered Architecture That Sophisticated Teams Are Using

    The architecture that is emerging among the most sophisticated connector deployments in 2026 uses three layers: the automation platform (Zapier, Make, or Power Automate) as the backbone that handles trigger logic, conditional routing, and high-volume execution; ChatGPT with Connectors as the reasoning and synthesis layer that generates outputs, makes decisions based on context, and interacts with humans in natural language; and MCP custom connectors as the bridge to internal systems that neither ChatGPT nor the automation platform natively supports.

    Building all three layers is not necessary for every workflow — start with the simplest configuration that solves the problem, and add layers only when you hit a ceiling that a simpler setup cannot clear. But understanding that this three-layer architecture exists, and which layer is responsible for what, saves teams from trying to make ChatGPT Connectors alone do jobs that require an automation platform, or building expensive MCP custom connectors for apps that already have mature native integration.

    The Workflow Wins Worth Prioritising This Week

    The honest conclusion about ChatGPT Connectors in mid-2026 is that the platform is more capable than most teams are using it for, more limited than some promotional coverage suggests, and more strategic in the decisions it requires than a simple feature checklist reveals.

    The wins are real. Teams are saving 40 to 60 minutes per worker per day on search and synthesis tasks. Sales operations teams are recovering deals that used to fall through the cracks and seeing measurable conversion improvements. Engineering teams are compressing onboarding timelines. Knowledge workers are accessing institutional memory that used to be effectively invisible. These are not theoretical gains — they are happening in production, in identifiable workflow categories, through specific connector configurations.

    The limitations are equally real. Read-only by default. Inconsistent multi-source query behaviour in standard chat mode. Plan-tier governance that genuinely matters for sensitive data. Prompt injection as a non-trivial threat surface. Regional availability constraints that affect enterprise deployments in certain geographies.

    The Four Workflows to Start With

    If you are deciding where to begin — or where to expand — these four workflows have the clearest ROI track record and the most manageable setup complexity:

    • Pipeline hygiene review: Connect your CRM (HubSpot natively, Salesforce via MCP) and run a weekly stalled-deal review with automated outreach drafts. Setup time: two to four hours. Time saved: two to four hours per week per ops person.
    • Meeting brief generation: Connect CRM plus Gmail plus web search. Pre-call research brief on demand. Setup time: one to two hours. Time saved: 20 to 40 minutes per call per sales rep.
    • Internal knowledge query: Index your Notion or Confluence workspace via the connector and provide the team with a natural language interface for internal documentation. Setup time: four to six hours including index configuration. Context-switching reduction: significant and immediate for research-heavy roles.
    • Status report drafting: Connect your project management tool (Notion, GitHub, Asana) and automate weekly status update drafts. Setup time: two to three hours. Time saved: 45 minutes to two hours per project manager per week.

    What to Audit Before You Build

    Before deploying any connector workflow that touches business-sensitive data, run through this checklist: confirm your team is on Business or Enterprise plan (not Plus or Pro); review which data sources the connector needs access to and configure the minimum required scope; document the data types being processed and check them against your organisation’s data classification policy; identify any write actions in the workflow and confirm the confirmation/approval step is functioning as expected; and if you are building a custom MCP connector, ensure input validation and audit logging are in place before connecting to production systems.

    The Bigger Picture

    What the Connectors trajectory in 2026 signals is a shift in what ChatGPT is fundamentally for. It is not settling into a role as a writing assistant or a question-answering tool, though it can still do both. It is becoming the intelligent interface layer on top of the applications and data sources that organisations already run — a place where natural language queries produce synthesised, contextualised, actionable outputs that no single source system could generate on its own.

    That is not where it arrived — it is where it is heading, measurably and week over week. The teams positioned to benefit the most from that trajectory are not the ones waiting for the platform to mature further. They are the ones building now, in the workflow categories where the ROI is clear, with governance configurations that will not bite them when the capabilities expand further. The wins this week are real. The infrastructure you build around them is what determines whether those wins compound.

  • Why Your Product Images Are Invisible to Alexa for Shopping — and the Legibility Fixes That Change That

    Why Your Product Images Are Invisible to Alexa for Shopping — and the Legibility Fixes That Change That

    Split-screen comparison showing illegible Amazon product infographic versus AI-readable redesign with bold high-contrast text — IF ALEXA FOR SHOPPING CAN'T READ YOUR IMAGES, YOU'RE INVISIBLE

    There is a peculiar irony running through a large slice of Amazon’s seller base in 2026. Brands spend real money on professional photography, graphic design, and creative direction to build image stacks they believe are doing heavy lifting on their listings. The product looks sharp. The infographic slides look polished. The lifestyle shots look aspirational. And then Alexa for Shopping — Amazon’s AI shopping assistant, which now mediates the discovery experience for hundreds of millions of shoppers — reads approximately none of the text inside those beautiful images.

    Not because the AI is unsophisticated. It is, in fact, highly sophisticated. The problem is that sophistication does not compensate for bad input. When your text overlays use decorative script fonts at 14px, when your callout copy sits in light grey on a white background, when your comparison table is rendered over a busy lifestyle photograph — the OCR layer that feeds the AI assistant fails silently. No error message. No notification in Seller Central. Just a quiet, invisible gap between what your images say and what the AI assistant actually registers.

    Industry practitioner data suggests this affects roughly 40% of seller images currently live on Amazon. That means four out of ten image slides in the average product listing are contributing zero textual signal to the system now ranking and recommending your products. The features you paid to showcase, the benefits you need shoppers to understand, the differentiators your brand spent years developing — they exist in your images, but not in Amazon’s model of your product.

    This article is about fixing that. Specifically, it covers the technical mechanics of how Amazon’s AI stack reads (or fails to read) product images, the design and content decisions that determine OCR success or failure, and the structured approach to rebuilding your image stack so that every slide contributes legible, indexable, AI-useful information.

    From Rufus to Alexa for Shopping — What Actually Changed on May 13, 2026

    For most of 2024 and 2025, Amazon’s AI shopping assistant was called Rufus. It launched as a conversational chatbot embedded in the Amazon app, answering shopper questions about products, comparing options, and surfacing recommendations through natural language queries. Sellers learned to optimize their listings for Rufus, and a cottage industry of “Rufus optimization” guides emerged.

    On May 13, 2026, Amazon retired the Rufus brand and folded its technology into a unified experience called Alexa for Shopping. The rebrand was more than cosmetic. Alexa for Shopping is designed as an agentic assistant — meaning it does not just answer questions, it can take purchasing-adjacent actions, surface recommendations proactively, compare products across multiple attributes simultaneously, and sit inside the search bar, product pages, the Amazon Shopping app, and Echo Show devices simultaneously.

    What This Means Practically for Sellers

    The core capability that sellers need to understand remains consistent from Rufus to Alexa for Shopping: the assistant uses multimodal AI to process product listings. That means it does not just read your title, bullets, and description. It also ingests your images, your A+ content, and your customer reviews, fusing all of those signals together to determine how well your product matches a given shopper’s intent.

    What changed with the May 2026 transition is scope and surface area. Alexa for Shopping is no longer a sidecar chatbot — it is now woven into the core search experience. When a shopper searches for “insulated travel mug that keeps coffee hot for 8 hours,” the AI assistant is not just filtering results by keyword match. It is actively reading product listings — including image content — to determine which products best answer that specific query.

    The implication for image legibility is direct: more shopper queries now flow through an AI layer that reads images. A higher percentage of your organic discovery now depends on whether the AI can extract usable signals from your visual content. The text you buried in a 12px italic font on slide three of your image stack is not a minor design choice. It is a data quality decision that affects how the AI models your product.

    The No-Prime Expansion Factor

    Alexa for Shopping also removed the Prime requirement that previously limited Rufus access. The assistant is now available to all Amazon shoppers regardless of subscription status. That expands the pool of queries running through AI-mediated discovery considerably — and it means the image legibility problem is not an edge case affecting a niche set of searches. It is a mainstream visibility issue for any seller whose products get surfaced through AI-assisted queries.

    How the Multimodal Stack Actually Reads Your Images

    Three-layer technical diagram showing how Amazon Alexa for Shopping reads product images: OCR text extraction, computer vision via Rekognition, and Vision-Language Model fusion into ranking signal

    Understanding why image legibility matters requires understanding the technical pipeline that processes your images before any AI assistant ever “sees” them. Amazon does not use a single model to read product images. It uses a layered stack, and each layer has different failure modes.

    Layer 1: OCR — Optical Character Recognition

    The first pass on any product image is OCR. Amazon uses Amazon Rekognition — its own computer vision service — to extract text from images. Rekognition scans every pixel for character patterns, attempts to reconstruct words and phrases, and hands that extracted text off to downstream systems.

    This is where most legibility failures happen. OCR is not magic. It is a pattern-matching system that performs reliably when the input is clean and degrades predictably when the input is noisy. The primary factors that determine OCR success or failure are: text size relative to image resolution, contrast ratio between text and background, font style complexity, text orientation, and the degree to which text overlaps with busy visual elements.

    When OCR fails to extract your text, the downstream systems — including the ranking models and the AI assistant — receive no information about what that text said. The feature claim you highlighted in slide four simply does not exist in Amazon’s representation of your listing. It is as if you never wrote it.

    Layer 2: Computer Vision via Amazon Rekognition

    Alongside OCR, Amazon Rekognition runs object detection, scene classification, color analysis, and compositional analysis on every product image. This layer answers questions like: What type of product is this? What is the dominant color? Is this a lifestyle shot or a white-background product image? Are there people in this image, and if so, what are they doing?

    This layer is generally more robust than OCR because it does not require text to be present at all — it works on pure visual content. But it interacts with the OCR layer in important ways. An infographic slide where the text fails OCR but the visual context is clear gives the system partial information: it knows the image exists and something about its composition, but it cannot extract the specific claims or features you were trying to communicate.

    Layer 3: Vision-Language Models

    The top of the stack is the Vision-Language Model (VLM) — the component that most closely resembles what we think of when we imagine “AI reading an image.” The VLM takes the outputs from OCR and computer vision as inputs and fuses them with the listing’s structured text data (title, bullets, attributes) and review data to construct a unified model of what the product is, what it does, and which shopper queries it is likely to satisfy.

    This is the model that ultimately informs Alexa for Shopping’s recommendations. When a shopper asks “what’s the best yoga mat for bad knees?” the VLM is drawing on a representation of each relevant product that includes — when the image stack is legible — the text claims from your infographic slides, the visual attributes detected in your product photos, and the structured keywords in your copy.

    When image text fails OCR at Layer 1, the VLM receives an impoverished representation. It can still work with your structured text data, but it has lost a meaningful input channel. In competitive categories where multiple products have similar structured text, the brands whose image text is successfully extracted by OCR have a structural advantage in how richly the AI model represents their product.

    The 40% OCR Failure Rate — What It Is, Why It Happens, and What You’re Losing

    Bar chart showing the 40% OCR failure problem — optimized images at 95% success vs typical seller images at 60%, with the three main failure causes: font too small, low contrast, stylized script font

    The 40% figure is not Amazon’s published statistic — Amazon does not publicly report on image OCR performance. It comes from practitioner analysis of Amazon Rekognition’s behavior across large seller catalogs, and it is consistent enough across multiple independent sources that it represents a reasonable working estimate for the scale of the problem.

    The more important question is not the exact number. It is understanding which specific design decisions cause OCR to fail — because those failures are almost entirely preventable.

    Failure Mode 1: Text That Is Too Small at Upload Resolution

    Amazon recommends uploading product images at a minimum of 1,000 pixels on the longest side, with 2,000 pixels or higher as the recommended standard for zoom functionality. OCR systems work on pixel data. A text label that appears “readable to a human” when viewed at normal zoom can sit at 18px effective height in the raw image file — below the threshold where Rekognition reliably extracts characters.

    The practical threshold from current practitioner guidance is a minimum of 24 pixels of rendered text height at the uploaded image resolution, with 36 pixels or higher as the recommended standard for reliable extraction. On a 2,000px wide image, that means headline text occupying considerably more vertical space than many current listing infographics allow.

    The failure pattern is consistent: sellers design their infographic slides on a 1080px canvas in Photoshop or Canva, viewing it at 100% zoom on a large monitor. The text looks fine. They export and upload. But at the resolution Amazon processes for OCR, the body copy is effectively invisible to character recognition.

    Failure Mode 2: Insufficient Contrast

    OCR systems rely on contrast to distinguish characters from their background. The Web Content Accessibility Guidelines (WCAG) define a minimum contrast ratio of 4.5:1 for normal text legibility — a threshold that also maps closely to the minimum contrast level at which Amazon Rekognition reliably extracts text from images.

    Common contrast failures in Amazon seller images include: light grey text on white backgrounds, white or cream text on pastel-colored panels, text that overlaps with gradient transitions in lifestyle photographs, and brand-colored text where the brand palette was chosen for aesthetic rather than accessibility reasons.

    The contrast problem is compounded by JPEG compression. Amazon re-compresses uploaded images, and compression artifacts reduce effective contrast at character edges — meaning an image that barely passes a contrast threshold at upload may fall below it after Amazon’s processing pipeline.

    Failure Mode 3: Decorative and Script Fonts

    OCR systems are trained on the distribution of fonts that appear in real-world text. They handle common sans-serif and serif typefaces extremely well. They handle script, display, handwritten, and heavily stylized fonts poorly to catastrophically.

    A brand that uses a custom calligraphic font for its headline copy, or a decorative serif with extreme weight variation, is asking the OCR system to solve a character recognition problem it was not optimized for. The system may extract garbled text, partial words, or nothing at all. From the AI’s perspective, that beautifully branded headline callout is noise.

    Failure Mode 4: Text Over Busy Backgrounds

    Placing text on top of lifestyle photography — a product in use, a model, an outdoor scene — creates a highly variable background that makes character segmentation difficult. Even at high contrast on average, the local contrast at individual character edges may be insufficient for reliable extraction. This is why the most OCR-reliable infographic layouts use solid or near-solid color panels behind text rather than relying on drop shadows, glows, or partial transparency to create legibility.

    What You’re Losing When OCR Fails

    When an infographic slide’s text fails OCR, the specific feature claims, benefit statements, and differentiating attributes in that slide do not get added to the AI’s representation of your product. For a product like a protein powder where the critical purchase factors — flavor, protein content per serving, sweetener type, protein source — are typically communicated in infographic slides rather than structured attributes, OCR failure can leave the AI with a materially incomplete picture of what makes your product relevant.

    The downstream consequences include: the AI assistant answering shopper queries without being able to reference information that was in your images; your product failing to surface in intent-based queries that your image text would have satisfied; and in competitive categories, rivals with better OCR compliance getting credited with signals that your listing technically contains but cannot effectively communicate.

    The Main Image Rule: Why Text-Free Remains Non-Negotiable

    Before discussing how to make image text legible, it is worth being precise about where image text belongs at all. Amazon’s product image policy is unambiguous on the main image: it must show the product on a pure white background with no text overlays, no logos in the frame (other than on the product itself), no badges, and no additional props or elements.

    This rule exists for multiple reasons, but from an AI-readability perspective it is actually a feature rather than a constraint. The main image slot is where Amazon’s computer vision system performs its most confident product classification. A clean white-background product shot gives the visual system clear signal about what the product is, its shape, its dominant colors, and its physical form factor. Clutter — including text — degrades that signal.

    Where Text Belongs and Where It Doesn’t

    The hierarchy for Amazon image text placement in 2026 is as follows:

    • Main image: No text. No exceptions. Violations risk listing suppression and lose you the clean visual classification signal.
    • Secondary images (slots 2–7): Text overlays are permitted and, when properly executed, are actively valuable. These are your infographic slides, benefit callouts, comparison images, and use-case demonstrations.
    • A+ Content modules: Text in A+ is processed by the VLM layer and can contribute meaningful signals, particularly in comparison tables and benefit modules. More on this below.
    • Amazon Stores: Image tiles in Stores have specific size specifications (3,000×1,500px for full-width tiles) and text overlay guidance that aligns with general OCR best practices.

    The practical implication is that your text legibility effort should be concentrated in secondary image slots 2–7 and your A+ content. Those are the surfaces where text is both allowed and actively useful for AI indexing — and where most current sellers are failing silently.

    Secondary Images as Structured Data: The New Way to Think About Infographic Slides

    Before and after comparison of Amazon product infographic slide — cluttered illegible design versus clean dark-panel design with bold white benefit callout text readable by AI and shoppers alike

    The most significant mindset shift available to Amazon sellers in 2026 is treating secondary image slots not as design canvases but as structured data entry points. This reframing has practical consequences for every decision you make about what goes in those slides and how it is presented.

    In the old model, a secondary image slide existed to persuade a shopper who had already clicked on your listing. Its job was emotional and visual: make the product look good, make the brand feel premium, communicate aspirational value. Design instincts optimized for these goals produce images that are often beautiful and often OCR-incompatible.

    In the current model, the secondary image slide serves two simultaneous audiences: the human shopper browsing your listing, and the AI system indexing your product. Those two audiences have different but largely compatible requirements. Humans need clarity, hierarchy, and visual appeal. The AI needs extractable text, meaningful semantic content, and consistency with your listing’s other data. Designing well for both is not a compromise — it is a discipline.

    Thinking About Slides as Database Fields

    Consider reframing each secondary image slot as an entry in a structured product database. If you were writing a database record for your product, what fields would you populate? Key ingredients or materials. Primary use cases. Quantified performance claims. Certifications and compliance. Comparison against the product it replaces. Size and dimension data. Compatibility information.

    Each of those “fields” maps directly to a high-value infographic slide. And each slide, if its text is legible, adds that field’s content to the AI’s representation of your product. The AI can then use those fields to match your product to relevant queries it might otherwise have missed.

    A protein powder listing with a legible “26g Protein Per Serving — No Artificial Sweeteners” callout in slide three gives the AI a precise, extractable data point. When a shopper asks Alexa for Shopping “what protein powder has no artificial sweeteners?” the AI has a signal to draw on. If that callout is in a 14px script font on a gradient background, that signal does not exist in the AI’s model of your product — even though you put it there.

    Content Priority for Each Slot

    With six secondary image slots available (and more with enhanced listings), a structured approach to slot allocation produces better AI signals than a purely creative one. A high-performing secondary image stack typically follows this hierarchy:

    1. Slot 2: The single most important purchase factor for your category — the one claim that most directly answers the primary shopper question. Make this the clearest, most legible slide in your entire stack.
    2. Slot 3: The second key purchase factor, or a quantified performance claim that supports slot 2.
    3. Slot 4: Ingredients, materials, certifications, or compliance information — particularly high value for categories where these are active shopper concerns.
    4. Slot 5: Use case or lifestyle context, with a text overlay that states the use case explicitly rather than relying on visual inference alone.
    5. Slot 6: Comparison, either against your own product variants or against the category standard (framed as benefit, not competitive attack, to avoid policy issues).
    6. Slot 7: Social proof anchor or brand story element that reinforces trust signals already present in your reviews.

    This is not a rigid template — category context matters significantly. But the underlying logic — allocating each slot to a specific, meaningful data point rather than a vague benefit statement — is consistent regardless of category.

    The Technical Legibility Stack — Font, Contrast, Size, and Hierarchy

    Typography contrast ratio reference chart for Amazon sellers — showing contrast ratios from 1:1 (invisible to OCR) through 4.5:1+ (WCAG AA compliant and OCR-reliable), with minimum font size guidance of 24px at upload resolution

    Now the specifics. The following technical parameters are derived from Amazon Rekognition’s documented OCR behavior, WCAG accessibility standards (which correlate strongly with OCR reliability), and practitioner testing across large catalog sets. These are not theoretical recommendations — they represent the thresholds at which OCR success rates shift materially.

    Font Selection

    Recommended: Clean sans-serif typefaces. Inter, Helvetica Neue, Montserrat, Source Sans, Open Sans, and their equivalents perform reliably in OCR extraction. These fonts have consistent stroke weights, clear character differentiation, and minimal ambiguity between similar letterforms (e.g., I, l, 1).

    Acceptable with care: Heavier-weight serif typefaces with consistent stroke widths. Fonts like Playfair Display at heavy weights or Georgia Bold can perform adequately, but they introduce more OCR uncertainty than their sans-serif equivalents.

    Avoid: Script fonts, handwritten fonts, ultra-thin weight variants of any typeface, condensed fonts at small sizes, and any custom brand font with unusual letterforms. If your brand guide requires a custom font, use it for hero elements only (large, single-word headlines) and fall back to a standard sans-serif for all substantive content text.

    Weight consideration: Use Medium (500) to ExtraBold (800) weight variants for body copy in infographics. Ultra-light variants (100–300) consistently underperform in OCR extraction regardless of size, because thin stroke widths create insufficient contrast at character edges after JPEG compression.

    Contrast Ratio

    The WCAG AA standard for normal text is a contrast ratio of 4.5:1. For large text (18px+ or 14px+ bold), the minimum is 3:1. These thresholds also represent the practical boundary for reliable Amazon Rekognition OCR extraction.

    In practice, aim higher. A contrast ratio of 7:1 or above — which is the WCAG AAA standard — provides a meaningful buffer against the contrast reduction introduced by Amazon’s image compression. This means:

    • White (#FFFFFF) text on a dark panel (#1A1A2E or similar) is essentially foolproof.
    • Near-black (#1C1C1C) text on pure white (#FFFFFF) is equally reliable.
    • Brand-colored text on white backgrounds should be verified against a contrast checker before use — many brand palettes produce ratios in the 2:1–3:1 range that fail OCR.
    • Text on lifestyle photo backgrounds requires careful placement to achieve consistent contrast. If you cannot guarantee 4.5:1 across the entire text area, use a solid color panel behind the text instead.

    Text Size at Upload Resolution

    The minimum for reliable OCR extraction is approximately 24 pixels of rendered text height at the uploaded image resolution. At the recommended upload size of 2,000 pixels on the longest side, this translates to headline text occupying roughly 3–5% of the image height, and body copy at a scale that would feel “large” by typical infographic design standards.

    Practical recommendations by content type:

    • Main headline / primary claim: Minimum 60–80px at 2,000px image width. This is your primary OCR target — the most important text in the slide should be the most reliably extracted.
    • Supporting callouts and sub-claims: Minimum 36–48px at 2,000px width.
    • Body copy or list items: Minimum 28–32px at 2,000px width. If your content cannot fit comfortably at this size, reduce the amount of text rather than the font size.
    • Fine print, legal disclaimers, certification badges: Anything below 24px is likely to fail OCR. Move critical compliance information into your listing bullets or description where it will be reliably indexed.

    Text Volume and Hierarchy

    A common design failure is treating infographic slides as a place to say everything at once. The more text you cram into a slide, the smaller each element must be, and the lower the average OCR success rate across the slide. OCR systems also struggle with dense text blocks where character boundaries are close together.

    A better approach: one primary claim per slide, expressed in the fewest words possible, at maximum size. Supporting details in a clearly differentiated secondary tier. Three or four bullet points at most per slide. White space is not wasted space — it is contrast buffer, and it gives the OCR system clear character separation to work with.

    Orientation and Angle

    OCR performs best on horizontally oriented text. Rotated, diagonal, or curved text paths reduce OCR accuracy significantly. If your design includes angled text for visual dynamism, assume that text will not be reliably extracted. Reserve it for purely decorative elements and keep all substantive content claims in standard horizontal orientation.

    A+ Content and the Visual Indexing Opportunity Most Sellers Miss

    Annotated Amazon A+ Content module diagram showing AI indexing opportunity zones: module text indexed by VLM, product comparison table, lifestyle image benefit callout, and brand story copy — labeled A+ Content: Your Most Underused AI Indexing Surface

    Most seller conversations about image legibility focus on the main product image stack — the seven slots visible on the product detail page. But Amazon’s multimodal AI system also processes A+ Content, and that content represents one of the most underused AI indexing surfaces in most sellers’ catalogs.

    A+ Content is processed by the VLM layer of Amazon’s system — the layer that fuses visual and textual signals into a unified product representation. Because A+ Content is brand-registered content with a higher quality signal than user-generated material, it gets meaningful weight in how the AI models the product.

    The Comparison Table Opportunity

    A+ Content’s comparison module — which allows you to compare your product against other ASINs in your catalog — is particularly high-value from an AI indexing perspective. The structured tabular format of comparison data is highly legible to both OCR and the VLM layer. Attribute names and values in a clean table format are essentially ideal structured input for the AI system.

    The mistake most sellers make with comparison modules is treating them primarily as upsell tools — designed to push shoppers toward higher-priced variants. They are also indexing tools. Every row in your comparison table is a structured feature attribute that the AI can use to match your product to relevant queries. Populate the comparison table with attributes that directly correspond to the queries your category shoppers actually ask, not just the attributes that make your premium variant look better.

    Image Modules in A+ Content

    Images embedded in A+ Content modules are subject to the same OCR and VLM processing as product listing images. The same legibility rules apply: high contrast, sufficient size, clean fonts, horizontal orientation, solid color panels behind text. The difference is that A+ Content images tend to be displayed at smaller effective sizes in the rendered page view, which means the resolution and text size requirements are even more critical relative to the finished image dimensions.

    A useful heuristic: design A+ Content image modules as if they will be viewed on a mobile screen at 50% zoom. If the text is still legible at that scale, the OCR system will have no trouble with it. If it requires squinting, it needs to be larger.

    Brand Story Modules and Contextual Matching

    The brand story section of A+ Content is often treated as a brand values page — a place to talk about origin story, mission, and craftsmanship. From an AI perspective, it is also a contextual signal that helps the VLM layer understand the broader product ecosystem and shopper intent your brand serves.

    Brand story copy that includes specific, concrete category language — material types, use contexts, performance characteristics — gives the AI additional context for placing your products in relevant discovery paths. Generic mission statements (“we believe in quality you can trust”) contribute nothing to AI indexing. Specific contextual language (“designed for high-altitude hiking, our insulation technology is tested at temperatures down to -20°F”) gives the AI precise signals to work with.

    What to Write in Your Image Text — Content Strategy, Not Just Design Strategy

    Legibility is a necessary but not sufficient condition for effective image text. The text also has to say the right thing. An OCR system that successfully extracts “OUR AMAZING QUALITY DIFFERENCE” has added very little to the AI’s model of your product. The same system successfully extracting “TESTED TO ASTM F1292 — 6-FOOT FALL PROTECTION” has added a precise, searchable, query-matching signal that could directly determine whether your product surfaces for a highly relevant shopper.

    The Query-Answer Framing

    The most useful framework for writing image text content is to ask: what question does this text answer, and is that the question shoppers in my category are actually asking?

    Amazon’s AI shopping assistant surfaces products in response to natural language queries. Those queries have specific information needs. A shopper asking “best air purifier for pet allergies” needs to know: does this purifier capture pet dander and pet-specific allergens? A shopper asking “protein powder for women over 50” needs to know: is this appropriate for that demographic, and what specific formulation decisions reflect that?

    Your image text should be answering these questions directly and explicitly. Not implicitly through lifestyle imagery and brand aesthetic, but explicitly through text that a query-matching AI can extract and use.

    Precision Over Poetry

    Brand copywriting instincts often push toward evocative, aspirational language. “Elevate your morning routine” is evocative. “KEEP HOT 12 HOURS / KEEP COLD 24 HOURS” is extractable. The AI assistant processes both, but only one of them becomes a usable data point when a shopper asks “which travel mug keeps coffee hot longest?”

    This does not mean your images should read like a spec sheet. It means that the primary claim on each slide should be stated in precise, descriptive language before any evocative framing is added. “ULTRA-SOFT BAMBOO JERSEY — TEMPERATURE REGULATING” serves both the human shopper and the AI. “THE SLEEP YOU DESERVE” serves neither particularly well.

    Numerical Specificity as an AI Signal

    Numbers are exceptionally well-handled by OCR systems and are high-value signals for AI query matching. A product that states “400-THREAD COUNT” in a legible slide has given the AI a precise matchable attribute for “high thread count sheets” queries. A product that shows “SPF 50+ / PA++++” in its sunscreen infographic has given the AI classification signals for multiple protection-level queries.

    Wherever your product has a quantifiable performance claim — capacity, duration, weight, dimensions, concentration, protection level, temperature range — that number should appear in your image text, legibly, in a format the OCR system can extract without ambiguity. Numbers with units beat pure superlatives every time in AI-mediated discovery.

    Consistency with Structured Listing Data

    One final content principle: the text in your images should be consistent with and complementary to the text in your structured listing data. The AI system fuses image text and structured text — if they contradict each other, the system may discount both. If your title says “BPA-Free” but your infographic slide says “Made with Food-Grade Stainless Steel Only — Zero Plastic Components,” the more specific image claim reinforces and extends the title claim rather than conflicting with it.

    Conflicts arise when infographic slides make claims that are absent from structured data entirely — a product marketed as “Keto Certified” in images but with no dietary certification data in the structured attributes, for example. These inconsistencies create uncertainty in the AI’s model of the product and can reduce the confidence with which it surfaces your listing for relevant queries.

    Testing and Validating Your Image Legibility

    Knowing the rules for legible images is one thing. Verifying that your actual images pass is another. There are several practical methods for testing before you go live — and for monitoring after you do.

    Pre-Upload OCR Testing

    Amazon Rekognition is available as a standalone API, and you can test your images against it directly before uploading them to Seller Central. Upload your infographic slides to the Rekognition DetectText endpoint and examine the extracted text blocks. Any text that does not appear in the extraction output will not be available to downstream systems including Alexa for Shopping.

    This is the most direct method for identifying OCR failures pre-upload, and it gives you actionable feedback: you can see exactly which text blocks failed to extract, adjust size and contrast accordingly, and re-test until extraction is complete.

    Third-party tools that wrap this functionality in seller-friendly interfaces are also available, and several major Amazon optimization platforms have added image OCR testing modules to their toolsets in 2026 in response to growing seller awareness of the issue.

    Contrast Ratio Checkers

    Before finalizing any infographic slide, run each text element through a contrast ratio checker. Free web tools allow you to input the exact hex values of your text color and background color and return the precise contrast ratio. Check every text element, not just the headline. A slide where the headline passes at 7:1 but the supporting bullet points sit at 2.8:1 is still a partial OCR failure.

    Manage Your Experiments — The Conversion Validation Layer

    Amazon’s Manage Your Experiments tool allows brand-registered sellers to run A/B tests on product images. This is the right mechanism for validating that legibility-optimized images not only improve AI indexing but also maintain or improve human conversion rates.

    The typical pattern for running image legibility tests: create a variant image set that applies the technical legibility standards above, run a 4–6 week test against your current images, and measure the impact on conversion rate, click-through rate from search, and (if available) organic rank position changes over the test period.

    Sellers running these tests in 2026 consistently report that well-executed infographic improvements lift conversion rates in the 10–30% range relative to plain product photography — consistent with the broader data on secondary image impact. The key “well-executed” qualifier includes legibility as a prerequisite: cluttered, low-contrast infographics do not consistently outperform simpler approaches, and in some cases underperform them by creating visual complexity that discourages shoppers.

    Monitoring After Upload

    After uploading optimized images, monitor your organic visibility metrics over the following 4–8 weeks. Amazon’s catalog indexing and AI model updates operate on a crawl cycle that is not instantaneous — changes you make today may not be fully reflected in AI-mediated discovery for several weeks. This lag means that image legibility improvements produce a delayed visibility effect, which sellers sometimes misinterpret as evidence that the changes did not work.

    Track your brand keyword ranking, non-brand keyword ranking, and (if you have access) the category search terms for which you appear in AI-generated responses. Improvements in non-brand keyword visibility are often the clearest signal that image OCR optimization is working, because non-brand queries rely more heavily on feature-matching signals — the kind of signals your infographic text provides when it is successfully extracted.

    The Silent Compounding Effect — What Legible Images Do to Organic Rank Over Time

    Line graph showing the compounding effect of image legibility on Amazon organic rank over 90 days — optimized OCR-compliant image stack trends steeply upward in green versus unoptimized images staying flat in red, with milestone markers at Week 1 image update deployment, Week 3 crawl cycle, and Week 6 rank velocity improvement

    Individual image optimization produces one-time improvements. A consistent commitment to image legibility across your entire catalog produces something different: a compounding structural advantage that accumulates over time and becomes increasingly difficult for competitors to close.

    Here is why it compounds. Every time Amazon’s system re-crawls and re-indexes your listing, it updates its model of your product based on all available inputs — including image text. A catalog where every secondary image and every A+ content module consistently provides high-quality, legible, semantically meaningful text gives the system more to work with on every crawl cycle. The AI’s confidence in its classification of your product increases with each successful extraction cycle.

    The Relevance Score Feedback Loop

    Amazon’s AI systems operate on relevance scores — continuous assessments of how well a product matches a category of queries. High-confidence, consistent signals (including legible image text that consistently confirms the same product attributes) raise the relevance score for specific query types. Higher relevance scores produce better positioning in AI-mediated discovery responses. Better positioning produces more clicks. More clicks produce better conversion data. Better conversion data raises the relevance score further.

    This is a virtuous cycle that begins with the data quality of your image text. Breaking into that cycle requires nothing more exotic than making sure the text in your images is actually readable by the system that determines whether shoppers find you.

    The Competitive Context

    In most Amazon categories, the majority of sellers have not systematically addressed image OCR compliance. This is not an indictment — the problem was not widely understood until the scale of AI-mediated discovery became apparent in 2025 and 2026. But it means that sellers who move now to implement a legibility-first image strategy are doing so in a competitive environment where most rivals are still losing 40% of their image signals.

    The window for a first-mover advantage here is meaningful but not permanent. As awareness of the issue spreads, more sellers will optimize. The sellers who build the compounding relevance score advantage now will be harder to displace later — but the advantage is only durable if the underlying catalog quality is maintained and updated as Amazon’s requirements and AI capabilities evolve.

    New Products vs. Existing Catalog

    For new product launches, building legibility into the image strategy from the start is significantly less costly than retrofitting an existing catalog. New listings start with no crawl history — the AI system builds its initial model of the product from the first crawl. A new product with a fully legible, well-structured image stack gives the AI a high-quality initial model, which tends to produce better early ranking than listings that require iterative improvement to reach legibility compliance.

    For existing catalog items, the retrofit approach — auditing current images, identifying OCR failures, and uploading corrected versions — produces improvements but requires patience for the crawl cycle to reflect the changes. Prioritize high-volume ASINs and categories where AI-mediated discovery is demonstrably active (categories with high rates of conversational queries) for the first wave of optimization.

    Building the Alexa-Ready Image Audit Process

    Turning the principles above into an operational process requires a structured audit methodology. The following framework is designed to be repeatable across a catalog of any size, from a single-ASIN brand to a multi-thousand ASIN catalog operation.

    Step 1: Image Inventory and OCR Baseline

    Pull all current product images from your Seller Central catalog. Run each secondary image through an OCR extraction test (Amazon Rekognition API or a third-party wrapper). For each slide, record: which text blocks were successfully extracted, which failed entirely, and which were partially extracted with errors. This establishes your baseline OCR compliance rate by ASIN and by slide position.

    Step 2: Prioritization by Impact

    Not all ASINs are equal. Prioritize the audit and redesign effort by: organic sales volume (high-volume ASINs benefit most from ranking improvements), competitive intensity (categories with AI-active shopper queries benefit most from legibility optimization), and OCR failure rate (ASINs with the highest failure rates have the most room for improvement).

    Step 3: Brief Creation for Design Teams

    Before sending images to a designer or design agency, create a structured brief for each ASIN that specifies: the primary claim for each slide (one per slide), the exact text to be used (pre-written, query-aligned content, not left to designer judgment), the technical requirements (minimum font size, minimum contrast ratio, approved font families, no text over busy backgrounds), and the image resolution requirement (minimum 2,000px on longest side).

    This brief-driven approach ensures that the design output is optimized for AI legibility from the start, rather than requiring a second round of corrections after design has been completed to human-centered aesthetics standards alone.

    Step 4: Post-Delivery Verification

    Before uploading any new image, verify: OCR extraction test passes for all substantive text elements, contrast ratio check passes at 4.5:1 minimum for all text (7:1 preferred), minimum font sizes met at delivered resolution, no substantive text appears over busy or variable backgrounds. Only images passing all four checks should be uploaded.

    Step 5: Monitoring and Iteration

    After upload, set a 6–8 week monitoring window. Track organic rank position for 3–5 target keywords per ASIN, click-through rate from search, and conversion rate. At the end of the monitoring window, assess whether improvements match expectations and identify any ASINs where the changes did not produce expected results for further investigation.

    Conclusion: The Legibility Gap Is a Data Quality Problem — Treat It Like One

    The framing of this problem as a “design issue” has caused a lot of sellers to underestimate its strategic importance. Adjusting font sizes and contrast ratios sounds like a minor creative concern. In the context of AI-mediated product discovery, it is a data quality problem — and data quality problems at scale have outsized consequences.

    When approximately 40% of the text in your image stack fails to extract, you are operating with a self-inflicted data gap in how Amazon’s AI models your product. The system is doing its best to match your listing to relevant shopper queries — but it is doing so with less information than you intended to provide. The features you highlighted, the benefits you invested in demonstrating, the differentiators that justify your price point: they are present in your images, but absent from the AI’s representation of your product.

    The fix is not complicated. It requires precision, discipline, and a willingness to prioritize AI legibility alongside human aesthetics in design decisions. The technical thresholds are concrete: 4.5:1 minimum contrast ratio, 24px minimum text height at upload resolution, clean sans-serif fonts, horizontal orientation, solid backgrounds behind text, one primary claim per slide expressed in specific and precise language.

    Implementing those standards consistently across your secondary image stack and A+ content does not require a major creative overhaul. It requires treating every image slot as a data entry point as well as a visual communication tool — and verifying, before upload, that the data you intended to enter is actually what the system receives.

    Alexa for Shopping is reading your images. The only question is whether it can actually read them.

    Quick-Reference Checklist

    • ☐ Main image: no text, pure white background, product only
    • ☐ Secondary images: each slide has one primary claim, stated in precise language
    • ☐ Minimum font size: 24px at uploaded image resolution (36px+ recommended)
    • ☐ Minimum contrast ratio: 4.5:1 (7:1+ recommended for body copy)
    • ☐ Font choice: clean sans-serif for all substantive content (no script, no ultra-thin weights)
    • ☐ Text orientation: horizontal only for all extractable content
    • ☐ Background: solid color panels behind text, not lifestyle photos
    • ☐ Image resolution: minimum 2,000px on longest side
    • ☐ OCR pre-test: run Rekognition DetectText before uploading
    • ☐ Contrast pre-test: verify all text elements against a contrast ratio checker
    • ☐ A+ content: apply same legibility standards to all image modules
    • ☐ A+ comparison table: populate with query-aligned attributes, not just upsell positioning
    • ☐ Content consistency: image text claims consistent with structured listing data
    • ☐ Monitor post-upload: track organic rank and CTR over 6–8 week crawl window
  • SBV Budget Rebalancing: When Video Should Eat Search

    SBV Budget Rebalancing: When Video Should Eat Search

    SBV Budget Rebalancing: When Video Should Eat Search — split screen showing fading search ads and a bright product video playing on an Amazon search page

    Most Amazon PPC accounts are built on the same unspoken assumption: Sponsored Products is the engine, and everything else exists to support it. Sponsored Brands Video gets a sliver of budget — enough to say it’s being tested, not enough to actually pressure-test whether it should own a larger share. That assumption made complete sense in 2021. In 2026, it is quietly costing brands significant money every month they leave it unchallenged.

    The economics of Amazon search have shifted. Sponsored Products CPCs have climbed roughly 48% cumulatively since 2019, with competitive categories absorbing 10–15% annual increases that in some verticals reach 25–35% year-over-year. More budget into SP no longer reliably buys more proportional reach or sales. Instead, it increasingly buys position maintenance — defending placements brands already hold against competitors willing to outspend them by a few cents more per click.

    Sponsored Brands Video, meanwhile, has moved from experimental format to dominant Sponsored Brands strategy. Advanced accounts now route 80–95% of their SB spend into SBV, and aggregate data from Q1–Q2 2026 shows SBV delivering approximately 1.6× the click-through rate and 1.3× the conversion rate of static Sponsored Brands. New-to-brand customer acquisition data — which SP campaigns simply cannot surface — reveals an entirely different story about where incremental growth is actually coming from.

    The question in 2026 is not whether video should take more of your search budget. The question is when — and what signals, metrics, and structures should govern that decision. This post works through all of it.

    The CPC Squeeze: What’s Actually Happening to Sponsored Products Economics

    Before you can make a rational case for moving budget out of Sponsored Products, you need to understand exactly what those rising CPCs are buying — and, more importantly, what they are no longer buying at the margin.

    The cost trajectory since 2019

    Amazon’s auction model for Sponsored Products has compressed advertiser efficiency consistently over the past several years. CPCs that averaged under $0.90 in many categories in 2019 now commonly land between $1.05 and $1.65 across mid-competition verticals, with high-competition categories — consumer electronics, supplements, home goods — pushing well beyond $2.00 for top placements on core keywords.

    The cumulative 48% CPC increase across the SP ecosystem since 2019 is not evenly distributed. Branded and category-defining keywords have absorbed the steepest increases, because these are the terms where auction pressure concentrates. Every established brand in a category is bidding on the same short-tail terms. The winner pays more than they did last year for the same position, and the loser goes back to the drawing board to figure out whether to overspend on defensive bidding or accept the erosion.

    What diminishing marginal returns looks like in practice

    Diminishing returns in SP aren’t always visible in the headline ROAS number — which is precisely why they’re dangerous. A Sponsored Products campaign can show a stable 4× ROAS while every additional dollar of budget added to it earns a 2× marginal return. The average looks fine. The marginal reality is quietly terrible.

    The clearest symptom is budget utilization behavior: campaigns that used to run out of budget by 11am now pace through the full day without exhausting their allocation, yet conversion volume hasn’t increased proportionally. This pattern signals that the algorithm is spending more carefully because incremental impression opportunities at acceptable CPCs are genuinely scarce. More budget cannot create more qualified search intent. It can only compete more aggressively for the intent that already exists — which, in a saturated category, means paying more to reach audiences that have already been heavily targeted.

    Position defense is not growth

    There is an important distinction between SP spend that acquires customers and SP spend that defends position. When a brand has established organic rank on its core keywords and runs SP to maintain those placements against competitor conquesting, a significant portion of that budget is effectively insurance rather than acquisition. That’s not inherently wrong — competitive defense has real value. But treating defensive SP spend and growth-oriented SP spend as a single undifferentiated pool is what causes accounts to chronically underinvest in formats that can actually expand the customer base.

    Recognizing the split between defensive and acquisitive SP spend is the first analytical step toward a rational SBV rebalancing conversation.

    Side-by-side comparison of Amazon Sponsored Products vs Sponsored Brands Video — CTR, CVR, new-to-brand reporting, and what each format actually buys

    SBV vs. SP: Understanding What Each Format Is Actually Buying You

    The mistake most advertisers make when comparing Sponsored Brands Video to Sponsored Products is treating them as substitutable formats competing for the same objective. They are not. They operate at different points in the shopping funnel, they deliver different types of value, and they should be evaluated on different metrics. Conflating them in a single ROAS comparison produces misleading conclusions in both directions.

    What Sponsored Products is purpose-built for

    Sponsored Products is, fundamentally, an intent-capture engine. When a shopper types “noise cancelling headphones under $100” into Amazon’s search bar, SP intercepts that expressed, bottom-of-funnel intent and places your product in front of someone who has already decided what category they’re buying from and roughly what they’re willing to spend. The conversion efficiency is high because the qualification work has already been done by the shopper’s own search behavior.

    This is why SP consistently posts higher direct ROAS than SBV in last-click attribution models. It’s not that SP is better at advertising — it’s that SP is fishing in a pond stocked with fish that are already hungry. The format deserves credit for execution, but the underlying demand isn’t being created by the ad. It existed before the ad appeared.

    The ceiling of SP efficiency is therefore largely determined by the volume of existing search intent in your category. Once you’ve captured the efficient portion of that intent, additional SP spend competes for diminishing returns: lower-intent queries, less-qualified audiences, and expensive defensive placements.

    What Sponsored Brands Video is actually doing

    SBV operates differently. It appears in the search results environment — same page, same intent context — but it functions more like an awareness and consideration tool than a pure intent-capture mechanism. The video format interrupts the browsing session in a way that a static text-and-image ad cannot. It communicates product context, brand story, and key differentiators within the first three seconds of autoplay, before the shopper has consciously decided to engage.

    That interruption capability is what produces SBV’s 1.6× CTR advantage over static Sponsored Brands. Shoppers who weren’t specifically looking for your brand get pulled into an evaluation they might otherwise have skipped. And because video conveys more information faster than a static thumbnail, the shoppers who do click arrive at the product detail page better informed — which supports the 1.3× CVR lift relative to static formats.

    Critically, SBV’s impact doesn’t stop at the direct conversion. Amazon’s new-to-brand reporting — available for Sponsored Brands formats but not Sponsored Products — reveals that SBV consistently drives a higher proportion of NTB customers than SP. These are shoppers who had never purchased from your brand in the prior 12 months. They represent genuine incremental growth, not recapture of existing demand.

    The attribution gap that makes SP look better than it is

    Standard Amazon attribution assigns conversion credit to the last-clicked ad before purchase. In a typical multi-touch journey, a shopper might see a Sponsored Brands Video ad that introduces your brand, spend four days considering the purchase, and eventually convert through a Sponsored Products click on a branded keyword. The SP campaign gets the credit. The SBV campaign that initiated the journey shows zero.

    This attribution structure systematically undervalues SBV’s contribution to overall account performance and overvalues SP’s apparent efficiency. Accounts that optimize exclusively on last-click ROAS will perpetually underinvest in the formats that drive top-of-funnel awareness — and then struggle to understand why their SP conversion rates gradually decline as branded search volume stagnates.

    The NTB Advantage: Why Standard ROAS Comparisons Lie

    New-to-brand metrics are one of the most underused data sets in Amazon advertising. They’re available for Sponsored Brands (including SBV) and Sponsored Display but absent from Sponsored Products entirely, which creates a structural information asymmetry that most advertisers never fully reckon with.

    What NTB metrics actually tell you

    Amazon defines a new-to-brand customer as someone who has not purchased from your brand in the previous 12 months. NTB metrics in the SBV reporting dashboard show you the number of NTB orders, NTB order revenue, NTB order rate, and the average NTB order value generated by your SBV campaigns.

    These numbers are important for one specific reason: they represent the only reliable proxy for incremental demand creation in your Amazon advertising account. Existing customers who repurchase would have done so with or without your ad. New-to-brand customers, by contrast, represent expansion of your addressable customer base — growth that almost certainly would not have occurred without the advertising exposure.

    A Sponsored Brands Video campaign showing a 2.5× direct ROAS with a 45% NTB order rate is delivering substantially more business value than its ROAS number suggests. A Sponsored Products campaign showing a 4.5× ROAS with a 12% NTB rate is largely servicing existing demand, not growing it. If you evaluate these two campaigns purely on ROAS, you’ll defund the one actually building your brand.

    Long-Term Sales ROAS and incremental ROAS frameworks

    Amazon has introduced Long-Term Sales ROAS (LTS ROAS) as an additional measurement layer, designed to estimate the incremental sales value of new-to-brand customers over a 12-month horizon after acquisition. The logic is straightforward: a customer acquired through SBV today may make five additional purchases over the next year. Attributing only the first purchase to the acquisition campaign dramatically understates its true economic contribution.

    Advanced advertisers are increasingly building incremental ROAS (iROAS) frameworks that incorporate NTB acquisition rates, estimated customer lifetime value, and downstream organic purchase behavior. When you run this math, SBV’s apparent ROAS disadvantage relative to SP frequently disappears — and in high-repeat categories like consumables, supplements, or pet products, SBV often shows superior iROAS precisely because it acquires customers who hadn’t yet been reached by SP.

    Practical NTB benchmarking

    If you’re running SBV campaigns and haven’t established NTB benchmarks, start there before making any rebalancing decisions. Pull 90-day NTB order rate, NTB order revenue, and NTB customer acquisition cost (NTB ad spend ÷ NTB orders) from your SBV campaigns. Compare NTB CAC to your estimated first-order margin to establish whether SBV is acquiring customers profitably. Then factor repeat purchase rate into a 12-month LTV calculation to determine the true value of each NTB customer generated by SBV.

    This analysis — not a surface-level ROAS comparison — is the analytical foundation for a defensible rebalancing decision.

    Four-quadrant signal dashboard showing the four triggers for rebalancing Amazon advertising budget from Sponsored Products to Sponsored Brands Video

    Four Signals That Mean Video Should Take Search Budget

    The rebalancing decision is not a one-time judgment call. It’s a diagnostic exercise that should be repeated at least quarterly, because the conditions that justify or contra-indicate a budget shift change as your account matures, your category evolves, and the auction dynamics shift. These four signals are the most reliable indicators that SBV deserves a larger share of your total PPC budget.

    Signal 1: SP CPC rising faster than category average

    When your Sponsored Products CPC is climbing 15% or more year-over-year on your core non-branded keywords, you’re experiencing auction pressure that additional budget cannot solve. You can’t bid your way out of a structurally expensive auction. At some threshold — different for every category and margin structure — incremental SP spend crosses from profitable to value-destroying, even if the headline ROAS looks acceptable.

    The diagnostic is simple: calculate your marginal ROAS on SP for the most recent 30 days versus the previous 30-day period, controlling for seasonality. If marginal ROAS is declining while CPC is rising, you’re past the efficient frontier on SP. That’s budget that should be finding a more productive home, and SBV is the logical first candidate.

    Signal 2: ROAS plateau despite sustained budget increases

    If your SP budget has increased by 20% or more over the past 90 days and total account ROAS has stayed flat or declined, the auction has absorbed your incremental spend without delivering proportional output. This is the most visible symptom of SP saturation in a mature account — the algorithm has found the profitable keywords and is now spending more to maintain those positions rather than finding new, efficient opportunities.

    The distinction here matters: ROAS plateauing because of seasonal softness is different from ROAS plateauing because of structural auction saturation. The test is whether your impression share on core keywords is already high (above 70%) even before budget increases. If you’re already capturing the majority of available impressions at your target keywords, adding budget will mostly raise CPCs rather than meaningfully expand volume.

    Signal 3: Branded search volume is stagnant

    Organic branded search — shoppers typing your brand name directly into Amazon — is one of the cleanest leading indicators of brand health and future conversion efficiency. When branded search volume grows, your SP branded campaigns become cheaper and more efficient, and organic conversion rates typically improve alongside. When branded search volume stagnates, it signals that your brand is failing to capture new customers at the top of the funnel who would eventually become high-value branded searchers.

    SBV’s primary mechanism for building branded search volume is exposure at the discovery stage: shoppers who see your SBV ad, don’t click immediately, but remember the brand name well enough to search for it specifically in a later session. This halo effect is real and measurable — brands that add SBV to an SP-only strategy consistently report 10–18% branded search volume increases over 90-day periods, which compounds into long-term organic rank improvements and reduced branded CPC.

    Signal 4: Category keyword saturation with available SBV placements

    Not all categories reach SBV saturation at the same pace. If your category analysis shows that fewer than 30–40% of search results pages in your core keywords display SBV ads — or that the same two or three competitor brands own the SBV slots consistently — there is an immediate placement arbitrage available. SBV CPCs in undersaturated categories frequently run materially lower than SP CPCs for comparable keyword targets, while delivering superior CTR and reaching audiences at a different decision-making stage.

    This asymmetry won’t last. As more advertisers recognize SBV’s efficiency advantage, auction pressure on video placements will increase. The window for low-CPC SBV entry into competitive categories is narrowing — which means accounts that act on this analysis in 2026 will establish creative assets, quality scores, and historical performance data that provide durable advantages before costs normalize.

    The Rebalancing Math: How to Calculate the Right Budget Split

    The portfolio math for SBV allocation in 2026 has crystallized around some fairly consistent benchmarks from advanced accounts. But those benchmarks are outputs of a calculation, not inputs to it. Understanding the calculation is more durable than memorizing the numbers.

    The standard advanced account structure

    Data from well-optimized Amazon PPC accounts in 2026 clusters around a consistent portfolio structure: 60–70% of total ad spend in Sponsored Products, 20–25% in Sponsored Brands, and 10–15% in Sponsored Display. Within the Sponsored Brands allocation, 80–95% flows to Sponsored Brands Video rather than static Sponsored Brands headline ads.

    Working through that math: if SB receives 20–25% of total spend and 90% of that goes to SBV, then SBV is absorbing roughly 18–22% of total PPC budget in advanced accounts. For a brand spending $50,000 per month in Amazon advertising, that’s $9,000–$11,000 per month in SBV — a number that would have seemed aggressive for most advertisers three years ago and is now increasingly treated as the baseline for accounts that take video seriously.

    How to calculate your specific rebalancing threshold

    Rather than adopting aggregate benchmarks wholesale, calculate your account-specific rebalancing ceiling using this structure. First, identify the portion of your current SP spend that is defensive rather than acquisitive — budget spent maintaining top-of-search positions on branded keywords and saturated category keywords where incremental ROAS has demonstrably declined. This is your rebalancing pool: spend that is currently delivering below-marginal returns in SP and could potentially generate higher incremental value in SBV.

    Second, establish your SBV capacity constraint. SBV budget can only be effectively deployed if you have sufficient creative assets and keyword targeting infrastructure to utilize it without quality degradation. Running more budget through a single SBV campaign with one creative asset leads to frequency fatigue and creative decay. The practical rule is that each distinct SBV creative should support no more than $3,000–$5,000 in monthly spend before performance begins to diminish from repetition.

    Third, calculate the incremental NTB acquisition opportunity. Using your current SBV NTB rate and NTB CAC, estimate how many additional new-to-brand customers the rebalanced budget would generate per month. Multiply by your 12-month LTV estimate. If that LTV figure exceeds the marginal ROAS you’re generating from the SP spend you’d be reallocating, the math supports the shift.

    The 5–10% incremental rule

    Whatever the calculation suggests, the execution should be gradual. The consensus among advanced Amazon PPC managers in 2026 is that budget shifts exceeding 10% of total account spend in a single adjustment period create performance instability. Amazon’s campaign algorithms require observation data to optimize new bid levels and placement priorities effectively. Large sudden budget changes can trigger algorithmic recalibration periods — sometimes manifesting as temporary performance dips — that make it impossible to evaluate whether the shift was genuinely beneficial or simply disruptive.

    Move 5–10% of SP budget into SBV over each 30-day period. Observe for 30 days before making the next adjustment. This pacing gives algorithms time to stabilize, gives you clean data to evaluate at each stage, and limits downside exposure if the initial rebalancing reveals unexpected issues with creative quality or keyword targeting in the SBV campaigns.

    Budget allocation pie chart for advanced Amazon PPC accounts in 2026 showing recommended split between Sponsored Products, Sponsored Brands Video, and Sponsored Display

    Creative That Earns the Budget: What SBV Needs to Perform

    Budget rebalancing without creative infrastructure is a money-wasting exercise. SBV is an unforgiving format in one specific respect: the creative asset is the campaign. You can build technically sound targeting, competitive bid levels, and a sensible keyword strategy, and still generate mediocre SBV results if the video asset fails to earn attention in the first three seconds. This is categorically different from SP, where a strong main image and price point do the majority of the conversion work.

    The first three seconds are non-negotiable

    SBV ads autoplay when approximately 50% of the unit is visible on screen, without sound, on mobile and desktop. The shopper did not choose to engage with your ad. The ad appeared in their scroll path, and they have approximately two to three seconds before their thumb continues to the next result. In that window, the video must accomplish one thing: show the product doing something interesting enough that stopping and watching more seems worthwhile.

    This sounds obvious. It is routinely violated. Common first-three-second failures include: opening with a logo or brand name before the product appears; slow-building lifestyle montages that haven’t shown the physical product by second four; text-heavy title cards that require reading rather than watching; and transitions that obscure the product during the critical hook window.

    Amazon’s own research supports the product-first principle: videos that show the core product within the first two to three seconds consistently outperform those that build to the product reveal. The mechanism is practical — a shopper searching for “stainless steel cookware” who immediately sees a gleaming pan being used on a stovetop has received immediate confirmation that this ad is relevant to their intent. A shopper who sees a nature landscape opening sequence has not.

    Design for mute: captions are not optional

    Because SBV autoplays without sound, every video that relies on spoken information to communicate its core message is operating at a structural disadvantage. The shopper who watches a 15-second SBV ad on mute and has no idea what the product does or what makes it different from competitors is not going to tap to enable audio — they’re going to scroll to the next result.

    Bold, high-contrast text overlays that mirror or supplement the visual content are the standard approach for mute-first design. Key benefit statements, differentiators, size/quantity callouts, and pricing signals should all appear as on-screen text at the relevant moment in the video. Captions for spoken content are a secondary measure — effective, but not a substitute for text overlays designed specifically for a sound-off experience.

    Runtime, refresh cadence, and creative volume

    Current SBV best practice benchmarks in 2026 center on videos in the 15–30 second range, with 15–20 seconds outperforming longer formats in most categories where the product benefit can be communicated concisely. Categories with complex products — technical equipment, multi-component systems, software-adjacent products — support slightly longer formats, but even these rarely benefit from videos exceeding 45 seconds in the search results environment.

    Creative decay is one of the most underappreciated performance risks in SBV campaigns. A video that drives strong CTR in month one will typically show meaningfully declining performance by month two or three as the same audiences see it repeatedly. Advanced SBV accounts maintain a minimum of two to three active creative variants per campaign and rotate in new assets at least every 30 days. Some highly scaled accounts run monthly creative production cycles specifically to prevent fatigue-driven performance erosion.

    Amazon’s introduction of its own Video Generator tool for Sponsored Brands campaigns in 2026 has lowered the production barrier for smaller advertisers, enabling basic video creation from existing product images and text. While this tool won’t replace purpose-built video production for established brands, it removes the “we don’t have video assets” constraint for brands that have been deferring SBV entry for creative-cost reasons.

    Multi-ASIN vs. single product SBV strategy

    SBV campaigns can showcase a single product or a curated selection of up to three products in a store spotlight format. The strategic choice between these approaches has meaningful implications for budget efficiency. Single-product SBV is typically more conversion-focused: the ad communicates one clear value proposition, and the click lands on a specific ASIN detail page. Multi-product SBV is more acquisition-focused: it shows category breadth, drives traffic to a custom landing page or brand store, and is more likely to drive NTB exploration across the catalog.

    The general guidance from 2026 account data is to run single-product SBV for your highest-priority ASINs where conversion rate optimization is the objective, and multi-product SBV when the goal is brand building and catalog discovery among new-to-brand audiences. Both have a place in a mature SBV portfolio — but mixing objectives within a single campaign makes it impossible to evaluate performance accurately.

    Attribution Reality: Measuring SBV’s True Contribution

    The measurement challenge for SBV is not technically complex — the tools exist. The challenge is organizational: most Amazon PPC reporting dashboards are built around last-click ROAS, which is the metric most brand managers and finance teams understand and can benchmark against. Introducing incremental ROAS, NTB metrics, and halo effect analysis requires either building new reporting infrastructure or doing a significant amount of educational work with stakeholders who have strong intuitions about what “good” ROAS looks like.

    Building an incrementality baseline

    The first step in accurate SBV measurement is establishing what your account looks like without SBV. If you’ve been running SBV campaigns for six months or more, you can do a retrospective analysis by pulling weekly performance data and identifying periods when SBV budgets were paused or significantly reduced — then examining what happened to SP conversion rates, branded search volume, and overall account ROAS during those periods. If SBV pauses correlate with degraded account-level performance even when SP budgets were held constant, that’s directional evidence of SBV’s incremental contribution.

    For accounts building a prospective incrementality baseline, the cleanest methodology is a geo-based holdout test: run SBV in specific states or regions while suppressing it in matched control regions, with SP budgets held constant across both groups. Comparing sales velocity, branded search growth, and NTB acquisition rates between test and control groups over 30–60 days gives you a reasonably clean incrementality estimate without touching your core SP performance.

    The branded search lift metric

    One of the most practical proxies for SBV’s halo contribution is branded search volume lift. Track your branded keyword impression volume in Sponsored Brands reports before and after SBV campaigns launch or scale. If branded search impressions increase materially — even if your branded SP bids haven’t changed — SBV is generating awareness that converts to intent in later sessions. This metric isn’t available in a single report; it requires pulling SB impression data over time and correlating it with SBV spend levels. But it’s tractable, and it tells a clean story that’s easy to communicate to stakeholders who aren’t fluent in incrementality methodology.

    What to actually report to decision-makers

    For internal reporting purposes, present SBV performance across three distinct metrics tiers: direct performance (CTR, CVR, direct ROAS), new-to-brand performance (NTB order rate, NTB revenue, NTB CAC), and brand health performance (branded search volume trend, branded keyword CPC trend). Showing all three simultaneously makes it impossible to evaluate SBV in purely direct-ROAS terms — which is the framework that leads to chronic SBV underinvestment — and creates a richer, more accurate picture of what the format is delivering to the business.

    How Rufus and Alexa for Shopping Change the Video Equation

    Amazon’s AI-powered shopping assistant — initially launched as Rufus and increasingly integrated across the shopping experience under the Alexa for Shopping umbrella — is adding a new dimension to the SBV value calculation. The precise mechanics of AI-assisted ad placement are still evolving and not fully documented by Amazon, but the directional trends are clear enough to inform 2026 budget strategy.

    Conversational discovery and Sponsored Prompts

    Rufus/Alexa for Shopping processes conversational queries — “What’s the best protein powder for building muscle?” — and generates product recommendations that blend organic results with Sponsored Brands and Sponsored Prompts placements. The AI’s intent-matching capability creates a new discovery surface that is qualitatively different from keyword-triggered search: the shopper is expressing category interest through a conversational format rather than entering a precise search query, which means the discovery mechanism rewards brand awareness and category association more than keyword optimization.

    SBV has a structural advantage in this environment. A brand that has generated meaningful awareness and association with a category through SBV campaigns — impressions, video completions, click-throughs — builds signals that inform the AI’s understanding of brand-category relevance. Brands that exist only as keyword-targeted SP listings have a thinner signal footprint for the AI to work with. As conversational discovery grows as a share of total Amazon shopping sessions, the brands with richer upper-funnel data will have compounding advantages in AI-assisted placement.

    Video surfaces in AI-driven shopping experiences

    Amazon has begun integrating video ad units into AI-assisted discovery surfaces alongside traditional search results. The trajectory suggests increasing video representation in these environments over time, consistent with broader platform trends toward richer media in shopping interfaces. Brands that have established SBV creative assets, performance history, and quality signals in 2026 will be better positioned to occupy these placements as they scale, compared to brands that delay video entry and attempt to build that infrastructure later in a more competitive environment.

    What this means for the rebalancing decision

    The Rufus/Alexa for Shopping trend reinforces the rebalancing case without transforming it. The core argument for shifting budget from SP to SBV — based on CPC economics, NTB acquisition, and incremental ROAS — is already compelling on its own terms. The AI shopping assistant dynamic adds a forward-looking dimension: the investment in SBV creative and performance history being made today is building assets that will compound in value as Amazon’s AI-driven discovery surfaces grow in importance. Brands that treat SBV as an experimental supplement to SP will find themselves starting from scratch in that future environment.

    Common Rebalancing Mistakes (And How to Avoid Them)

    Budget rebalancing decisions are easy to get wrong even when the strategic logic is sound. These are the most consistent failure modes observed in accounts that attempt SBV rebalancing without adequate preparation.

    Moving budget before creative is ready

    The most common and costly mistake is reallocating SP budget into SBV before the SBV creative infrastructure is genuinely ready to absorb it efficiently. Launching a $10,000/month SBV budget against a single 30-second video with mediocre production quality will produce poor results — not because SBV doesn’t work, but because the creative is the limiting factor. Poor SBV results often lead to the incorrect conclusion that “video doesn’t work for our category” and a reversion to SP-heavy allocation, when the actual lesson is that video requires creative investment proportional to the budget behind it.

    The rule of thumb: don’t move more than $3,000–$5,000 per month into SBV per creative asset until you’ve validated CTR and CVR performance on that asset at lower spend levels. Scale budget only behind creative that has demonstrated it can earn attention.

    Evaluating SBV on the same metrics as SP

    Applying SP’s ROAS target to SBV campaigns is analytically incorrect and will systematically prevent SBV from reaching budgets where it can generate its distinctive value. SBV typically shows 15–30% lower direct ROAS than SP in the same account — not because it’s less efficient, but because it’s doing different work. Holding SBV to the same ROAS threshold as SP ensures that every marginal dollar of SBV budget that exceeds that threshold gets cut before the campaign has the scale to generate NTB acquisition at volume.

    Set separate performance targets for SBV based on NTB-adjusted metrics, not direct ROAS. A reasonable starting threshold: SBV ROAS + (NTB order rate × estimated NTB LTV) should exceed SP marginal ROAS. If the combined metric clears the bar, the SBV budget is justified even if the direct ROAS looks weaker in isolation.

    Rebalancing during peak seasons

    Budget structure changes made during Q4, Prime Day, or other high-velocity periods introduce additional variables that make it impossible to evaluate whether performance changes are driven by the rebalancing or by the seasonal dynamics. Always conduct rebalancing tests during stable, predictable demand periods. Use Q1 and Q3 for the bulk of your structural budget experimentation. Apply the learnings from those experiments to your Q2 and Q4 budget configurations, rather than running live experiments during your most consequential trading periods.

    Ignoring keyword strategy in SBV campaigns

    SBV is a keyword-targeted format. The quality of keyword selection in SBV campaigns matters significantly for both performance and cost efficiency. A common mistake is targeting only the same core category keywords in SBV that are already heavily contested in SP — which drives up CPCs, reduces the efficiency advantage of SBV, and limits the format’s reach to audiences the account is already aggressively targeting through SP.

    SBV keyword strategy should include a meaningful proportion of broader, aspirational, or adjacent category keywords that SP campaigns don’t target efficiently. These wider matches reach shoppers earlier in the consideration journey — exactly where SBV’s awareness and video-engagement advantages are most relevant. The CTR from these broader terms will be lower than core keyword CTR, but the NTB acquisition rate will typically be higher, and the CPCs will be more competitive.

    90-day phased Amazon PPC budget rebalancing roadmap: Phase 1 audit and baseline, Phase 2 test 10-15% shift, Phase 3 scale or pause based on incrementality data

    The Phased Rebalancing Framework: A 90-Day Approach

    The following framework provides a structured approach to SBV budget rebalancing that manages risk, preserves account stability, and generates clean data at each stage to support subsequent decisions. It assumes an existing SP-primary account with either no current SBV presence or a small experimental SBV allocation.

    Phase 1 (Days 1–30): Establish baselines and prepare creative

    The first month is entirely analytical and preparatory. Run your existing SP and SBV campaigns without structural changes. Pull 30-day and 90-day performance data across: SP CPC by keyword group, SP marginal ROAS (estimated), SP impression share on core keywords, SBV CTR and CVR by creative asset, SBV NTB order rate and NTB CAC, and branded keyword search volume trends.

    Use this data to identify: (1) which SP campaigns or keyword groups are showing the clearest diminishing marginal returns — these are the rebalancing source pool; (2) which SBV creative assets have demonstrated the strongest CTR and NTB performance at current spend levels — these are the assets worth scaling; and (3) what creative gaps exist if the SBV budget were to double or triple.

    Simultaneously, prepare or commission any additional creative assets needed for Phase 2 scaling. The 30-day Phase 1 window is the production runway for the video assets that Phase 2 will need. Entering Phase 2 without ready creative puts you in the position of scaling budget against an asset before it’s been adequately tested.

    Phase 2 (Days 31–60): Execute the first rebalancing shift

    Move 10–15% of your identified SP rebalancing pool into SBV. If your analysis in Phase 1 suggested $8,000/month in SP spend that is delivering below-marginal returns, shift $800–$1,200 of that into SBV in Phase 2. This is deliberately conservative — the goal is not to maximize the rebalancing speed but to generate clean, observable data on how the shift affects both account-level performance and SBV-specific metrics.

    Configure SBV campaigns with the validated creative assets identified in Phase 1. Separate campaigns by targeting strategy: one campaign targeting your core category keywords, one targeting broader adjacent keywords, and — if you have the budget — one targeting competitor ASINs or branded terms where SBV’s video format can interrupt competitor consideration. Maintain all existing SP campaigns at their current levels minus the reallocated amount; do not simultaneously adjust SP bids, which would introduce additional variables.

    Track weekly: total account ROAS (not just SBV ROAS), SP conversion rate, SBV CTR and CVR, SBV NTB order rate, and branded keyword impression volume. Any significant deterioration in total account ROAS or SP conversion rate should trigger a diagnostic review before Phase 3.

    Phase 3 (Days 61–90): Scale, hold, or pull back based on data

    By Day 61, you have 30 days of clean Phase 2 performance data. The decision tree is straightforward:

    If total account ROAS held or improved: SBV has absorbed the rebalanced budget without degrading overall performance. The data supports further rebalancing. Execute a second 10–15% shift in Phase 3 and extend the framework to a 180-day cycle.

    If total account ROAS declined but SBV NTB metrics are strong: The direct ROAS decline may be offset by NTB acquisition value. Run the iROAS calculation including estimated LTV contribution from NTB customers. If the combined metric supports the shift, hold the current allocation and monitor for 30 more days before deciding whether to scale further or stabilize.

    If both direct ROAS and NTB metrics are weak: The creative or targeting in Phase 2 is the problem, not the rebalancing thesis. Pause the SBV scale, diagnose which elements of creative and targeting underperformed, produce revised assets, and re-run Phase 2 with the improvements before attempting Phase 3 again.

    The structured approach forces each rebalancing decision to be grounded in observed data rather than either blind commitment to the rebalancing thesis or premature retreat at the first sign of performance volatility. Most accounts that fail at SBV rebalancing fail because they either move too fast without adequate measurement infrastructure or abandon the strategy based on direct ROAS data alone without incorporating NTB and iROAS context.

    Conclusion: The Budget Assumption Worth Revisiting

    The SP-primary Amazon advertising account was the right structure for a previous version of the Amazon advertising ecosystem. In that environment — lower SP CPCs, limited SBV placement inventory, fragmented video creative tools — allocating 80–90% of PPC budget to Sponsored Products was a rational, efficient choice. That environment no longer exists in 2026.

    SP CPCs have climbed to levels where incremental spend in many categories generates genuinely poor marginal returns. SBV has matured into a format with documented CTR advantages, measurable NTB acquisition capacity, and a clear place in the full shopping funnel. The analytical tools — NTB metrics, LTS ROAS, incremental ROAS frameworks — to evaluate SBV on appropriate terms are available in Amazon’s own reporting console. The creative production barrier has dropped with Amazon’s Video Generator and widespread access to affordable video production services.

    The remaining barrier is organizational: the habit of evaluating all advertising spend on last-click direct ROAS, which makes SP look more efficient than it is at the margin and makes SBV look less efficient than it is when NTB and halo contributions are included. Changing that measurement framework is the precondition for making rational rebalancing decisions.

    The four signals — rising SP CPCs, ROAS plateaus, stagnant branded search volume, and underutilized SBV placement inventory — are a diagnostic toolkit, not a checklist requiring all four items to be present before action is warranted. Two or three of them appearing simultaneously is sufficient to begin the 90-day rebalancing framework and generate the data that will either confirm or complicate the thesis.

    Video is not eating search because it is a better channel in some abstract sense. It’s earning budget because the economics of search have shifted to a point where video’s incremental contribution — measured honestly and completely — is frequently more valuable than the marginal return on additional search spend. That’s not a creative trend. It’s a math problem with a specific answer that differs for every account and changes every quarter. The job is to run the math, act on what it shows, and keep running it.

    Key Takeaways

    • SP CPCs have risen ~48% cumulatively since 2019; marginal returns on additional SP spend are declining in most competitive categories.
    • SBV delivers approximately 1.6× higher CTR and 1.3× higher CVR than static Sponsored Brands, with new-to-brand reporting that SP cannot provide.
    • Standard last-click ROAS comparisons systematically undervalue SBV; NTB-adjusted and incremental ROAS frameworks are required for accurate evaluation.
    • Advanced accounts in 2026 allocate 80–95% of SB budget to SBV, representing roughly 16–25% of total PPC spend.
    • The four rebalancing signals: rising SP CPC, ROAS plateau, stagnant branded search volume, and available SBV placement inventory.
    • Move budget in 10–15% increments per 30-day period; evaluate with a combined direct ROAS + NTB + iROAS framework.
    • Creative quality is the binding constraint on SBV performance — do not scale budget ahead of creative readiness.
    • Rufus/Alexa for Shopping’s conversational discovery surfaces reward brands with richer upper-funnel data, reinforcing the long-term case for SBV investment.
  • Amazon Ads AI Bidding: The Test-First Framework That Actually Sequences Your Experiments

    Amazon Ads AI Bidding: The Test-First Framework That Actually Sequences Your Experiments

    Amazon Ads AI bidding test-first framework: chaotic random testing vs structured sequenced flowchart

    Here is the mistake most Amazon advertisers are making with AI bidding in 2026: they treat it as a feature to activate, not a system to build. They flip on dynamic bidding, wait a week, see mixed results, then chase the next lever — placement multipliers, a third-party tool, maybe the new Ads Agent — without ever knowing whether the first test actually worked.

    The result is a campaign account that looks increasingly automated but performs no better than it did six months ago. Sometimes worse.

    The core problem is not the tools. Amazon’s native AI bidding infrastructure has matured considerably. The problem is test sequencing. Each bidding layer you add to a campaign interacts with the ones already in place. If you run placement multipliers before you’ve established a stable bid mode, you cannot attribute the outcome to either variable. If you hand off to Ads Agent before you’ve established clean conversion signals, the agent learns from noise. The tests compound — but so do the errors.

    This article lays out a specific test order: what to run first, what each test actually measures, how long to wait before drawing conclusions, and what failure looks like at each stage. It draws on real campaign data, Amazon’s own documentation, and practitioner analysis from accounts managing thousands of Sponsored Products campaigns in 2026.

    This is not a beginner’s overview of dynamic bidding. It is a sequenced testing framework for advertisers who already understand the basics and want to know how to build on top of them systematically — without breaking what is already working.

    Why Test Order Matters More Than the Test Itself

    Most Amazon PPC education treats each bidding feature as an independent dial. Turn this one up for volume, turn that one down for efficiency. In practice, these features are interdependent layers in a single auction system, and the order in which you activate them determines what signals each layer receives.

    Consider a simple example. You run a Sponsored Products campaign on dynamic bidding — up and down. Amazon’s algorithm is now adjusting your bids in real time based on its estimate of the probability that any given impression will convert. You then add a 100% Top of Search placement multiplier. The result: on a high-intent search with strong conversion probability, Amazon bids up (say, 30% above your base), and then your multiplier pushes another 100% on top of that. Your effective CPC on top-of-search placements is now 2.6x your stated base bid — a number no efficiency model anticipated.

    You now have two variables interacting in a way you cannot disentangle from a single report. If ACoS spikes, was it the bidding mode or the multiplier? You do not know, and you cannot know, unless you tested them separately in sequence.

    The Compounding Signal Problem

    This sequencing challenge becomes even more critical when AI is involved. Amazon’s bidding algorithms — whether native dynamic bidding or the newer Ads Agent — learn from the conversion data your campaigns generate. That learning is path-dependent: the AI builds a model based on the historical pattern of impressions, clicks, and conversions your campaign has produced. If that history contains periods where two variables changed simultaneously, the model’s understanding of cause and effect is degraded.

    Introduce a third-party AI tool on top of an already-noisy foundation and the problem multiplies. The external tool is now learning from data that Amazon’s system already partially shaped — and both systems may be making competing bid adjustments on the same auction. Practitioner analysis from 2026 accounts consistently flags this as a primary cause of “AI drift,” where automated systems stabilize at a local optimum significantly below what disciplined manual management would have achieved.

    The Right Mental Model: Layers, Not Levers

    Think of Amazon Ads AI bidding as a layer cake. The base layer is your campaign structure and keyword match types. The second layer is your bid mode. The third is your placement modifiers. The fourth is your portfolio or budget controls. The fifth is any AI agent or third-party automation layer on top.

    Each layer should be stable and understood before you add the next one. Stability does not mean perfect — it means you have enough data to have a directional read on performance. This is the foundation of the framework that follows.

    Step One: The Pre-Test Audit — Diagnose Before You Automate

    Before changing any bidding setting, there is a diagnostic step that most advertisers skip entirely. It takes roughly 30 minutes per campaign, but it determines whether AI bidding has any chance of working in the first place.

    AI bidding systems learn from conversion signals. If those signals are weak, infrequent, or contaminated, the algorithm learns the wrong patterns and confidently executes on them. The diagnostic checks four things:

    1. Conversion Volume Sufficiency

    Amazon’s native AI bidding stabilizes with approximately 30 or more conversions over any 30-day window per campaign. Below that threshold, the algorithm does not have enough data to model conversion probability with any reliability. This is not a formal Amazon policy number — the company does not publish a universal minimum — but it reflects consistent practitioner experience and parallels the documented behavior of Amazon DSP Performance+, which officially requires a minimum conversion volume before the learning phase can conclude.

    Check your last 30 days of conversion data at the campaign level. If you are running below 30 orders, AI bidding will not reliably outperform a well-structured manual bid. Fix conversion volume first: tighten match types, eliminate non-converting keywords, and improve listing conversion rate before touching bidding mode.

    2. Attribution Cleanliness

    Amazon’s 14-day attribution window means conversions show up in reports days after the click. If you have recently changed prices, run a coupon, or had a Buy Box loss, the conversion data in your current window is contaminated — it reflects a product state that no longer exists. AI bidding trained on that data will optimize for a context that has passed. Always audit your last 30 days for any external changes before running a bidding test.

    3. Campaign Isolation

    Each campaign you test should contain products with similar economics and conversion rates. Mixing high-margin, fast-selling ASINs with slow-moving commodity SKUs in a single campaign forces the AI to average across wildly different conversion patterns. The result is an algorithm that is perpetually confused and perpetually underperforming. Segment before you test.

    4. Listing Quality Baseline

    Bidding AI cannot fix a listing that does not convert. If your main image, title, price, or review count is meaningfully below category benchmarks, raising bids — automatically or otherwise — generates expensive impressions that do not convert. Document your listing conversion rate (orders divided by sessions from the Brand Analytics or Business Reports page) before starting any bidding test. If it is below 10% in a category where competitors average 15–20%, the problem is the listing, not the bids.

    Step Two: Bidding Mode — Down Only vs Up and Down (The Data You Actually Need)

    Amazon dynamic bidding comparison: Down Only vs Up and Down — ACoS, CPC, and volume trade-offs with 2026 data

    Bid mode is the first real test in the sequence, and the data on it is clearer than most advertisers realize. A BidX analysis of approximately 130,000 campaigns in 2024 found that dynamic bidding — down only produced the lowest average ACoS across the study group, with a click-through rate only 0.02% lower than up and down campaigns. The CTR difference was negligible; the ACoS difference was not.

    In 2026, this picture has sharpened further. Multiple advertisers and agency reports have documented that the up-and-down engine has been retuned by Amazon, with CPCs running approximately 18–27% higher in many categories since late April 2026 compared to historical averages — while conversion rates remained largely flat. That combination is a direct efficiency hit to any campaign using up and down without a deliberate rationale for accepting higher costs.

    When Down Only Is the Right Default

    Down only should be your starting bid mode for the majority of Sponsored Products campaigns. It functions as a cost floor — Amazon can reduce your bid when conversion probability is low, but it cannot inflate your bid above your stated maximum. This gives the AI a real optimization lever (downward adjustment) while preventing the uncapped spend that damages ACoS in high-competition auctions.

    This mode is particularly effective for mature campaigns with established conversion history, campaigns with tight margin constraints, and any ASIN in a category where CPCs have risen significantly in 2026. The algorithm’s downward adjustments can reduce wasted spend on low-intent impressions without requiring you to manually review every keyword bid daily.

    When Up and Down Has a Specific Role

    Up and down is not a universally bad choice — it has a specific, narrow use case: product launches and aggressive share-capture scenarios where you have pre-committed to higher short-term CPC in exchange for velocity and ranking signal. If you are launching a new ASIN and need to build conversion history quickly, or if you are running a time-limited conquest campaign against a key competitor, giving Amazon the ability to bid above your base to win high-intent auctions can be worth the cost.

    The critical discipline is defining an exit condition before you start. Decide: after how many days, or at what ACoS threshold, does this campaign revert to down only? Without a predefined exit, up and down campaigns tend to accumulate cost and never get rationalized.

    How to Run This Test Cleanly

    To test bid mode in isolation, use Amazon’s Campaign Experiments tool (available within the Ads console under “Experiments”). This feature splits your campaign traffic between two configurations — a control and a treatment — and attributes outcomes to each. Run the experiment for a minimum of 28 days to capture enough conversion events for statistical reliability. The single variable to change is bid mode. Keep base bids, keyword lists, match types, and placement modifiers identical across both arms of the experiment.

    Step Three: Placement Multipliers — The Lever Nobody Tests Correctly

    Amazon Top of Search placement multiplier testing diagram showing adjustment ranges and ACoS decision logic

    Placement multipliers are tested in Step Three because they operate on top of your bid mode. If your bid mode is not yet stable and understood, adding placement modifiers creates compounding uncertainty that you cannot resolve. Once you have established a stable bid mode — ideally down only — and have at least 28 days of clean data from that mode, placement multipliers become the next variable to isolate.

    Amazon Sponsored Products allows you to set percentage bid modifiers for two placements: Top of Search (first page) and Product Pages. Rest of Search always uses your base bid with no modifier. Modifiers can go up to +900%, though anything above 150% is almost never justified outside extreme brand-defense scenarios.

    The Stacking Problem

    The most important thing to understand about placement multipliers is how they interact with dynamic bidding. If you are on dynamic bidding — up and down — and you add a 100% Top of Search multiplier, Amazon’s algorithm can bid above your base on a high-intent impression, and then your multiplier adds another 100% on top of that adjusted bid. The CPC you actually pay can reach multiples of your stated base bid, with zero notification from Amazon. This is the stacking risk that inflates spend silently.

    On dynamic bidding — down only, stacking is less dangerous: the multiplier can push above your base for top-of-search placements, but Amazon cannot inflate the base beyond your stated maximum before the multiplier applies. The effective exposure is more predictable. This is one more reason to resolve your bid mode first.

    How to Test Placement Multipliers Correctly

    Start with your placement report, not with a multiplier adjustment. Pull the Placement Report from your campaign’s reports tab, filtered to the last 30 days. This report breaks out ACoS, CPC, conversions, and spend by placement type: Top of Search, Product Pages, and Rest of Search. This data tells you whether Top of Search is currently profitable for your campaigns — before you spend a dollar more amplifying it.

    If your Top of Search ACoS is already below your target, a moderate multiplier (try 25–50% to start) will send more budget to your most profitable placement. Increase in 10-percentage-point increments every 10–14 days, checking placement-level ACoS after each adjustment. Expert consensus in 2026 puts the productive range for most accounts at 50–150% for Top of Search. Above 150%, CPC exposure typically erodes the efficiency gains from better placement.

    If your Top of Search ACoS in the placement report is already above target, a multiplier will not fix that — it will amplify the problem. The issue is either keyword relevance, listing conversion, or a CPC floor set too high for your margin. Fix the underlying conversion issue before applying any positive multiplier.

    Product Pages: The Underused Placement

    Product page placements (your ads appearing on competitor or complementary product detail pages) often convert at lower rates than Top of Search but can deliver profitable scale at lower CPCs. Test product page multipliers separately from Top of Search multipliers using the same placement-report-first process. Many accounts find a moderate product page multiplier (20–40%) expands volume cost-effectively when top-of-search is expensive and competitive.

    Step Four: The Learning Period Protocol — How to Protect the Algorithm’s Work

    Amazon AI bidding learning period 8-week timeline showing optimal intervention points and what not to do in weeks 1 and 2

    Every time you make a meaningful change to a campaign running AI-assisted bidding — bid mode, placement modifier, keyword addition, budget change — the learning period effectively resets. Amazon’s algorithm needs time to rebuild its conversion probability model under the new conditions. This is not unique to Amazon; it mirrors the documented behavior of Google’s Smart Bidding, which carries a formal 2-week learning period designation.

    On Amazon, the learning period is not formally labeled as such in most campaign types (though Amazon DSP Performance+ explicitly documents up to four weeks), but practitioner data consistently shows performance instability in the first two to three weeks after a structural campaign change. The accounts that most commonly report “AI bidding doesn’t work” are the ones making changes every few days.

    The Eight-Week Protocol

    When you activate a new bidding configuration, commit to the following timeline:

    Weeks 1–2 (Learning Zone): Do not change bids, match types, budgets, or placement modifiers. Monitor impressions and spend to confirm the campaign is active and within expected ranges, but resist any optimization impulse. The algorithm is building its baseline model. Any intervention at this stage teaches the system that its early signals were wrong — even if they weren’t.

    Weeks 3–4 (Early Signal Review): Begin reviewing conversion trend data only. You are not yet optimizing — you are assessing whether the trajectory is directionally correct. Is ACoS trending downward compared to the pre-change baseline? Is conversion rate stable or improving? These are the questions to answer. Still no bid or structure changes.

    Weeks 5–6 (First Adjustment Window): If the trajectory is positive, make incremental adjustments — small changes of 10–15% to base bids or placement modifiers, never multiple changes simultaneously. If performance has deteriorated materially from your pre-test baseline, evaluate whether the issue is the bidding configuration or an external factor (seasonality, listing change, inventory constraint).

    Weeks 7–8 (Optimization Phase): You now have approximately 60 days of data under the new configuration. At this point you can make more confident decisions about scaling, restructuring, or moving to the next layer in the framework.

    What Counts as a “Reset” Trigger

    Not every campaign change resets the learning period equally. Minor changes — adding a single negative keyword, adjusting budget by less than 20% — typically do not cause significant disruption. Major changes — switching bid mode, adding or removing large keyword groups, changing campaign structure, enabling or disabling a third-party bidding tool — will reset the model’s confidence in its conversion estimates. Apply the full eight-week protocol after any major change.

    Step Five: Portfolio Bidding and Budget Signals — Teaching the Algorithm What Matters

    Once individual campaigns are stable under a tested bid mode with understood placement behavior, the next layer is portfolio-level optimization. Portfolio bidding on Amazon allows you to set shared budget caps and, for some ad types, target ACoS or ROAS goals at the portfolio level rather than managing each campaign individually.

    This matters in 2026 because Amazon’s bidding engine increasingly looks at portfolio-level signals — not just individual campaign data — when modeling conversion probability. A campaign within a well-structured portfolio with a clear, consistent budget signal performs differently than the same campaign running in isolation. The algorithm uses budget pacing behavior, cross-campaign conversion patterns, and aggregate spend data as inputs alongside the keyword-level signals it has always processed.

    Budget Signals the Algorithm Reads

    Amazon’s AI bidding reads your budget behavior as a quality signal. Campaigns that run out of budget early in the day and go dark for hours create a fragmented performance history — the algorithm sees active-then-inactive patterns and struggles to model consistent conversion probability. Budget depletion events also suppress impression share during high-converting hours (typically mid-morning and early evening), replacing your AI-optimized bids with absence.

    Before adding portfolio-level controls, audit your daily budget utilization. If any campaign is consistently hitting its daily cap before 3 PM, the budget constraint is limiting what the AI can learn. Either raise the budget or reduce it deliberately to a level where the campaign can run all day on its existing allocation. Partial days create partial data.

    Portfolio ACoS Targets vs Campaign-Level ACoS Targets

    A common mistake in 2026 is setting a portfolio-level ACoS target that averages out fundamentally different product economics. A $15 accessory with a 60% margin should not share an ACoS target with a $150 appliance running at 25% margin. The algorithm receives a blended efficiency goal that is wrong for both products.

    Structure portfolios around products with similar margin profiles and similar business goals. Keep launch campaigns — where you deliberately accept higher ACoS to build conversion history — in separate portfolios from mature, efficiency-optimized campaigns. The portfolio’s ACoS target is a signal the AI uses to calibrate bid aggressiveness. A mixed signal produces mixed results.

    The Budget Increase Protocol

    When increasing campaign or portfolio budgets, Amazon’s guidance and practitioner consensus both suggest limiting single-step increases to approximately 20–30% of the current budget. Larger budget jumps can cause the AI to recalibrate its pacing model, temporarily overserving impressions in early-day hours and underserving in peak-conversion windows. Gradual increases preserve the pacing behavior the algorithm has learned and produce more stable performance through growth phases.

    Step Six: Amazon Ads Agent — Where It Actually Helps and Where It Doesn’t

    Amazon Ads Agent launched in early 2026 as an agentic AI campaign management layer built on Amazon’s Bedrock infrastructure. It allows advertisers to describe goals in plain English, receive proposed campaign setups, bid adjustments, keyword suggestions, and budget changes — then approve or reject those proposals before they go live. It is the closest thing Amazon has offered to a fully AI-managed campaign workflow within its native console.

    The key word is “proposed.” Amazon Ads Agent does not make changes autonomously by default — it surfaces recommendations for human review and approval. This is meaningful: it means the agent operates as an informed advisor rather than an autonomous bidder, and it means its effectiveness depends entirely on the quality of the input signals it receives.

    What Ads Agent Does Well

    Ads Agent is genuinely useful for three specific tasks. First, search term harvesting: the agent can identify converting search terms from auto-targeting campaigns and recommend promotion into exact-match manual campaigns, a task that is time-consuming and easy to deprioritize manually. Second, bulk bid adjustments: for accounts with dozens or hundreds of campaigns, reviewing and proposing bid changes at scale is where the agent saves the most time, surfacing the same adjustments that a skilled human manager would make but across a larger surface area faster. Third, campaign creation from briefs: describing a new product launch goal in natural language and receiving a structured campaign draft (with suggested keyword groups, match types, and initial bids) materially reduces the time from product launch to active advertising.

    Where Ads Agent Falls Short

    Ads Agent does not currently understand your product economics, inventory position, or margin structure. It optimizes for the performance metrics it can see inside Amazon Ads — clicks, conversions, ACoS — without any awareness that your ASIN is low on stock, that your margin on this product is 12% rather than 35%, or that this campaign’s goal is new-to-brand acquisition rather than immediate profitability. These strategic inputs still require human specification.

    The agent also performs significantly better when it is working with stable, clean campaign data. This brings us back to sequencing: Ads Agent should be introduced after you have established stable bid modes (Step Two), tested and calibrated placement multipliers (Step Three), and completed at least one full learning period (Step Four) on your primary campaigns. Activating the agent on a campaign that is still in its first 30 days of a new bidding configuration means the agent learns from noise and projects that noise forward into its recommendations.

    A Practical Activation Checklist for Ads Agent

    Before activating Ads Agent on any campaign, confirm: the campaign has at least 60 days of stable performance data; your ACoS target is explicitly documented and can be entered as a goal parameter; you have a human review cadence (minimum weekly) to evaluate proposed changes before approving them; and you have excluded any campaigns in active launch or experimental phases from the agent’s scope. Ads Agent is a force multiplier for stable, mature campaigns — not a replacement for the foundational work that makes those campaigns stable.

    Step Seven: Hourly Bid Scheduling via Amazon Marketing Stream

    Amazon Marketing Stream hourly bid scheduling heatmap showing peak and off-peak conversion windows with Tinuiti case study results

    Hourly bid scheduling is the most operationally advanced layer in the framework — and the one with some of the most dramatic published results. Amazon Marketing Stream provides near-real-time hourly performance data (traffic, conversions, CPC, ACoS, budget consumption) via the Amazon Ads API, updated hourly across Sponsored Products, Sponsored Brands, Sponsored Display, and DSP. Accessing this data requires API integration — either via a third-party tool that has built Marketing Stream integration or via a custom technical build.

    When Tinuiti applied historical hourly Marketing Stream data to identify peak conversion windows for a soda-category campaign and raised bids 40–55% during those windows, the results were notable: share of voice increased 104%, sales increased 273%, and new-to-brand units increased 570% at the account level. The test campaigns directly attributed 120% sales growth to the hourly optimization. These are extreme results in a particular category context, not a universal guarantee — but they illustrate the magnitude of value available when intraday conversion patterns are significant.

    How to Build an Hourly Bid Schedule

    The starting point is data collection, not adjustment. Before modifying any bids, you need at least four to six weeks of hourly Marketing Stream data to establish reliable conversion patterns. Most categories show identifiable peaks — commonly mid-morning (7–9 AM), lunch hours (12–2 PM), and evening windows (7–10 PM) — but these patterns vary significantly by product type, audience demographics, and category. Consumer electronics may peak differently from grocery; home goods may peak differently from automotive.

    Once your hourly conversion data reveals clear high-converting and low-converting windows, structure bid adjustments through a third-party tool (most major Amazon PPC platforms including Perpetua, Intentwise, and Quartile offer Marketing Stream-based dayparting), or via API rules if you have technical resources in-house. A reasonable starting range: reduce bids 15–25% during consistently low-converting hours and increase bids 20–40% during consistently high-converting hours. Adjust in increments, not all at once, and re-evaluate after four weeks as the bid changes may themselves shift which hours generate the most volume.

    When Hourly Scheduling Is Not Worth the Complexity

    Hourly bid scheduling adds meaningful operational complexity. It requires Marketing Stream API access, a technical integration layer, and ongoing monitoring to ensure that bid schedules remain aligned with actual conversion patterns as they evolve. For accounts spending under approximately $500 per day, this complexity is unlikely to generate returns that justify the investment — the conversion volume at that spend level may not be large enough to make hourly patterns statistically significant. At higher spend levels, particularly $1,000 per day and above, the efficiency gains from routing budget away from low-converting hours and toward peak windows can deliver meaningful annual savings.

    The Guardrail Stack: Bid Floors, Ceilings, and Exit Conditions

    No AI bidding system — native or third-party — should operate without a defined guardrail stack. Guardrails are the human-set constraints that prevent automation from optimizing toward local maxima that destroy account health: bids that run to zero and kill impression share, or bids that spike unconstrained during competitive auctions and blow through margin.

    Bid Floor: Your Non-Negotiable Minimum

    A bid floor prevents your AI from bidding so low that you lose impression share entirely. Calculate your floor based on the minimum CPC needed to remain competitive for your top-priority keywords in your category. This is not a fixed number — it varies by category and changes as competitor behavior evolves — but as a starting rule, your bid floor should sit at approximately 70–80% of your current average CPC for high-priority keywords. Below that level, you become invisible in the auction; above it, the AI has meaningful room to optimize downward without eliminating your presence.

    Bid Ceiling: The Protection Against Runaway Spend

    A bid ceiling caps the maximum your AI can bid on any individual keyword or placement. This is most critical when using dynamic bidding — up and down combined with placement multipliers, where effective CPCs can reach multiples of your base bid. Set your ceiling at the maximum CPC that still delivers a profitable conversion given your margin and target ACoS. The formula: bid ceiling = (product price × target ACoS × conversion rate). Any bid above this ceiling cannot, on average, produce a profitable result. Feed this number explicitly into your bidding tool’s cap settings.

    Exit Conditions: Knowing When to Turn It Off

    Every AI bidding experiment needs a predefined exit condition — a specific, quantified threshold at which you stop the test and revert to your control configuration. Without this, poor performers accumulate spend indefinitely while you wait for the algorithm to “figure it out.”

    Define exit conditions before each test, typically: if ACoS exceeds 150% of your target for more than 14 consecutive days after the initial learning period, revert to control; if conversion rate drops more than 30% relative to pre-test baseline and stays there for 7 days, revert; if campaign budget depletes before noon on more than 5 consecutive days, adjust budget before proceeding. These thresholds should be written down and checked systematically, not evaluated subjectively when you feel uncomfortable with the numbers.

    When to Escalate to Third-Party AI Bidding Tools

    Decision tree for choosing native Amazon AI bidding vs third-party tools based on spend level, catalog complexity, and portfolio needs

    Amazon’s native AI bidding infrastructure — dynamic bidding modes, portfolio controls, Ads Agent, and Marketing Stream — covers the majority of optimization needs for most accounts. Third-party AI bidding tools offer incremental capabilities in specific situations, but they are not universally superior to the native stack, and they introduce operational complexity that should be justified by expected returns before adding.

    In 2026, the gap between native Amazon AI and third-party AI tools has narrowed significantly. Amazon’s own algorithms have improved, Ads Agent has added meaningful automation, and Marketing Stream has brought intraday granularity that was previously only available via external integrations. For accounts under approximately $1,000 per day in spend with a catalog of fewer than 50 ASINs, the native stack is the rational starting point.

    Cases Where Third-Party Tools Add Genuine Value

    Third-party tools — platforms like Perpetua, Quartile, Intentwise, and several others — earn their place in three specific scenarios.

    First, cross-campaign portfolio optimization at scale. For accounts managing hundreds of campaigns across dozens of ASINs, native tools require significant manual effort to coordinate budget reallocation across campaigns. Third-party platforms can rebalance spend across the entire portfolio in response to real-time performance signals — moving budget from underperforming campaigns to overperforming ones intraday. Amazon’s native portfolio tools offer some of this, but the external platforms generally operate with more sophistication at high campaign counts.

    Second, margin-aware bidding. Native Amazon bidding optimizes to ACoS, ROAS, or click volume — it does not know your cost of goods, fulfillment fees, or net margin. Third-party tools that integrate product economics data can bid to true profitability rather than proxy metrics. For catalogs with highly variable margins, this distinction matters significantly.

    Third, cross-marketplace coordination. Sellers active across multiple Amazon marketplaces (US, EU, UK, Japan) managing coordinated campaigns benefit from third-party platforms that can apply shared learning and budget coordination across geographies — something native Amazon tools cannot currently do.

    The Overlay Risk

    The most important caution with third-party tools is what happens when their bid adjustments conflict with or layer on top of Amazon’s native AI adjustments. If Amazon’s dynamic bidding algorithm is adjusting bids in real time and your third-party tool is also adjusting bids on a 15-minute cycle, both systems are operating on delayed information about what the other has just done. The result can be erratic effective CPCs and unstable learning data for both systems.

    Best practice in 2026: when using a third-party bidding tool, set Amazon’s native bid mode to “fixed bids” for those campaigns, giving the external tool full control rather than running two competing AI systems simultaneously. Establish which layer has authority, and stick to it.

    What Good Testing Infrastructure Looks Like in Practice

    The framework above is a sequence of decisions. Making those decisions well requires a consistent measurement infrastructure that most Amazon advertisers do not have in place. Here is what that infrastructure needs to include.

    A Documented Pre-Test Baseline

    Before each test in the sequence, document your current performance metrics: average daily spend, ACoS, conversion rate, CPC, and impression share over the prior 30 days at the campaign level. Without this baseline, you cannot assess whether the test delivered an improvement, a degradation, or no measurable change. This sounds obvious, but a significant number of advertisers run tests without recording the starting state and then evaluate outcomes by feel rather than by comparison.

    Consistent Reporting Cadence

    During any active test, pull placement reports, search term reports, and campaign performance reports weekly — not daily. Daily data on Amazon is highly volatile due to attribution delays and normal auction variance. Weekly data provides a smoother, more reliable signal. Monthly data is too infrequent to catch issues before they compound. Weekly is the right cadence during active experiments.

    One Variable at a Time — Enforced as a Rule

    This principle appears in every PPC testing framework ever written, and it is violated in every account examined by every agency that has ever conducted an audit. The pressure to make multiple improvements at once is real — you have a list of things you want to fix, and changing one at a time feels slow. The cost is that you never know what worked, which means you cannot scale what works or avoid what doesn’t.

    In AI bidding specifically, the cost of violating this principle is higher than in manual bidding, because each change resets the algorithm’s learning state. Multiple simultaneous changes do not reset the learning period once — they reset it into a configuration where the algorithm is building a model for a state that may change again before the model has stabilized. The compounding confusion can set performance back months.

    An ACoS Waterfall by Product Lifecycle Stage

    Document your ACoS targets explicitly by product lifecycle stage. Launch-phase ASINs should have a deliberately higher ACoS target (you are paying to build conversion history). Growth-phase ASINs should have a moderate target. Mature, high-volume ASINs should have a tight efficiency target. Each stage implies a different bidding mode, different exit conditions, and different intervention thresholds. Without this documentation, you will inevitably apply efficiency-phase thinking to launch campaigns and kill their velocity, or apply launch-phase thinking to mature campaigns and erode their margin.

    The Sequence Is the Strategy

    Amazon Ads AI bidding in 2026 is genuinely powerful. The algorithms have improved, the data infrastructure has deepened, and the tools — from Ads Agent to Marketing Stream hourly data — provide capabilities that required expensive third-party solutions or custom engineering just two years ago. The frustrating reality, however, is that power does not equal performance. The accounts that are extracting the most from these systems are not the ones with the most advanced tools. They are the ones that built the right foundation in the right order.

    The sequence matters because each layer feeds the next. Clean conversion data makes AI bidding stable. A stable bid mode makes placement testing interpretable. Understood placement behavior makes portfolio ACoS targets accurate. Accurate targets make Ads Agent recommendations trustworthy. Trustworthy recommendations, combined with hourly Marketing Stream data, make intraday bid scheduling genuinely useful rather than just technically possible.

    Running these steps out of order — or running them all at once — collapses the clarity that makes each step work. The accounts that report AI bidding “doesn’t deliver results” have almost universally skipped the audit, changed too many things at once, evaluated outcomes before learning periods completed, or added AI on top of a structurally broken campaign foundation.

    The Practical Starting Point for This Week

    If you are reading this with an active Amazon Ads account and want to know where to start, the answer is the pre-test audit in Step One. Pull your last 30 days of conversion data by campaign, check each campaign for the four diagnostic criteria, and identify which campaigns have the data quality to support AI bidding and which ones need foundational work first. That audit, completed honestly, will tell you more about your account’s current situation than any bidding tool or algorithm setting can.

    From there, the framework gives you a sequence. Follow the sequence. Let each step complete before starting the next. Document your baseline before each change. Set exit conditions before you begin. And resist the pressure to accelerate — in AI bidding, patience at each step is not passivity. It is the mechanism by which the algorithm learns to deliver the results you are trying to measure.

    Key takeaways: Complete your four-point pre-test audit before changing any bid setting. Start with dynamic bidding — down only as your default mode. Test placement multipliers only after bid mode is stable. Protect the learning period from interference for at least 4 weeks after any major change. Build portfolio structures around products with similar margins. Introduce Ads Agent only on mature, stable campaigns. Explore hourly scheduling at scale only after the preceding layers are working. Always define guardrails and exit conditions before starting any test.